Laptop Mouse Pad Not Working Windows 10

Is your laptop mouse pad not working on Windows 10? Don’t panic. This is a common issue with simple fixes. From checking basic settings to updating drivers, most touchpad problems can be resolved in minutes. This guide walks you through every step to get your laptop mouse pad working again.
Key Takeaways
- Check the basics first: Your touchpad might be disabled by a keyboard shortcut or simple setting change before assuming a hardware failure.
- Driver issues are the most common cause: Outdated or corrupted touchpad drivers frequently cause the laptop mouse pad to stop working on Windows 10.
- Windows updates can break things: A recent Windows 10 update may have changed your touchpad settings or installed incompatible drivers.
- BIOS settings matter: Sometimes the touchpad gets disabled at the BIOS level, which Windows settings alone cannot fix.
- External devices can interfere: Plugging in a USB mouse can automatically disable your touchpad depending on your laptop settings.
- Hardware failure is rare but possible: If software fixes don’t work, the touchpad hardware itself may need professional repair or replacement.
- Prevention is key: Regularly updating drivers and being careful with Windows updates can prevent most touchpad issues from happening.
📑 Table of Contents
- Introduction: When Your Laptop Mouse Pad Stops Working
- Understanding Why Your Laptop Mouse Pad Stops Working
- Quick Fixes to Try First
- Updating and Reinstalling Touchpad Drivers
- Checking Windows 10 Settings and Updates
- Advanced Troubleshooting Methods
- When to Seek Professional Help
- Preventing Future Touchpad Problems
- Conclusion
Introduction: When Your Laptop Mouse Pad Stops Working
You’re sitting down to work. You open your laptop. You go to move the cursor and nothing happens. Your laptop mouse pad is not working. It’s frustrating, right? We’ve all been there. That moment of panic when your touchpad suddenly goes unresponsive can really throw off your whole day.
The good news is that when your laptop mouse pad is not working, it’s usually something you can fix yourself. You don’t need to be a tech expert. Most of the time, the problem is a simple setting that got changed or a driver that needs updating. Windows 10 has several built-in tools that can help you get your touchpad back up and running.
In this guide, we’ll cover everything you need to know about fixing a laptop mouse pad not working on Windows 10. We’ll start with the easiest fixes and work our way up to more advanced solutions. By the end of this article, you’ll have your touchpad working like new again. Let’s dive in.
Understanding Why Your Laptop Mouse Pad Stops Working
The Most Common Causes
Before we jump into fixes, it helps to understand why your touchpad might stop working in the first place. Knowing the cause can save you a lot of time and frustration. Here are the most common reasons your laptop mouse pad stops responding on Windows 10.
Accidental keyboard shortcuts are probably the number one culprit. Most laptops have a function key that toggles the touchpad on and off. It’s easy to hit this key by accident without even realizing it. You might have been typing away and brushed against the wrong key combination.
Driver problems come in at a close second. Your touchpad needs special software called drivers to communicate with Windows 10. When these drivers become outdated, corrupted, or incompatible after a Windows update, your touchpad can stop working entirely.
Windows updates can also cause issues. Microsoft regularly pushes updates to Windows 10, and sometimes these updates change settings or install drivers that don’t play nice with your specific touchpad hardware.
Hardware vs. Software Issues
It’s important to figure out whether you’re dealing with a hardware or software problem. Software issues are much more common and much easier to fix. Hardware problems usually require professional repair.
Here’s a quick way to tell the difference. If your touchpad works in the BIOS but not in Windows 10, it’s almost certainly a software issue. If it doesn’t work anywhere, including the BIOS, you might be looking at a hardware failure.
Most of the time, when people say their laptop mouse pad is not working on Windows 10, it’s a software issue. So let’s focus on those solutions first.
Quick Fixes to Try First
Check If Your Touchpad Is Disabled
The very first thing you should check is whether your touchpad has been disabled. This sounds obvious, but you’d be surprised how often this is the actual problem. Many people spend hours troubleshooting when the solution is just a simple toggle.
Look at the top row of your keyboard. You should see a key with a touchpad icon. It’s usually on one of the F-keys like F5, F6, F7, or F9. Press the Fn key plus that function key to toggle your touchpad back on. You should see an on-screen notification confirming the change.
If you’re not sure which key it is, check your laptop’s manual or look for a small icon that looks like a touchpad with a line through it. Different laptop brands place this key in different locations.
Check Windows 10 Touchpad Settings
Windows 10 has built-in touchpad settings that control whether your touchpad is enabled. Sometimes these settings get changed during updates or by accident. Here’s how to check them.
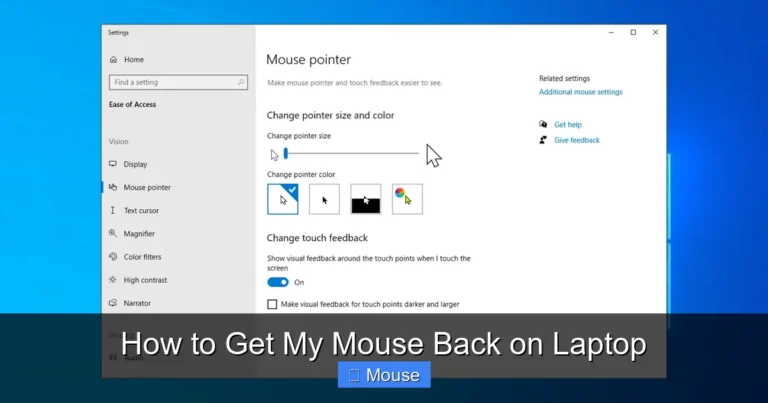
Go to Settings > Devices > Touchpad. Make sure the toggle at the top says “On.” If it’s off, simply click it to turn your touchpad back on. While you’re here, also check the setting that says “Leave touchpad on when a mouse is connected.” If this is off, plugging in any USB mouse will disable your touchpad.
This is one of those settings that can cause a lot of confusion. You plug in a mouse to test something, and suddenly your touchpad stops working. Then you unplug the mouse and the touchpad still doesn’t work. It’s because the setting got changed somewhere along the way.
Restart Your Laptop
Never underestimate the power of a simple restart. When your laptop mouse pad is not working on Windows 10, a restart can often fix the issue by refreshing all the drivers and services that control your touchpad.
Don’t just shut the lid. Do a full restart from the Start menu. This ensures that all services are properly shut down and restarted. Many touchpad issues are caused by a driver or service that got stuck, and a restart clears that right up.
If a regular restart doesn’t work, try a full shutdown. Hold the Shift key while clicking “Shut down” in the Start menu. This performs a complete shutdown rather than the hybrid shutdown that Windows 10 normally uses. Then power your laptop back on.
Updating and Reinstalling Touchpad Drivers
Why Drivers Matter
Drivers are the software that lets Windows 10 talk to your touchpad hardware. Without the right drivers, your touchpad is just a piece of plastic that doesn’t do anything. When drivers become outdated or corrupted, your touchpad can stop working completely.
Visual guide about Laptop Mouse Pad Not Working Windows 10
Image source: i.pinimg.com
Think of drivers like translators. Windows speaks one language, and your touchpad hardware speaks another. The driver translates between them. If the translator goes on vacation, communication breaks down. That’s essentially what happens when your touchpad driver fails.
How to Update Your Touchpad Driver
Updating your touchpad driver is one of the most effective fixes when your laptop mouse pad is not working on Windows 10. Here’s how to do it step by step.
Right-click on the Start button and select Device Manager. Look for “Mice and other pointing devices” and click the arrow to expand it. You should see your touchpad listed there. It might be called “Synaptics TouchPad,” “ELAN TouchPad,” “Precision TouchPad,” or something similar.
Right-click on your touchpad device and select Update driver. Choose “Search automatically for drivers.” Windows will look online for the latest driver and install it if it finds one. This process usually takes just a few minutes.
After the update is complete, restart your laptop. Check if your touchpad is working. If it is, great! If not, we have more steps to try.
How to Reinstall Your Touchpad Driver
If updating the driver didn’t work, try reinstalling it completely. This can fix issues caused by corrupted driver files that an update can’t repair.
Go back to Device Manager > Mice and other pointing devices. Right-click on your touchpad and select Uninstall device. Check the box that says “Delete the driver software for this device” if it appears. Then click Uninstall.
Once the driver is uninstalled, restart your laptop. Windows 10 will automatically detect the touchpad hardware and reinstall a generic driver. This fresh installation often fixes problems that updates couldn’t resolve.
After the restart, check if your touchpad is working. If it is, you might want to visit your laptop manufacturer’s website to download the specific driver for your model. This ensures you have the best possible driver for your hardware.
Checking Windows 10 Settings and Updates
Windows Update Troubleshooter
Windows 10 includes a built-in troubleshooter that can automatically detect and fix problems with your touchpad. This is a great tool to try when your laptop mouse pad is not working because it can catch issues you might miss.
Go to Settings > Update & Security > Troubleshoot > Additional troubleshooters. Look for “Hardware and Devices” and run the troubleshooter. It will scan your system for problems and attempt to fix them automatically.
The troubleshooter might find issues with your touchpad driver, conflicting software, or incorrect settings. It will give you a report of what it found and what it fixed. This can give you valuable clues about what’s causing your touchpad problem.
Roll Back Recent Windows Updates
If your touchpad stopped working right after a Windows update, that update might be the culprit. Windows 10 sometimes installs updates that conflict with certain hardware drivers, including touchpad drivers.
To check for this, go to Settings > Update & Security > Windows Update > View update history. Look at the most recent updates. If your touchpad stopped working around the same time as a recent update, you might want to uninstall that update.
Go to Settings > Update & Security > Windows Update > View update history > Uninstall updates. Find the recent update and uninstall it. Restart your laptop and check if your touchpad is working again.
If rolling back the update fixes your touchpad, you can pause future updates temporarily while waiting for Microsoft to release a fix. Go to Settings > Update & Security > Windows Update > Pause updates.
Check for Conflicting Software
Sometimes third-party software can interfere with your touchpad. Mouse management software, gaming utilities, or even antivirus programs can sometimes conflict with touchpad drivers.
Think about any software you installed around the time your touchpad stopped working. If you installed any mouse-related software or system utilities, try uninstalling them to see if that fixes the issue.
You can also try booting into Safe Mode to see if your touchpad works there. Safe Mode loads only the essential drivers and services. If your touchpad works in Safe Mode but not in normal Windows, a third-party program is likely causing the conflict.
Advanced Troubleshooting Methods
Check BIOS Settings
Your laptop’s BIOS has settings that control hardware components, including the touchpad. If the touchpad is disabled in the BIOS, no amount of Windows troubleshooting will fix it.
To access the BIOS, restart your laptop and press the appropriate key during startup. This is usually F2, F10, F12, or Delete, depending on your laptop brand. Look for a message during boot that says “Press [key] to enter setup.”
Once in the BIOS, look for touchpad settings. They might be under “Advanced,” “System Configuration,” or “Input Devices.” Make sure the touchpad is set to “Enabled.” Some BIOS versions have options like “Internal Pointing Device” that you need to turn on.
Save your changes and exit the BIOS. Your laptop will restart. Check if your touchpad is working now. If you’re not comfortable navigating the BIOS, check your laptop’s manual for specific instructions.
Run System File Checker
Windows 10 has a built-in tool called System File Checker that can repair corrupted system files. Sometimes these corrupted files can cause your touchpad to stop working.
Open Command Prompt as Administrator. You can do this by right-clicking the Start button and selecting “Command Prompt (Admin)” or “Windows PowerShell (Admin).” Type the following command and press Enter:
sfc /scannow
This will scan all protected system files and replace corrupted files with correct versions. The process can take 15 to 30 minutes. Don’t close the window while it’s running. Once it’s done, restart your laptop and check your touchpad.
Perform a System Restore
If your touchpad was working fine before and suddenly stopped, a System Restore can take your laptop back to a time when everything was working correctly. This can undo changes that caused your touchpad to stop working.
Type “Create a restore point” in the Windows search bar and open it. Click on System Restore and follow the prompts. Choose a restore point from a date when your touchpad was working. The restore process will revert your system settings and drivers to that earlier state.
System Restore won’t affect your personal files, but it will remove any programs or drivers installed after the restore point date. Make sure to choose a restore point that’s recent enough to minimize disruption but old enough to be before the touchpad problem started.
When to Seek Professional Help
Signs of Hardware Failure
If you’ve tried all the software fixes above and your laptop mouse pad is still not working on Windows 10, you might be dealing with a hardware problem. Here are some signs that point to hardware failure.
If your touchpad doesn’t work in the BIOS, it’s likely a hardware issue. If you see physical damage to the touchpad area, that’s another sign. Sometimes liquid spills or drops can damage the touchpad hardware without leaving visible marks.
Another sign is if your touchpad works intermittently. If it works sometimes and doesn’t work other times, with no pattern related to software changes, the hardware connection might be loose or failing.
What a Professional Can Do
A professional technician can diagnose whether your touchpad hardware is faulty. They have tools and expertise to test the hardware directly, which is something you can’t easily do at home.
If the touchpad hardware is bad, a technician can replace it. Touchpad replacement is a common repair that most laptop repair shops can handle. The cost varies depending on your laptop model, but it’s usually more affordable than buying a new laptop.
Before taking your laptop in for repair, make sure you’ve backed up your important files. While touchpad replacement shouldn’t affect your data, it’s always good to have a backup just in case.
Using an External Mouse as a Temporary Solution
While you’re figuring out the touchpad issue, an external mouse can keep you productive. You can pick up a basic USB mouse for very little money, and it will work right away without any setup.
If you prefer wireless, a Bluetooth mouse is another great option. Just make sure your laptop has Bluetooth capability. Most modern laptops do, but it’s worth checking before you buy.
An external mouse isn’t just a temporary fix. Many people prefer using an external mouse even when their touchpad is working. They’re often more comfortable and precise for extended use.
Preventing Future Touchpad Problems
Keep Your Drivers Updated
One of the best ways to prevent touchpad problems is to keep your drivers updated. Check for driver updates regularly, especially after major Windows updates. Your laptop manufacturer’s website is the best source for the correct drivers.
Some laptop brands have their own update utilities that make this easier. Dell has Dell Update, HP has HP Support Assistant, and Lenovo has Lenovo Vantage. These tools can automatically check for and install driver updates for your specific laptop model.
Be Careful with Windows Updates
While Windows updates are important for security, they can sometimes cause hardware issues. Before installing a major Windows update, it’s a good idea to create a restore point. This gives you an easy way to roll back if something goes wrong.
You can also wait a few days after a major update is released before installing it. This gives other users time to report any problems, and Microsoft time to release fixes for any issues that pop up.
Protect Your Laptop
Physical protection can prevent hardware damage to your touchpad. Avoid eating or drinking near your laptop. Liquid spills are one of the most common causes of touchpad hardware failure.
Use a laptop sleeve or case when transporting your laptop. This protects against drops and impacts that can damage internal components. Also, be gentle with the touchpad itself. Pressing too hard or using sharp objects on the surface can damage it over time.
Conclusion
Having your laptop mouse pad not working on Windows 10 is definitely frustrating, but it’s usually fixable. Start with the simple solutions like checking if the touchpad is disabled and restarting your laptop. Most of the time, that’s all it takes.
If the quick fixes don’t work, move on to updating or reinstalling your touchpad drivers. Driver issues are the most common cause of touchpad problems, and a fresh driver installation often does the trick. Don’t forget to check your Windows settings and run the built-in troubleshooter.
For more persistent issues, try the advanced methods like checking BIOS settings or running System File Checker. And if nothing works, don’t hesitate to seek professional help. A hardware issue might be the cause, and a technician can get you back up and running.
The key is to stay calm and work through the solutions methodically. With the steps in this guide, you should be able to get your laptop mouse pad working again on Windows 10. And remember, an external mouse is always a good backup plan while you troubleshoot.
Frequently Asked Questions
What is laptop mouse pad not working windows 10?
laptop mouse pad not working windows 10 is an important topic with many practical applications.