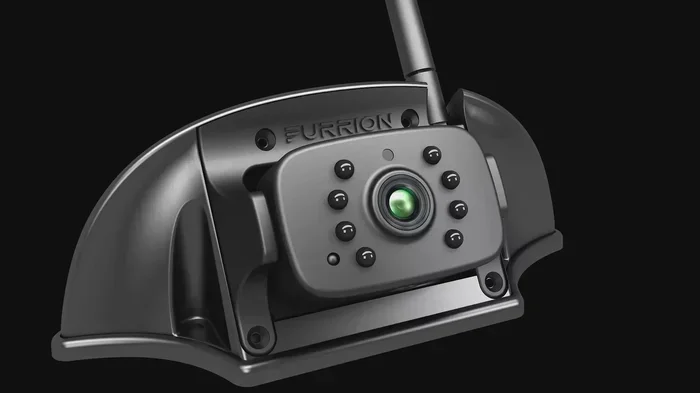
Rv Backup Camera Compatible with Furrion Mount
Choosing the right RV backup camera compatible with Furrion mount makes towing safer and easier. You need a camera that fits your mount, handles weather well, and gives a clear picture. We will walk you through the best options, wiring basics, and simple installation steps. By the end, you will know exactly what to look for and how to set it up without stress.
Key Takeaways
- Match the mount first: Pick a camera that physically fits your Furrion mount before buying anything else.
- Check video format: Make sure the camera output matches your monitor or head unit for a clean picture.
- Weather matters: Look for a sealed, rust-resistant camera that can handle rain, dust, and vibration.
- Wiring needs planning: A clean install depends on proper power, ground, and video cable routing.
- Wide angle helps: A broader view reduces blind spots and makes backing up much easier.
- Test before finishing: Always check the image and connections before sealing or tightening everything.
- Keep it clean: A quick cleaning routine keeps your view clear and extends the camera life.
📑 Table of Contents
- RV Backup Camera Compatible with Furrion Mount: What You Need to Know
- Understanding the Furrion Mount and Camera Fit
- Key Features to Look For in an RV Backup Camera
- Wiring and Installation Basics for Your Setup
- Choosing Between Wired and Wireless Options
- Installation Tips, Common Mistakes, and Quick Fixes
- Making Your RV Backup Camera Work Better Every Day
- Conclusion
RV Backup Camera Compatible with Furrion Mount: What You Need to Know
Backing up an RV can feel stressful at first. Large mirrors help, but they do not show everything. That is why so many owners want a reliable rear view system. If you already have a Furrion mount, you may be wondering which camera will work best with it. The good news is that there are several solid choices, and the right one depends on your rig, your monitor, and how you plan to use it.
This guide breaks the topic down in a simple way. You will learn how to match a camera to your mount, what features matter most, and how to handle the wiring without making a mess. We will also talk about common mistakes, practical installation tips, and a few extra things that can make your setup better. Think of this as a friendly walkthrough from someone who has seen a lot of RV installs and wants you to get it right the first time.
Understanding the Furrion Mount and Camera Fit
Before you buy a camera, it helps to understand the mount itself. A mount is the hardware that holds the camera in place. If the camera does not fit the mount properly, you may have to force it, modify it, or replace parts. None of those options are ideal. So the first step is to look closely at the shape, size, and mounting style of your Furrion mount.
Why Mount Compatibility Matters
A camera and mount need to work as a team. If the camera body is too large, it may not sit flush. If the screw pattern is different, you may need extra hardware. A loose fit can also lead to vibration, which can make the video jitter while you drive or back up. A stable connection gives you a cleaner image and less hassle later.
Here are a few things to check before choosing a camera:
- Mounting hole pattern: Measure the spacing and compare it to the camera base.
- Camera body size: Make sure the camera can sit securely without overhang issues.
- Mounting angle: Some mounts allow more tilt or rotation than others.
- Hardware included: Check whether you need extra screws, brackets, or adapters.
Types of Cameras That Often Work Well
Not every camera is built the same way. Some are compact and simple. Others include extra features like sensors, night vision, or built-in lights. For a Furrion mount, many owners do well with a license plate backup camera with monitor setup, because the camera can often be placed near the rear plate area and still give a useful view. A wired backup camera with monitor is also a common choice when you want a stable connection and reliable power.
If you want a cleaner rear look, some people choose a license plate backup camera mount style that blends into the rear trim. That can be a nice option if appearance matters to you. On the other hand, if your RV has a larger rear area or a ladder-style setup, a backup camera mount for Jeep Wrangler style bracket may inspire you to think about adjustable positioning, even if your rig is not a Jeep. The main idea is to choose a mount-friendly camera that gives you the view you need.
Key Features to Look For in an RV Backup Camera
Once you know the camera fits the mount, the next step is to look at the features. A good RV camera should do more than just show a picture. It should give you a clear, steady image in different lighting and weather conditions. It should also be easy to use with your existing monitor or head unit.
Image Quality and Viewing Angle
A sharp image makes a big difference. If the picture is blurry or washed out, it is harder to spot obstacles, curbs, or people behind you. A wider viewing angle can also help because it reduces blind spots. That said, ultra-wide views can sometimes make objects look smaller, so it is a good idea to find a balance that feels useful to you.
Look for these traits:
- Clear resolution: Enough detail to recognize obstacles and movement.
- Good low-light performance: Helpful for evening parking and dark campsite roads.
- Wide enough field of view: Enough to reduce blind spots without feeling distorted.
- Stable image: Minimal shaking from road vibration.
Weather Resistance and Build Quality
RVs travel through all kinds of conditions. Rain, dust, heat, and cold can all affect a camera over time. A well-built camera should feel sturdy and sealed against the elements. If you are installing it on the rear of a trailer or motorhome, you also want it to handle vibration from the road. A flimsy camera can become annoying fast.
A few build features are worth checking:
- Sealed housing: Helps keep moisture and dirt out.
- Rust-resistant materials: Useful for long-term outdoor exposure.
- Strong bracket or base: Helps reduce wobble and shifting.
- Simple lens design: Easier to clean and less likely to collect debris.
Night Vision and Low-Light Performance
Many backup situations happen at night. Maybe you are pulling into a campsite after sunset, or backing into a tight spot in a dark parking lot. In those moments, a camera with decent night vision can be very useful. Some cameras use built-in lighting or infrared-style support to improve visibility when surroundings are dark.
If your RV often travels after dark, this feature deserves attention. A camera that performs well in daylight but disappears at night will not help much. You want a system that stays useful across different times of day.
Wiring and Installation Basics for Your Setup
A camera is only as good as its installation. Even a great camera can disappoint if the wiring is messy, loose, or poorly connected. The good news is that you do not need to be a professional installer to do this right. You just need a careful plan and a little patience.
Power, Ground, and Video Connections
Most backup cameras need three main things: power, ground, and a video signal path. Power keeps the camera on when needed. Ground completes the circuit. The video cable sends the image to your monitor. If any of these are weak or loose, the picture may flicker, cut out, or never show up at all.
A clean install usually follows a few simple rules:
- Use proper wire size: Match the wire to the power needs of the camera and monitor.
- Secure connections: Tighten terminals and protect them from moisture.
- Route cables carefully: Keep them away from sharp edges, moving parts, and heat sources.
- Test before sealing: Check the image and power behavior before finalizing the install.
If you are not sure how to set up the connection, it can help to read a guide like how to connect Insight backup camera for general connection ideas. Different systems can have different steps, but the basic idea stays the same: power, ground, and video must all be correctly linked.
Routing Cables Cleanly on an RV
Cable routing is where many installs go from good to great. A neat route not only looks better, but it also protects the cables from damage. On an RV, you may need to pass wires along the rear panel, inside a trim piece, or under a protected edge. The goal is to keep the cable out of sight without pinching or stretching it.
Here are a few practical tips:
- Plan the path first: Look at the rear structure before drilling or clipping anything.
- Avoid loose loops: Excess cable can vibrate and wear out faster.
- Use protection where needed: Grommets or edge protection can prevent cuts.
- Keep connections accessible: You may want future access for troubleshooting.
If your setup includes a separate monitor, you may also want to review options like a backup camera and monitor kit so the camera and display work together smoothly. A matched kit can save time because the parts are more likely to be compatible from the start.
Choosing Between Wired and Wireless Options
When people shop for an RV camera, one of the biggest choices is wired versus wireless. Both can work. The better option depends on your rig, your comfort level, and how you want the system to behave.
Wired Systems
Wired cameras are often chosen for stability. Since the video signal travels through a cable, there is less chance of interference or dropouts. That can be reassuring for an RV that sees a lot of road time. Wired setups also tend to be straightforward in concept: connect power, ground, and video, then mount the camera and test the image.
Wired systems are a strong fit when:
- You want a dependable connection.
- You plan to install the camera permanently.
- Your monitor is close enough for a clean cable run.
- You prefer fewer wireless pairing steps.
Wireless Systems
Wireless setups can be attractive if you want fewer cables running across the rig. They can also be easier in some installs because you do not have to route a long video cable through tight spaces. However, wireless systems can sometimes be more sensitive to interference, range, or power planning. If you choose wireless, it is smart to test the signal in different spots before finishing the install.
Wireless can make sense when:
- You want a cleaner cable layout.
- The camera and monitor are positioned in a way that works well wirelessly.
- You are okay testing signal strength and stability.
- You may move the camera or monitor later.
Which One Fits a Furrion Mount Setup Best?
There is no single answer for everyone. If your mount is in a fixed position and you want a steady image with minimal fuss, a wired setup may be the easier path. If you are trying to reduce cable runs or keep things more flexible, wireless may be worth considering. Either way, make sure the camera still fits the mount and that the power plan makes sense for your RV.
It is also worth thinking about the monitor itself. Some owners already have a display in the cab or near the rear controls. Others add a dedicated screen. If you are adding both camera and monitor at the same time, looking at a license plate backup camera with monitor option can simplify the process because the pieces are often planned to work together.
Installation Tips, Common Mistakes, and Quick Fixes
Even a straightforward install can run into small problems. Most of them are easy to avoid if you know what to watch for. Below are some common mistakes and a few quick fixes that can save you time.
Common Mistakes to Avoid
One of the biggest mistakes is rushing the fit check. If the camera does not sit right on the mount, do not force it. Another mistake is skipping the test phase. It is much easier to adjust the camera before you seal everything up. A third mistake is poor cable protection. Cables that rub against sharp metal or plastic can fail sooner than expected.
Other mistakes include:
- Weak ground connection: This can cause flickering or no image.
- Tight bends in cables: Sharp bends can damage the wire over time.
- Ignoring vibration: A loose mount can make the picture shake.
- Skipping weather sealing: Moisture can cause problems later.
Quick Fixes and Practical Tips
If the image is weak, check the connections first. Make sure the power and ground are solid. If the picture looks distorted, the camera angle may need adjustment. Small changes in tilt can make a big difference in what you see behind the RV. If the lens gets dirty, clean it gently so the view stays clear.
A few helpful habits:
- Test early and often: Check the image at different steps during install.
- Adjust before finalizing: Fine-tune the angle before tightening everything.
- Protect exposed parts: Use proper seals or covers where needed.
- Keep the lens clean: A simple cleaning routine helps a lot over time.
If you want to keep the camera performing well, it is worth learning how to keep backup camera clean so dirt, road grime, and weather residue do not block your view. A clean lens is one of the easiest ways to improve reliability.
When to Get Extra Help
Some installs are simple. Others are more complicated because of the RV layout, existing wiring, or monitor setup. If you are dealing with a strange mount position, limited access, or electrical uncertainty, it may be smart to pause and ask for help. A careful install is better than a fast one that creates new problems.
If you are also working on a larger rear setup, such as a fifth wheel tailgate with camera style arrangement, the layout may need extra planning. In those cases, the camera position, cable path, and monitor placement all matter more than usual.
Making Your RV Backup Camera Work Better Every Day
Once the camera is installed, the job is not quite finished. A little ongoing care keeps the system useful. Small habits can improve image quality, reduce wear, and make backing up less stressful.
Good Habits for Long-Term Use
Check the camera from time to time. Make sure the mount is still tight and the lens is clean. If you notice the image getting dim or shaky, inspect the connections and angle. It is also smart to test the system before long trips, especially if you plan to back into tight campsites or parking spaces.
Helpful habits include:
- Regular visual checks: Look for loose hardware or damaged wiring.
- Gentle cleaning: Wipe the lens without scratching it.
- Periodic testing: Confirm the camera works before you need it.
- Note changes: If the image quality drops, investigate early.
Improving the Overall Setup
If you want to make the system even more useful, think about the whole viewing experience. A better monitor placement can make the image easier to see while backing. A cleaner cable route can reduce clutter. A more secure mount can reduce vibration. Even small improvements can make the system feel more reliable.
If you ever replace or upgrade parts, make sure the new camera still fits your mount and works with your monitor. That is the simplest way to avoid compatibility headaches. A RV backup camera compatible with Furrion mount should not just attach properly; it should also give you the kind of view and reliability you actually need on the road.
Conclusion
Finding the right RV backup camera compatible with Furrion mount is mostly about matching the camera to the mount, choosing features that suit your towing habits, and installing the wiring carefully. A good fit gives you a steady image. Good build quality helps the camera last longer. A clean install makes the whole system easier to trust.
Take your time with the fit, test the image before you finish, and keep the lens clean after installation. Whether you choose a wired setup or a wireless one, the best camera is the one that works smoothly with your RV and makes backing up less stressful. With the right choice and a little care, your rear view can become one of the most useful parts of your rig.
Frequently Asked Questions
What does RV backup camera compatible with Furrion mount mean?
It means the camera should physically fit the Furrion mount and attach securely without major modifications. It also helps if the camera matches your monitor and power setup so the whole system works smoothly.
How do I know if a camera will fit my Furrion mount?
Check the mounting hole pattern, camera base size, and mounting angle before buying. If possible, compare the camera dimensions to the mount and make sure the hardware lines up properly.
Should I choose a wired or wireless RV backup camera?
Choose wired if you want a stable connection and plan to install it permanently. Choose wireless if you want fewer cables and are willing to test signal strength and reliability in your rig.
What features matter most in an RV backup camera?
Image clarity, viewing angle, weather resistance, and decent low-light performance matter a lot. A sturdy build and a secure mount are also important because RVs face vibration and outdoor exposure.
How can I keep my backup camera working well over time?
Inspect the mount, check the wiring, and clean the lens regularly. If the image becomes weak or shaky, test the connections and adjust the camera angle if needed.
Do I need a monitor with my RV backup camera?
Yes, a monitor or display is needed to see the camera image. Some setups use a built-in head unit, while others use a separate screen, so pick one that matches your camera output and your driving needs.