Upgrading your laptop’s RAM is one of the most effective and affordable ways to dramatically improve its performance. First, you must check your laptop’s specific model to determine its maximum supported RAM, the type of RAM it uses (e.g., DDR4 or DDR5), and how many slots are available. Once you have this information, you can purchase compatible memory modules and, in most cases, install them yourself with just a few simple tools. After the physical installation, verifying the new RAM in your system settings confirms a successful upgrade, leading to faster boot times, smoother multitasking, and a more responsive overall experience.
Is your trusty laptop starting to feel sluggish? Do you find yourself waiting impatiently for programs to load, battling with browser tabs that make your system groan, or experiencing frustrating freezes when you have more than a couple of applications open? Before you start budgeting for a brand-new machine, there’s a powerful, cost-effective upgrade that could breathe new life into your computer: increasing its Random Access Memory, or RAM. Think of RAM as your laptop’s short-term workspace. The more workspace you have, the more tasks it can handle actively and quickly without needing to shuffle data back and forth to the much slower hard drive or SSD. This guide will walk you through every single step of how to increase RAM on a laptop, from the initial detective work to the final screw-tightening, ensuring you can confidently perform this upgrade yourself.
Key Takeaways
- Check Compatibility First: Your laptop’s make and model dictate the maximum RAM it supports, the RAM type (DDR generation), speed, and configuration (slots available). Never guess; use tools or manufacturer specs.
- Buy From Reputable Sources: Purchase RAM from trusted brands (like Crucial, Kingston, Samsung) and reputable retailers to avoid counterfeit or incompatible modules that can cause system instability.
- Static Electricity is the Enemy: Always ground yourself by touching a metal object before handling RAM modules to prevent electrostatic discharge, which can permanently damage the components.
- Installation is Often Simple: For most modern laptops, upgrading RAM involves removing a back panel, ejecting old clips, and seating new sticks. It typically requires only a small Phillips-head screwdriver.
- Verify Immediately After: Boot into your BIOS/UEFI or operating system’s system information to confirm the new total RAM is recognized before closing up the laptop completely.
- RAM vs. Storage Upgrade: Adding RAM helps with multitasking and running multiple applications. If your laptop is slow mainly because the hard drive is full or it’s an old HDD, a SSD upgrade may provide a more noticeable daily speed boost.
- Know When It’s Not Possible: Some ultra-thin laptops and many modern Apple MacBooks have RAM soldered directly to the motherboard, making an upgrade impossible. Research is non-negotiable.
📑 Table of Contents
- Why Upgrading Your Laptop’s RAM is a Game-Changer
- Phase One: The Critical Pre-Upgrade Investigation
- Selecting the Perfect Compatible RAM
- The Physical Installation: A Step-by-Step Guide
- Post-Upgrade: Verification and Optimization
- Troubleshooting Common Issues and When Not to Upgrade
- Conclusion: Your Laptop’s New Lease on Life
Why Upgrading Your Laptop’s RAM is a Game-Changer
Before we dive into the “how,” let’s clearly understand the “why.” RAM is volatile memory used to store data that your computer’s processor needs quick access to—like the currently open operating system, applications you’re using, and the data within them. When your RAM fills up, your system starts using a portion of your storage drive as “virtual memory.” This process, called paging or swapping, is dramatically slower because SSDs and especially HDDs can’t match the speed of RAM. This is the primary cause of that sluggish, laggy feeling.
The Tangible Benefits of More Memory
Adding more RAM directly attacks this bottleneck. You’ll notice immediate improvements in several key areas:
- Seamless Multitasking: You can keep dozens of browser tabs open, work in a word processor, have a music player running, and check email—all without the system stuttering or apps taking forever to refocus.
- Faster Performance in Demanding Apps: Applications like photo editors (Adobe Photoshop), video editing software, 3D modeling tools, and modern games rely heavily on ample RAM. More memory means smoother scrubbing through timelines, faster filter application, and reduced in-game stutters.
- Improved System Responsiveness: General Windows or macOS navigation feels snappier. Opening the Start Menu, switching between windows, and launching applications happens with less delay.
- Future-Proofing: Software and operating systems become more resource-intensive over time. Upgrading RAM now gives your laptop more headroom to handle future updates and applications for years to come.
It’s crucial to note that a RAM upgrade won’t fix a slow laptop caused by an outdated CPU, a failing or full hard drive, or severe malware. It specifically addresses performance issues stemming from insufficient memory capacity.
Phase One: The Critical Pre-Upgrade Investigation
This is the most important phase. Skipping this research is the #1 reason RAM upgrades fail or lead to wasted money. You cannot simply buy any stick of RAM and expect it to work. You need three specific pieces of information about your laptop: the maximum RAM it supports, the type of RAM it requires, and its current configuration.
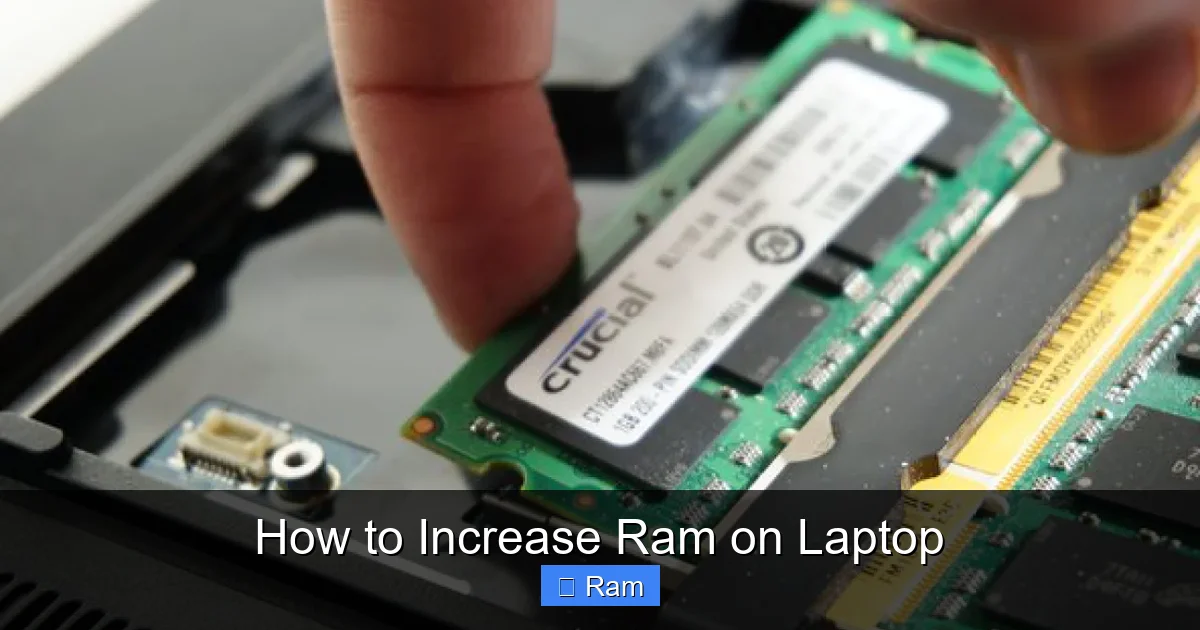
Visual guide about How to Increase Ram on Laptop
Image source: i0.wp.com
Step 1: Identify Your Laptop’s Exact Model
You need the precise model number, not just “Dell Inspiron” or “HP Pavilion.” Flip your laptop over. Look for a sticker on the bottom or, in some cases, under the battery. The model number is usually labeled as “Model,” “Product Name,” or “Model Number.” It will look something like “Dell XPS 15 9510,” “HP Pavilion 15-ek1xxx,” or “Lenovo ThinkPad T14 Gen 3.” Write this down exactly.
Step 2: Discover Your Current RAM Configuration
You need to know how many RAM slots your laptop has and if any are already occupied. The easiest way is to use a free, trusted system information tool.
- For Windows: Download and run CPU-Z (a gold-standard free tool). Go to the “Memory” tab to see your current RAM type (e.g., DDR4), size, and speed. Then, go to the “SPD” tab. Click on each drop-down (Slot #1, Slot #2, etc.). If a slot is empty, it will say “No Module.” If it has a stick, it will show its details. This tells you exactly how many slots you have total and how many are used.
- For macOS: Click the Apple menu > About This Mac > Memory. It will show you the current RAM and how many slots are used. For more detail, click “System Report” and look under “Memory.”
- Built-in Tools (Less Reliable): You can also press Ctrl+Shift+Esc (Windows) to open Task Manager, go to the Performance tab, and click Memory. It shows total RAM and speed, but not slot count or type definitively.
Step 3: Consult Manufacturer Specifications & Tools
Now, take your exact model number to the manufacturer’s support website. Search for your model and look for the “Specifications” or “Tech Specs” page. Find the section on “Memory.” It will list:
- Maximum Supported RAM: e.g., “Up to 64GB.” This is your hard limit. You cannot install more than this.
- RAM Type: e.g., “DDR4 SODIMM 3200MHz.” SODIMM is the small form factor used in laptops. The generation (DDR4, DDR5) and speed (in MHz) are critical.
- Number of Slots: It may state “2 SODIMM slots” or “1 slot (user-accessible).”
Pro Tip: Many manufacturers like Dell, HP, and Lenovo have online configuration tools or support pages where you can input your serial number to get the *exact* configuration your specific laptop shipped with, which is even more accurate than the generic model specs.
Selecting the Perfect Compatible RAM
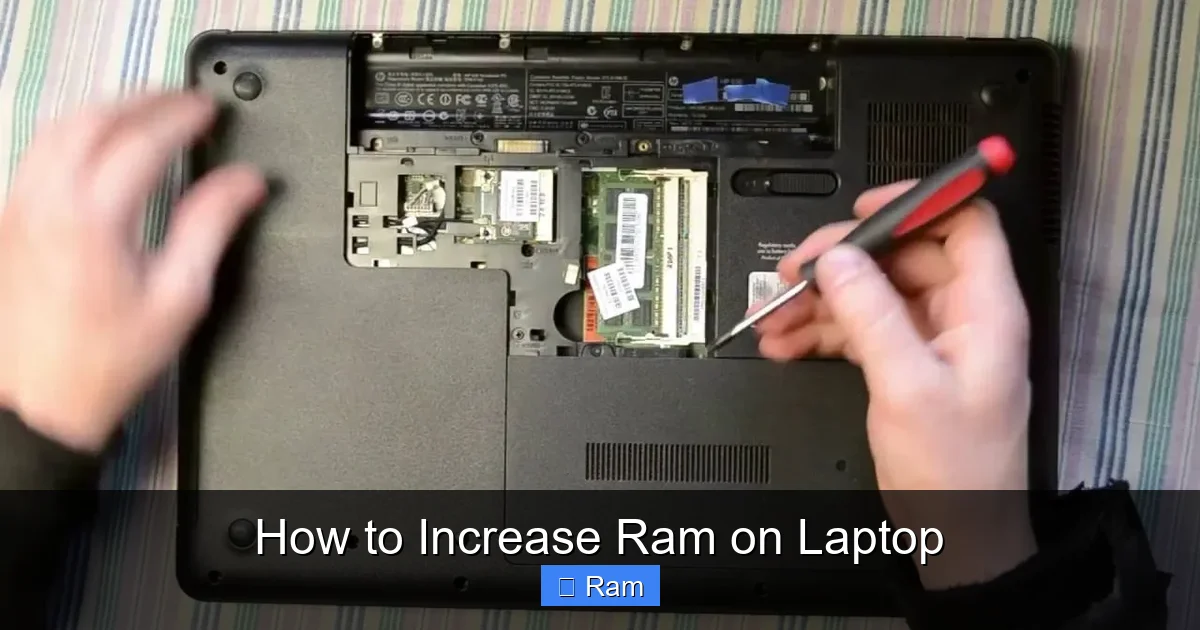
Armed with your laptop’s specs (max RAM, type, speed, slot count), you’re ready to shop. The goal is to buy RAM that matches or is compatible with these requirements.
Visual guide about How to Increase Ram on Laptop
Image source: i0.wp.com
Understanding RAM Specifications
When you shop, you’ll see listings like “16GB DDR4 3200MHz CL22 SODIMM.” Let’s break that down:
- Capacity (GB): The size of the stick. Common sizes are 4GB, 8GB, 16GB, and 32GB. To maximize performance, it’s often best to install matching pairs (e.g., two 8GB sticks for dual-channel mode, if your laptop supports it). Check your current setup—if you have one 8GB stick, adding another 8GB of the same type/speed is ideal.
- Generation (DDR4, DDR5): This must match exactly. DDR4 and DDR5 are physically different and not interchangeable. Your laptop’s manual or the CPU-Z info tells you which one you need.
- Speed (MHz): e.g., 2666MHz, 3200MHz, 4800MHz. RAM can often run at a slower speed if your system doesn’t support higher speeds, but it’s best to get RAM that matches your laptop’s supported speed or is rated for a higher speed (which will auto-downclock). Mixing speeds will cause all sticks to run at the speed of the slowest one.
- Timings (CL): e.g., CL22. Lower is generally better for performance, but matching timings between sticks in a dual-channel setup is more important than getting the absolute lowest CL.
- Form Factor: For laptops, you must buy SODIMM. This is the small, narrow version. Desktop RAM is longer and is called UDIMM—do not buy this.
- Voltage: Standard DDR4 is 1.2V. DDR5 is 1.1V. This is usually not a concern if you match the generation, but it’s listed.
Where to Buy and What to Look For
Buy from reputable brands like Crucial (by Micron), Kingston, Samsung, G.Skill, or Corsair. They provide excellent compatibility filters on their websites. Crucial’s System Scanner is particularly user-friendly—it will automatically detect your laptop and show you compatible upgrades. Amazon and Newegg are also good, but always double-check the seller and product details. Avoid obscure brands on marketplaces like eBay unless you’re very knowledgeable.
Example Purchase Scenario: Your research on a Dell XPS 13 (2021 model) shows: Max 32GB, 2 slots, DDR4 4266MHz. You currently have one 8GB stick. The best upgrade path is to buy a 16GB DDR4 4266MHz SODIMM from Crucial to replace the 8GB stick (for 16GB total) or, better yet, buy a kit of two 16GB DDR4 4266MHz sticks (32GB total) if your budget allows and you want to maximize performance with a matched dual-channel pair.
The Physical Installation: A Step-by-Step Guide
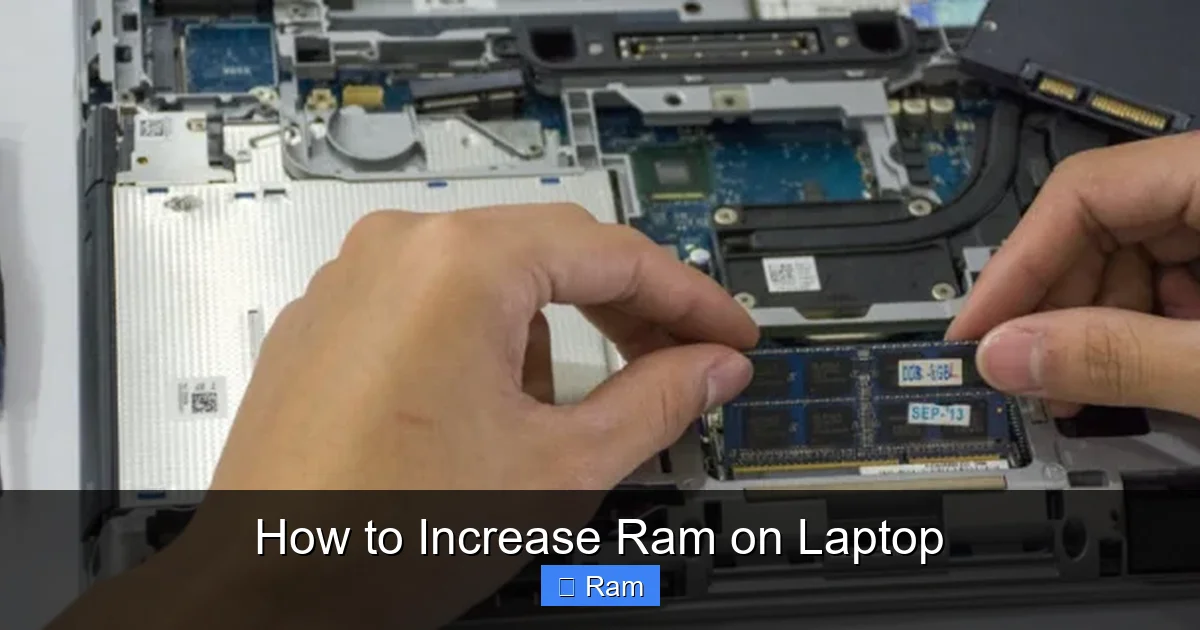
Now for the hands-on part. For the vast majority of laptops with user-upgradable RAM, this process is straightforward and takes 10-15 minutes. The key is patience and care.
Visual guide about How to Increase Ram on Laptop
Image source: i0.wp.com
Gathering Your Tools & Preparing Your Workspace
You will need:
- A small Phillips-head (#0 or #1) screwdriver. Some laptops use Torx screws; check your screws first.
- Optional but helpful: a plastic spudger or pry tool for opening delicate clips.
- A static-free workspace. A wooden table is fine. Avoid carpets.
- ESD (Electrostatic Discharge) Protection: The single most important safety step. Either use an anti-static wrist strap clipped to a grounded metal object, or simply frequently touch a bare metal part of your laptop’s chassis (like the port holes) or a grounded metal object (like a desk leg) to discharge static electricity from your body before touching any internal components.
CRITICAL: Ensure your laptop is completely powered off. Not just sleep or hibernate. Shut it down. Then, unplug the charger and remove the battery if it’s easily removable. For non-removable batteries (most modern laptops), just having it powered off and unplugged is sufficient, but be extra careful.
Accessing the RAM Compartment
Most laptops have a dedicated access panel on the bottom secured by one or two screws. Here’s how to proceed:
- Remove the screws: Use your screwdriver to carefully remove all screws from the bottom panel. Keep them in a small container. Note their lengths and positions; some laptops have different-sized screws.
- Open the panel: Gently pry around the edges with a plastic tool or your fingernail. The plastic clips can be stubborn; work your way around slowly. Do not force it. If there’s no panel and the entire bottom case comes off, you’ll need to remove all bottom screws and carefully pry the case apart, working around the edges.
- Locate the RAM modules: You should see one or two small circuit boards (the RAM sticks) held down by small metal clips on either side. They are usually perpendicular to the motherboard.
Removing the Old RAM
- Push the clips outward: Gently but firmly push the two small metal clips on either side of the RAM stick away from the center. They will pivot and pop up, releasing the stick.
- Tilt and remove: The RAM stick will pop up at an angle (about 30-45 degrees). Gently pull it straight out by the edges, holding it by the sides. Avoid touching the gold contacts or the black chips on top.
- Repeat if necessary: If you have two sticks, repeat the process for the second one.
Installing the New RAM
- Check the notch: Look at the bottom of your new RAM stick. There’s a small off-center notch. This must align with a raised tooth in the RAM slot. It only fits one way. Do not force it.
- Insert at an angle: Hold the new stick by the edges. Align the notch with the slot and place it in the slot at the same 30-45 degree angle the old one popped out to. Press firmly but gently on the top edge until the gold contacts are fully inserted into the slot.
- Seat the stick: Now, press down *directly* on the top center of the stick until the metal clips on both sides snap back into place, locking it flat against the motherboard. You should hear/feel a soft click. Ensure it is seated evenly and the clips are fully engaged.
- Repeat for the second stick: If installing two, use the next slot. Again, ensure the notches align and press down evenly.
Reassembly and First Boot
- Double-check: Look at your installation. Are the sticks fully flat? Are the clips locked? Is there any dust or debris?
- Replace the panel: Carefully place the bottom cover back on, ensuring all screw holes align. Press around the edges to snap the plastic clips back into place. Do not tighten screws until all are started, then tighten them in a diagonal pattern (like a car wheel) to ensure even pressure.
- Reconnect power: Plug in your charger (and reinsert the battery if you removed it).
- Power on: Turn on your laptop. Immediately enter the BIOS/UEFI setup (usually by pressing F2, Del, F10, or F12 during boot—your laptop screen will hint). In the BIOS, navigate to the system information or memory section. You should see the new total RAM capacity displayed (e.g., 32GB). This is your first confirmation.
- Boot into your OS: Exit BIOS and let it boot into Windows or macOS. Once logged in, check System Information or Task Manager again to confirm the OS recognizes the full amount of RAM.
Post-Upgrade: Verification and Optimization
Seeing the correct amount of RAM in your system settings is the first green light. But how do you know it’s truly working and performing optimally?
Verifying the Upgrade
In Windows, right-click the Start button > Task Manager > Performance tab > Memory. The top right will show the total RAM (e.g., “32.0 GB”). It will also show the speed (e.g., “3200 MHz”) and the “Form factor” (SODIMM). The “Hardware reserved” amount should be very small (a few hundred MB). In macOS, Apple menu > About This Mac > Memory. It will show the total and the number of slots used.
For a deeper check, run CPU-Z again. Go to the “Memory” and “SPD” tabs. Ensure the Type, Size, and Speed for each slot are correct and match your new RAM’s specifications.
Running a Memory Test
While rare, faulty RAM can cause random crashes. It’s good practice to run a test. The built-in Windows Memory Diagnostic is a decent start. Search for it in the Start menu, run it, and choose “Restart and check for problems.” It will reboot and run a scan, reporting any errors upon return to Windows. For a more thorough test, use MemTest86 (free). You create a bootable USB drive with it, boot from that USB, and let it run several passes (an hour or more). Any red errors indicate a problem—likely with the RAM stick itself or a compatibility issue.
Optimizing Performance
Once verified, you generally don’t need to “optimize” RAM. The system manages it automatically. However, you should:
- Check your page file: Windows manages this well, but if you have a very large amount of RAM (32GB+), you can consider setting a custom, smaller page file size on your SSD in System Properties > Advanced > Performance Settings > Advanced > Virtual memory. This is an advanced tweak; for most users, “System managed size” is perfect.
- Enjoy the speed! Open all those browser tabs, launch your editing software, and multitask to your heart’s content. You should feel a significant difference in responsiveness.
Troubleshooting Common Issues and When Not to Upgrade
What if things don’t go smoothly? Here’s how to handle common problems.
My Laptop Won’t Boot After Installing RAM
This is the most common symptom of an incompatible or faulty installation.
- First, power cycle: Unplug the charger, remove the battery (if possible), and hold the power button for 30 seconds to drain residual power. Then try booting again.
- Reseat the RAM: Open it up again. Remove the new RAM sticks, blow out the slots with compressed air, and firmly reseat them, ensuring they are fully locked in by the clips.
- Test one stick at a time: If you have two new sticks, try booting with only one installed (try each one in each slot). This isolates a bad stick or a bad slot.
- Reinstall the old RAM: Put your original RAM back in. If the laptop boots, you know the new RAM is incompatible or defective. Contact the seller for a return/replacement.
My Laptop Recognizes Less RAM Than I Installed
This usually means a hardware limitation.
- 32-bit vs. 64-bit OS: A 32-bit version of Windows can only use about 3.2-3.5GB of RAM, regardless of how much you install. You must be running a 64-bit OS to use more than 4GB. This is rare on modern laptops but possible on very old systems.
- Integrated Graphics Limitation: On some laptops, especially those with powerful integrated graphics (like AMD Ryzen with Vega or Intel Iris Xe), a portion of the system RAM is “reserved” for the GPU. The “Hardware reserved” amount in Task Manager might be 1-2GB. This is normal and not a problem.
- Motherboard Limit: You may have hit the motherboard’s maximum supported RAM, even if the OS could handle more. Re-check your manufacturer’s specs.
When a RAM Upgrade is Not Possible or Advisable
Not all laptops can be upgraded. Here are the red flags:
- Soldered RAM: In the pursuit of thinness, many manufacturers now solder the RAM chips directly to the motherboard. There are no slots. You cannot upgrade it. Your laptop’s service manual or a teardown video from iFixit will confirm this.
- No Access Panel: Some ultrabooks require complete disassembly (removing the motherboard) to access RAM, which is not a DIY project.
- Single Slot, Already Maxed: Your laptop has one slot and it’s already filled with the maximum supported size (e.g., a 16GB stick in a laptop that maxes at 16GB). No upgrade path.
- The Laptop is Very Old or Underpowered Elsewhere: If your laptop has a slow, early-generation Intel Celeron or Pentium processor, or a spinning hard drive (HDD), adding RAM will help, but the experience will still be hampered by those other bottlenecks. In this case, replacing an HDD with an SSD is often the single best upgrade you can make.
Conclusion: Your Laptop’s New Lease on Life
Learning how to increase RAM on a laptop demystifies a process that many assume is complex or risky. By following the disciplined approach of research, compatibility verification, careful purchasing, and methodical installation, you can successfully perform one of the most impactful upgrades possible for your computer. The feeling of reviving a once-sluggish machine into a fast, multitasking powerhouse is incredibly rewarding. You not only save money compared to buying a new laptop but also gain a deeper understanding of your device. Remember the golden rule: never guess on compatibility. Invest 15 minutes in proper research using CPU-Z and your manufacturer’s website, and your upgrade will be smooth, successful, and will deliver tangible performance benefits for years. Now, go open those hundred browser tabs without fear!
Frequently Asked Questions
Can I mix different brands or sizes of RAM?
You can often mix brands and sizes, but it’s not ideal for peak performance. For best results, especially in dual-channel mode, use identical sticks (same brand, model, capacity, speed, and timings). If you mix, the system will run all RAM at the speed and timings of the slowest stick. Mixing a new stick with an old one is a common way to add capacity, but be prepared for potential minor instability.
What is the maximum RAM my laptop can support?
This is determined by your laptop’s motherboard and chipset. The only way to know for sure is to check your manufacturer’s official specifications for your exact model number. Tools like CPU-Z can show your current RAM but not the maximum limit. Don’t rely on generic online forums; always verify with the official source.
Do I need a professional to install laptop RAM?
For the vast majority of laptops with a user-accessible RAM panel, no. The process is designed to be user-friendly and requires only a small screwdriver and care to avoid static electricity. If your laptop requires complete disassembly or has soldered RAM, then yes, a professional is necessary, and often an upgrade isn’t possible at all.
Is increasing RAM the same as getting a bigger hard drive or SSD?
No, they serve completely different purposes. RAM (memory) is for temporary, fast-access workspace for active tasks. Storage (HDD/SSD) is for permanent data storage (your OS, programs, files). Adding RAM improves multitasking and app performance. Upgrading from an HDD to an SSD dramatically improves boot times, file loading, and overall system snappiness. They complement each other.
Will more RAM always make my laptop faster?
Only if your performance issue is caused by running out of RAM. If your laptop is slow because it has an old, weak CPU, a failing HDD, or is infected with malware, adding RAM will have little to no effect. Use Task Manager (Performance tab) to check. If your RAM usage is consistently near 100% during normal use, an upgrade will help. If it’s rarely above 50%, the bottleneck lies elsewhere.
My laptop has 4GB of RAM. Should I upgrade to 8GB or 16GB?
For modern Windows 10/11 or macOS, 8GB is considered the practical minimum for comfortable general use (web browsing, office apps). If you do any multitasking, light photo editing, or have many browser tabs open, 16GB is the new sweet spot for a smooth, future-proof experience. Consider your budget and typical use case. Jumping from 4GB to 8GB is a huge leap, but 16GB provides more headroom for years to come.