How to Add Ram to a Laptop
Upgrading your laptop’s RAM is one of the most effective and affordable ways to improve performance. This comprehensive guide walks you through every step, from checking compatibility to safely installing new memory modules. You’ll learn exactly how to add RAM to a laptop, avoid common pitfalls, and ensure your upgrade is successful, whether you’re a beginner or have some experience.
Key Takeaways
- Compatibility is critical: Not all RAM fits all laptops. You must match the type (DDR3, DDR4, DDR5), speed, and maximum capacity your specific laptop model supports.
- Always power down completely: Shut down the laptop, unplug it, and remove the battery (if possible) before touching any internal components to prevent electrical damage.
- Work in a static-safe environment: Use an anti-static wrist strap or frequently touch a grounded metal object to prevent electrostatic discharge from frying sensitive memory chips.
- Post-install verification is essential: After installing new RAM, immediately check your system’s BIOS or operating system to confirm the new memory is recognized and running at the correct speed.
- Know when to seek help: If your laptop has RAM soldered to the motherboard or requires complex disassembly, it’s safer to consult a professional technician to avoid permanent damage.
[FEATURED_IMAGE_PLACEHOLDER]
📑 Table of Contents
- Introduction: Why Adding RAM is Your Laptop’s Best Upgrade
- Understanding RAM Compatibility: The Foundation of a Successful Upgrade
- Gathering Your Tools and Preparing Your Workspace
- The Step-by-Step Guide: How to Physically Add RAM to a Laptop
- Post-Installation: Verifying Success and Optimizing Performance
- Troubleshooting Common Issues After Adding RAM
- Advanced Considerations and When to Walk Away
- Conclusion: Enjoy Your Faster, More Capable Laptop
Introduction: Why Adding RAM is Your Laptop’s Best Upgrade
Is your trusty laptop feeling sluggish? Do you wait impatiently for programs to load, struggle with multiple browser tabs, or hear the ominous sound of the hard drive thrashing? Before you consider an expensive new machine, there’s a powerful, cost-effective solution you can often do yourself: adding more RAM. Random Access Memory (RAM) is your laptop’s short-term workspace. The more RAM you have, the more applications and data your system can juggle at once without slowing down. Learning how to add RAM to a laptop is a valuable skill that can breathe new life into an older computer, making multitasking smooth and improving overall responsiveness.
The process of how to add RAM to a laptop might sound technical, but for the vast majority of models with user-accessible slots, it’s a straightforward procedure akin to changing a battery. The key is knowledge: knowing what type of RAM your laptop needs, how to access the memory bay safely, and how to install the new modules correctly. This guide will demystify the entire process. We’ll start with the absolute basics of RAM compatibility, move through the tools and safety steps, provide a detailed walkthrough of the physical installation, and finish with post-upgrade checks and troubleshooting. By the end, you’ll have the confidence to open up your laptop and complete this upgrade yourself.
First, let’s address a common myth: upgrading RAM is not just for tech geeks. Manufacturers design many laptops—especially business and productivity models—with easy access panels precisely so users can upgrade memory and storage. Even if you’ve never peeked inside a computer before, following this guide step-by-step will equip you with everything you need to know about how to add RAM to a laptop successfully.
Understanding RAM Compatibility: The Foundation of a Successful Upgrade
Before you even think about buying new memory or picking up a screwdriver, the most important step in how to add RAM to a laptop is determining compatibility. Installing the wrong type of RAM is the most common reason for failed upgrades. You can’t just buy any stick of laptop memory; it must be a precise match for your specific motherboard. Here’s exactly what you need to check.

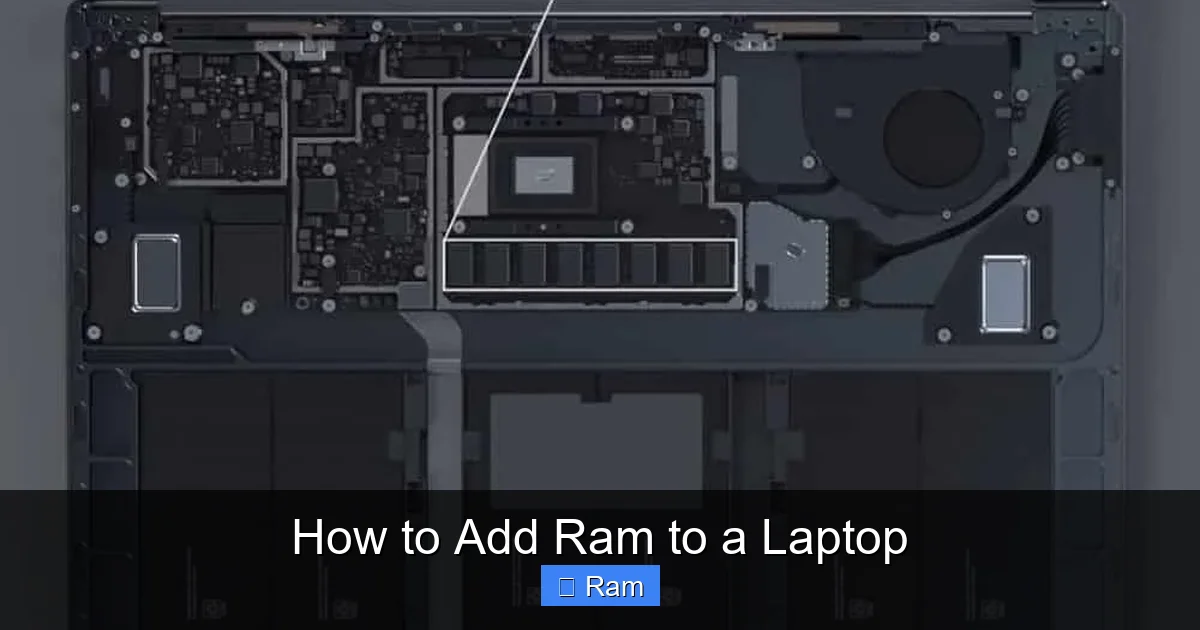
Visual guide about How to Add Ram to a Laptop
Image source: techinspection.net
Identifying Your Laptop’s Current RAM Configuration
The easiest way to start is to see what’s already inside. On Windows, press Ctrl + Shift + Esc to open Task Manager, then go to the Performance tab and click on Memory. Here you’ll see the current RAM amount, speed (e.g., 3200 MHz), and the form factor (almost always SO-DIMM for laptops). It might also show the number of slots used. For more detailed specs, use a free tool like CPU-Z. Under the Memory and SPD tabs, you’ll see the exact type (DDR4, DDR5), size of each stick, model number, and timings. Write this information down.
Decoding RAM Types: DDR Generations and Form Factors
Laptop RAM uses a smaller form factor called SO-DIMM (Small Outline Dual In-line Memory Module). It’s physically incompatible with desktop DIMMs. Beyond the form factor, you must match the DDR generation:
- DDR3: Older, found in laptops from roughly 2008-2015. Has 240 pins and a single notch position.
- DDR4: The standard for most laptops from ~2015-2020. Has 260 pins and the notch is in a different spot than DDR3.
- DDR5: The latest standard in newer laptops (2020+). Has 262 pins and a unique central notch. DDR5 is not backward compatible with DDR4 slots.
Critical: You cannot mix DDR generations. Your laptop’s motherboard is designed for one specific type. Trying to force the wrong type will damage the slot.
Speed (MHz) and Timings: Should You Match Exactly?
RAM speed is measured in megahertz (MHz), like 2666, 3200, or 4800. Your new RAM should at least match the speed of your existing modules. The system will run all RAM at the speed of the slowest module. If you’re replacing all sticks, you can go for a faster kit, but your laptop’s chipset must support that speed. For best stability, matching the exact make and model of your existing RAM (brand, part number) is ideal, especially for dual-channel operation. Mixing different brands or speeds usually works but can sometimes cause instability, requiring manual timing adjustments in the BIOS, which most laptops don’t expose to users.
Capacity: How Much RAM Do You Need and What’s the Maximum?
This is the second part of compatibility. You need to know two numbers: your laptop’s current RAM and its maximum supported RAM. A quick web search for “[Your Laptop Brand and Model] maximum RAM” will almost always lead you to the official technical specifications page. For example, “Lenovo ThinkPad T480 max RAM.” This will tell you the total capacity (e.g., 32GB) and the number of slots (usually 1 or 2). If you have 8GB in one slot and the max is 32GB, you can likely install a 32GB stick (if one slot) or two 16GB sticks (if two slots). For modern Windows 11/10, 16GB is the comfortable sweet spot for general use and light creative work; 32GB is recommended for heavy multitasking, virtual machines, or professional creative apps.
Gathering Your Tools and Preparing Your Workspace
Now that you know what RAM to buy, it’s time to prepare. The physical act of how to add RAM to a laptop is simple, but doing it in the right environment prevents disasters. Rushing this step is the #1 cause of static damage or lost screws.
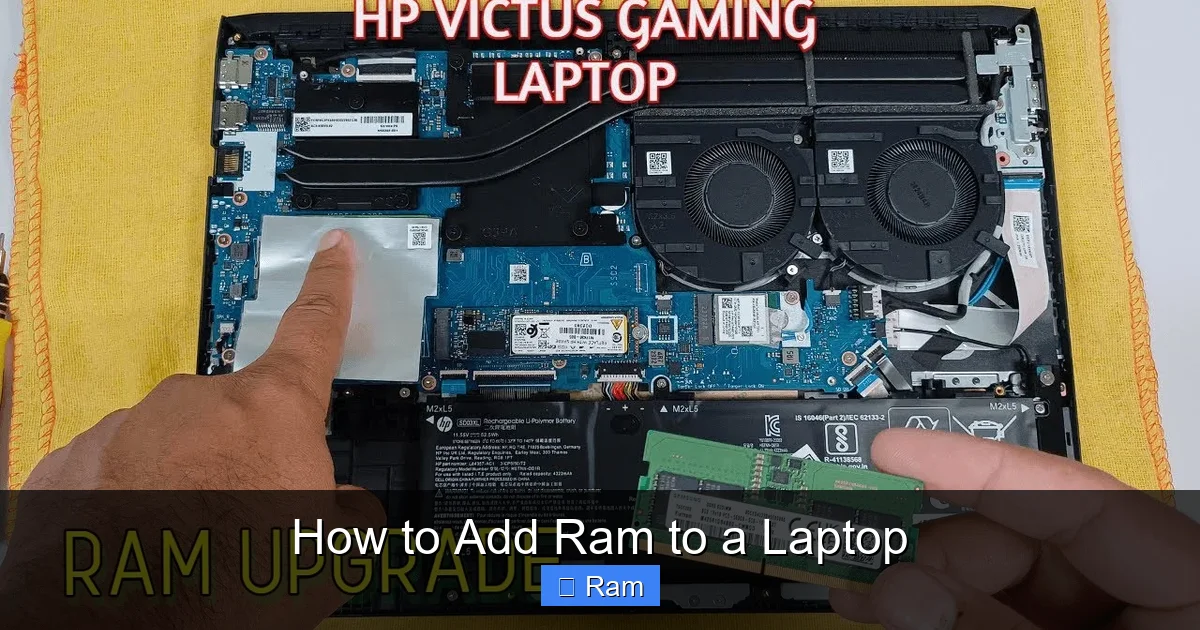
Visual guide about How to Add Ram to a Laptop
Image source: i.ytimg.com
The Essential Toolkit
You don’t need much. Assemble these before you begin:
- A small Phillips-head screwdriver: The #00 or #0 size is most common for laptop screws. Sometimes a flathead is needed for pry tools.
- Your new, compatible RAM module(s): Handle these only by the edges.
- An anti-static wrist strap (highly recommended): This is the best investment to prevent electrostatic discharge (ESD). Clip the alligator clip to a grounded metal object like a bare desk leg or the metal chassis of a powered-off desktop computer.
- A plastic spudger or pry tool: For gently prying open plastic clips without scratching. A old credit card can work in a pinch.
- A small container or magnetic mat: To keep screws safe and organized. Laptop screws are tiny and easy to lose.
- A well-lit, clean, flat surface: A large table with plenty of room to lay out parts in order.
Creating a Static-Safe Workspace
Static electricity is a silent killer of computer components. Your body can build up a charge just by walking on carpet or taking off a sweater. Before you touch the laptop’s internals, you must discharge this static. The anti-static wrist strap is the best method. If you don’t have one, follow these steps: Power off and unplug the laptop. Then, before touching any internal parts, press the power button for 5-10 seconds to drain residual power from capacitors. Next, touch the bare metal chassis of the laptop (the bottom case) with one hand while you work with the other. Periodically touch the metal again to re-discharge. Avoid working on carpet, plastic tables, or in dry, windy environments.
Preparing the Laptop: The Critical First Steps
This is non-negotiable. Improper shutdown is a major risk.
- Save all work and fully shut down the laptop. Do not use Sleep or Hibernate. Go to Start > Power > Shut down.
- Unplug the AC adapter/power cable.
- Disconnect all peripherals: USB drives, external monitors, docking stations, etc.
- Remove the battery if it’s user-removable. This is a crucial safety step. Many modern laptops have sealed batteries. If yours is removable, take it out now. If it’s internal, you must disconnect the battery cable from the motherboard during the disassembly process—we’ll cover that later.
The Step-by-Step Guide: How to Physically Add RAM to a Laptop
With compatibility confirmed, tools ready, and workspace prepped, we move to the core of how to add RAM to a laptop: the physical installation. The process varies slightly by laptop model, but the fundamental principles are universal. We’ll cover the two most common access methods: the simple bottom panel and the more involved keyboard removal.
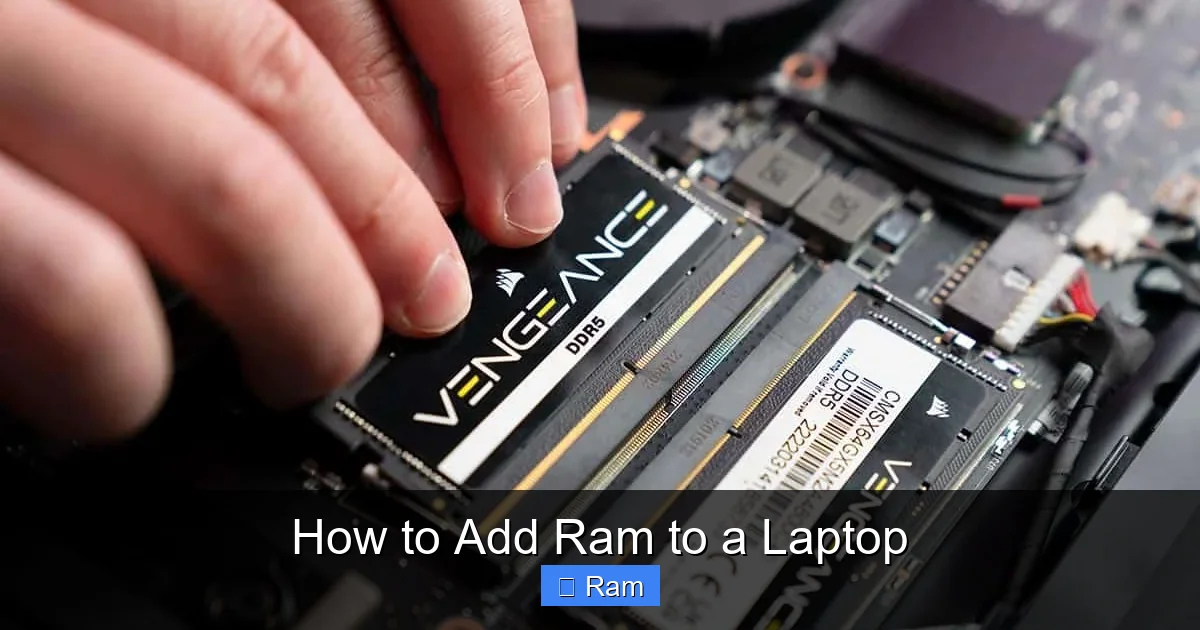
Visual guide about How to Add Ram to a Laptop
Image source: wepc.com
Method 1: The Easy Access Bottom Panel
This is the ideal scenario. Many laptops, particularly business-class models from Dell (Latitude), HP (EliteBook), and Lenovo (ThinkPad), have a single large panel on the bottom secured by one or two screws. Removing this panel exposes the RAM slots, storage drive, and sometimes the Wi-Fi card.
Step 1: Locate and Remove the Panel. Flip the laptop over. Look for a panel with a RAM symbol (two chips with an arrow) or a large rectangular section held by screws. Sometimes it’s a smaller door specifically for RAM. Use your Phillips screwdriver to remove all screws. Note their lengths and positions; some may be different. Keep them in your container. Gently pry the panel up with your plastic tool. It may have clips around the edges; work slowly around the perimeter. Once all clips are free, lift the panel off and set it aside.
Step 2: Locate the RAM Slots. You’ll see one or two small circuit boards (the RAM sticks) held down by small metal clips on either side. They are usually the most accessible components.
Step 3: Remove Existing RAM (if replacing or adding to a full slot). Gently push the two metal retention clips on the sides outward and away from the center. The module will pop up at an angle (~30 degrees). Carefully pull the module straight out by its edges, holding it by the middle. Place it somewhere safe on your anti-static bag if you’re keeping it.
Step 4: Install the New RAM. Take your new RAM module. Note the notch on the bottom edge—it’s not centered. Align this notch with the key in the slot. This ensures it can only go in one way. Hold the module by the long edges, not the chips. Place it in the slot at the same ~30-degree angle it was when removed. Press down firmly and evenly on the top edge until the retention clips automatically snap into place, locking the module flat. You should hear a soft click. Ensure it’s seated evenly and the clips are fully engaged.
Step 5: Reassemble. Double-check that nothing is loose or touching the motherboard. Replace the bottom panel, aligning the clips, and press down around the edges. Reinsert all screws in their correct holes and tighten them snugly but do not over-tighten and strip the plastic threads.
Method 2: When RAM is Under the Keyboard
Some ultrabooks, gaming laptops, and Apple MacBooks (pre-Apple Silicon) hide the RAM under the keyboard. This is a more complex disassembly. If your laptop has a bottom panel that only exposes the battery and SSD, you likely need this method. Proceed with extreme caution.
Step 1: Research Your Specific Model. Search for “[Your Exact Laptop Model] RAM upgrade guide” or a teardown video on iFixit or YouTube. This is vital to avoid breaking delicate ribbon cables or plastic clips.
Step 2: Remove the Bottom Panel. As before, remove all screws. Some laptops have screws hidden under rubber feet or warranty stickers. Do not force anything.
Step 3: Disconnect the Battery (CRITICAL). Locate the battery connector on the motherboard. It will be a small white plug with a black lock. Use your plastic tool to gently lift the lock tab about 2-3mm, then pull the plug straight out. Do not pull on the wires.
Step 4: Remove the Keyboard. This varies. Some keyboards are held by screws under the bottom panel (which you’ve already removed). Others are held by plastic clips all around the top edge. You may need to carefully pry the top edge up with a plastic tool, working from one side to the other. Be mindful of the keyboard ribbon cable connecting at the top or bottom. Once the keyboard is loose, flip it over and disconnect the ribbon cable by lifting its lock tab and pulling the cable out.
Step 5: Access and Install RAM. Under the keyboard, you should now see the RAM slots. Follow the same installation steps from Method 1. Often, one slot is under a small metal shield; you may need to remove a screw to access it.
Step 6: Reassemble in Reverse Order. Reconnect the keyboard ribbon cable first, lock the tab, then carefully lay the keyboard back down and press firmly around the edges until all clips snap. Reconnect the battery plug. Then replace the bottom panel and screws.
Post-Installation: Verifying Success and Optimizing Performance
You’ve closed everything up and powered on your laptop. The moment of truth! But your job isn’t done yet. Proper verification ensures your upgrade is complete and stable.
The First Boot and BIOS Check
On the first boot after adding RAM, your laptop might take a bit longer to start. This is normal; the system is initializing and testing the new memory. Don’t panic if you hear beeps—a single short beep is usually a good POST (Power-On Self-Test). Multiple beeps indicate a memory error. If it doesn’t boot or beeps repeatedly, power off and re-check your installation (RAM not fully seated, wrong type).
To confirm, enter your laptop’s BIOS/UEFI setup. Restart and press the designated key (often F2, F10, F12, Del, or Esc) during the manufacturer logo. Navigate to the System Information or Memory tab. Here you should see the total installed RAM matching your new configuration (e.g., 16GB). It may also list the speed and type.
Verifying Within Your Operating System
In Windows, go back to Task Manager > Performance > Memory. The top right should show the correct total. Click on the graph to see details: it should list the Speed (close to your RAM’s rated speed), Form Factor (SO-DIMM), and Hardware Reserved (a small amount used by the system, usually <1GB). For a deeper check, use CPU-Z again. Under the Memory tab, check the Type and Size. Under the SPD tab, select each slot to see the specifications of each individual module. Ensure both (if two are installed) show similar speeds and sizes for optimal dual-channel performance.
Running a Memory Stress Test
For complete peace of mind, run a memory test. Windows has a built-in tool: search for “Windows Memory Diagnostic,” run it, and choose “Restart now and check for problems.” It will reboot and run a thorough test, reporting any errors. For a more intensive test, use the free MemTest86. You create a bootable USB drive, boot from it, and let it run for several hours. A clean run with zero errors confirms your RAM is stable and healthy.
Troubleshooting Common Issues After Adding RAM
Even with careful preparation, things can go wrong. Here’s how to diagnose and fix the most common problems encountered when learning how to add RAM to a laptop.
Problem: Laptop Won’t Boot (No Power/No Display)
Solution: First, ensure the AC adapter is plugged in and the battery (if internal) is properly reconnected. Disconnect all peripherals. Power cycle: unplug the charger, remove the battery (if possible), hold the power button for 30 seconds, then reconnect battery and charger and try again. If still dead, you may have shorted something. Re-open the case and check that no tools or screws are left inside, that the RAM is fully seated and locked, and that all internal cables (especially the display cable if you removed the keyboard) are securely connected.
Problem: Beep Codes or “Memory Error” Message
Solution: This is the motherboard telling you the RAM is bad or incompatible. Power off. Reseat the RAM: remove it, blow out the slot with compressed air (or a gentle puff from your mouth), and reinsert the module firmly, ensuring the clips lock. Try booting with only the new RAM installed (remove the old stick if you have two). If it works, the old stick may be faulty. If it still fails with just the new stick, the new RAM is likely incompatible or defective. Try the new stick in the other slot. If it fails in both, return the new RAM.
Problem: RAM is Recognized but at a Lower Speed
Solution: This is common when mixing RAM of different speeds. The system defaults to the lowest common denominator. Check your RAM’s rated speed (on the label or via CPU-Z). If you have two different sticks (e.g., 2666MHz and 3200MHz), they will both run at 2666MHz. For best performance, use a matched kit of the same speed and timings. Also, some budget laptops have a BIOS setting to enable XMP/AMP profiles for higher speeds; check your BIOS for an option like “Memory Frequency” or “XMP” and enable it if available.
Problem: System Instability (Crashes, Blue Screens)
Solution: This often points to a timing/voltage issue, especially with higher-speed RAM. First, run MemTest86 to confirm errors. If errors appear, the RAM may be faulty, or your laptop’s chipset may not support the speed/timings of the new module. Try manually setting slower timings in the BIOS if possible. Alternatively, the new RAM module itself might be defective. Test it in another laptop if possible, or contact the seller for an RMA.
Advanced Considerations and When to Walk Away
While most RAM upgrades are simple, some modern laptop designs present unique challenges. Knowing these will help you decide if how to add RAM to a laptop is a DIY project for you or a job for a professional.
Soldered RAM: The Upgrade-Proof Design
An increasing number of laptops, especially thin-and-light ultrabooks and all Apple Silicon MacBooks, have their RAM chips soldered directly onto the motherboard. This means there are no slots. The RAM capacity is fixed at the time of manufacture. If your laptop has soldered RAM, you cannot upgrade it. Your only options are to accept the limitation or upgrade to a new laptop. You can check by looking up your model’s specifications—it will say “soldered” or “onboard,” or the service manual will show no accessible slots. You can also look inside; if you see no slots but see small square chips near the CPU, that’s soldered RAM.
Maximum RAM Limits: It’s Not Just About Slots
Even if you have an empty slot, your laptop’s chipset and BIOS impose a hard limit on total addressable RAM. A laptop with two slots might only support 16GB total (8GB per slot), even if 32GB modules exist. Always check the manufacturer’s max RAM spec. Also, 32-bit versions of Windows can only use about 3.5GB of RAM, regardless of how much you install. If you’re running a 32-bit OS (unlikely on a modern laptop), you must upgrade to a 64-bit OS to use more than 4GB.
The Dual-Channel Advantage
For optimal performance, especially for integrated graphics and memory-intensive tasks, install RAM in matched pairs (e.g., two 8GB sticks instead of one 16GB stick) if your laptop has two channels. This allows the memory controller to access both sticks simultaneously, nearly doubling the theoretical bandwidth. If you have only one stick, you’re running in single-channel mode, which is slower. So, if you have two slots, aim for two identical modules.
When to Call a Professional
Honestly assess your comfort level. Stop and seek professional help if:
- You need to remove dozens of screws and many complex layers to reach the RAM.
- You see many fragile, thin ribbon cables that you’re not confident in handling.
- The RAM is under a glued-down keyboard or palm rest that you’d have to force.
- Your laptop is under warranty and the warranty terms state that opening it voids coverage.
- You feel any hesitation or anxiety. The cost of a professional upgrade is far less than the cost of a new laptop if you damage yours.
Conclusion: Enjoy Your Faster, More Capable Laptop
Congratulations! By following this guide, you’ve learned one of the most empowering skills in personal computing: how to add RAM to a laptop. You’ve moved from uncertainty to action, from a sluggish machine to a responsive partner. The process—researching compatibility, preparing a safe workspace, carefully disassembling, installing the new modules, and verifying the upgrade—is a logical sequence that rewards patience and attention to detail.
Remember the core principles: compatibility is king, static is the enemy, and verification is mandatory. The feeling of powering on your laptop and seeing double the memory in Task Manager is incredibly satisfying. You’ve not only saved money but also reduced electronic waste by extending the life of your device. This knowledge is transferable; you can now help friends and family with their upgrades. As you close up your laptop for the final time, take a moment to appreciate your new capability. You’ve demystified the internals of your machine and taken control of its performance. Your laptop is now ready to handle more tabs, larger files, and more applications at once, proving that sometimes, the best way to move forward is to upgrade what you already have.
Frequently Asked Questions
Can I add RAM to any laptop?
No. Many modern laptops have RAM soldered to the motherboard, which cannot be upgraded. You must check your specific laptop model’s service manual or specifications to see if it has accessible RAM slots and what type of RAM it supports.
How much RAM do I actually need in 2024?
For general web browsing and office work, 8GB is the bare minimum. For comfortable multitasking with many browser tabs and applications, 16GB is the recommended sweet spot. Professionals in video editing, 3D rendering, or software development should consider 32GB or more, provided their laptop supports it.
Will upgrading my laptop RAM void the warranty?
It depends on the manufacturer and warranty terms. Some brands (like Dell, HP, Lenovo) allow user-upgradable RAM and storage without voiding the warranty, as long as you don’t damage anything in the process. Others, particularly some ultrabook brands, may consider any opening as voiding the warranty. Always check your warranty documents first.
Can I mix different sizes or brands of RAM?
Technically yes, but it’s not ideal. You can install a 16GB stick alongside an 8GB stick, and the system will use them in “flex mode” (part dual-channel, part single-channel). However, mixing brands or speeds can sometimes cause instability, as the system tries to synchronize to the lowest common specifications. For best results, use identical modules (same brand, model, size, speed).
My laptop has a 32-bit version of Windows. Can I still add more than 4GB of RAM?
No. A 32-bit operating system can only address approximately 3.5GB of RAM, regardless of how much you physically install. To use more than 4GB of RAM, you must install a 64-bit version of Windows. Most laptops sold in the last decade support 64-bit OS.
Will adding more RAM make my laptop faster for gaming?
It depends. If your laptop was previously starved for memory (e.g., running games with only 8GB and the game uses 10GB+), adding more RAM can significantly improve performance and eliminate stuttering by preventing the system from using slow hard drive/SSD space as “virtual memory.” However, if your bottleneck is the graphics card (GPU) or CPU, more RAM will have little to no effect on game frame rates.