Connecting a mouse to your laptop is a simple process that dramatically improves productivity and comfort. Whether you have a traditional wired USB mouse, a modern Bluetooth model, or one with a tiny USB receiver, this guide walks you through every connection method for both Windows and macOS. We’ll also cover essential troubleshooting steps for common problems like unresponsive cursors or connection drops, and provide advanced tips for gamers and power users. By the end, you’ll confidently connect any mouse and optimize its settings.
Let’s be honest: the built-in trackpad on your laptop is a marvel of engineering. It’s compact, always with you, and works great for basic tasks. But there comes a point—maybe when you’re editing a photo, building a spreadsheet, or diving into a game—where you just need more precision, more buttons, and a more comfortable grip. That’s the moment you decide to connect a mouse to your laptop. It sounds simple, and it usually is! But with the variety of mice available today, the process can be slightly different depending on your device and your mouse’s technology. This guide is your definitive, stress-free manual for making that connection, no matter your tech skill level. We’ll start with the simplest methods and walk through every scenario, ensuring you spend less time fiddling and more time working or playing.
Think of this as a friendly chat over coffee. I’ll explain the “why” behind the steps, not just the “what.” You’ll learn how to connect a mouse to a laptop running Windows 11 or macOS Sonoma, how to handle a mouse that isn’t immediately recognized, and even how to set up a second mouse for a presentation. By the time we’re done, that little cursor will be dancing exactly to your tune.
Key Takeaways
- Connection Types: There are three primary methods: plug-and-play USB (wired), Bluetooth (wireless), and USB receiver (wireless with a dongle).
- Compatibility Check: Ensure your laptop’s OS (Windows/macOS) and hardware (Bluetooth version, USB ports) support your chosen mouse type.
- Driver Requirements: Most modern mice are plug-and-play, but some advanced or gaming mice require specific driver software for full functionality.
- Troubleshooting Basics: Always start with checking physical connections, battery levels, and restarting your laptop before diving into complex fixes.
- Ergonomic & Performance Settings: After connecting, adjust pointer speed, scroll direction, and button assignments in your OS settings for comfort and efficiency.
- Multiple Mice: Your laptop can handle multiple mice simultaneously; useful for presentations or dual-user setups.
📑 Table of Contents
How to Connect a Wired USB Mouse to Your Laptop
This is the most straightforward method. A wired mouse is the classic, no-nonsense workhorse. It draws power directly from your laptop’s USB port, so you never worry about batteries. The connection is typically instant and reliable, making it perfect for beginners and anyone who hates wireless hiccups.
The Simple Plug-and-Play Process
Connecting a wired mouse is often as simple as plugging it in. Here’s the step-by-step:
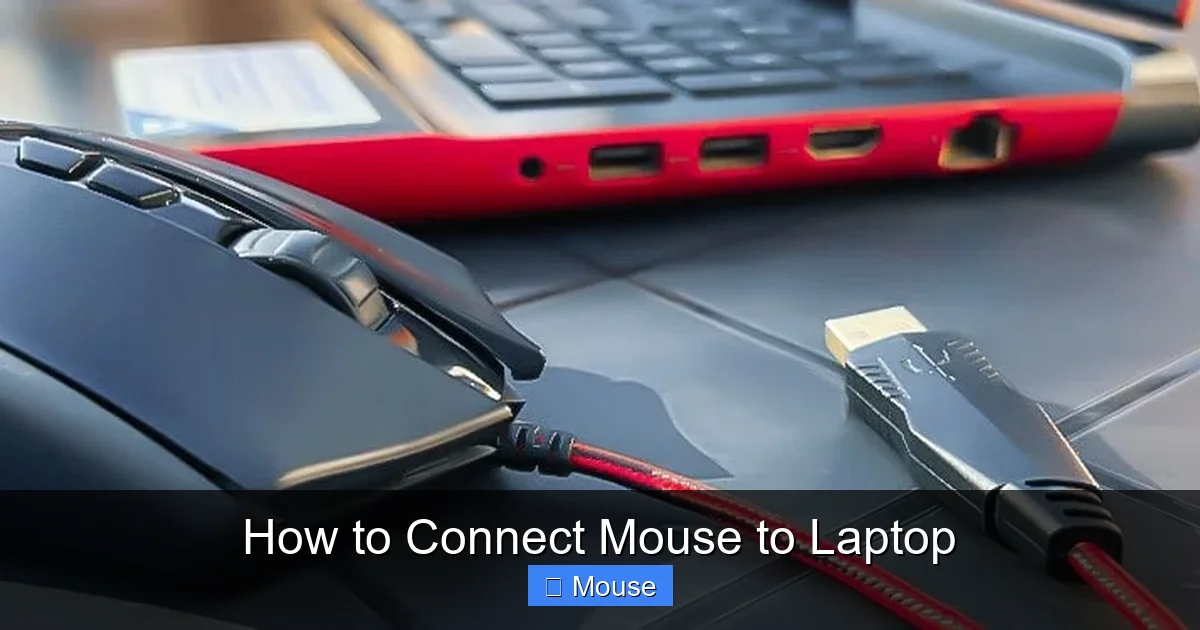
- Locate an Available USB Port: On most modern laptops, these are the standard rectangular USB-A ports. If your laptop only has newer, smaller USB-C/Thunderbolt ports (common on ultrabooks and MacBooks), you’ll need a simple USB-A to USB-C adapter or a cable that has USB-C on one end and USB-A on the other.
- Connect the Mouse: Firmly plug the mouse’s USB connector into the port. You should feel a slight click.
- Wait for Recognition: Your operating system will detect new hardware. On Windows, you might see a notification in the bottom-right corner that says “Setting up a device” or “Your device is ready.” On macOS, a similar notification may appear, or you might see the cursor change momentarily.
- Start Using It: That’s often it! The mouse should be fully functional immediately. Move it—the on-screen cursor should respond. Test the left and right buttons and the scroll wheel.
Troubleshooting: What If It Doesn’t Work?
If your cursor doesn’t move after plugging in a wired mouse, don’t panic. Follow this checklist:
- Try a Different USB Port: The port you used might be faulty. Plug into another one.
- Restart Your Laptop: A simple reboot can resolve minor driver conflicts.
- Check Device Manager (Windows): Right-click the Start button and select “Device Manager.” Expand “Mice and other pointing devices.” If you see a yellow exclamation mark on an entry or an entry called “Unknown device,” right-click it and select “Update driver” or “Uninstall device” and then unplug/replug the mouse to reinstall it.
- Check System Information (macOS): Click the Apple menu > About This Mac > System Report. Under “Hardware,” select “USB.” You should see your mouse listed in the USB device tree. If not, the port or cable may be faulty.
- Test the Mouse on Another Computer: This isolates the problem. If the mouse works elsewhere, the issue is with your laptop. If it doesn’t, the mouse may be broken.
How to Connect a Wireless Bluetooth Mouse to Your Laptop
Bluetooth mice offer a clean, cable-free desk. They use radio frequency to communicate with your laptop’s built-in Bluetooth adapter. The process involves “pairing” the two devices, which is a one-time setup (unless you reset it).
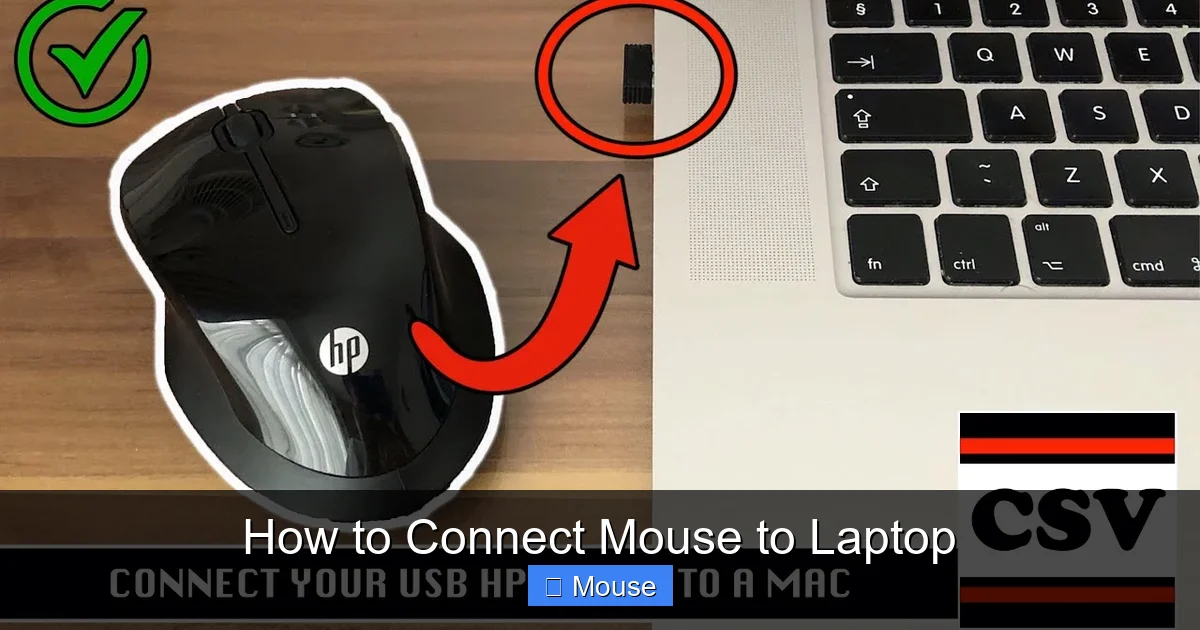
Visual guide about How to Connect Mouse to Laptop
Image source: i.ytimg.com
Pre-Pairing Checklist for Bluetooth
Before you start, ensure:
- Your Laptop Has Bluetooth: Almost all modern laptops do. On Windows, you can check by looking for the Bluetooth icon in the system tray (bottom-right). On macOS, look for the Bluetooth icon in the menu bar (top-right) or check System Settings > Bluetooth.
- Your Mouse Has Power: Turn it on using a physical switch, usually on the bottom. If it uses removable batteries, ensure they’re fresh. If it’s rechargeable, ensure it’s charged.
- Your Mouse is in Pairing Mode: This is crucial. There’s often a small button on the bottom labeled with a Bluetooth symbol (↔). Press and hold it (usually 3-5 seconds) until an LED starts blinking rapidly. This blinking means the mouse is discoverable by your laptop. Consult your mouse’s manual for the exact method, as some use a combination of buttons.
Pairing Steps for Windows 11/10
- Open Bluetooth Settings: Click the Start Menu > Settings (gear icon) > Bluetooth & devices > Add device.
- Select “Bluetooth”: In the “Add a device” window, click on “Bluetooth.”
- Select Your Mouse: Your laptop will start scanning. Your mouse’s name (e.g., “Logitech MX Master 3,” “Apple Magic Mouse”) should appear in the list. Click on it.
- Complete Pairing: You might see a brief “Connecting” message, then “Your device is ready to go!” The blinking LED on your mouse should become steady or turn off, indicating a successful, stable connection.
Pairing Steps for macOS (Sonoma, Ventura, etc.)
- Open System Settings: Click the Apple menu > System Settings (or System Preferences on older versions).
- Go to Bluetooth: The Bluetooth pane should be in the sidebar. Ensure Bluetooth is turned ON (the toggle should be blue).
- Put Mouse in Pairing Mode: As described above, make sure your mouse’s LED is blinking.
- Find and Connect: Your mouse should appear in the “Devices” list. Click the “Connect” button next to its name. The button may change to “Connected.”
- Finalize: You may be asked to confirm a pairing code (usually 0000 or 1234) or simply see a success notification. The mouse LED will stabilize.
Common Bluetooth Issues & Fixes
Bluetooth is generally reliable but can be finicky. If pairing fails or the connection drops:
- Remove Old Pairings: If the mouse was previously paired with another device (like your phone), it might be trying to connect to that instead. Turn off Bluetooth on other nearby devices or “forget” the mouse in their Bluetooth settings.
- Check Battery: Low battery is the #1 cause of intermittent Bluetooth dropouts.
- Reduce Interference: Other wireless devices (Wi-Fi routers, microwaves, cordless phones) can interfere. Move your laptop and mouse closer, or temporarily disable other 2.4GHz devices.
- Update Bluetooth Drivers (Windows): In Device Manager, under “Bluetooth,” right-click your adapter and select “Update driver.”
- Reset Bluetooth Module: On Windows, you can toggle Bluetooth off and on in Settings. On macOS, holding Shift+Option and clicking the Bluetooth menu bar icon reveals a “Debug” menu with options to reset the module.
How to Connect a Wireless Mouse with a USB Receiver (Nano Dongle)
Many wireless mice, especially from brands like Logitech, come with a small USB receiver (often called a “nano dongle” or “Unifying receiver”). This method uses a dedicated radio frequency (RF) connection, which is often more stable and has lower latency than Bluetooth, making it popular with gamers and presenters.
Visual guide about How to Connect Mouse to Laptop
Image source: technewstoday.com
The Plug-and-Pair Process
The beauty of these systems is their simplicity. The receiver and mouse are pre-paired at the factory.
- Insert the Receiver: Plug the tiny USB receiver into an available USB port on your laptop. For best performance, use a port directly on the laptop rather than a crowded USB hub.
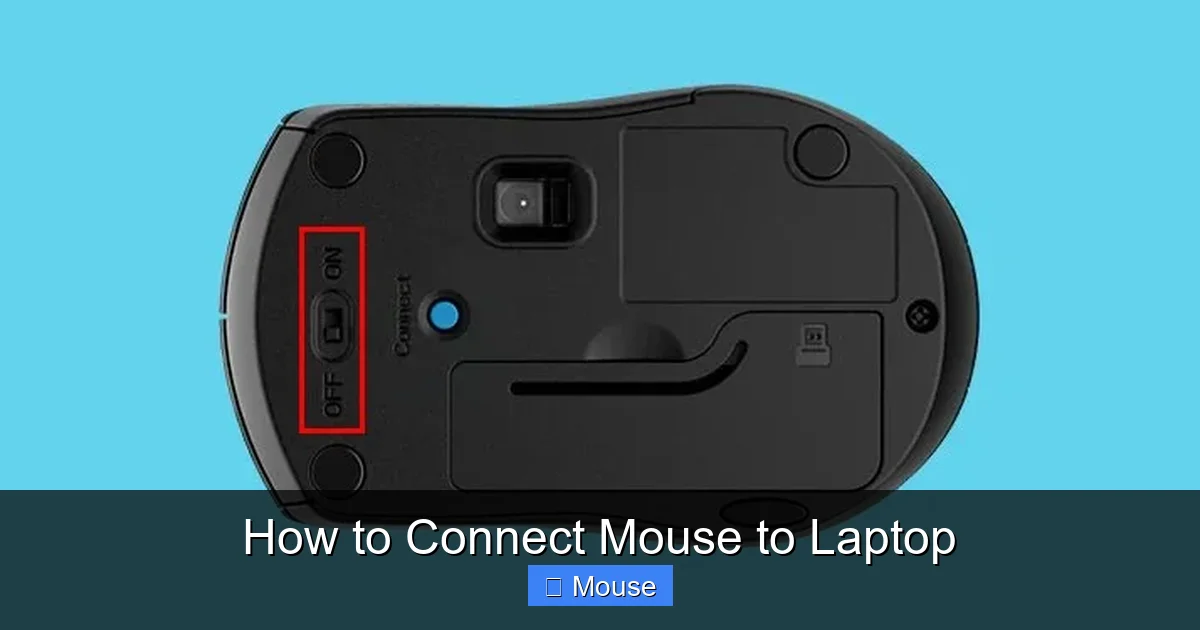
- Turn On the Mouse: Flip the power switch on the bottom of the mouse to “On.”
- Instant Connection: They should connect automatically within a second or two. Move the mouse—the cursor should respond. It’s that simple. No pairing dialog boxes are needed.
Using Unifying Receivers (Logitech Specific)
Logitech’s “Unifying” receivers allow you to pair *multiple* compatible mice and keyboards to a single receiver. This is great if you have limited USB ports.
- Download Logitech Options/Logi Options+ Software: Go to Logitech’s website and download the companion software for your mouse.
- Pair Additional Devices: Open the software, click “Add Devices,” and follow the prompts to put your Unifying mouse in pairing mode (usually a specific button hold). The software will discover and bind it to the already-plugged-in receiver.
- Switch Between Paired Devices: With the software, you can easily switch which mouse is active if you have multiple paired, though typically only one will control the cursor at a time.
Troubleshooting RF Receiver Mice
- Receiver Not Recognized? Try a different USB port. Avoid using USB 3.0 blue ports if possible, as they can sometimes cause RF interference with the 2.4GHz signal. A short USB extension cable can move the receiver away from the laptop’s internal electronics for a better signal.
- Mouse Unresponsive? Check the power switch and batteries. Ensure the mouse isn’t too far from the receiver (typical range is 10-15 feet, but obstacles reduce this).
- Cursor Jittery or Laggy? This is often an interference issue. Keep the receiver away from other USB devices, especially those with large metal casings. A USB extension cable is the best fix.
- Lost Receiver? If you have a Logitech Unifying mouse, you can buy a replacement receiver and pair the mouse to it using the Logi Options+ software. For other brands, you may need to contact support.
Advanced Connection & Setup Considerations
Now that you’re connected, let’s make the experience perfect. This section is for the enthusiasts, the gamers, and anyone who wants to squeeze every last drop of functionality from their peripheral.
Visual guide about How to Connect Mouse to Laptop
Image source: technewstoday.com
Installing Manufacturer Software for Customization
While basic mouse functions work out of the box, dedicated software unlocks its full potential. Brands like Logitech (Logi Options+), Razer (Razer Synapse), Corsair (iCUE), and SteelSeries (GG) offer powerful suites.
- Reassign Buttons: Turn side buttons into copy/paste, forward/back, or custom macros for games or productivity apps.
- Adjust DPI/CPI: DPI (Dots Per Inch) determines cursor sensitivity. Lower DPI (400-800) offers precision for shooters; higher DPI (1600-3200+) allows faster cursor movement across multiple monitors. Software lets you set multiple DPI stages and toggle between them with a button press.
- Create Profiles: Save different button and DPI configurations for specific applications (e.g., one profile for Photoshop, another for Excel, another for your favorite FPS game). The software can auto-switch profiles when you open an app.
- Configure RGB Lighting: Customize colors, patterns, and effects for gaming mice.
Optimizing Mouse Settings in Your Operating System
Before you touch the manufacturer’s software, get the basics right in your OS.
- Windows: Go to Settings > Bluetooth & devices > Mouse. Here you can adjust “Mouse pointer speed,” “Scroll lines,” and “Scroll inactive windows when I hover over them.” For more advanced pointer precision, search for “Additional mouse settings” in the Start Menu to open the classic Mouse Properties dialog (with pointers, wheel, and hardware tabs).
- macOS: Go to System Settings > Mouse. You’ll find sliders for “Tracking speed” (cursor acceleration), “Double-click speed,” and “Scrolling speed.” macOS also has a “Primary mouse button” setting (left/right). Note: macOS does not have a native system-wide DPI setting; that’s controlled by the mouse’s hardware or its software.
Ergonomics and Health: Setting Up for Comfort
A poorly set up mouse can lead to wrist strain (RSI). Take 5 minutes to optimize.
- Mouse Sensitivity: Your goal is to move the cursor across the screen with a natural, relaxed arm/wrist movement, not by wildly flicking your wrist. If you have to pick up the mouse to reach the edge of the screen, increase the pointer speed. If the cursor is too jittery and overshoots targets, decrease the speed.
- Grip Style: Are you a palm gripper, claw gripper, or fingertip gripper? Your mouse shape should support your natural grip. A mouse that’s too wide or too flat will cause discomfort over time.
- Position: Keep your wrist in a neutral, straight position. Use a mouse pad with a wrist rest if needed, but ensure it doesn’t force your wrist into an upward bend.
- Take Breaks: Use the 20-20-20 rule: every 20 minutes, look at something 20 feet away for 20 seconds. Also, periodically relax your hand and arm.
Comprehensive Troubleshooting Guide: “My Mouse Still Isn’t Working!”
When all else fails, methodical diagnosis is key. This flowchart-style approach will solve 95% of issues.
Step 1: The Absolute Basics
- Power: Is the mouse turned on? Are the batteries fresh? For wired mice, is it firmly plugged in? Try a different port.
- Surface: Is the mouse on a proper mousepad or a non-reflective, opaque surface? Glass, glossy tables, and highly reflective surfaces confuse optical/laser sensors.
- Restart: Reboot your laptop. It’s the golden rule of IT for a reason.
Step 2: OS-Level Checks
- Device Manager (Windows): Look for errors under “Mice and other pointing devices” and “Bluetooth.” Uninstall the device, unplug/replug, and let Windows reinstall it.
- Bluetooth Settings: Is Bluetooth turned on? Is the mouse listed as “Connected” or just “Paired”? Try removing it from the list and re-pairing from scratch.
- USB Selective Suspend (Windows): This power-saving feature can turn off USB ports. Search for “Power Options” in the Start Menu, click “Change plan settings” for your active plan, then “Change advanced power settings.” Expand “USB settings” > “USB selective suspend setting” and set it to “Disabled.”
Step 3: Hardware & Driver Deep Dive
- Update Chipset & USB Drivers: Go to your laptop manufacturer’s support website (Dell, HP, Lenovo, etc.) and download the latest chipset and USB drivers for your specific model. Install them.
- Test in Safe Mode (Windows): Boot into Safe Mode (with Networking). If the mouse works here, a third-party software conflict is likely. Uninstall recent software, especially antivirus or mouse customization tools.
- BIOS/UEFI Check: Some older laptops have a “USB Legacy Support” setting in the BIOS that must be enabled for USB mice to work in pre-boot environments. It’s usually on by default.
- Try a Different Mouse: The ultimate test. If a different mouse works on your laptop, your original mouse is faulty. If no mouse works, your laptop’s ports or controller may have a problem.
Conclusion
Connecting a mouse to your laptop should be a empowering moment, not a frustrating one. You now have the complete map: wired for simplicity and reliability, Bluetooth for a truly wireless desk, and USB receivers for rock-solid gaming-grade performance. Remember the core steps—power on, put in pairing mode (if wireless), select from your OS’s device list—and you’ll be set in under a minute. When things go wrong, walk through our troubleshooting ladder from basic (batteries, restart) to advanced (drivers, BIOS). Finally, take a few minutes to customize your settings and consider your ergonomics. Your wrist will thank you for it. So go ahead, plug in that sleek new peripheral, and enjoy the precision and comfort you’ve been missing. Your laptop just got a serious upgrade.
Frequently Asked Questions
My Bluetooth mouse won’t pair. What should I do?
First, ensure the mouse is in pairing mode (LED blinking) and your laptop’s Bluetooth is discoverable. Remove the mouse from any previous device’s paired list. Restart your laptop’s Bluetooth by toggling it off and on. If it still fails, update your laptop’s Bluetooth drivers from the manufacturer’s website.
The cursor moves erratically or lags with my wireless mouse. How can I fix this?
For Bluetooth mice, this is often due to interference or low battery. Replace the batteries and move the mouse closer to the laptop. For RF receiver mice, try plugging the receiver into a different USB port, preferably using a short USB extension cable to move it away from the laptop body and other electronics, which can block the signal.
Can I use more than one mouse with my laptop at the same time?
Yes! Both Windows and macOS support multiple pointing devices simultaneously. You can have a wired mouse and a wireless mouse both connected. The last device to move the cursor will typically gain control. This is useful for presentations where you might pass a second mouse to a colleague.
Why does my wired mouse stop working after my laptop wakes from sleep?
This is a common power management issue. On Windows, go to Device Manager, find your mouse under “Mice and other pointing devices,” right-click its properties, go to the “Power Management” tab, and uncheck “Allow the computer to turn off this device to save power.” On macOS, this is less common but can be related to USB power settings in System Settings.
Do I need to install drivers for my new mouse?
For basic functionality (moving the cursor, left/right click, scroll wheel), almost all modern mice are plug-and-play and require no driver. However, for advanced features like programmable buttons, DPI adjustment, and RGB lighting, you will need to download and install the manufacturer’s software (e.g., Logi Options+, Razer Synapse).
My mouse cursor is moving too fast/slow. How do I adjust the sensitivity?
On Windows, go to Settings > Bluetooth & devices > Mouse and adjust the “Mouse pointer speed” slider. For more precise control, search for “Additional mouse settings” to access the “Pointer Options” tab and uncheck “Enhance pointer precision” for linear, 1:1 movement. On macOS, adjust “Tracking speed” in System Settings > Mouse. For DPI-specific changes, use your mouse’s manufacturer software if available.