Sony Camera for Wildlife Photography
Choosing the right Sony camera for wildlife photography can transform your nature shots. These cameras offer fast autofocus, high burst rates, and excellent low-light performance. We will help you pick the best model for your needs. Learn how to capture sharp animal images in the wild.
Wildlife photography is exciting. You never know what you will see. A deer might jump out. A bird might dive. You need gear that keeps up. That is why many photographers choose a Sony camera for wildlife photography. Sony makes strong tools for this job.
These cameras have great sensors. They focus very fast. They shoot many pictures quickly. This helps you catch the perfect moment. In this guide, we will look at what to buy. We will also share tips for better shots. You will learn how to get sharp animal images every time.
Key Takeaways
- Fast Autofocus Matters: Look for Real-time Tracking to keep moving animals in focus.
- High Burst Speed: Capture rapid action with 10+ frames per second shooting.
- Lens Choice Is Key: Use telephoto lenses to reach distant wildlife safely.
- Low Light Performance: Full-frame sensors handle dawn and dusk shooting better.
- Battery Life: Long days in the field require spare batteries or power banks.
- Weather Resistance: Choose weather-sealed bodies for harsh outdoor conditions.
- Budget Considerations: Balance body cost with lens investment for best results.
📑 Table of Contents
Why Choose a Sony Camera for Wildlife Photography
Sony is a top brand for nature shots. Their cameras are built for speed. They also handle low light well. This is important for early mornings. Many pros trust Sony for wildlife photography gear. The reason is simple. The technology works very well in the field.
One big plus is the autofocus. Sony uses real-time tracking. It locks onto eyes or bodies. It keeps the subject sharp. This is vital when animals move fast. You do not want to miss the shot. A good camera for nature photography must track well. Sony does this better than most.
Another benefit is the burst mode. You can shoot many frames per second. This increases your chances of success. Animals do not wait for you. You need a fast camera for wildlife to keep up. Sony models often shoot at 10 fps or more. Some even reach 20 fps. That is very helpful for action.
The sensors are also excellent. Full-frame bodies gather more light. This helps in dark forests. It also gives you clean images. You can crop them later if needed. A full-frame wildlife camera gives you more room to work. You get better detail in the final photo.
Real-Time Tracking Benefits
Real-time tracking changes the game. You point the camera at the animal. The system follows it. You do not need to adjust focus manually. This saves time and effort. It also reduces missed shots. Many Sony mirrorless camera models have this feature. It works with birds and mammals alike.
Burst Mode Explained
Burst mode lets you hold the shutter. The camera takes many photos in a row. This is great for jumping or running animals. You can pick the best frame later. Look for a high-speed camera for nature when you shop. Fast shooting helps you capture motion. It also freezes movement well.
Top Sony Models for Wildlife Photography
There are many options to pick from. The best choice depends on your budget. It also depends on your style. Here are some strong picks for a Sony camera for wildlife photography. Each one has its own strengths.
Sony A7 IV
This is a full-frame body. It has 33 megapixels. That gives you lots of detail. You can crop images and still keep quality. The autofocus is very reliable. It tracks eyes and bodies well. This makes it a solid full-frame wildlife camera. It is also good for landscapes and portraits.
Sony A9 III
This model is built for speed. It has a global shutter. That means no rolling distortion. Fast motion looks natural. It shoots at very high frame rates. This is ideal for birds in flight. If you need a fast camera for wildlife, this is a top choice. It handles tough action very well.
Sony A6700
This is an APS-C option. It is smaller and lighter. That helps when you hike long trails. It still has great autofocus. It also offers good image quality. Many beginners like this Sony mirrorless camera. It is more affordable than full-frame bodies. You still get strong performance in the field.
Sony A1
This is a premium flagship body. It has huge resolution and speed. You get the best of both worlds. It is perfect for serious pros. If budget is not a problem, this camera for nature photography stands out. It delivers top-tier results in any condition.
Lens Choices for Sony Wildlife Shots
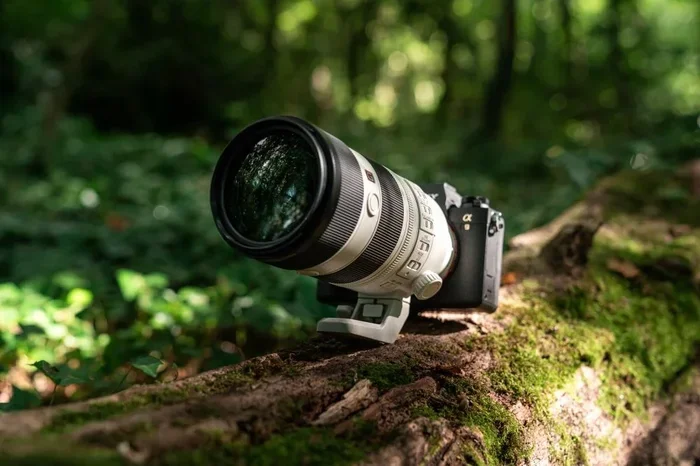
The body is only half the story. You also need the right glass. A telephoto lens brings distant animals closer. This is key for safety and composition. A good lens for wildlife photography makes a huge difference. You want reach and sharpness.
Sony has many E-mount options. Some are lightweight. Some are very sharp. You should match the lens to your body. A telephoto lens for Sony can be long. It helps you fill the frame. You can also use extenders for more reach. Just watch the aperture change.
Fast lenses help in low light. They let in more light. This is useful at dawn or dusk. Animals are active at these times. A wide aperture also blurs the background. This makes your subject pop. It is a classic trick for sharp animal images.
Consider weight too. Big lenses can be heavy. You may need a tripod or monopod. This adds stability. It also reduces shake. A stable setup improves clarity. It is a simple way to get better results.
Telephoto Lens Options
Look for 200mm to 600mm ranges. These cover most wildlife needs. Longer lenses help with shy animals. They also help with small birds. You can get close without moving. This keeps you safe and quiet. A strong lens for wildlife photography is a smart buy.
Prime vs Zoom Lenses
Prime lenses are often sharper. They also have wider apertures. Zoom lenses offer more flexibility. You can change focal length fast. For wildlife, zooms are very handy. You never know how close the subject will get. Many pros use high-quality zooms. They balance speed and range well.
Camera Settings for Wildlife Photography
Settings matter a lot. You want fast response. You also want clean files. Start with shutter speed. Keep it high for moving subjects. This freezes motion. A good rule is 1/1000 second or faster. For birds, go even higher. This helps you capture crisp action.
Next, think about aperture. Use a wide opening when light is low. This keeps ISO down. It also sharpens the subject. But do not blur too much. You may want some context in the frame. Balance is key for a Sony camera for wildlife photography.
ISO should be flexible. Modern Sony sensors handle noise well. Do not fear higher ISO values. A sharp noisy image is better than a blurry clean one. Auto ISO can help a lot. It adjusts as light changes. This is great when you move through different areas.
Focus mode is also important. Use continuous focus for moving subjects. Set it to track eyes or bodies. This keeps the subject sharp. Use single focus only for still scenes. That is rare in wildlife work. Most of the time, you need fast autofocus.
Shutter Speed Tips
Fast shutter speeds freeze motion. They also reduce blur from your hands. If the light is low, raise ISO. Or open the aperture more. Do not drop shutter speed too much. A blurry animal photo is hard to save. Keep it fast for best results.
ISO and Noise Control
Noise is not always bad. Modern tools can reduce it. Shoot in RAW for more control. You can clean up grain later. Keep ISO as low as you can. But do not sacrifice shutter speed. A clear shot at high ISO wins every time.
Field Tips for Better Wildlife Photos
Gear is important. Skills matter too. Patience is your best tool. Animals do not pose for you. You must wait for the right moment. Stay quiet and still. Move slowly to avoid scaring them. This helps you get natural behavior.
Use natural light when you can. Early morning and late afternoon are best. The light is soft and warm. It brings out rich colors. Midday sun can be harsh. Shadows can hide details. Plan your shoots around good light. This improves every wildlife photography gear setup.
Composition is also key. Leave space in the direction the animal faces. This makes the image feel open. Use the background to add context. Trees, water, and sky tell a story. Keep the eye line clean. A simple background often works best.
Practice your tracking skills. Follow the animal with your lens. Keep the focus point on the eye. This takes time to master. Start with easier subjects. Birds at a feeder are a good start. Then move to wilder scenes. You will improve with each outing.
Patience and Timing
Good shots take time. You may wait for hours. That is normal in this hobby. Watch the animal behavior. Learn its habits. This helps you predict action. When you know what comes next, you can prepare. That is how you capture sharp animal images.
Using Light Well
Soft light is your friend. It shows texture and color. Avoid hard shadows on faces. Position yourself to use the sun. Backlight can create nice outlines. Side light adds depth. Try different angles. You will learn what works best in each scene.
Common Mistakes and Quick Fixes
Even pros make errors. The good news is you can fix them. One common mistake is slow focus. This happens when settings are wrong. Make sure you use continuous focus. Check that tracking is on. This solves many missed shots.
Another issue is shaky images. Long lenses magnify shake. Use a stable support. A monopod helps a lot. Brace yourself against a tree or wall. This steadies the camera. It also reduces fatigue over long days.
People also forget battery life. Long outings drain power fast. Bring spare batteries. Keep them warm in cold weather. Cold reduces battery performance. A small power bank can help too. Plan ahead so you do not run out.
Memory cards can slow you down. Use fast cards for burst shooting. Slow cards may cause delays. They can even stop the camera. Buy reliable cards with high speed. This keeps your Sony camera for wildlife photography running smoothly.
Focus Errors
Focus errors are common. The camera may lock on the background. Check your focus point often. Move it to the subject eye. Use tracking to hold it there. Review your shots on the screen. Learn from each mistake. You will improve fast.
Shake and Stability
Shake ruins sharpness. Use a fast shutter speed. Support the lens with a strap or rest. Press the shutter gently. Use the viewfinder for extra stability. These small tricks help a lot. They make your images cleaner and sharper.
Expert Insights and Final Thoughts
Many photographers love Sony for good reason. The gear is fast and smart. It helps you react quickly. It also handles tough light well. That is why it is a strong Sony camera for wildlife photography choice. You get tools that work in the field.
Remember that gear is only part of the puzzle. Your eye matters too. Learn to see light and behavior. Practice often. Review your work. Over time, your skills will grow. The camera will feel like an extension of you.
Start with one good body and lens. Master it before you add more. This keeps things simple. It also saves money. You can upgrade later as your needs change. The right wildlife photography gear grows with you.
Stay curious and keep shooting. Every outing teaches you something. Some days will be quiet. Others will be full of action. Both are valuable. Enjoy the process and respect nature. That is the heart of great wildlife photography.
Key Takeaways
Choose a body with fast tracking. Pick a lens with good reach. Set your shutter speed high. Manage ISO with care. Bring spare batteries and fast cards. Use a stable support in the field. These steps will improve your results. You will get more keepers every trip.
Frequently Asked Questions
What is the best Sony camera for beginners in wildlife photography?
The Sony A6700 is a strong choice for starters. It is lighter, more affordable, and still offers fast autofocus. You get great performance without a high price tag.
Do I need a full-frame Sony camera for wildlife?
Full-frame bodies give better low-light performance and more cropping room. They are helpful but not required. An APS-C model can still produce excellent wildlife images.
Which lens is best for Sony wildlife photography?
A telephoto zoom in the 200mm to 600mm range works well for most situations. It gives you reach and flexibility. Pair it with a sharp prime if you want faster apertures.
How important is burst speed for animal photography?
Burst speed is very important for moving subjects. It increases your chances of capturing the perfect moment. Faster frame rates help freeze action and reduce missed shots.
What settings should I use for birds in flight?
Use a fast shutter speed, continuous autofocus, and a wide aperture when possible. Set ISO to auto if the light changes often. This keeps the bird sharp and well exposed.
How can I improve sharpness in low light wildlife shots?
Use a wide aperture and raise ISO as needed. Keep your shutter speed fast enough to freeze motion. A stable support also helps reduce blur in dim conditions.