Installing an NVMe SSD requires securing it with a single screw, but “tight” is a dangerous misnomer. The screw should be snug and secure, never forcefully tightened. Over-tightening is the #1 cause of installation damage, cracking the SSD’s delicate circuit board or stripping the screw hole. The universal rule is to tighten by hand until you feel solid resistance, then give a mere quarter-turn with a tool if absolutely necessary. Always use the correct, short M2x3 or M2x2.5 screw that came with your motherboard or SSD, and confirm it sits on a standoff if your board requires one. When in doubt, consult your motherboard manual—the goal is a stable, vibration-free connection, not maximum torque.
So, you’ve just unboxed your shiny new NVMe SSD. You’ve aligned it perfectly in the M.2 slot on your motherboard, heard the satisfying click as it seated itself, and now you’re holding that tiny, critical little screw in your hand. You’re about to secure it, but a small, nagging thought creeps in: how tight should this screw actually be? It’s a deceptively simple question with a critically important answer. Get it wrong, and you could be looking at a cracked, dead SSD or a damaged motherboard. Get it right, and your drive will serve you faithfully for years. Let’s settle this once and for all, in plain language.
The short, urgent answer is: not tight at all. We’re talking “snug” and “secure,” not “tight.” The goal is to prevent the SSD from vibrating loose inside your PC case, not to clamp it down with the force of a mechanic tightening a lug nut. The most common installation error with NVMe SSDs isn’t forgetting the screw—it’s over-tightening it. This single screw is the most common point of failure during a first-time installation. But why? And what does “snug” actually feel like? Let’s break it down.
Key Takeaways
- The Golden Rule is “Finger-Tight Plus”: The screw should be tightened firmly by hand until it is snug and the SSD is flat against the motherboard. A tiny additional turn (¼ to ½) with a screwdriver is the absolute maximum. If you need significant force, you are over-tightening.
- Over-Tightening Causes Catastrophic Damage: Excessive torque cracks the SSD’s printed circuit board (PCB), damages the NAND chips, or strips the threaded hole in the motherboard’s M.2 standoff, rendering the slot unusable.
- Use the Correct Screw: Always use the specific M2x3 or M2x2.5 screw provided by your motherboard manufacturer. Using a longer or thicker screw can pierce the SSD’s casing and short-circuit components.
- The Screw’s Job is Retention, Not Compression: Its purpose is to hold the SSD in place against vibration and prevent it from working loose. It is not meant to squeeze the SSD against the board. The SSD’s own placement and the motherboard’s M.2 slot contacts provide the necessary pressure for the electrical connection.
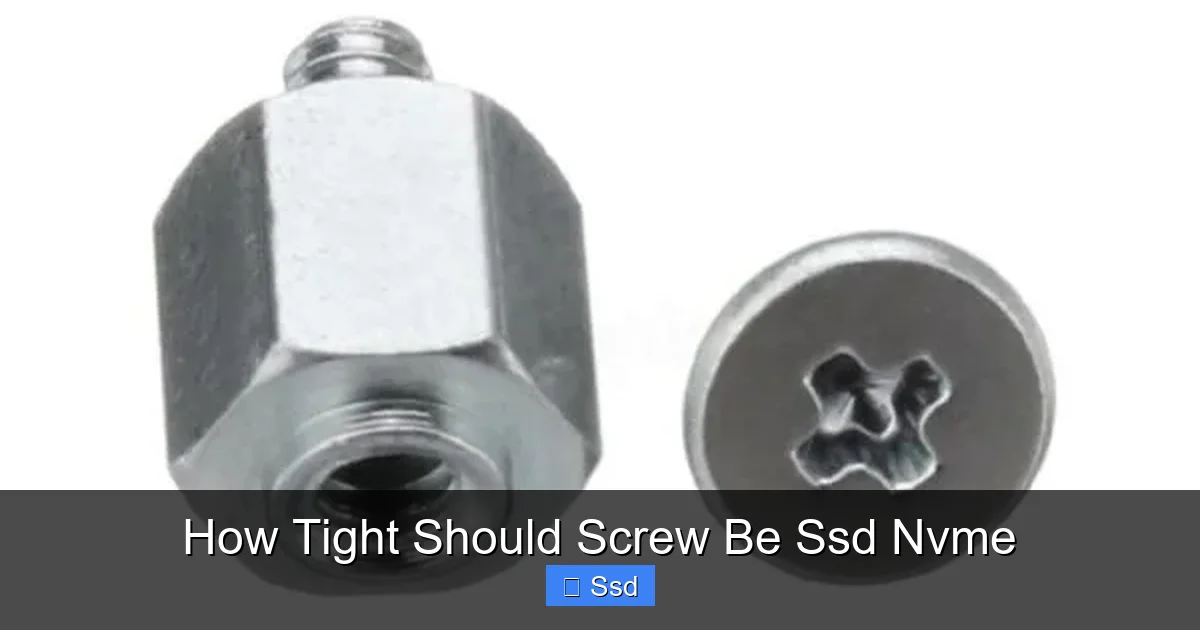
- Check for a Required Standoff: Some motherboards, especially for longer (2242/2260) SSDs, have a small metal standoff (pillar) that the screw threads into. The screw should thread *through* the SSD’s mounting hole and into this standoff. If your board has a threaded hole directly in the PCB area, no standoff is used.
- When in Doubt, Consult the Manual: Your motherboard’s manual is the definitive source for installation instructions, including diagrams showing screw location and whether a standoff is pre-installed or needs to be moved.
📑 Table of Contents
- Understanding the NVMe SSD Installation
- The “Hand-Tight” Rule: Your New Best Practice
- The Dire Consequences of Over-Tightening
- Tools, Techniques, and Troubleshooting
- Motherboard Variations and Manufacturer Quirks
- Troubleshooting After Installation: “I Think I Might Have Overtightened”
- Conclusion: The Philosophy of the Perfect Screw
Understanding the NVMe SSD Installation
Before we talk tightness, we need a quick refresher on what’s actually happening. An M.2 NVMe SSD is a small, flat card that plugs directly into a dedicated slot on your motherboard. The electrical connection is made purely by the physical insertion of the gold-plated contact pins at the end of the SSD into the slot’s socket. This connection is firm and requires no additional clamping force from the screw to establish a data link.
The screw’s sole, singular job is retention. It’s a simple mechanical fastener. Its purpose is to anchor one end of the SSD (the end with the label or components) to the motherboard tray or backplate. This prevents the SSD from slowly working its way out of the slot due to vibrations from your case fans, spinning hard drives, or even just moving the PC. It holds the card in place so the contacts stay seated. It is not there to squeeze the card against the board. The card is already firmly in the slot; the screw just stops it from wiggling out.
The Components Involved: Screw, Standoff, and SSD
A proper installation involves three key parts:
- The SSD: It has a small, usually rectangular mounting hole near its “business end.” This hole is precisely sized for the specific screw that should have come with your motherboard or the SSD itself in a small baggie.
- The Screw: It is almost always an M2x3 or M2x2.5 screw (M2 thread diameter, 3mm or 2.5mm long). The length is critical. It must be long enough to pass through the SSD’s mounting hole and engage the threads below, but not so long that it bottoms out and presses against the SSD’s PCB or components.
- The Standoff (or Threaded Hole): On your motherboard, you’ll find either:
- A small, threaded metal pillar (standoff) that the screw threads into. This is common for longer SSDs (like 2280, 22110) to provide a solid anchor point.
- A simple threaded hole directly in the motherboard’s PCB or backplate. This is more common for the ubiquitous 2280 size.
Your screw must engage the threads in the standoff or hole. It should not be pressing down on the SSD itself. You can often see a tiny gap between the underside of the screw head and the SSD’s label or surface when it’s correctly installed.
The “Hand-Tight” Rule: Your New Best Practice
Forget what you know about tightening other screws. Forget about using a power drill. Forget about feeling for a “tight” click. For NVMe SSD screws, you are using your fingers and maybe the very tips of a screwdriver for a tiny, final nudge. Here is the step-by-step mental and physical guide:

Visual guide about How Tight Should Screw Be Ssd Nvme
Image source: cf.shopee.co.id
Step 1: Finger-Tighten Until Resistance
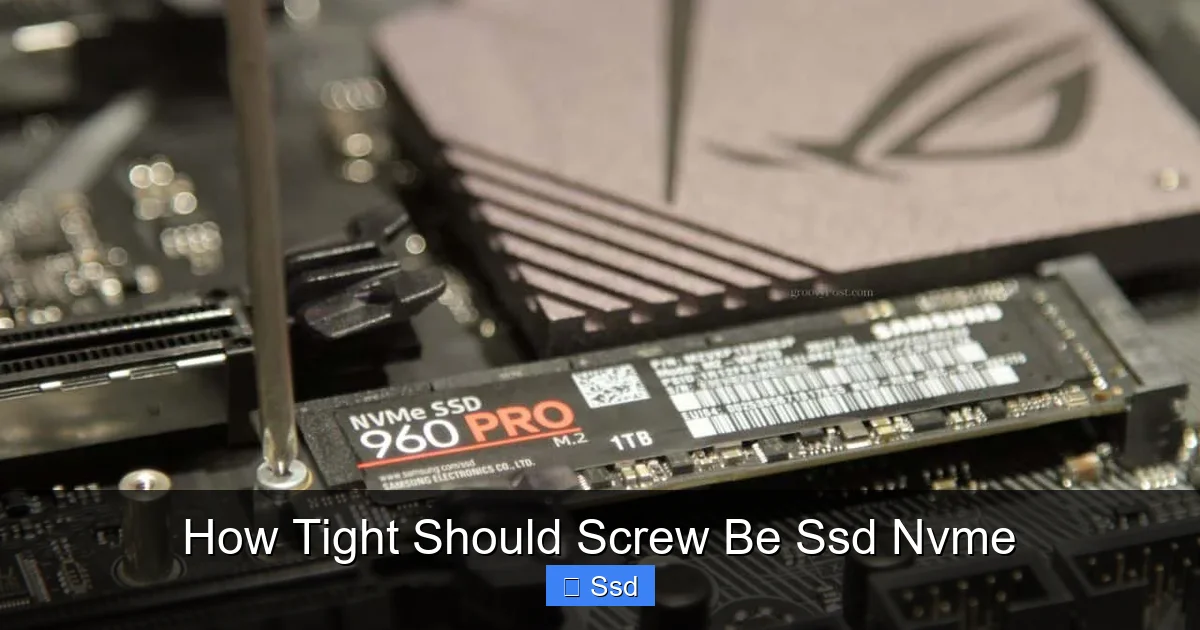
Place the screw through the SSD’s mounting hole and align it with the threaded standoff or hole below. Using only your thumb and forefinger, begin turning the screw clockwise. You will feel it thread in easily at first. Continue turning. The resistance will gradually increase as the screw’s threads bite into the metal standoff or motherboard thread.
Keep turning. You will feel a distinct point where the resistance becomes solid and firm. The screw will no longer turn easily. This is your target. At this point, the screw is threaded in fully and the SSD is being held firmly against the motherboard tray. The head of the screw should be sitting flush or nearly flush with the top of the SSD’s mounting hole, and the SSD itself should be lying perfectly flat with no gap between it and the motherboard.
Step 2: The “Quarter-Turn” Test (If Needed)
Sometimes, especially if the threads are new or slightly stiff, you might get to the solid resistance point and feel the SSD could still jiggle *just a tiny bit*. This is where the most cautious, minimal additional tightening comes in.
Pick up a small, precise screwdriver (a #0 or #1 Phillips is usually ideal—the one that came with your motherboard is perfect). Place it in the screw head. Apply the absolute lightest pressure and turn the screw no more than ¼ to ½ of a full rotation. Stop immediately. Check for movement. The SSD should now be completely immobile. If it is, STOP. Do not tighten further “just to be sure.”
Analogy Time: Think of it like tightening the lid on a glass jar of pickles. You turn it until it’s sealed and won’t come off. You don’t then grab a wrench and torque it down until the glass cracks. That’s what you’re risking with an SSD.
Signs You’re Doing It Right
- The screw turns smoothly until a firm, solid stop.
- You feel no “give” or further easy turning after that stop.
- The SSD does not lift or tilt when you gently try to rock it with your finger.
- The screw head is level with or just barely recessed into the SSD’s mounting hole.
- You used no tools, or only a screwdriver for a tiny, final nudge.
The Dire Consequences of Over-Tightening
Why is this such a big deal? Because the materials involved are fragile, and the forces are concentrated on a tiny point. The SSD is a complex sandwich of silicon, memory chips, and a thin, flexible PCB. The motherboard’s M.2 area is also a精密 piece of engineering.
Visual guide about How Tight Should Screw Be Ssd Nvme
Image source: temperosystems.com.au
Cracking the PCB: The Most Common Failure
The most frequent result of over-tightening is a hairline crack in the SSD’s green printed circuit board (PCB). This crack often starts at the mounting hole and can radiate out. It might not be visible to the naked eye immediately, but it will disrupt the tiny, delicate traces that carry data and power between the NAND flash memory, the controller chip, and the M.2 connector. Your symptoms will be:
- The drive not being detected in BIOS or by the operating system.
- Intermittent disconnects during use.
- The drive appearing, then disappearing from your system.
- Complete failure, with the drive not showing up at all.
This damage is almost always permanent and not covered by warranty, as it’s considered physical user damage. You’ve essentially turned a $100 drive into a paperweight.
Stripping the Motherboard Thread
The threaded hole or standoff on your motherboard is made of thin metal, often just plated brass. Applying too much torque can easily strip these threads. Once stripped, the screw will spin freely in the hole with no purchase. The SSD will be completely unsecured and will rattle around inside your case. This is also often irreparable without replacing the entire motherboard or attempting a risky, permanent epoxy fix.
Crushing Components and Short Circuits
Using a screw that is too long is a related but separate error. An overly long screw will continue turning past the threads and physically press down on the components on the other side of the SSD’s PCB. This can:
- Crack or chip small surface-mount components (like resistors or capacitors).
- Pierce the SSD’s metal casing or thermal pad, potentially causing a short circuit if the screw touches the PCB.
- Damage the M.2 slot’s contacts on the motherboard by pushing the SSD down at an angle.
This is why using the exact screw supplied with your motherboard is non-negotiable. Those screws are engineered to the correct length for that specific board’s M.2 slot design.
Tools, Techniques, and Troubleshooting
Armed with the knowledge of *why* and *how much*, let’s talk about the practical how-to and what to do if things go wrong.
Visual guide about How Tight Should Screw Be Ssd Nvme
Image source: groovypost.com
The Right Tool for the Job
Your fingers are your primary tool. That’s it. For the final, minimal nudge, use the screwdriver that came with your motherboard. It’s sized perfectly for the screw head (usually a Phillips #0 or #1). Avoid using large, heavy screwdrivers from a general toolkit; their weight and handle size make it too easy to apply excess torque. A precision screwdriver set is a great investment for PC building.
Never, ever use a power screwdriver, electric screwdriver, or drill. The torque from these tools is astronomical compared to what is needed and guarantees destruction.
What If the Screw Won’t Go In? (Cross-Threading)
If you feel the screw bind and refuse to turn smoothly almost immediately, you have likely misaligned it and are cross-threading it. This means the screw’s threads are not engaging the standoff’s threads properly and are grinding against metal. Do not force it.
Solution: Back the screw out completely (counter-clockwise). Feel the hole with your finger to ensure it’s clear. Re-align the screw perfectly straight with the hole. You should feel it drop in and thread smoothly with almost no resistance for the first few turns. If it binds again, you may have a defective screw or a damaged thread in the motherboard. Stop and inspect.
What If the Screw Feels Loose After Tightening? (Stripped Threads)
If you get it “tight” but the SSD still wiggles, and the screw feels like it’s spinning without gripping, the threads in the standoff or motherboard are likely stripped. This can happen from a previous over-tightening attempt or a manufacturing defect.
Solutions (in order of preference):
- Check for a different screw length: Rarely, a slightly longer screw can engage fresh threads deeper in the standoff. Only try this if you are certain the long screw won’t hit the SSD.
- Use a slightly larger diameter screw: This is a last resort and risky. An M2.5 screw in an M2 hole will destroy the threads permanently. Only attempt if the motherboard is already dead to you.
- Epoxy or Threadlocker: A tiny drop of low-strength threadlocker (like Loctite 242, blue) or a strong epoxy can glue the screw in place. This is permanent and makes future removal very difficult. Apply minimally only to the screw threads.
- Replace the Motherboard: For a high-end board, this may be the only safe option. Some standoffs are removable and replaceable, but this is rare on modern motherboards.
Motherboard Variations and Manufacturer Quirks
Not all M.2 slots are created equal. While the “finger-tight” rule is universal, the physical implementation can vary.
Single vs. Multiple Screw/Standoff Positions
Most ATX motherboards have multiple M.2 slots. For the primary slot (usually the one closest to the CPU), the standoff is often permanently fixed. For secondary slots, you may need to move the standoff yourself. The motherboard will have several pre-installed standoffs in different positions corresponding to different SSD lengths (2242, 2260, 2280, 22110). You must screw your SSD into the standoff that matches its length. If you try to screw it into a standoff meant for a longer SSD, you might be using the wrong hole, or the screw won’t reach. If you use a standoff meant for a shorter SSD, the screw will bottom out too early and not secure the card.
The “No Standoff” Design
Some newer, compact motherboards (especially Mini-ITX) have a design where the M.2 screw threads directly into a hole in the motherboard’s backplate or a reinforced area of the PCB, with no separate metal standoff. The installation principle is identical: thread the screw in by hand until snug. The risk of cracking the PCB from over-tightening is slightly higher in these designs, making the gentle approach even more critical.
Heatsink-Integrated M.2 Slots
Many modern motherboards, especially those aimed at enthusiasts, have M.2 slots with a large metal heatsink attached. The process is the same, but there’s an extra step: you often have to remove a small heatsink cover plate first, install the SSD, and then screw it down through the heatsink’s mounting hole. The screw here is securing the heatsink *and* the SSD. The same tightness rules apply. Be gentle, as you’re now tightening against the heatsink’s mass. Ensure the SSD is making proper contact with the thermal pad inside the heatsink before final tightening.
Troubleshooting After Installation: “I Think I Might Have Overtightened”
You’ve installed your SSD, powered on your PC, and… it’s not showing up in BIOS. A cold dread sets in. Did I break it? Here’s your diagnostic and recovery plan.
First, Do Not Panic and Re-Tighten
The first instinct is to grab the screwdriver and give it another turn. Do not do this. If it’s already over-tightened, more torque will only make a crack worse or strip the threads further.
Step 1: Power Down and Visually Inspect
Shut down and unplug your PC. Open the case. Using a bright light, examine the SSD and the screw area meticulously.
- Look for any visible cracks in the green PCB around the mounting hole or elsewhere.
- Look for any distortion. Is the SSD bowed or bent? A properly installed SSD should be perfectly flat.
- Check if the screw head is sunk deeply into the hole, possibly pressing against the label underneath.
- Inspect the screw hole on the motherboard. Is the metal around it deformed or raised?
Step 2: The Gentle Release Test
If you see no obvious damage, try this: using your fingers, very gently try to loosen the screw a quarter-turn. Does it feel like it’s under tension, or does it release freely? If it feels like it’s under tension (you have to push to turn it counter-clockwise), it was likely over-tightened. If it turns back easily, it was probably just fine and the issue lies elsewhere (cable, BIOS setting, faulty drive).
Step 3: The “Loosen and Re-Seat” Maneuver
This is your safest recovery attempt. Carefully remove the screw completely. Gently, without applying any force to the PCB, lift the SSD straight up and out of the slot. Look at the gold contacts—are they dirty or bent? Blow out any dust from the M.2 slot on the motherboard with compressed air.
Now, re-insert the SSD. Align it perfectly (don’t force it) and press it down firmly and evenly with your thumb until you feel and hear it click fully into the slot. It should sit flush. Now, re-install the screw using the strict “finger-tight plus” rule. Tighten it just until it’s snug and the SSD doesn’t move. No more.
Step 4: Test and Accept Defeat
Reassemble, power on, and enter BIOS. Is the drive detected? If yes, success! You likely just had a poor initial seat or a slightly loose connection. If it’s still not detected, and you suspect over-tightening caused an internal crack, the drive is most likely dead. If you have another PC or motherboard available, testing it there can confirm the fault. At this point, the only recourse is an RMA with the manufacturer (which they may deny if they find physical damage) or replacement.
Conclusion: The Philosophy of the Perfect Screw
Installing an NVMe SSD should be one of the simplest, most satisfying steps in building or upgrading a PC. That tiny screw is the final punctuation mark on a job well done. The philosophy around its tightness is simple: secure, not strained. Your goal is a partnership between the screw and the motherboard’s design. You are completing a circuit of mechanical security that the engineers intended. They did not design it to withstand the force of a tool-assisted overtightening; they designed it for the gentle, definitive touch of a human hand.
Remember the key points: use the correct screw, thread it by hand until solid resistance, and stop. If you feel the need to apply significant force with a tool, you are doing it wrong. The sound of a properly installed SSD is silence—no creaking, no strain, just a solid, immobile connection. That quiet confidence is what you’re aiming for. Treat that little screw with respect, and your blazing-fast NVMe drive will reward you with years of silent, flawless performance. When in absolute doubt, your motherboard’s manual is your co-pilot, and the principle of “less is more” is your unwavering guide.
Frequently Asked Questions
Is there a specific torque value (e.g., Newton-meters) for an NVMe SSD screw?
No, motherboard and SSD manufacturers do not publish official torque specifications for M.2 screws because the required force is minimal and variable. The universally accepted method is hand-tightening until firm resistance, as applying precise torque with a tool risks over-tightening. The design relies on the screw’s threads providing resistance, not a specific torque value.
I used a screwdriver and the screw head is now stripped. What do I do?
A stripped screw head means you applied too much torque. First, try to gently back it out with more downward pressure on the screwdriver. If it won’t budge, you may need to use a rubber band between the screwdriver and screw for grip, a precision screw extractor set, or very carefully use a small flathead screwdriver to turn it. In the worst case, you might have to drill it out, which risks damaging the motherboard standoff.
My motherboard didn’t come with a screw or standoff. What now?
This is a common oversight. The correct M2x3 or M2x2.5 screw is a standard, inexpensive part. You can purchase an “M.2 SSD mounting screw kit” from your motherboard manufacturer’s support page, from PC component retailers, or from online marketplaces like Amazon. Ensure you get the correct length for your specific SSD size (2280 is most common).
Can I use threadlocker (Loctite) on the NVMe screw to prevent it from loosening?
It is generally not recommended. Low-strength (blue) threadlocker is removable but can still make future removal difficult, especially on the small, soft threads of a motherboard standoff. The screw, when properly hand-tightened, should not loosen under normal PC operation and vibration. If you are in an extremely high-vibration environment (like a moving vehicle), a tiny drop on the threads might be considered, but it’s usually overkill.
My SSD has a heatsink and the screw goes through it. Does that change the tightness?
No, the principle is identical. The screw is still threading into the motherboard’s standoff. The heatsink is simply sandwiched between the SSD and the screw head. You must ensure the SSD is making even contact with the thermal pad inside the heatsink before final tightening. Tighten the screw gradually and evenly until the SSD is immobilized. Do not crush the heatsink down onto the SSD; let the thermal pad make contact under its own gentle pressure.
What if I don’t have the screw at all? Is it safe to run the SSD without it?
It is not safe to operate your PC without the screw installed. The M.2 SSD is not held firmly in the slot. It can easily work loose due to case vibrations, causing the electrical connection to break intermittently or completely. This leads to crashes, data corruption, and drive disconnects. Always install the screw. If you’ve lost it, source a replacement immediately before using the drive.