An NVMe SSD add-on card is a powerful expansion card that slots into your motherboard’s PCIe slot, bypassing slower SATA connections to deliver extreme storage speeds. It’s the perfect solution for PCs with limited M.2 slots, older systems, or enthusiasts needing ultra-fast, high-capacity storage for demanding tasks like 4K video editing and high-end gaming. These cards transform your system’s storage performance by leveraging the full bandwidth of the PCIe interface.
You’ve built a beast of a PC. Your CPU is a turbocharged monster, your GPU could render a Pixar film in real-time, and you’ve got enough RAM to open every browser tab known to man. But then… your game loads from a spinning hard drive or a standard SATA SSD. That frustrating bottleneck is real. This is where the unsung hero of high-performance storage comes in: the NVMe SSD add-on card. It’s not just another SSD; it’s a complete storage subsystem on a stick that plugs into your PCIe slot, designed to obliterate bottlenecks and unleash your system’s true potential. Forget what you know about storage upgrades; this is a game-changer.
For years, the SATA interface was the king of storage. Then came M.2 NVMe SSDs, which plugged directly into the motherboard, offering a dramatic leap in speed. But what if your motherboard only has one or two M.2 slots, and they’re already occupied? Or what if you’re rocking a fantastic but slightly older X99 or Z270 board that has PCIe slots galore but only slow PCIe 2.0 M.2 connectors? This is the niche the NVMe SSD add-on card fills with authority. It’s a specialized expansion card, typically with one, two, or even four M.2 slots, that connects directly to the high-bandwidth PCIe lanes coming from your CPU or chipset. It’s the ultimate tool for storage expansion, speed, and flexibility.
Key Takeaways
- Ultimate Speed: NVMe SSD add-on cards use the PCIe bus, offering vastly higher speeds (up to 4-7x faster) than SATA SSDs and even many onboard M.2 slots, especially on older motherboards.
- Slot Expansion: They are the primary solution to add multiple high-speed NVMe drives to systems that have no free M.2 slots or only slower PCIe 3.0 M.2 connectors.
- Compatibility Check: They require an available PCIe x4, x8, or x16 slot (physically and electrically) and BIOS/UEFI support for booting from PCIe storage, which is common on modern boards.
- Thermal Management is Key: High-performance NVMe drives on these cards generate significant heat. Cards with built-in heatsinks and thermal pads are crucial for maintaining sustained speeds and drive longevity.
- Versatile Use Cases: Ideal for content creators, data scientists, gamers with massive libraries, and professionals needing scratch disks or fast network-attached storage (NAS) builds.
- RAID Potential: Many add-on cards support hardware RAID 0, 1, 10, etc., allowing you to combine drives for even higher throughput (RAID 0) or redundancy (RAID 1), though software RAID in the OS is often simpler.
- Not a Boot Solution for All: While many modern motherboards can boot from a PCIe NVMe card, some very old systems (pre-2013) may lack the necessary UEFI firmware support, requiring a separate SATA boot drive.
📑 Table of Contents
What Exactly Is an NVMe SSD Add-On Card?
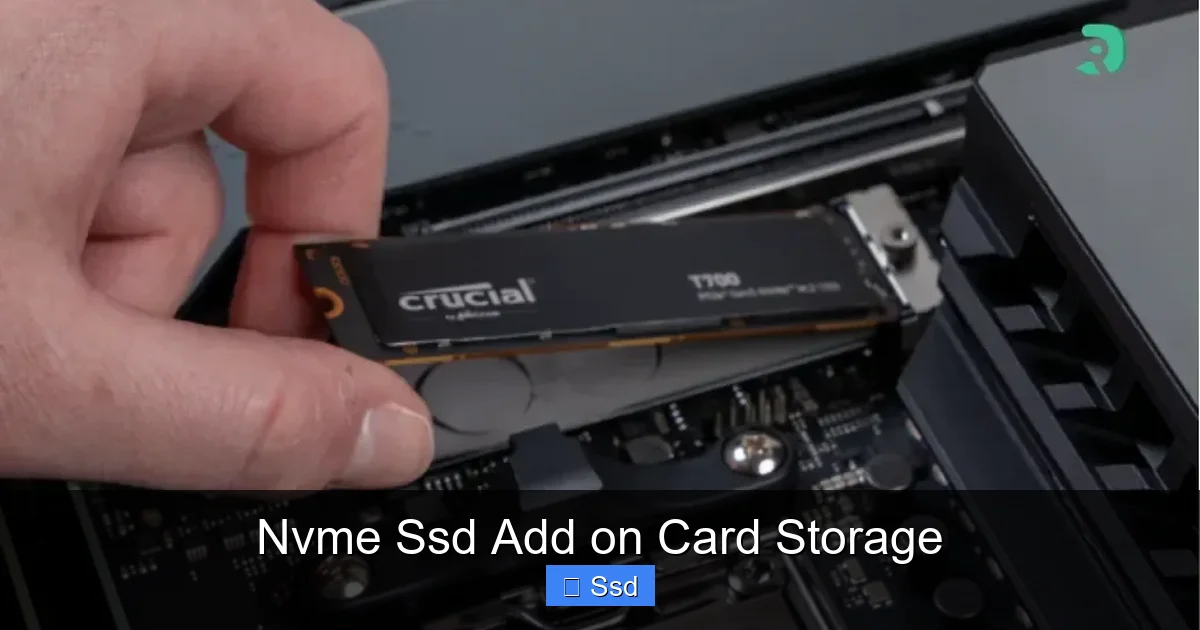
At its heart, an NVMe SSD add-on card is a simple concept executed brilliantly. It’s a printed circuit board (PCB) that fits into a PCI Express (PCIe) slot on your motherboard—the same slots your graphics card uses. On this board, you’ll find one or more M.2 connectors. You then install standard M.2 NVMe SSDs (the “gumstick” drives) into these slots. The card acts as a bridge, translating the PCIe interface into the NVMe protocol your SSDs speak.
The Anatomy of a High-Performance Card
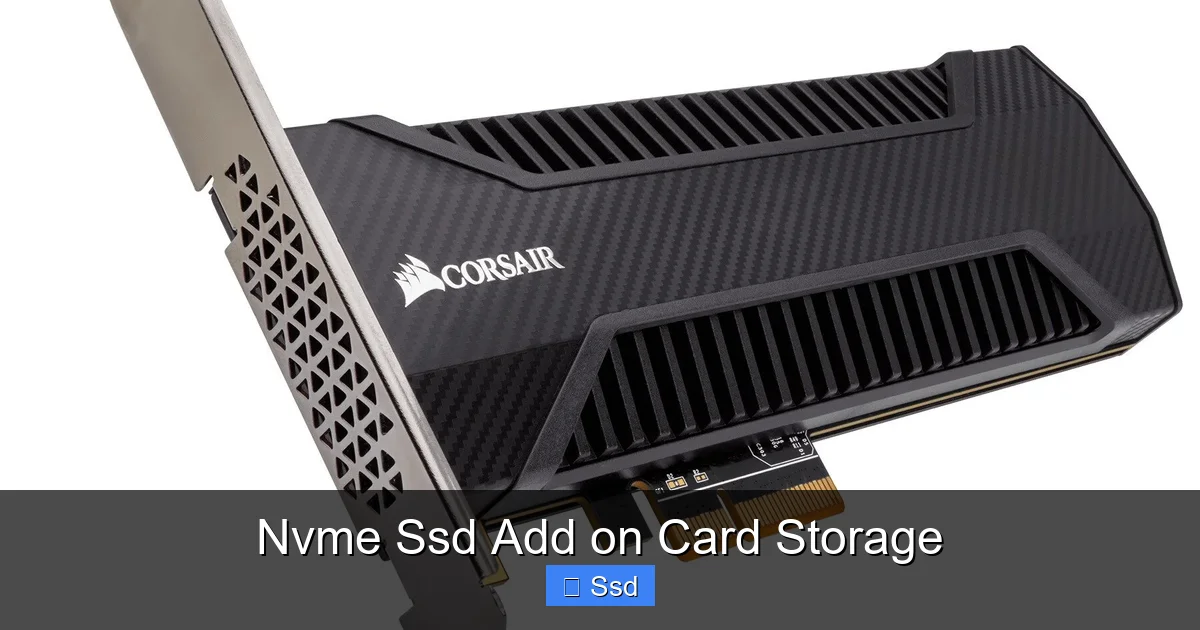
Not all add-on cards are created equal. A basic, no-frills card might just be a PCB with M.2 slots and a power connector. But for serious performance, you’ll want a card with robust components. Look for:
- A Dedicated Controller: Some cards, especially those with 4+ drives, include a separate RAID controller chip (like ASMedia’s ASM2812) to manage multiple drives and enable hardware RAID. Simpler cards rely on the motherboard’s PCIe lanes and the NVMe drivers in your operating system.
- Substantial Heatsink: This is non-negotiable. NVMe SSDs, especially under heavy sustained workloads, can throttle their speeds dramatically when they get hot (a phenomenon called thermal throttling). A large, finned aluminum heatsink, often with a copper base or heatpipe, is essential to draw heat away from the NAND flash memory and the controller.
- Thermal Pads: Quality cards include high-quality thermal pads that make direct contact between the SSD’s controller/chip and the heatsink. Without these, the heatsink is just decoration.
- Power Delivery: Cards with multiple high-power drives may require an auxiliary 6-pin or 8-pin PCIe power connector from your PSU to ensure stable operation, supplementing the power provided by the motherboard slot.
PCIe Slot Types: x1, x4, x8, x16 – Does It Matter?
Physically, an NVMe SSD add-on card can be designed for any PCIe slot size. A card with a single or dual M.2 slot might be built on an x1 or x4 card, fitting into a longer x4, x8, or x16 slot. A card with four M.2 slots will almost always be an x8 or x16 card. Here’s the critical part: the card will only negotiate the number of PCIe lanes it’s electrically wired for and that your motherboard provides to that slot.
For example, if you plug a dual-M.2 card (wired for x4 lanes) into an x16 slot that is electrically connected to your CPU, it will get x4 lanes of PCIe 4.0 or 5.0 bandwidth. That’s plenty for two Gen4 or Gen5 SSDs. But if you plug that same card into a slot connected to your older chipset (which might only be PCIe 3.0), you’re limited to that older, slower bandwidth. Always check your motherboard manual to see which PCIe slots are wired to the CPU versus the chipset and what generation they are.
Why Choose an Add-On Card Over Onboard M.2 Slots?
This is the million-dollar question. With modern motherboards often packing 2-4 M.2 slots, why go the add-on card route? The advantages are specific and powerful.

Visual guide about Nvme Ssd Add on Card Storage
Image source: notebookcheck.net
1. The Obvious: You’ve Run Out of M.2 Slots
This is the number one reason. You have a fantastic motherboard, but it has two M.2 slots. One is occupied by your OS drive, the other by your work project drive. You want to add a third ultra-fast scratch disk for video editing or a dedicated game library. Without an add-on card, you’re forced to either use a slower SATA SSD or replace one of your existing NVMe drives. An NVMe SSD add-on card instantly grants you two or four more high-speed slots without sacrificing existing ones.
2. Bypassing Slow Chipset-Linked M.2 Slots
This is a more technical but crucial advantage. On many motherboards, not all M.2 slots are created equal. The slot(s) directly connected to the CPU will have the full, direct bandwidth of the PCIe lanes from your processor (e.g., PCIe 4.0 x4). Slots connected to the chipset often share bandwidth with other devices (SATA ports, USB controllers, other PCIe slots) and may be an older generation (e.g., PCIe 3.0). An add-on card plugged into a CPU-direct PCIe x16 slot can provide dedicated, high-generation lanes for your storage, avoiding this shared bandwidth bottleneck. For a content creator moving huge files, this dedicated path is a lifesaver.
3. Superior Thermal Performance
Let’s be honest: most motherboard M.2 slot heatsinks are an afterthought. They’re small, often made of thin metal, and poorly coupled to the SSD. A dedicated, large NVMe SSD add-on card is built around thermal dissipation. Its massive heatsink, often with a more aggressive design and better thermal pads, can keep your SSDs running 10-20°C cooler under load. This means sustained write speeds stay high, and your SSDs will have a longer, healthier life. You’re investing in a dedicated cooling solution for your storage.
4. Enabling RAID with Hardware Management
While you can set up software RAID in Windows (Storage Spaces) or macOS (Disk Utility), a hardware RAID controller on an add-on card offers benefits. It offloads the RAID calculation work from your CPU, can provide bootable RAID arrays (which some OSes struggle with via software), and often offers more robust RAID levels and management utilities. For a professional needing a fast, redundant RAID 1 array for critical projects, a card with a dedicated RAID chip is a clean, reliable solution.
How to Choose the Right NVMe SSD Add-On Card
Walking into the world of add-on cards can be daunting. Here’s your no-nonsense buying guide, broken down by what you need.
Visual guide about Nvme Ssd Add on Card Storage
Image source: dropreference.com
Step 1: Count Your Slots and Assess Your Needs
First, be honest. How many extra NVMe drives do you really need? A single-drive card is cheap and simple. A dual-card is the sweet spot for most enthusiasts wanting a fast game drive or a second scratch disk. A quad-card is for professionals, server builders, or those with a serious storage addiction. Remember, each drive you add consumes power and generates heat, so your case’s airflow and your PSU’s capacity matter.
Step 2: Match the Card to Your PCIe Slot and Generation
This is the most critical compatibility check. Open your motherboard manual.
- Identify your available PCIe slots: Which ones are physically open? (e.g., PCIe_1, PCIe_2).
- Find their electrical configuration: The manual will state if a slot runs at x16, x8, x4, or x1 mode. It will also state which generation (3.0, 4.0, 5.0) and whether it’s connected to the CPU or the chipset.
- Match the card’s requirement: A dual-M.2 card typically needs at least a physical x4 slot (it will work in an x8 or x16). A quad-M.2 card often needs a physical x8 or x16 slot. Ensure the slot you plan to use has enough lanes (x4 minimum for dual, x8+ for quad) and is the highest generation your CPU supports (usually the top-most slot).
Step 3: Heatsink is Not Optional
Do not buy a bare PCB. Always choose a model with a substantial, well-reviewed heatsink. Look at user photos and reviews. Does the heatsink make full contact with the SSDs? Are the thermal pads thick and effective? Brands like ASUS Hyper M.2 Card, ASRock AIC, and Samsung 990 PRO Heatsink (for single drives) are known for excellent thermal designs.
Step 4: Consider Power Requirements
Check if the card requires an auxiliary power connector. A dual-card with two Gen4 SSDs might draw enough power to be unstable without a 6-pin PCIe power plug from your PSU. If your PSU is older or has limited connectors, factor this in. A single-drive card will almost never need extra power.
Step 5: RAID or No RAID?
Decide if you need hardware RAID. For most users, a simple “JBOD” (Just a Bunch Of Disks) or using each drive as a separate volume in the OS is simpler and just as fast for sequential reads. If you need a bootable RAID 0 array for maximum speed or a RAID 1 for mirroring, look for a card explicitly advertising hardware RAID support with its own BIOS/UEFI configuration screen during boot (like the ASUS Hyper M.2 x16 Gen4 Card).
Installation: A Simple Process with a Crucial Detail
Physically installing an NVMe SSD add-on card is as easy as installing a graphics card. The software and configuration steps, however, are where attention to detail pays off.
Visual guide about Nvme Ssd Add on Card Storage
Image source: cdn.appuals.com
The Physical Install: Slots and Screws
1. Power Down: Shut down your PC, unplug the power cable, and press the power button to discharge residual electricity.
2. Open the Case: Remove the side panel.
3. Find the Slot: Identify the correct PCIe x4/x8/x16 slot (refer to your manual). Remove the corresponding slot cover on the back of the case.
4. Insert the Card: Align the card’s connector with the slot, press down firmly and evenly until it clicks into place.
5. Secure It: Screw the card’s bracket into the case’s slot cover.
6. Connect Power (if needed): Plug in the auxiliary PCIe power cable from your PSU.
7. Install SSDs: Insert your M.2 NVMe SSDs into the card’s M.2 slots at a 30-degree angle, then press them down and secure with the provided tiny screws or standoffs. Ensure the thermal pads are correctly positioned between the SSD and the heatsink before fully tightening.
The Software & BIOS/UEFI Setup
1. Enter BIOS/UEFI: Power on your PC and press Delete/F2 to enter your motherboard’s firmware settings.
2. Check PCIe Settings: Navigate to the “Advanced” or “Boot” section. Ensure that the PCIe slot you used is enabled and set to its highest generation (Auto or Gen4/Gen5). Also, look for “NVMe RAID Mode” or “Storage Option” settings. If you want to use the card’s hardware RAID, you must enable RAID mode here. If you’re using the drives as separate disks, AHCI mode is fine (usually default).
3. Check Boot Order: If you plan to install your operating system on a drive on this card, you must ensure the motherboard can see it. In the boot priority list, you may see a generic “NVMe Controller” or the specific drive model. If your OS installer (Windows/Linux USB) doesn’t see the drives, double-check that the PCIe slot is running at the correct generation and that RAID mode is enabled if using hardware RAID.
4. Save and Exit: Save your BIOS settings and reboot.
Installing the OS and Drivers
If installing a fresh OS (like Windows 11), the installer should automatically see the NVMe drives connected through the card. Proceed with installation normally. After Windows installs, go to your motherboard manufacturer’s website and install the latest chipset drivers and NVMe drivers if available (often included in chipset drivers). For cards with their own RAID controller (like ASUS Hyper cards), you must install the card’s specific driver and management software from the manufacturer’s support page to configure RAID arrays within Windows.
Real-World Performance and Use Cases
The theory is great, but what does it mean for you? Here’s where an NVMe SSD add-on card shines in practical applications.
For the Content Creator: The Ultimate Scratch Disk
Video editors working with 4K, 6K, or 8K RAW footage know the pain of timeline playback stutters. Your footage lives on a fast drive. A dedicated NVMe SSD add-on card hosting a 2TB or 4TB Gen4 drive, kept icy by a massive heatsink, becomes the perfect scratch disk. You import footage directly to it, and your editing software reads and writes with abandon. The sustained write speeds (often 5,000+ MB/s) mean rendering and exporting times plummet. Pair two drives in a RAID 0 on a hardware RAID card, and you’re talking about throughput approaching 10,000 MB/s for massive project files.
For the Hardcore Gamer: Instant Load Times, Massive Libraries
Modern AAA games are enormous, with 150GB+ installs common. With a fast NVMe SSD add-on card, you can dedicate one slot to a 4TB game drive. Not only do load times vanish, but with a secondary fast drive for your OS and apps, your system feels instantly responsive. The card’s superior cooling ensures that even during long gaming sessions where the game might patch or cache data in the background, the drive doesn’t throttle and slow down.
For the Professional & Data Hound: Workstation and NAS
Engineers running simulations, data scientists processing datasets, and developers compiling massive codebases all benefit from blistering I/O. A quad-M.2 card populated with four 2TB drives can be configured as a single, monstrously fast volume or a fast, redundant RAID 10 array. In a home server or NAS build (like with TrueNAS or Unraid), an NVMe SSD add-on card can provide the ultimate cache pool, accelerating access to frequently used data on slower, high-capacity hard drives. It’s the ultimate “tiered storage” solution.
The Future-Proofing Factor and Final Thoughts
As we march toward PCIe 5.0 and beyond, the beauty of the NVMe SSD add-on card format becomes even clearer. Your motherboard’s M.2 slots are fixed. But a PCIe slot is a universal, backward-compatible highway. You can buy a top-tier PCIe 5.0 add-on card today, populate it with current-gen PCIe 4.0 SSDs, and enjoy their stellar performance. Then, in two years, when PCIe 5.0 SSDs become affordable and common, you simply swap the drives. Your investment in the card (and your case’s airflow) is protected. You’re future-proofing your storage expansion path.
So, who is this for? It’s not for everyone. If your motherboard has three unused, fast M.2 slots, you might not need one. But for the enthusiast with a full-size ATX board, the creator pushing storage limits, the gamer wanting a dedicated library drive without compromise, or anyone with an older but powerful system, an NVMe SSD add-on card is one of the most impactful upgrades you can make. It directly attacks the storage bottleneck that holds back even the most powerful systems. It’s a statement that you refuse to compromise. Do your homework on compatibility, invest in a card with a real heatsink, and prepare to have your mind blown by just how fast your PC can truly be.
Frequently Asked Questions
Will an NVMe SSD add-on card work in any PCIe slot?
It will work in any physically compatible slot (e.g., an x16 card fits in an x16, x8, or x4 slot), but its performance depends on the slot’s available PCIe lanes and generation. A card needing x4 lanes will be limited by a slot running at only x2 or by an older PCIe generation (e.g., PCIe 3.0 vs 4.0). Always check your motherboard manual for slot configuration.
What’s the difference between a cheap bare PCB card and a premium one with a heatsink?
The difference is thermal performance and sustained speed. A bare PCB offers no cooling, so NVMe SSDs will quickly thermal throttle under load, reducing speeds by 50% or more. A premium card with a large heatsink and quality thermal pads keeps drives cool, allowing them to maintain their maximum advertised speeds for much longer periods, which is critical for large file transfers and professional workloads.
Can I boot my operating system from a drive on an NVMe add-on card?
Yes, in most cases. Modern motherboards with UEFI firmware support booting from NVMe devices on PCIe add-on cards. However, some very old motherboards (pre-2013/2014) may lack this support. You must also ensure the PCIe slot you use is initialized early in the boot process, which is typically true for the primary GPU slot. It’s best to test with the drive installed before migrating your OS.
Do I need to enable anything special in the BIOS for the card to work?
Usually, no. Simply install the card and drives, and the motherboard should recognize them as NVMe storage devices. The main setting to check is the PCIe generation for the slot (set to Auto or the highest supported). If you plan to use the card’s hardware RAID feature, you must change the SATA/NVMe storage mode from AHCI to RAID in the BIOS and install the card’s specific drivers/software in your OS.
Is RAID 0 with an add-on card worth it for gaming?
For pure gaming, the real-world benefit of a RAID 0 array (combining two drives for double sequential speed) is often negligible. Game loading is more dependent on random read speeds (4K Q1T1), where a single modern NVMe SSD is already excellent. RAID 0 also eliminates redundancy; one drive fails, you lose all data. A single, high-capacity, high-endurance NVMe drive is simpler and safer for a game library.
Will using an add-on card affect my GPU’s performance if they share PCIe lanes?
It can, but it depends entirely on your motherboard’s lane allocation. On most consumer boards, the primary PCIe x16 slot for the GPU is wired directly to the CPU and runs at full x16 speed independently. The add-on card would go into a different slot (e.g., the second or third PCIe slot), which is usually connected to the chipset and has its own set of lanes. They should not compete. However, if you use a motherboard with limited CPU lanes (like some AMD X670E boards that split lanes), plugging multiple high-bandwidth devices into CPU-connected slots might cause them to run at lower speeds (e.g., x8/x8). Consult your manual.