Upgrading your laptop’s RAM is one of the most cost-effective ways to improve performance. First, check your current RAM and laptop’s compatibility using tools or manuals. Then, purchase the correct DDR type and capacity, followed by a straightforward installation process that most users can handle to significantly speed up multitasking and demanding applications.
Is your laptop struggling to keep up? Do you see that spinning wheel of doom more often than you’d like? Before you start saving for a brand-new machine, there’s a powerful and often overlooked upgrade that can breathe new life into your trusted companion: increasing its RAM. Random Access Memory, or RAM, is your laptop’s short-term memory workspace. The more RAM you have, the more applications and data your system can juggle at once without slowing down. This comprehensive guide will walk you through every single step of how to increase RAM on a laptop, from the initial detective work to the final screw-tightening. We’ll break down the technical jargon into plain English, give you practical examples, and equip you with the confidence to do it yourself or know exactly what to ask for if you decide to get help.
Key Takeaways
- Check Your Current Setup: Use system tools or software to identify your laptop’s current RAM amount, type (DDR3/4/5), and number of slots before buying anything.
- Know Your Maximum Supported RAM: Your laptop’s motherboard and processor have a physical and technical limit. Consult the manufacturer’s specs or use a scanner tool to find this number.
- Match RAM Specifications Exactly: For best results, new modules should match the existing RAM’s type (DDR generation), speed (MHz), and voltage. Mixing mismatched sticks can cause instability.
- Upgrading is Often Simpler Than You Think: Many modern laptops have a simple access panel. With basic tools and safety precautions, the physical installation takes under 10 minutes.
- Software Tweaks Are a Supplement, Not a Replacement: Adjusting virtual memory or cleaning startup programs helps, but adding physical RAM provides a direct, permanent boost for memory-hungry tasks.
- Consider Your Actual Needs: If you only browse the web and use office apps, 8GB may be sufficient. For gaming, video editing, or virtual machines, 16GB+ is a worthwhile target.
- When in Doubt, Seek Professional Help: If your laptop has RAM soldered to the motherboard or you’re uncomfortable opening it, a repair shop can perform the upgrade safely.
📑 Table of Contents
- Why Upgrade Your Laptop’s RAM? The Performance Difference
- Step 1: Assessing Your Current RAM and Laptop Compatibility
- Step 2: Understanding RAM Types and Specifications
- Step 3: Purchasing the Right RAM Module
- Step 4: The Physical Installation Process
- Step 5: Software Optimizations and When RAM Isn’t the Answer
- Conclusion: Your Laptop’s New Lease on Life
Why Upgrade Your Laptop’s RAM? The Performance Difference
Understanding the “why” makes the “how” much clearer. RAM is fundamentally different from your laptop’s storage (the hard drive or SSD). Storage is like a large filing cabinet—it holds all your files, programs, and operating system permanently. RAM is like your desk surface. When you open a program, your laptop copies the necessary data from the slow filing cabinet (storage) onto your large, fast desk (RAM) so the processor can work on it immediately. If your desk is too small (low RAM), you’re constantly shuffling papers back to the cabinet (a process called “swapping” or “paging”), which grinds everything to a halt.
Signs You Need More RAM
How do you know if a cramped desk is your problem? Look for these classic symptoms:
- Constant Sluggishness During Multitasking: You can’t have a browser with ten tabs open, a Word document, and Spotify running without everything feeling laggy.
- Frequent “Not Responding” Messages: Applications freeze and say “(Not Responding)” even when you’re not doing anything particularly intensive.
- Slow Program Launch Times: It takes an unusually long time for software like Photoshop, video editors, or even your email client to start up.
- The Hard Drive is Constantly Active: You hear the hard drive (if you have one) churning away, or your SSD activity light is solid. This often means the system is frantically swapping data to storage because RAM is full.
- Struggles with Specific Tasks: Modern web browsing (especially with many tabs), working with large spreadsheets, editing photos, or light video editing become painful.
You can confirm this by opening your Task Manager (Ctrl+Shift+Esc) and going to the “Performance” tab, then clicking “Memory.” If you see consistently high usage (80%+) under normal use, a RAM upgrade will likely provide a dramatic improvement.
The Tangible Benefits of More Memory
Increasing RAM isn’t just about fixing slowdowns; it’s about enabling a smoother, more productive experience. You’ll gain the ability to keep more applications open and instantly accessible. Your web browser, with all its tabs and extensions, will be far less likely to cause system-wide lag. For creative work, larger files and complex projects in applications like Adobe Premiere Pro or DaVinci Resolve will render and preview more smoothly. Even modern games, while primarily dependent on the GPU, benefit from ample RAM to load assets and maintain high frame rates in open-world environments. Ultimately, you spend less time waiting and more time working or playing.
Step 1: Assessing Your Current RAM and Laptop Compatibility
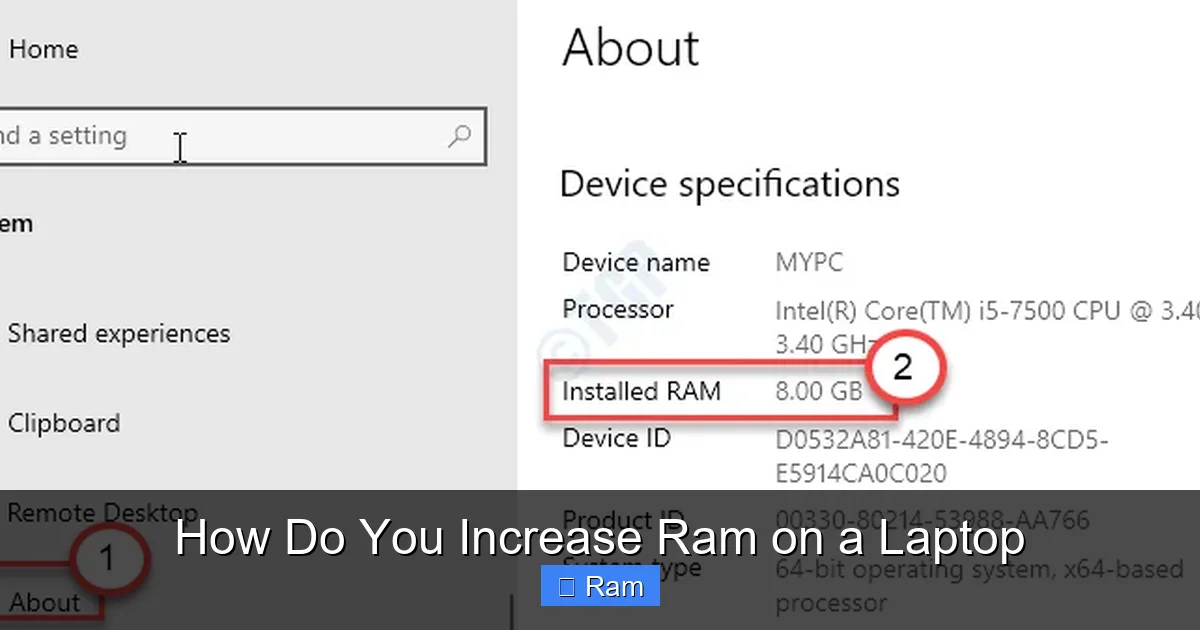
This is the most critical phase. Jumping the gun and buying the wrong RAM is a waste of money and time. You need to become a detective and gather three key pieces of information: how much RAM you currently have, what type it is, and how many slots are available. You also need to discover the maximum RAM your laptop’s motherboard can support.
Visual guide about How Do You Increase Ram on a Laptop
Image source: c8.alamy.com
Using Built-in System Tools (Windows & macOS)
The easiest first step is to use what’s already on your laptop.
- On Windows: Press Ctrl+Shift+Esc to open Task Manager. Navigate to the Performance tab and select Memory from the left panel. Here you’ll see the total amount of RAM (e.g., “8.0 GB”), the speed (e.g., “3200 MHz”), and the form factor (usually “SODIMM” for laptops). It will also tell you how many slots are used out of the total (e.g., “2 of 2”).
- On macOS: Click the Apple menu > About This Mac. The memory information is displayed prominently. For more detailed specs, click System Report… and navigate to Memory under Hardware.
These tools give you a great starting point, but they don’t always reveal the maximum supported RAM or the exact DDR generation (DDR3, DDR4, DDR5) with 100% certainty. For that, you need to go deeper.
Consulting Manufacturer Specifications & Using Scanner Tools
Your laptop’s manufacturer is the ultimate source of truth. Go to the support page for your exact model number (find this on a sticker on the bottom of the laptop or in your system settings). Look for the “Tech Specs,” “Product Specifications,” or “Upgrade Guide” section. It will list the maximum RAM supported, the type, and the number of slots. For example, a spec sheet might read: “Memory: 8GB, 1x SODIMM slot, supports up to 32GB DDR4 2666MHz.”
If digging through manuals isn’t your style, reputable third-party memory manufacturers offer fantastic free scanning tools. Websites like Crucial.com (by Micron) and Kingston.com have system scanners that, when downloaded and run, will analyze your laptop’s hardware and recommend 100% compatible RAM upgrades. These tools are incredibly reliable and take the guesswork out of compatibility. They are an excellent resource, especially for older or less common models.
Step 2: Understanding RAM Types and Specifications
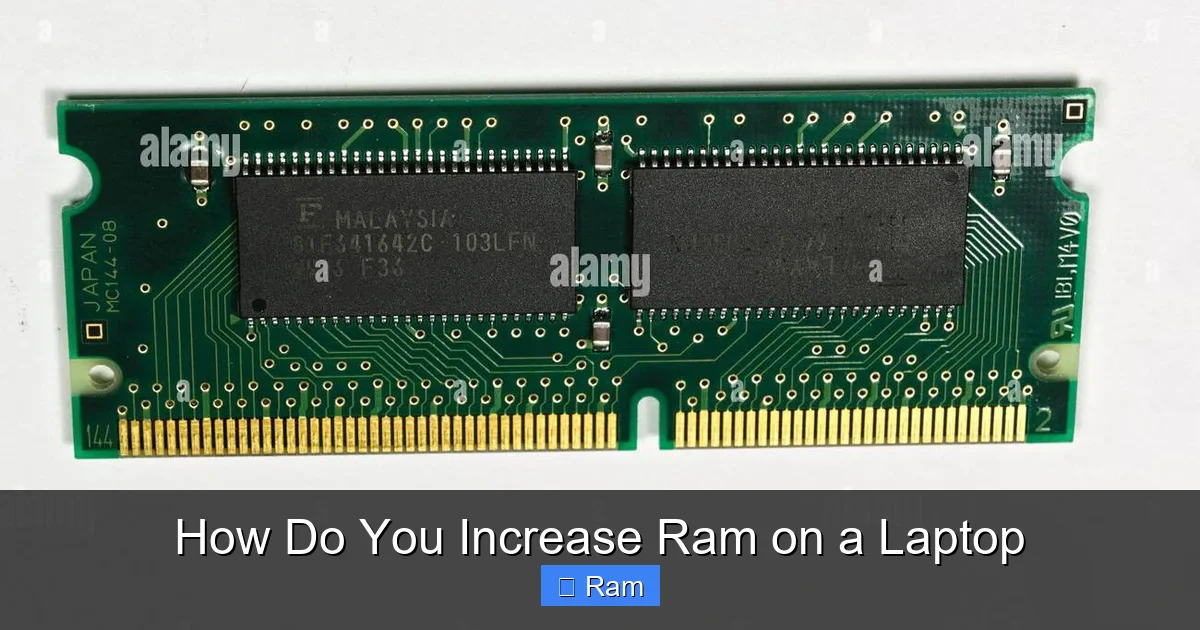
Now that you know your laptop’s requirements, you need to understand what you’re buying. Laptop RAM, called SODIMM (Small Outline Dual In-line Memory Module), is physically smaller than desktop DIMMs. The key differentiators are the DDR generation, speed, and capacity.
Visual guide about How Do You Increase Ram on a Laptop
Image source: thegeekpage.com
DDR Generations: DDR3, DDR4, and DDR5
DDR (Double Data Rate) technology has evolved. DDR3 is very common in laptops from roughly 2010-2017. It has 204 pins and a single notch in a specific position. DDR4 succeeded it, used in most laptops from 2015 onward. It has 260 pins and the notch is in a different spot. Crucially, DDR3 and DDR4 are not physically compatible; you cannot force one into a slot designed for the other. DDR5 is the latest standard, found in high-end laptops from 2021 onward. It has 262 pins and yet another notch position. It’s vital to buy RAM that matches your laptop’s supported DDR generation. Your scanner tool or manual will specify this.
Speed (MHz), Timings, and Capacity
Speed, measured in megahertz (MHz), like 2666MHz or 3200MHz, indicates how fast the RAM can operate. Your laptop will default to the speed of the slowest module installed. For best results, match the speed of your existing RAM. If upgrading a single stick, buying a faster stick will work but will run at the lower speed of the older stick.
“Timings” (e.g., CL19) are latency measurements. Lower numbers are better, but for most laptop upgrades, matching the general speed is more important than matching exact timings. Capacity is measured in gigabytes (GB). Common sizes are 4GB, 8GB, 16GB, and 32GB per module. Your maximum per-slot capacity is limited by the motherboard and the RAM module’s own limit (most modern SODIMMs are 16GB or 32GB). A 16GB module is a safe and common choice for a significant upgrade.
Step 3: Purchasing the Right RAM Module
Armed with your laptop’s exact requirements (e.g., “DDR4 SODIMM, 2666MHz, up to 32GB”), it’s time to buy. Where and what you buy matters for reliability and warranty.
Visual guide about How Do You Increase Ram on a Laptop
Image source: budgetpcupgraderepair.com
Where to Buy: Trusted Retailers and Brands
Stick with reputable brands known for quality memory and rigorous testing. Top brands include Corsair, Crucial (Micron), Kingston, G.Skill, and Samsung. These companies often offer lifetime warranties on their RAM. Purchase from authorized dealers like the brand’s own website, Amazon (sold by the brand), Newegg, or major electronics retailers. Avoid obscure brands on auction sites; the risk of receiving faulty or mislabeled modules is higher. When buying, you can often select “by laptop model” on sites like Crucial, which filters out incompatible options automatically.
Single Stick vs. Dual-Channel Kits
If your laptop has two RAM slots and you’re replacing both sticks, consider buying a matched pair (a “kit” sold as two identical modules, like a 2x8GB kit). Motherboards can run in “dual-channel” mode when two identical modules are installed, which provides a significant performance boost (especially for integrated graphics and certain applications) by allowing data to be transferred simultaneously. If you’re only adding one stick to an empty slot, buy a single module that matches the specs of the existing one. If you’re replacing the only stick with a larger one, a single high-capacity module is fine. For optimal performance in a two-slot system, aim for a matched pair.
Step 4: The Physical Installation Process
This is the hands-on part. For many modern laptops, it’s remarkably simple. However, the process varies by model. Some have a single access panel on the bottom; others require removing the entire bottom case; and a few (especially ultrabooks) have RAM soldered to the motherboard, making an upgrade impossible. This is why the compatibility check is non-negotiable.
Preparation and Safety First
Before you touch a screw, prepare your workspace and yourself.
- Power Down Completely: Shut down your laptop. Do not just sleep or hibernate it.
- Unplug Everything: Remove the charger, USB devices, docking stations, and any external peripherals.
- Discharge Static Electricity: Static discharge can fry sensitive electronics. Work on a hard, non-carpeted surface. The best practice is to wear an anti-static wrist strap and clip it to a grounded metal object (like an unpainted screw on an outlet plate). If you don’t have one, frequently touch a grounded metal object (like your laptop’s metal chassis after you’ve unplugged it) to discharge any static from your body.
- Gather Your Tools: You’ll typically need a small Phillips-head screwdriver (#0 or #1). Some laptops use Torx screws. A plastic pry tool or spudger is helpful for prying open clips without scratching. A small container for screws is essential.
Accessing the RAM Bay
- Locate the Access Panel: Turn the laptop over. Look for a small rectangular panel, often held by one or two screws. It might have a RAM symbol (two sticks with an arrow) embossed near it. If you don’t see a panel, the entire bottom case must be removed. Consult a teardown guide for your specific model on sites like iFixit.com.
- Remove Screws and Panel: Unscrew the panel screws carefully and keep them safe. Gently pry the panel up. It may have clips holding it; work your pry tool around the edges.
- Identify the RAM Slots: You’ll see one or two small circuit boards (the SODIMMs) held down by small metal clips on either side.
Removing Old RAM and Installing New
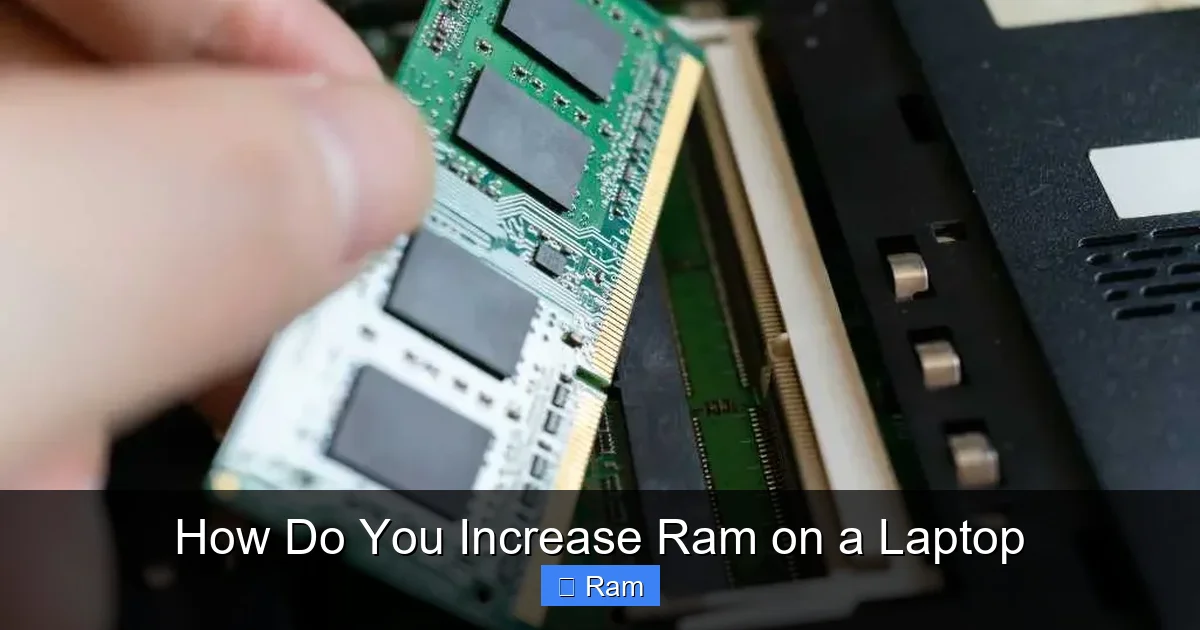
- Release the Clips: Gently but firmly push the two metal clips on the sides of the SODIMM slot outward. The module will pop up at an angle, usually about 30 degrees.
- Remove the Old Module: Grasp the module by its edges and pull it straight out. Place it in an anti-static bag if you plan to keep or sell it.
- Insert the New Module: Hold the new RAM module by the edges, aligning the notch on the gold contacts with the key in the slot. The notch must match! Insert the module into the slot at the same 30-degree angle. Press down firmly and evenly on the top edge until the side clips snap into place and lock the module flat. You should hear/feel a click. Ensure it’s seated evenly and fully.
- Reassemble: Replace the access panel or bottom case, reinsert all screws, and tighten them snugly but do not over-tighten.
First Boot and Verification
Flip the laptop over, plug in the charger, and power it on. It may reboot once or twice—this is normal as it recognizes the new hardware and configures itself. Once you reach your desktop, immediately verify the new RAM is recognized. Go back to Task Manager > Performance > Memory. You should see the new total capacity (e.g., “16.0 GB” instead of “8.0 GB”). If it shows the correct amount, congratulations! If the laptop doesn’t boot, beeps, or shows a black screen, power it off, unplug it, and re-seat the RAM modules. Double-check the notch alignment and that they are fully clicked in.
Step 5: Software Optimizations and When RAM Isn’t the Answer
While adding physical RAM is the definitive solution for memory shortage, it’s not a magic fix for all performance issues. Sometimes, the bottleneck lies elsewhere. Before you open your laptop, or as a supplement to your new RAM, consider these software steps.
Adjusting Virtual Memory (Page File)
Virtual memory is a space on your hard drive/SSD that Windows uses as overflow when RAM is full. While not a substitute for real RAM, ensuring it’s properly configured can help with stability. The general rule is to let Windows manage it automatically. However, on systems with very low RAM (4GB or less) and a fast SSD, manually setting a larger page file size (e.g., 1.5x your RAM) can sometimes help. Search for “Adjust the appearance and performance of Windows” in the Start menu, go to the Advanced tab, click Settings under Performance, then the Advanced tab again, and click Change under Virtual memory. Uncheck “Automatically manage,” select your drive, and set a custom size. This is an advanced tweak; for most users, the default is fine.
Identifying Other Performance Bottlenecks
If your laptop is still slow after a RAM upgrade, the culprit may be:
- Storage Drive: An old, slow hard disk drive (HDD) is the single biggest performance limiter in many older laptops. Upgrading to a SATA or NVMe SSD will provide a more noticeable day-to-day speed boost than adding RAM alone. The two upgrades together are transformative.
- Processor (CPU): An outdated or low-power CPU (like an Intel Celeron or old AMD A-series) will struggle with modern software, regardless of RAM.
- Overheating: Dust-clogged fans and dried-out thermal paste cause thermal throttling, where the CPU and GPU reduce speed to cool down. Cleaning the internals and re-pasting can restore performance.
- Malware/Bloatware: Run a malware scan and audit your startup programs (Task Manager > Startup tab). Disabling unnecessary startup items can dramatically improve boot times and responsiveness.
Use tools like HWMonitor to check temperatures, and CrystalDiskMark to benchmark your storage. This diagnostic approach ensures you’re addressing the actual problem.
Conclusion: Your Laptop’s New Lease on Life
Learning how to increase RAM on a laptop demystifies a process that is far more accessible than many people believe. It starts with careful research—using built-in tools, manufacturer specs, or trusted scanner utilities to understand your machine’s limits. From there, it’s a matter of purchasing the correct, high-quality SODIMM module from a reputable brand. The physical act of opening the laptop, removing the old stick, and clicking the new one into place is a satisfying, hands-on skill that saves you money and e-waste. Remember to always prioritize safety: power down, unplug, and discharge static. Once installed, the proof is in the pudding—a responsive system that can handle your daily workload without breaking a sweat. While RAM upgrades are powerful, they are part of a holistic approach to system maintenance. Pairing more memory with a clean OS and, if possible, an SSD upgrade can make an older laptop feel like a new machine. So, open that back panel with confidence. You’ve got the knowledge to give your laptop the memory boost it deserves.
Frequently Asked Questions
Can I increase the RAM on any laptop?
No. Many modern ultra-thin laptops and some business models have the RAM soldered directly onto the motherboard, making it impossible to upgrade. You must first check your laptop’s specifications or open it to see if it has accessible SODIMM slots.
What is the maximum RAM my laptop can support?
This is determined by your laptop’s motherboard chipset and processor. The limit is often 32GB, but some older models cap at 8GB or 16GB, while newer high-end ones support 64GB. The only way to know for sure is to check your manufacturer’s official specifications for your exact model number.
What’s the difference between DDR3, DDR4, and DDR5 RAM?
They are different, incompatible generations of RAM technology. DDR4 is faster and more power-efficient than DDR3, and DDR5 is the latest, offering even higher speeds. They have different physical notch positions and pin counts (DDR3: 204 pins, DDR4: 260 pins, DDR5: 262 pins), so you cannot install the wrong type into a slot.
Should I upgrade my laptop’s RAM or just buy a new one?
If your laptop is less than 5-7 years old, has a decent processor (Intel Core i5/i7 or AMD Ryzen 5/7), and the only bottleneck is low RAM (4-8GB), then upgrading is almost always the smarter, more economical choice. If the laptop is very old, has a slow HDD, a weak CPU, or the RAM is soldered, investing in a new system is better.
Will adding more RAM always make my laptop faster?
Not always. It will only provide a noticeable speed boost if your current performance issues are caused by running out of available RAM. If your laptop is slow because it has an old, slow hard drive, an underpowered CPU, or is overheating, adding RAM will have little to no effect. Use Task Manager to confirm high memory usage before upgrading.
Do I need any special tools to install laptop RAM?
You typically need only a small Phillips-head screwdriver (size #0 or #1) to remove the access panel screws. A plastic pry tool is helpful but not essential. For safety, an anti-static wrist strap is highly recommended to prevent electrostatic discharge damage to the components. Always ensure the laptop is completely powered off and unplugged before you begin.