How to Set Up Lighting for Streaming
Great lighting transforms your stream from amateur to professional. Without proper lighting, even the best camera falls flat. This guide breaks down everything you need to know, from basic three-point setups to budget-friendly hacks, so your viewers see you in the best light—literally.
So you’ve invested in a decent microphone, a capable camera, and a powerful PC. You’ve chosen your streaming software and picked your platforms. But when you hit “Start Streaming,” something feels… off. Your image looks flat, your face is shadowy, or the colors just don’t pop. The culprit is almost always one thing: poor lighting. Believe it or not, lighting for streaming is more critical to your visual quality than the camera you use. A $100 webcam with perfect lighting will consistently outperform a $1000 DSLR in a dimly lit room. This comprehensive guide will walk you through everything you need to know to set up professional, flattering lighting for your stream, regardless of your budget or space. We’ll move from core principles to practical setups, common mistakes, and even advanced techniques. Let’s shed some light on the subject.
Key Takeaways
- Three-point lighting is non-negotiable: A key light, fill light, and backlight create depth, dimension, and a professional look.
- Soft light is your best friend: Harsh, direct light creates unflattering shadows. Always diffuse your lights using softboxes, umbrellas, or DIY solutions.
- Match color temperatures: Ensure all your lights output the same Kelvin temperature (e.g., 5600K daylight) to avoid a jarring, mixed-color look.
- Position lights at 45-degree angles: Place your key light to the side and slightly in front of you to sculpt your face and avoid flat lighting.
- Control your environment: Eliminate competing light sources like windows or overhead fluorescents that can ruin your carefully crafted setup.
- You don’t need to break the bank: Excellent streaming lighting can be achieved with affordable LED panels, clamp lights, and clever DIY diffusers.
- Test and adjust constantly: Use your camera’s viewfinder or a test recording to check for shadows, hotspots, and overall balance before going live.
📑 Table of Contents
- Why Lighting is the Secret Weapon of Top Streamers
- Decoding the Toolbox: Essential Light Types for Streaming
- Mastering the Three-Point Lighting Blueprint
- Your Step-by-Step Lighting Setup Guide
- Common Lighting Mistakes (And How to Fix Them)
- Budget Streaming Lighting Hacks That Actually Work
- Advanced Techniques for Studio-Quality Streams
- Conclusion: Your Journey to Perfect Light Starts Now
Why Lighting is the Secret Weapon of Top Streamers
Before we talk about *how* to set up lights, we must understand *why* it matters so much. Lighting isn’t just about making things brighter; it’s about shaping perception, guiding the viewer’s eye, and creating an emotional tone.
The Psychology of Light
Think about a horror movie versus a romantic comedy. The lighting tells you how to feel before any dialogue is spoken. In streaming, your lighting subconsciously communicates professionalism, energy, and trust. Flat, ugly lighting can make you look tired, unwell, or amateurish. Clean, dimensional lighting makes you appear alert, vibrant, and engaged. It separates you from the background, giving you a “presence” on screen that flat lighting simply cannot achieve. Good lighting for streaming makes your audience feel like they’re having a one-on-one conversation with you in a well-produced studio.
How Lighting Directly Impacts Viewer Retention
In the crowded world of live streaming, viewers have infinite choice. A poorly lit stream is an immediate reason to click away. Your audience’s eyes and brains are working overtime to compensate for bad lighting, causing subconscious fatigue. Conversely, clean, well-lit video is easy on the eyes. It allows viewers to focus on your content—your gameplay, your commentary, your personality—not on struggling to see your face. Investing time in your lighting is a direct investment in audience retention and growth.
Decoding the Toolbox: Essential Light Types for Streaming
Not all lights are created equal. Understanding the different types of lighting tools and their purposes is the first step to building your setup. We’re primarily concerned with three roles: the Key Light, the Fill Light, and the Backlight (or Rim Light). But first, let’s look at the hardware itself.
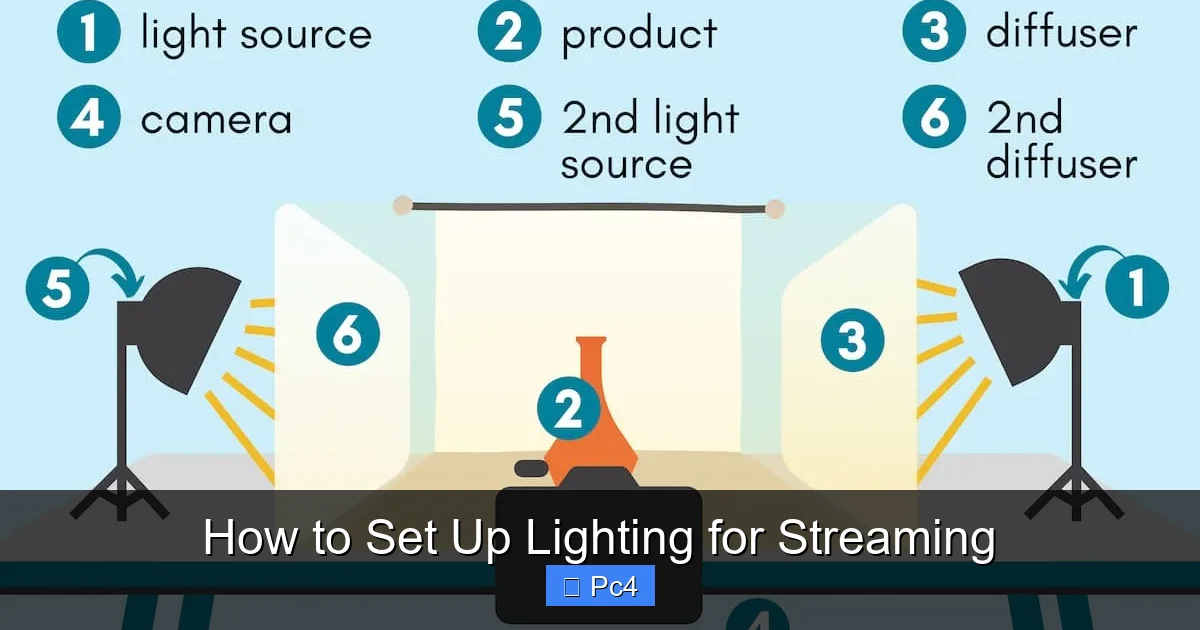
Visual guide about How to Set Up Lighting for Streaming
Image source: craftprofessional.com
Continuous LED Panels vs. Other Sources
For streaming, you will use continuous lighting—lights that are on constantly, as opposed to flash/strobe units used in photography. The dominant technology is LED (Light Emitting Diode). LED panels are ideal because they are cool-running (no heat baking you), energy-efficient, and often have adjustable brightness (intensity) and color temperature. Avoid old halogen or incandescent bulbs; they produce excessive heat and have fixed, often yellowish, color temperatures.
Key Light: The Star of the Show
The key light is your primary, strongest light source. It does most of the work in illuminating your face and creating the main pattern of light and shadow (called “modeling”). It’s typically placed to one side of your camera and slightly in front of you. Its intensity and quality (hard vs. soft) define the overall look of your shot.
Fill Light: The Softener
The fill light’s job is to “fill in” the darker shadows created by the key light, particularly on the side of your face away from the key. It is always less intense than the key light. Its purpose is not to eliminate shadows entirely (which creates a flat, unnatural look) but to reduce their harshness. A fill light can be a dedicated lamp, a reflector, or even a weak second LED panel.
Backlight (Rim Light): The Separator
The backlight is placed behind and above you, pointing down at your shoulders and the back of your head. Its job is to create a subtle outline of light around you, separating you from your background. This adds immense depth and a professional, “three-dimensional” feel to your video, making you pop out from the screen instead of looking like a flat cutout.
Modifiers: Softboxes, Umbrellas, and Diffusers
A bare LED panel is a hard light source. It creates sharp, defined shadows. For flattering portrait-style lighting, you almost always want soft light. Soft light has gradual transitions between light and shadow, smoothing skin texture and being generally more pleasing. To soften a light, you use a modifier:
- Softbox: The gold standard. A rectangular fabric box with a diffusion panel that spreads the light source into a large, soft area. Provides excellent control.
- Umbrella (shoot-through or reflective): A cheaper, more portable option. A shoot-through umbrella diffuses light widely, while a reflective one gives a slightly harder but still soft effect.
- DIY Diffusion: A white bed sheet, parchment paper taped to a frame, or even a shower curtain can work in a pinch to scatter harsh light.
Mastering the Three-Point Lighting Blueprint
Now that we know the roles, let’s put them together into the foundational setup for professional lighting for streaming: the Three-Point Lighting system. This is the blueprint used in film, television, and professional photography studios worldwide.
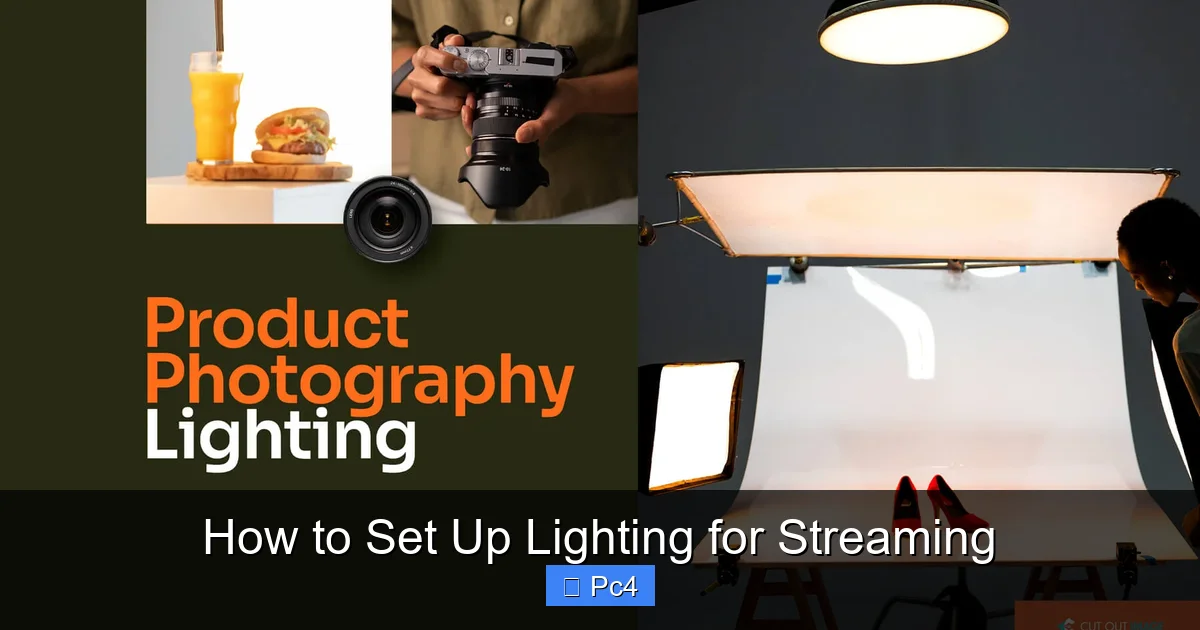
Visual guide about How to Set Up Lighting for Streaming
Image source: cutoutimage.com
Positioning Your Key Light
Sit in your streaming chair in your normal position. Imagine a clock face in front of you, with 12 o’clock being directly in front of your face. Your camera should be at 12 o’clock. Place your key light at approximately 45 degrees to your side (either 2 o’clock or 10 o’clock) and 45 degrees above your eye line. This angle sculpts your face nicely, highlighting your cheekbones and creating a natural shadow on the opposite side of your nose. The light should point down at you, not up. The height is crucial to avoid unflattering “raccoon eyes” or nose shadows.
Fill Light Placement and Intensity
Place your fill light on the opposite side of your key light, roughly mirroring its angle but much closer to the camera axis (closer to 12 o’clock). It should be less bright than your key light. A good rule of thumb is to set your fill light to about half the brightness of your key. You can achieve this by using a dimmer, a lower-wattage bulb, or simply moving it farther away. The goal is to soften shadows, not erase them. Look at the shadow side of your face; you should still see detail, not pure black.
Backlight Placement for Maximum Impact
Position your backlight behind and above your monitor, pointing down at the top of your head and shoulders. It should be high enough that it doesn’t shine directly into your camera lens, causing flare. Aim it so the light just grazes the top of your shoulders and the back of your head. You’ll know it’s working when you see a faint, bright outline separating you from your background on your camera feed. Start with it slightly less bright than your key light and adjust up until you see that rim.
Your Step-by-Step Lighting Setup Guide
Enough theory. Let’s get practical. Follow this checklist to go from a dark room to a professionally lit streaming space.
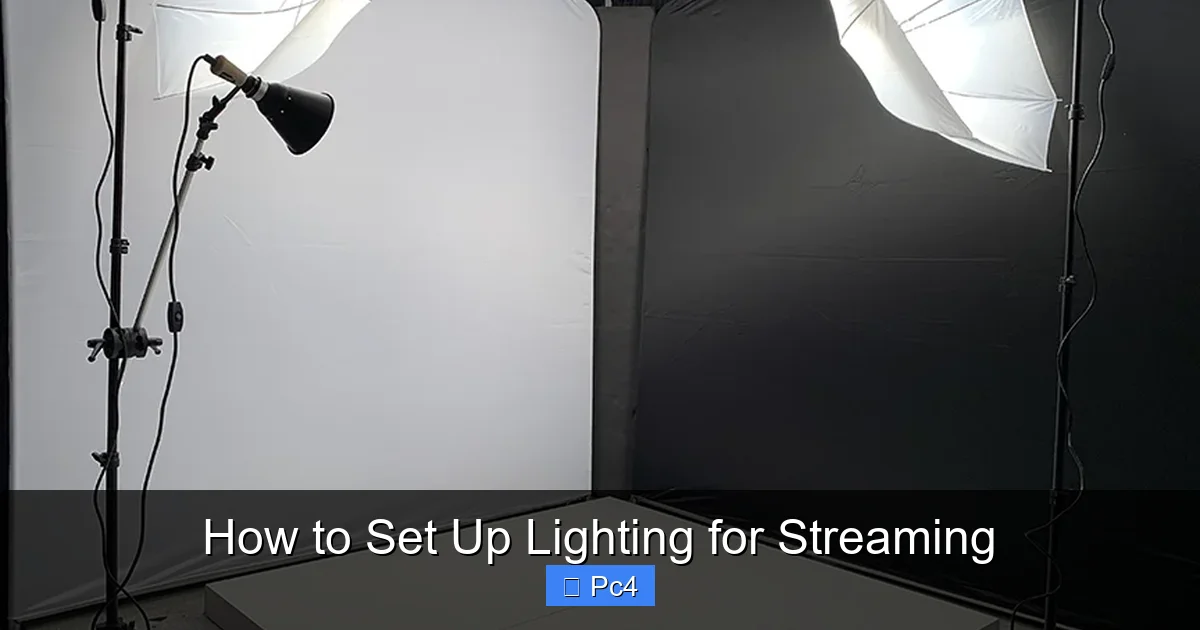
Visual guide about How to Set Up Lighting for Streaming
Image source: fitnyc.edu
Step 1: Assess and Control Your Environment
Before plugging in a single light, eliminate all uncontrolled light sources. Close blinds or curtains to block windows. Turn off overhead fluorescent lights (they have terrible, uneven color temperatures). If you have a lamp in the room, turn it off. Your streaming lighting should be the only light source hitting you. This control is essential for consistency. Also, consider your background. A plain, non-distracting wall is best. If you use a backdrop, ensure your backlight is strong enough to separate you from it.
Step 2: Assemble and Position the Key Light
Set up your main LED panel on a sturdy light stand. If you don’t have a stand, a clamp light that attaches to your desk or shelf is a fantastic, inexpensive alternative. Attach your softbox or other diffuser. Position it at the 45-degree angle described above. Turn it on and set it to a brightness that feels comfortable—not blinding. If your light has a color temperature dial, set it to 5600K (daylight). This is the standard for neutral white light.
Step 3: Add and Dial In the Fill Light
Set up your second light or reflector on the opposite side. If using a dedicated LED panel, start with it at a much lower brightness than your key. If using a simple reflector (a piece of white foam core or a professional reflector), position it to bounce light from your key light back onto the shadow side of your face. This is a very effective, zero-cost fill solution. Look at your camera’s preview. The shadow side of your face should now have visible detail, but the light should still be clearly coming from the key light side.
Step 4: Implement the Backlight
Place your third light behind you. A small, directional LED panel or even a bright flashlight with a snoot (a tube to focus the beam) works well. Aim it at the back of your head and shoulders. Turn it on. Look at your camera feed. You should see a thin outline of light around your silhouette. If you look “flat,” the backlight is too weak or mispositioned. If the light spills onto your background too much, angle it down more or move it slightly to the side.
Step 5: The Critical Test and Adjust Loop
Now, the fine-tuning. Turn off all lights except the key. Take a photo or video. See the harsh shadows? Now turn on just the fill. See the difference? Finally, add the backlight. Look for:
- Shadow under nose/chin: Raise the key light angle or move it slightly more forward.
- Too dark on one side: Increase fill light brightness or move reflector.
- No separation from background: Increase backlight intensity or reposition it higher/behind you.
- Harsh shadows on walls: Move lights closer to you (they’ll be softer relative to you) or use wider modifiers.
This iterative process is key to perfecting your streaming lighting setup.
Common Lighting Mistakes (And How to Fix Them)
Even with the right gear, mistakes happen. Here are the most frequent pitfalls and their solutions.
The Shadow Dilemma: Raccoon Eyes and Nose Shadows
Problem: Dark circles under your eyes or a prominent shadow down from your nose. Cause: Your key light is too low or too far in front of you. Fix: Raise the height of your key light so it shines down on your face at a 45-degree angle. Move it slightly more to the side and less directly in front. The light should come from above and to the side, not straight on from the front.
Color Clash: The “Mixed White” Nightmare
Problem: One side of your face looks yellow/orange, the other looks blue. Cause: You have lights with different color temperatures (e.g., a warm desk lamp and a cool LED panel) hitting you from different sides. Fix: This is why matching color temperatures is rule #1. Buy all your lights with the same Kelvin rating (5600K is safest). If you must mix, use magenta or green gel filters on the offending light to balance it, but it’s easier to just use matching bulbs.
Overexposure: Blown-Out Highlights
Problem: Your forehead or cheeks are pure white with no detail. Cause: Your key light is too bright, too close, or pointed directly at you. Fix: Move the key light farther away. Use its dimmer to lower intensity. Ensure the light is pointed at you at an angle, not head-on. Check your camera’s exposure settings—you may need to lower the exposure compensation if your camera is auto-exposing for the bright light.
The Flat, “Washed-Out” Look
Problem: You look like a ghost. No shadows, no dimension. Cause: Your fill light is too bright, or you have too many lights spilling everywhere. You’ve erased all shadows. Fix: Dim your fill light significantly. Turn off any unnecessary lights. The goal is a clear difference between your lit side and shadow side. A 2:1 or 3:1 ratio (key:fill) is a good starting point.
Budget Streaming Lighting Hacks That Actually Work
Think you need $300 for a good setup? Think again. Here’s how to achieve great lighting for streaming on a tight budget.
The $50 Desk Lamp & White Shirt Method
This is the ultimate starter setup. Get two inexpensive, adjustable desk lamps with clamp bases from a hardware store or Amazon (~$15 each). Buy two daylight-balanced (5600K) LED bulbs (around $8-$10 each). For your key light, clamp one lamp to the side of your desk, angle it at 45 degrees, and clip a white t-shirt or a piece of white poster board in front of the bulb as a makeshift diffuser. For fill, use the second lamp on the opposite side, set to a lower brightness or with a thinner diffusion layer. For a backlight, a cheap USB-powered LED strip taped to the back of your monitor works wonders. Total cost: under $50.
Repurposing Household Items
Get creative. A large white foam core board (from a craft store) makes an excellent, free-standing reflector for fill light. A bed sheet draped over a laundry basket or a frame creates a giant softbox. A white umbrella (used for photography) is one of the best, most portable diffusers you can buy for under $20. Your goal is to bounce and spread light, not create it from scratch. Use what you have to shape the light you own.
Prioritizing Your Budget
If you have $100 to spend, allocate it like this: $60 for one good quality, large softbox LED panel (like from Neewer, Godox, or even Elgato’s Key Light Air) to use as your key. $20 for a second, smaller LED panel or a quality reflector for fill. $20 for a basic clamp light and bulb for a backlight. This prioritized spending on the key light first will yield the biggest visual improvement.
Advanced Techniques for Studio-Quality Streams
Once you’ve mastered the basics, elevate your stream with these pro techniques.
Color Grading with Practical Lights
You can subtly tint your scene using colored gels on your backlight. A very light blue gel on your backlight can add a cool, techy vibe. A warm orange gel can create a cozy, intimate feel. Use this sparingly and subtly. The gel should be so light that your camera’s white balance still sees it as mostly white, but it adds a beautiful, subconscious color cast to your outline and the edge of your background.
Dynamic Lighting for Different Content
Don’t be afraid to change your setup based on your stream’s mood. For a high-energy gaming session, you might use brighter, cooler lights. For a relaxed Just Chatting or storytelling stream, use warmer, dimmer, and softer lighting. Consider a dimmer switch for all your lights so you can adjust intensity live without getting up. Some smart LED panels even have app control to change color temperature on the fly.
Lighting for Multi-Camera Setups
If you use a face cam and an overhead desk cam, your lighting needs change. The overhead camera will see the top of your head and your desk. Ensure your key light is high enough to light the top of your head for that shot. You may need a separate, small light on your desk to illuminate items you show the overhead camera. The core three-point setup for your face cam should remain your priority, as it’s the primary viewer connection.
Conclusion: Your Journey to Perfect Light Starts Now
Setting up proper lighting for streaming is not a one-time task but an ongoing experiment. Start with the fundamental three-point blueprint: a key, a fill, and a backlight. Diffuse your key light, match your color temperatures, and control your environment. From there, tweak, adjust, and find what works for your unique face, your space, and your stream’s personality. Remember, the goal isn’t perfection; it’s consistent, flattering, and professional-looking video that keeps your viewers focused on what you have to say, not how you look. The equipment is just a tool—your eye and your willingness to test are your most valuable assets. So unbox those lights, clamp them down, and start shaping the light. Your best stream yet is waiting to be illuminated.
Frequently Asked Questions
Do I really need three lights? Can’t I just use one?
You can start with one excellent key light and use a reflector for fill. This is a valid two-light setup. However, the backlight makes a dramatic difference in perceived quality and depth. We recommend starting with a key and fill, then adding a backlight as your next upgrade. One light alone will almost always look flat and shadowy.
My room is small and has white walls. Will my lights bounce everywhere?
Yes, and that’s actually helpful! In a small, bright room, your walls act as giant reflectors, providing natural fill. This means you can use a weaker fill light or even rely on the wall bounce. However, it also means you must control your key light’s spill. Use flags (black cardboard) on the sides of your key light to prevent it from bouncing off walls and creating unwanted ambient light that flattens your image.
What’s the best color temperature for streaming lighting?
Stick to 5600K (Daylight). This is the standard for neutral white light and matches the typical daylight white balance setting on most cameras. It’s the most versatile and flattering for skin tones. Avoid “warm white” (2700K-3000K) bulbs unless you are deliberately going for an extremely cozy, lamp-lit aesthetic, as they can make skin look sallow on camera.
Can I use my gaming monitor’s RGB lighting as part of my setup?
Technically yes, but with caution. Monitor backlighting can create a distracting, colored glow on your face or background, especially in dark rooms. It’s best used as a very subtle background accent, not as a primary light source. Rely on your dedicated front-facing lights for your face, and keep monitor lighting low or on a neutral color.
How high should my key light be?
Aim for the light to be at least 1 to 1.5 feet above your eye line when you’re in your normal seated position. This downward angle is crucial for preventing unflattering shadows under your eyes, nose, and chin. If your light stand is too short, use a boom arm or clamp it to a higher shelf.
I keep getting a shadow on my backdrop behind me. How do I fix it?
This is a classic sign that your key light is too close to you and/or your backdrop. Move your key light closer to you and farther from the backdrop. This makes the light “fall off” more quickly, meaning it illuminates you brightly but doesn’t have enough power left to brightly light the wall behind you. Your backlight will then be the primary light on your backdrop, creating a clean separation.