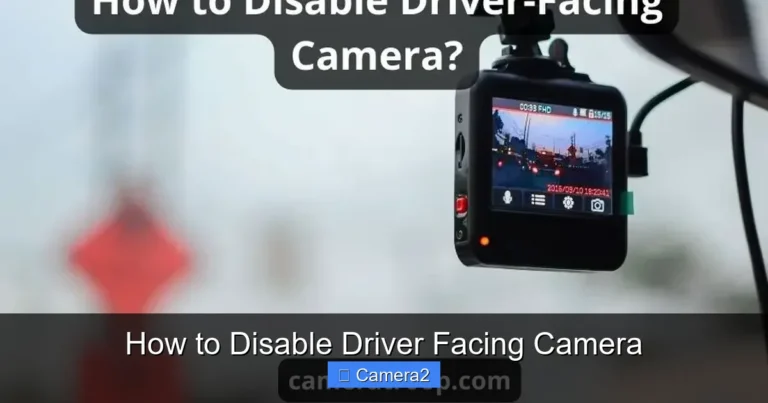
What Is 3 Trigger on Moultrie Camera
What is 3 Trigger on a Moultrie camera? It is a special setting that lets the camera fire three consecutive photos each time motion is detected. This feature helps capture fast‑moving game and ensures you don’t miss the perfect moment.
Key Takeaways
- Three‑shot sequence: The 3 Trigger mode records three images per trigger event, giving you a mini‑burst.
- Adjustable interval: You can set the delay between each shot, typically 0.5‑2 seconds.
- Battery impact: Using 3 Trigger shortens battery life, so plan power management.
- Best for fast action: Ideal for hunting, birding, and wildlife where subjects move quickly.
- Customization: Pair 3 Trigger with flash, infrared, and sensitivity settings for optimal results.
- Compatibility: Most modern Moultrie trail cameras support 3 Trigger, but check your model’s manual.
- Practical tip: Combine 3 Trigger with a narrow detection zone to avoid unnecessary shots.
📑 Table of Contents
- Introduction: Why the 3 Trigger Feature Matters
- What Is 3 Trigger on a Moultrie Camera?
- Setting Up 3 Trigger: Step‑by‑Step Guide
- When to Use 3 Trigger and When to Skip It
- Battery and Memory Management Tips
- Real‑World Example: Setting Up 3 Trigger for Deer in a Forest Clearing
- Common Mistakes and How to Fix Them
- Advanced Tricks: Pairing 3 Trigger with Other Features
- Conclusion: Mastering 3 Trigger for Better Wildlife Photography
Introduction: Why the 3 Trigger Feature Matters
If you’ve ever set up a trail camera and come back to find only a single blurry picture of a deer sprinting by, you know how frustrating missed moments can be. Moultrie, a leading name in wildlife surveillance, introduced the 3 Trigger mode to solve exactly that problem. Instead of a lone frame, the camera snaps three pictures in quick succession whenever its motion sensor is activated. This simple change dramatically raises the odds of catching a clear, well‑framed shot.
In this article we’ll break down what 3 Trigger really is, how it works inside a Moultrie camera, and when you should (or shouldn’t) use it. We’ll also share practical setup tips, battery‑saving tricks, and a few real‑world examples so you can start getting better photos on your next hunt or wildlife study.
What Is 3 Trigger on a Moultrie Camera?
Definition in plain language
3 Trigger is a camera setting that tells the device to take three separate photos each time its motion detector is tripped. Think of it as a tiny burst mode built into the camera’s firmware. The first image captures the moment the animal first appears, the second follows a split second later, and the third comes after another short pause.
Visual guide about What Is 3 Trigger on Moultrie Camera
Image source: careofcarl.com
How the sensor decides to fire
Moultrie cameras use passive infrared (PIR) sensors to sense heat signatures. When the sensor detects a change that matches its sensitivity threshold, it sends a signal to the processor, which then initiates the 3 Trigger sequence. The interval between each shot can usually be set in the camera’s menu—common options are 0.5 seconds, 1 second, or 2 seconds.
Setting Up 3 Trigger: Step‑by‑Step Guide
1. Access the camera’s menu
Power on your Moultrie unit and press the Menu button. Navigate to the “Trigger Mode” or “Capture Settings” section. If you’re using a newer model like the Moultrie A-30, you’ll find a dedicated “3‑Shot Burst” option.
Visual guide about What Is 3 Trigger on Moultrie Camera
Image source: cdn.clothbase.com
2. Choose 3 Trigger
Select “3 Trigger” from the list. Some models label it “3‑Shot Mode” or “Burst 3.” Confirm your choice by pressing OK or the green checkmark.
3. Set the interval
Pick the delay that best matches your target’s speed. For fast‑moving deer, a 0.5‑second interval works well. For larger, slower animals like elk, a 1‑second gap may be sufficient.
4. Adjust other settings
- Sensitivity: Set the PIR sensitivity to “Medium” or “High” depending on how much vegetation is in the detection zone.
- Flash mode: Choose “No‑Glow” for stealth or “White Flash” for color images at night.
- Resolution: Higher resolution uses more memory; balance quality with storage capacity.
5. Save and exit
Press Save or Exit. Your camera is now ready to capture three shots per motion event.
When to Use 3 Trigger and When to Skip It
Ideal scenarios
- Hunting: Hunters love seeing the exact moment a buck raises its head. Three images give a clearer picture of the animal’s size and antler spread.
- Bird watching: Fast‑flying birds can blur in a single frame. A rapid three‑shot burst often catches a crisp wing‑beat.
- Research: Scientists tracking behavior need multiple frames to study gait and movement patterns.
When to avoid 3 Trigger
- Battery conservation: Each extra shot drains power. If you’re deploying a camera for weeks on a single set of AA batteries, consider “Single Shot” mode.
- Limited storage: Three images per trigger fill memory cards quickly, especially at high resolution.
- High traffic areas: In places with frequent false triggers (wind‑blown foliage), 3 Trigger can generate a lot of unwanted photos.
Battery and Memory Management Tips
Choosing the right power source
For extended deployments, pair your Moultrie camera with high‑capacity lithium batteries or a solar panel kit. Lithium cells hold more charge and work better in cold weather, which is common during early morning wildlife activity.
Visual guide about What Is 3 Trigger on Moultrie Camera
Image source: media.endclothing.com
Optimizing memory usage
Use a 32 GB or larger microSD card and format it in the camera before each season. Enable “Auto‑Delete” if your model supports it—older images are removed once the card is full, ensuring you never lose the most recent captures.
Balancing resolution and file size
If you’re primarily interested in identification rather than print‑quality photos, drop the resolution to 8 MP. This reduces file size by up to 40 %, letting you store more 3‑shot bursts before hitting the card limit.
Real‑World Example: Setting Up 3 Trigger for Deer in a Forest Clearing
Step 1: Scout the location
Walk the trail at dawn and locate a natural clearing where deer often feed. Look for signs such as fresh tracks and rubs.
Step 2: Position the camera
Mount the camera about 6 feet high on a sturdy tree, aiming slightly downward toward the feeding spot. Use a mounting bracket designed for trail cams to keep it stable.
Step 3: Configure 3 Trigger
Set the trigger mode to 3 Trigger with a 0.5‑second interval, medium PIR sensitivity, and “No‑Glow” flash. Save the settings.
Step 4: Test and adjust
Walk in front of the camera to simulate a deer. Check the preview images; if they’re too dark, switch to “White Flash.” If you get too many false triggers from wind, lower the sensitivity.
Step 5: Review results
After a week, download the images. You’ll likely see a sequence where the first frame shows the deer entering the clearing, the second captures it mid‑grazing, and the third shows it turning away—perfect for both scouting and record‑keeping.
Common Mistakes and How to Fix Them
Mistake 1: Setting the interval too long
If you choose a 2‑second delay for fast animals, the third shot may miss the action entirely. Reduce the interval to 0.5 seconds for high‑speed subjects.
Mistake 2: Ignoring the detection zone
Placing the camera too close to foliage can cause constant false triggers, quickly draining the battery. Trim branches or adjust the angle to narrow the detection field.
Mistake 3: Overlooking firmware updates
Manufacturers often release firmware that improves burst timing and power efficiency. Check Moultrie’s website regularly and update your camera via the USB port.
Advanced Tricks: Pairing 3 Trigger with Other Features
Using time‑lapse together
Some models let you run a time‑lapse schedule while keeping 3 Trigger active for motion events. This gives you a daily overview plus detailed bursts when animals appear.
Combining with “Night Vision” modes
Enable infrared LEDs for stealthy night captures. The 3 Trigger sequence works the same way, but you’ll get black‑and‑white images that don’t spook nocturnal wildlife.
Geo‑tagging for research
If your camera supports GPS tagging, each 3‑shot burst will carry location data. This is invaluable for scientists mapping animal movement patterns.
Conclusion: Mastering 3 Trigger for Better Wildlife Photography
The 3 Trigger feature on Moultrie cameras is a game‑changer for anyone serious about catching clear, actionable photos of moving subjects. By understanding how the setting works, configuring the right interval, and balancing power and storage, you can dramatically increase your success rate. Remember to test your setup, keep the firmware current, and adjust sensitivity to your environment. With these tips, the next time you check your camera you’ll likely see a three‑image story instead of a single, missed moment.
Frequently Asked Questions
What does the “3 Trigger” mode actually do?
It tells the camera to take three separate photos each time motion is detected, with a user‑set interval between each shot.
Can I use 3 Trigger at night?
Yes. The mode works with both infrared (no‑glow) and white‑flash night settings, letting you capture multiple night‑time images.
How does 3 Trigger affect battery life?
Taking three images per trigger uses more power than a single shot. Expect roughly 20‑30% faster battery drain, so plan extra batteries or a solar kit.
Is 3 Trigger available on all Moultrie models?
Most recent models support it, but older units may only have single‑shot or dual‑shot options. Check your model’s manual to be sure.
Can I change the time between each shot?
Yes. In the camera’s menu you can select intervals such as 0.5 seconds, 1 second, or 2 seconds, depending on your needs.
Should I use 3 Trigger in high‑traffic areas?
Generally no. In places with many false triggers, three shots per event can quickly fill your memory card and waste battery. Single‑shot mode is usually better there.