Camera with Transmitter and Receiver
A camera with transmitter and receiver lets you watch live video from anywhere without messy cables. This setup works great for home security, wildlife watching, and remote projects. You will learn how these systems connect, what features matter most, and how to pick the right pair for your needs. We keep things simple and practical so you can start monitoring with confidence.
Have you ever wanted to watch a distant spot without running wires across your yard or building? A camera with transmitter and receiver makes that possible. You place the camera where you need it, and the receiver catches the signal so you can view the feed on a screen or phone. It sounds simple, and it is, once you know the basics.
These systems show up in homes, farms, workshops, and even outdoor trails. People use them for security, pet monitoring, wildlife watching, and remote project checks. The best part is that you can set them up in tight spaces where cables would be a headache. In this guide, we will walk through how these cameras work, what to look for, and how to get a clean, reliable signal.
Key Takeaways
- Wireless freedom: A camera with transmitter and receiver removes the need for long cable runs, making installation faster and cleaner.
- Real-time viewing: These systems send live video to your phone, tablet, or monitor so you can check scenes from anywhere.
- Range matters: Signal strength depends on distance, walls, and interference, so plan your placement carefully.
- Power options vary: Some units run on batteries, while others need constant power, so match the setup to your use case.
- Video quality counts: Resolution, frame rate, and low-light performance shape how clear your feed will look.
- Security features help: Encryption, passwords, and secure apps keep your feed private and safe from unwanted access.
- Right tool for the job: Choose a camera with transmitter and receiver based on whether you need security, streaming, or nature monitoring.
📑 Table of Contents
- What Makes a Camera with Transmitter and Receiver Work
- Why People Choose a Wireless Camera Setup
- Key Features to Look For
- How to Set Up Your System for Best Results
- Common Problems and How to Fix Them
- Choosing the Right Setup for Your Needs
- Quick Tips for Better Wireless Video
- Final Thoughts on Wireless Camera Systems
What Makes a Camera with Transmitter and Receiver Work
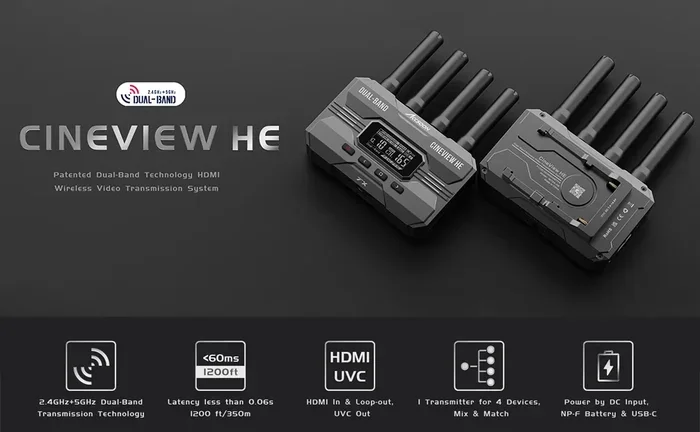
At its core, this setup has two main parts. The camera captures video and sends it out through a transmitter. The receiver picks up that signal and passes it to a display, app, or recording device. Some systems use Wi-Fi, while others use radio frequency or dedicated wireless links. The goal is the same: move video from point A to point B without a physical cable.
How the Signal Travels
The transmitter turns video into a wireless signal. That signal travels through the air to the receiver. The receiver then decodes the signal and shows the video on your monitor or phone. If the signal is strong, the video stays smooth. If the signal weakens, you may see lag, dropouts, or lower quality.
Think of it like a conversation across a room. If the room is quiet, the message comes through clearly. If there is noise or a wall in the way, the message gets harder to hear. Wireless video works in a similar way, so placement matters a lot.
Common Connection Types
Different systems use different methods to send video. Here are the most common options you will see:
- Wi-Fi based systems: These connect through your home network and often let you view feeds remotely.
- Radio frequency links: These work over shorter or medium distances and can be useful where Wi-Fi is weak.
- Dedicated wireless pairs: Some cameras come with a matching receiver, which can make setup easier.
- Cellular or cloud-linked units: These send video through mobile networks, which helps in remote locations.
Each option has trade-offs. Wi-Fi is convenient, but it depends on your network. Radio links can be steady, but range may be limited. The right choice depends on where you want to install the camera and how you plan to watch the feed.
Why People Choose a Wireless Camera Setup
A camera with transmitter and receiver solves several common problems. First, it cuts down on wiring. That means fewer holes to drill, less cable to hide, and a cleaner install. Second, it gives you flexibility. You can move the camera to a new spot without pulling wires through walls or trenches.
Third, these systems are useful in places where power or cable access is limited. A barn, shed, driveway, or campsite may not have easy wiring paths. A wireless setup can fill that gap. People also like the convenience of checking a live feed from a phone while sitting on the couch or being away from home.
Good Uses for Wireless Video Systems
These cameras fit many situations. Here are a few practical examples:
- Home entry points: Watch doors, gates, or driveways without running long cables.
- Backyards and perimeters: Cover open spaces where trenching cables would be difficult.
- Workshops and garages: Check tools, deliveries, or parked vehicles from inside the house.
- Animal and bird watching: Observe wildlife without standing nearby and scaring them away.
- Remote property checks: Look over a cabin, job site, or storage area while you are away.
If you want a setup that feels flexible and easy to adjust, wireless video is a strong choice. Just keep in mind that convenience works best when you plan the signal path and power source ahead of time.
Key Features to Look For
Not every wireless camera is built the same. Some focus on easy phone viewing, while others aim for long range or crisp night video. When shopping for a camera with transmitter and receiver, pay attention to the features that match your real use. A high number on a spec sheet does not always mean better results in your space.
Video Quality and Low-Light Performance
Resolution tells you how detailed the image can be. Higher resolution can help you read signs, recognize faces, or spot small details. But resolution alone is not everything. Frame rate matters too, because smoother video makes movement easier to follow. Low-light performance is just as important if you plan to watch at night or in dim areas.
A good way to think about it is this: a clear daytime image is nice, but a reliable nighttime image is often more valuable. If you need around-the-clock viewing, look for strong low-light support and a sensor that handles darkness well.
Range and Signal Stability
Range tells you how far the signal can travel before it becomes weak or unstable. But real-world range is usually less than the ideal number on a box. Walls, trees, metal objects, and other wireless devices can all interfere. If you need to cover a longer distance, try to keep the path between camera and receiver as open as possible.
Signal stability matters more than raw distance. A camera that works well across a shorter path is often better than one that struggles across a longer path. If your feed keeps dropping, the setup becomes frustrating fast.
Power Source and Battery Life
Some wireless cameras plug into power, while others run on batteries. Battery-powered units are easy to place, but you must recharge or replace batteries on schedule. Wired power is less flexible, but it removes the worry of a dead battery at the wrong time.
If you choose battery power, think about how often you will check it. A camera in a hard-to-reach spot may be annoying if the battery runs down often. For steady long-term use, many people prefer a unit that can stay plugged in.
App, Monitor, and Recording Options
Some systems send video to a phone app. Others output to a small monitor or recording device. The best option depends on how you want to use it. If you want alerts and remote checking, an app-based system is handy. If you want a simple display in one place, a receiver with a monitor may be enough.
Recording is another useful feature. Some setups save clips to a card or cloud storage, while others only show live video. If you want evidence or later review, make sure the system supports recording in a way that fits your workflow.
How to Set Up Your System for Best Results
A good install starts with a simple plan. Before you mount anything, decide where the camera should sit and where the receiver should live. Try to keep the path between them clear. Avoid placing the camera behind thick walls or metal obstacles if you can. A few small adjustments during setup can make a big difference in signal quality.
Placement Tips That Help
Position the camera where it can see the area you care about most. Then check the receiver location. If the signal seems weak, move the receiver closer or raise it higher. Even a few feet can improve performance. Keep the unit away from heavy interference when possible.
- Keep the path open: Fewer obstacles usually mean a steadier signal.
- Raise the camera: Height can improve both viewing angle and signal flow.
- Test before mounting: Run the system temporarily first, then finalize the install.
- Check power access: Make sure batteries or power cables are practical for the spot.
Tuning the Settings
Once the hardware is in place, adjust the settings for your environment. If the video looks too dark, tweak exposure or night mode if your system offers it. If the feed lags, lower the resolution a bit or reduce other wireless load nearby. Small changes can make the viewing experience much smoother.
It also helps to label your cameras and receivers clearly if you have more than one. That way, you know which feed belongs to which area. This sounds minor, but it saves time later, especially if you expand your setup.
Common Problems and How to Fix Them
Even a solid wireless system can run into trouble now and then. The good news is that many issues have simple fixes. Most problems come from signal blockage, power limits, or settings that do not match the environment. If you know what to check, you can solve a lot of them quickly.
Weak or Dropping Signal
If the video freezes or disappears, start by checking the path between the camera and receiver. Move them closer if possible. Remove obstacles or raise the units to reduce blockage. If your system uses Wi-Fi, make sure your network is healthy and not overloaded.
If the signal is still unstable, try changing the camera position in small steps. Wireless signal behavior can be tricky, so a slight shift sometimes helps more than a major move.
Poor Night Video
Night images can look grainy or too dark if the camera cannot gather enough light. Clean the lens first, since dirt can make night footage worse. Then check night mode settings if your system has them. In some cases, adding a small light source near the camera can improve visibility without hurting the setup.
If night video stays poor, the camera sensor may simply be limited in low light. In that case, manage your expectations and place the camera where some ambient light is available.
Battery Drain and Power Issues
Battery-powered cameras can run out faster if they record often or use strong transmission settings. Check your power schedule and see whether the camera is working harder than it needs to. If the unit is in a cold or hot place, battery performance may also drop.
For important spots, a wired power option is often more reliable. If you must use batteries, keep a spare set ready and test the runtime in your actual location, not just in a store demo.
Choosing the Right Setup for Your Needs
The best choice depends on what you want to watch and how you want to view it. A camera with transmitter and receiver can be a great fit for simple monitoring, but the right model still depends on your goals. Ask yourself a few easy questions before buying.
Questions to Ask Before You Buy
- Where will the camera go? Indoor, outdoor, high, low, or far away?
- How will I view the feed? Phone, monitor, or both?
- Do I need recording? Live view only, or saved clips too?
- What is my power plan? Battery, outlet, or solar support?
- How important is night vision? Daytime use only, or 24-hour monitoring?
If you answer these clearly, the decision gets much easier. You do not need the most advanced system for every job. Sometimes a simple, reliable setup is the smartest one.
Matching Features to Use Cases
For a front door or gate, you may want quick alerts and a clear view of faces. For a backyard or property edge, range and weather resistance matter more. For wildlife or casual watching, battery life and easy placement may be the top priorities. For a workshop or garage, a steady signal and simple monitor setup can be enough.
It helps to think in terms of daily use. A camera that looks impressive on paper but is hard to maintain may not be the best fit. A modest system that works reliably every day will usually feel better in the long run.
Quick Tips for Better Wireless Video
Here are a few practical habits that make these systems easier to live with:
- Test first, mount later: Temporary setup helps you catch signal problems early.
- Keep lenses clean: Smudges and dust can soften the image, especially at night.
- Plan for maintenance: Check batteries, storage, and app access on a regular schedule.
- Protect the gear: Use weather-safe mounting and shield units from direct damage when possible.
- Start small: One good camera and receiver pair is better than several struggling units.
These small habits save time and keep your feed usable. Wireless video is easiest when you treat it like a living setup, not a one-time install.
Final Thoughts on Wireless Camera Systems
A camera with transmitter and receiver gives you a flexible way to watch a space without dragging cables everywhere. It can support home security, remote checks, and outdoor observation with less hassle than a wired install. The key is to match the system to your space, your power plan, and the way you actually want to view the video.
If you start with a clear goal, test the signal early, and choose features that matter for your use, the setup will feel much smoother. Wireless video is not magic, but it is very useful when you understand the basics. With a little planning, you can build a system that stays dependable and easy to use.
Frequently Asked Questions
How far can a camera with transmitter and receiver send video?
The distance depends on the system, the environment, and any walls or objects in the path. Open space usually gives better range, while thick walls and interference can reduce it. It is best to test the actual setup in your location before finalizing the install.
Do these cameras need Wi-Fi to work?
Not always. Some systems use their own wireless link, while others rely on Wi-Fi or mobile networks. If you want remote viewing through an app, Wi-Fi or cellular support is helpful. If you only need a local receiver and monitor, a dedicated wireless pair may be enough.
Can I view the feed on my phone?
Many systems allow phone viewing through an app or web interface, but it depends on the model. If phone access matters to you, check that the receiver or camera supports it before buying. Some setups only output to a monitor or recording device.
What if the video looks choppy or keeps freezing?
Choppy video often points to a weak signal, too much distance, or interference. Try moving the camera or receiver closer, clearing obstacles, or reducing other wireless load nearby. If the problem continues, lowering the video quality setting may help.
Are battery-powered wireless cameras reliable?
They can be reliable, but only if you keep up with battery checks and replacement or recharging. Battery life varies based on use, temperature, and how often the camera transmits video. For critical spots, wired power is often more dependable.
What should I look for if I need night viewing?
Look for strong low-light performance, a sensor that handles darkness well, and a night mode if the system includes one. A camera that looks good in daylight may still struggle after sunset. If possible, test the night image in your actual lighting conditions before settling on a unit.