Dell M 2 Nvme Ssd Install
Installing a Dell M 2 NVMe SSD is one of the best upgrades you can make for faster storage. This guide walks you through every step, from checking compatibility to getting your new drive up and running. Whether you are using a Dell desktop or laptop, you will find clear instructions that make the process simple and stress-free.
Upgrading your Dell system with a Dell M 2 NVMe SSD install can transform your computing experience overnight. You get lightning-fast boot times, quick file transfers, and a more responsive system overall. If you have been thinking about making this upgrade, you are in the right place.
This guide covers everything you need to know. We will walk through compatibility checks, the physical installation process, BIOS configuration, driver setup, and common troubleshooting steps. By the end, you will feel confident handling the entire NVMe SSD installation on your own.
The process is simpler than most people expect. You do not need to be a tech expert. With the right tools and a little patience, you can have your new M.2 NVMe drive running in under 30 minutes. Let us get started.
Key Takeaways
- Compatibility First: Always confirm your Dell model supports NVMe M.2 drives before buying.
- BIOS Setup Matters: Enabling AHCI and NVMe mode in BIOS is essential for proper detection.
- Physical Installation Is Simple: Most Dell systems have a single M.2 slot that takes minutes to access.
- Driver Updates Help Performance: Installing the latest NVMe drivers ensures optimal speed and stability.
- Cloning Saves Time: You can migrate your existing operating system to the new drive without reinstalling Windows.
- Heat Management Counts: M.2 NVMe SSDs can run hot, so consider a heatsink for sustained performance.
📑 Table of Contents
- Why Install a Dell M 2 NVMe SSD?
- Checking Compatibility Before You Begin
- Tools and Preparation
- Step-by-Step Dell M 2 NVMe SSD Install
- Configuring BIOS and Drivers
- Cloning Your Existing Drive (Optional)
- Common Mistakes to Avoid
- Expert Tips for Optimal Performance
- Troubleshooting Common Issues
- Conclusion
Why Install a Dell M 2 NVMe SSD?
Before we dive into the steps, it helps to understand why this upgrade is so worthwhile. Traditional hard drives use spinning disks to read and write data. NVMe SSDs use flash memory, which is dramatically faster.
Here are the key benefits you will notice after a Dell M 2 NVMe SSD install:
- Faster Boot Times: Your system can go from off to desktop in seconds instead of minutes.
- Quick Application Launches: Programs open almost instantly, even heavy ones like video editors or games.
- Speedier File Transfers: Moving large files around becomes a breeze with read speeds that can exceed 3,000 MB/s.
- Lower Power Consumption: NVMe drives use less energy than traditional drives, which can improve laptop battery life.
- No Moving Parts: This means less noise and greater durability compared to mechanical hard drives.
Compared to SATA SSDs, a PCIe NVMe M.2 SSD offers significantly higher throughput. The PCIe interface allows the drive to communicate directly with the CPU, bypassing bottlenecks. This makes it the ideal choice for anyone who wants top-tier performance from their Dell machine.
Checking Compatibility Before You Begin
Not every Dell system supports every NVMe drive. Before you purchase a drive, you need to verify a few things. Skipping this step can lead to frustration and wasted money.
Confirm Your Dell Model Supports M.2 NVMe
Start by checking your Dell model’s specifications. Visit Dell’s official support page and enter your service tag. Look for storage slot information. Most modern Dell desktops and laptops from the last few years include at least one M.2 NVMe slot.
Here is what to look for in the specs:
- M.2 Slot Type: Make sure it supports NVMe, not just SATA M.2 drives.
- Key M Connector: Most NVMe drives use the B or M key. Check which one your Dell system uses.
- PCIe Generation: Newer Dell systems support PCIe Gen 4 or Gen 5. Older models may only support Gen 3.
- Maximum Drive Length: M.2 drives come in different sizes, typically 2280. Ensure your system accommodates this length.
Choosing the Right NVMe Drive
Once you confirm compatibility, it is time to pick a drive. The 1TB NVMe M.2 SSD is the most popular choice for most users. It offers plenty of space for your operating system, applications, and files.
If you need more storage, consider a 2TB NVMe M.2 SSD. These drives are perfect for content creators, gamers, and professionals who work with large files. The price difference between 1TB and 2TB models has narrowed considerably in recent years.
Popular options that work well in Dell systems include drives from Samsung, Crucial, Kingston, and WD. When you buy a 1TB NVMe M.2 SSD, make sure it is the 2280 form factor, which is the standard for most Dell M.2 slots.
Tools and Preparation
Gather everything you need before starting the physical installation. Having all your tools ready prevents interruptions and keeps the process smooth.
Here is your checklist:
- Phillips-head screwdriver: Most Dell cases use small Phillips screws.
- Anti-static wrist strap: This protects your components from static electricity. If you do not have one, touch a metal surface before handling the drive.
- The NVMe M.2 SSD: Handle it by the edges to avoid touching the gold connectors.
- A small container: For holding screws safely.
- A USB drive (optional): If you plan to clone your existing drive, you will need a separate USB drive with cloning software.
Back up your important data before starting. Even though the process is straightforward, there is always a small risk of data loss during hardware changes. A quick backup to an external drive or cloud storage gives you peace of mind.
Step-by-Step Dell M 2 NVMe SSD Install
Now for the main event. Follow these steps carefully and you will have your new drive installed in no time.
Step 1: Power Down and Unplug
Shut down your Dell computer completely. Unplug the power cable from the back of the unit. If you are working on a laptop, remove the battery if possible. This eliminates any risk of electrical damage during the installation.
Step 2: Open the Case
For Dell desktops, remove the side panel. Most Dell towers use thumb screws or standard Phillips screws on the back panel. For laptops, you may need to remove the bottom cover. Check your specific Dell model’s manual for the exact disassembly steps.
Step 3: Locate the M.2 Slot
Inside your Dell system, look for the M.2 slot on the motherboard. It is a small horizontal slot with a single screw holding the retention bracket. On some Dell systems, there may be a heatsink covering the slot. If so, gently remove the heatsink first.
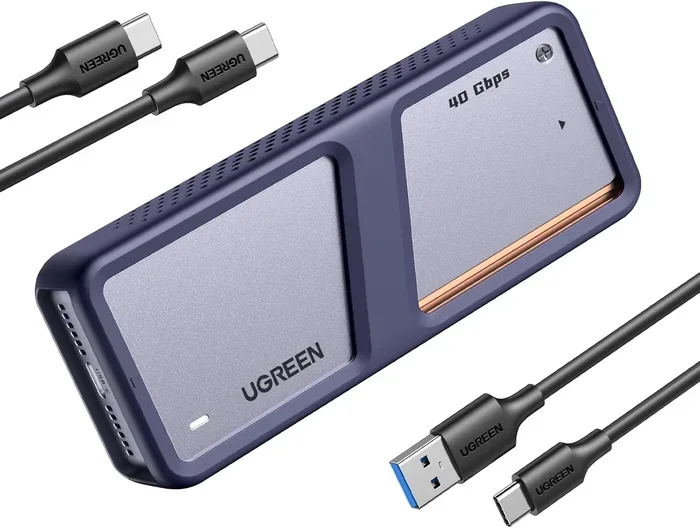
If your Dell system does not have an M.2 slot, you can use an NVMe M.2 SSD enclosure or a PCIe adapter card. These accessories let you use NVMe drives in systems that lack a native M.2 slot.
Step 4: Insert the NVMe SSD
Hold the NVMe drive at a 30-degree angle. Align the gold connectors with the M.2 slot. Gently push the drive down until it sits flat. Use the retention screw to secure it in place. Do not overtighten the screw. A snug fit is all you need.
If you are installing a 2TB NVMe M.2 SSD, the drive may be slightly thicker. Make sure there is enough clearance inside your Dell case for proper airflow.
Step 5: Reassemble and Power On
Replace the side panel or bottom cover. Reconnect the power cable. Turn on your Dell system and enter the BIOS by pressing F2 or DEL during startup (depending on your model).
Configuring BIOS and Drivers
Once the physical installation is complete, you need to configure your system software to recognize the new drive. This step is just as important as the hardware installation itself.
Enabling NVMe in BIOS
Enter your Dell BIOS settings. Navigate to the storage or SATA configuration section. Make sure the SATA mode is set to AHCI. Some Dell systems also have a separate NVMe configuration option. Enable it if present.
If your new drive does not appear in the BIOS, try the following:
- Reseat the drive by removing and reinserting it.
- Check that the drive is fully seated in the slot.
- Update your Dell BIOS to the latest version.
- Reset BIOS settings to default and try again.
Installing NVMe Drivers
Windows 10 and 11 include native NVMe drivers, so you may not need to install anything manually. However, installing the latest drivers from the manufacturer can improve performance and stability.
Visit the Dell support page or the SSD manufacturer’s website to download the latest NVMe drivers. Install them after you have booted into Windows with your new drive connected.
Initializing and Formatting the Drive
If this is a brand-new drive, you need to initialize it before use. Open Disk Management in Windows by right-clicking the Start button and selecting Disk Management. Your new NVMe drive should appear as unallocated space.
Follow these steps:
- Right-click the unallocated space and select New Simple Volume.
- Follow the wizard to assign a drive letter.
- Choose NTFS as the file system.
- Format the drive and wait for the process to complete.
Your new Dell M 2 NVMe SSD is now ready to use. You can move files, install applications, or even set it as your primary boot drive.
Cloning Your Existing Drive (Optional)
If you want to replace your old drive entirely, cloning is the way to go. Cloning copies everything from your existing drive to the new NVMe SSD, including your operating system, applications, and personal files.
Popular cloning tools include Macrium Reflect, Clonezilla, and Samsung Data Migration. Here is the general process:
- Connect both the old drive and the new NVMe drive to your Dell system.
- Open your cloning software and select the source drive (your old drive).
- Select the destination drive (your new NVMe SSD).
- Start the clone and wait for it to complete. This can take anywhere from 30 minutes to several hours depending on the amount of data.
- Once cloning is done, shut down the system and swap the drives if needed.
After cloning, enter the BIOS and make sure the new NVMe drive is set as the primary boot device. Save your settings and reboot. Your system should now boot from the new NVMe M.2 SSD with everything intact.
Common Mistakes to Avoid
Even with clear instructions, mistakes can happen. Here are the most common errors people make during a Dell M 2 NVMe SSD install and how to avoid them.
- Forgetting to check compatibility: Always verify that your Dell system supports NVMe before purchasing a drive.
- Overtightening the screw: The retention screw only needs to be snug. Tightening it too much can damage the motherboard.
- Skipping BIOS updates: An outdated BIOS can cause NVMe drives to go undetected. Update before installing.
- Not enabling AHCI mode: If AHCI is disabled, your system may not recognize the NVMe drive properly.
- Ignoring heat management: NVMe SSDs generate heat. Without proper airflow or a heatsink, performance can throttle over time.
- Forgetting to back up data: Always back up important files before making hardware changes to your system.
Avoiding these mistakes will save you time and prevent potential issues. Take your time with each step, and do not rush the process.
Expert Tips for Optimal Performance
Once your Dell M 2 NVMe SSD install is complete, there are a few extra steps you can take to get the most out of your new drive.
Keep your firmware updated. SSD manufacturers regularly release firmware updates that improve performance, fix bugs, and enhance compatibility. Check the manufacturer’s website periodically for updates.
Enable TRIM support. TRIM helps your NVMe SSD maintain peak performance over time by allowing the operating system to communicate which data blocks are no longer in use. Windows 10 and 11 enable TRIM by default, but you can verify it by running the command fsutil behavior query DisableDeleteNotify in the Command Prompt. A result of 0 means TRIM is active.
Consider a heatsink. If you plan to run intensive workloads like video rendering or large file transfers, a small M.2 heatsink can prevent thermal throttling. Some Dell systems already include a heatsink in the design.
Use the drive as a boot drive. For the best overall system experience, install Windows and your most-used applications on the NVMe drive. This takes full advantage of the speed benefits.
Monitor drive health. Use free tools like CrystalDiskInfo to keep an eye on your SSD’s health metrics. This helps you catch potential issues before they become serious problems.
Troubleshooting Common Issues
If your new NVMe M.2 SSD is not showing up or performing as expected, do not panic. Most issues have simple solutions.
Drive Not Detected in BIOS
This is the most common issue. Try reseating the drive first. If that does not work, check your BIOS settings to ensure NVMe support is enabled. Updating the BIOS to the latest version often resolves detection problems.
Slow Performance After Installation
If your drive is running slower than expected, check a few things. Make sure the SATA mode is set to AHCI in BIOS. Verify that the latest NVMe drivers are installed. Also, confirm that your drive is not experiencing thermal throttling due to overheating.
Windows Not Booting from the New Drive
If you cloned your drive and Windows will not boot, enter the BIOS and check the boot order. Make sure the NVMe drive is listed as the first boot device. You may also need to run the Windows boot repair tool from a recovery USB drive.
Conclusion
A Dell M 2 NVMe SSD install is one of the most impactful upgrades you can make to your Dell system. The process is straightforward, the benefits are immediate, and the cost is reasonable. From faster boot times to quicker file transfers, your new NVMe drive will breathe fresh life into your computer.
Follow the steps in this guide carefully, and you will have your new drive installed and running in no time. Remember to check compatibility first, handle the drive with care, and take your time with the BIOS configuration. Once everything is set up, you will wonder why you did not upgrade sooner.
Do not let a slow system hold you back any longer. Grab a compatible NVMe M.2 SSD, follow this guide, and enjoy the speed difference right away.
Frequently Asked Questions
Do I need special tools to install a Dell M 2 NVMe SSD?
Not really. A basic Phillips-head screwdriver is all you need. An anti-static wrist strap is helpful but optional. Just make sure you work on a clean, flat surface and handle the drive by its edges.
Can I install a 2TB NVMe SSD in my Dell system?
Most modern Dell systems support 2TB NVMe M.2 drives. Check your Dell model’s specifications to confirm the maximum supported capacity. If your system has an M.2 slot that supports PCIe NVMe, a 2TB drive should work fine.
How long does a Dell M 2 NVMe SSD install take?
The physical installation takes about 10 to 15 minutes. If you are also cloning your existing drive, add another 30 minutes to a few hours depending on the amount of data. Setting up the drive in Windows and installing drivers takes just a few more minutes.
Do I need to install drivers after a Dell M 2 NVMe SSD install?
Windows 10 and 11 include built-in NVMe drivers, so your drive should work right out of the box. However, installing the latest drivers from the SSD manufacturer or Dell’s support page can improve performance and fix potential compatibility issues.
What is the difference between M.2 SATA and M.2 NVMe SSDs?
M.2 SATA SSDs use the same SATA interface as traditional drives and are much slower. M.2 NVMe SSDs use the PCIe interface, which is significantly faster. For Dell systems that support NVMe, always choose an NVMe M.2 drive for the best performance.
Can I use an NVMe M.2 SSD in an older Dell system?
It depends on whether your older Dell system has an M.2 slot that supports NVMe. Some older Dell systems only support M.2 SATA drives. Check your Dell model’s specifications or manual to confirm NVMe support before purchasing a drive.