How To Force Your Game To Use A Dedicated GPU On Windows 11
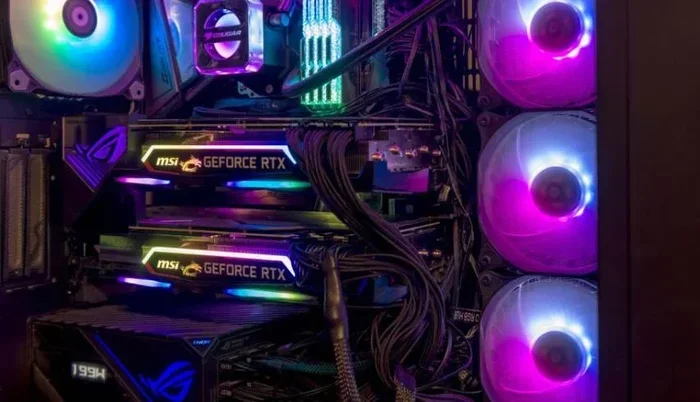
Forcing your game to use a dedicated GPU on Windows 11 is essential for smooth gameplay and better frame rates. Windows 11 has built-in graphics settings that let you choose which GPU runs each app. You can also use NVIDIA Control Panel or AMD Radeon Settings for more control. This guide covers every method so you can get the most out of your graphics card and eliminate lag.
Gaming on a laptop can be frustrating when your system uses the wrong graphics processor. You bought a powerful dedicated GPU but your game still runs slowly. Why does this happen? Windows 11 sometimes defaults to the integrated graphics chip instead of your powerful graphics card. This saves battery but kills performance.
The good news is that forcing your game to use the dedicated GPU is simple. Windows 11 has several built-in tools for this. You can also use GPU-specific software for more control. In this guide, we walk you through every method step by step. Whether you have an NVIDIA or AMD card, you will find the right fix here.
Let us dive in and make sure your games run the way they should. You will learn how to check your current GPU settings, change them easily, and troubleshoot common problems. By the end, your game performance will be noticeably better.
Key Takeaways
- Windows 11 Graphics Settings: The easiest way to set a preferred GPU for any game or app.
- NVIDIA Control Panel: Offers advanced options for NVIDIA GPU users to force dedicated GPU usage.
- AMD Radeon Settings: AMD users can configure GPU preferences through the Radeon software.
- Battery vs. Performance: Switching from power-saving mode to high-performance mode helps your laptop use the right GPU.
- Driver Updates: Keeping your graphics drivers updated ensures smooth GPU switching and better game performance.
- Per-App Configuration: You can set different GPUs for different apps, giving you full control over system resources.
📑 Table of Contents
Why Windows 11 Sometimes Uses the Wrong GPU
Windows 11 tries to be smart about GPU switching. It picks the integrated GPU for everyday tasks like browsing the web or watching videos. This saves battery life. But when you launch a demanding game, the system should switch to your dedicated GPU automatically. Sometimes it does not work that way.
Several reasons cause this problem:
- Power plan settings: If your laptop is on a power-saving plan, it may stick with the integrated GPU to conserve energy.
- Outdated drivers: Old graphics drivers can cause Windows to misidentify which GPU to use.
- Missing app settings: Some apps do not have their GPU preference set, so Windows guesses.
- Battery mode: On laptops, being unplugged often triggers integrated GPU usage.
Understanding why this happens helps you fix it. The next sections show you exactly how to take control of your GPU utilization.
How to Set a Dedicated GPU in Windows 11 Graphics Settings
The easiest and most direct method uses Windows 11 built-in graphics settings. This works for all GPUs, including Intel, NVIDIA, and AMD. You do not need any third-party software.
Step-by-Step Guide
Follow these steps carefully:
- Open Settings. Press the Windows key plus I on your keyboard. The Settings window opens.
- Go to Display. Click on System, then click Display from the left sidebar.
- Find Graphics. Scroll down and click on the Graphics option. This is where you manage GPU preferences.
- Add your game. Click the Browse button. Navigate to your game’s executable file. Select it and click Add.
- Choose the GPU. Click on the added app. Select Options. Choose High Performance from the dropdown menu.
- Save and launch. Close Settings and start your game. It should now use your dedicated GPU.
This method works great for most games. If your game does not appear in the list, make sure you browse for the exact .exe file. You can also check how much RAM your system has to ensure it supports the game. Use how to check the RAM on my laptop if you are unsure.
Quick Tips for Windows Graphics Settings
- Always browse for the .exe file. Searching sometimes does not find the right app.
- Set GPU preference before launching. Changing it while a game is running may not take effect.
- Check both modes. Some games show Power Saving and High Performance options.
Using NVIDIA Control Panel to Force Dedicated GPU
If you have an NVIDIA graphics card, the NVIDIA Control Panel gives you more powerful options. This tool lets you set GPU preferences for individual games with precision.
Setting Up NVIDIA Control Panel
Here is how to use it:
- Right-click your desktop. A context menu appears.
- Select NVIDIA Control Panel. The panel opens with many options on the left side.
- Go to Manage 3D Settings. Click on this option under the 3D Settings section.
- Switch to the Program Settings tab. You will see a dropdown to select your game.
- Choose your game. Select it from the dropdown or click Add to browse for the .exe file.
- Set the preferred GPU. Under the Select preferred graphics processor dropdown, choose High-performance NVIDIA processor.
- Apply the changes. Click Apply at the bottom right corner.
This method gives you more control than Windows Settings. You can also adjust shader cache size, power management mode, and other settings that affect game performance. For more on GPU-related topics, check out is Fortnite a CPU or GPU game to understand how different games use your hardware.
Advanced NVIDIA Settings Worth Knowing
- Texture filtering quality: Set this to High for better image quality.
- Vertical sync: Turn this off for lower input lag in competitive games.
- Power management mode: Set to Prefer Maximum Performance for the best results.
Using AMD Radeon Settings for GPU Selection
AMD users have a similar tool called AMD Radeon Software (formerly AMD Radeon Settings). This software provides granular control over your AMD graphics card settings.
How to Configure AMD Radeon for Dedicated GPU Use
Follow these steps:
- Open AMD Radeon Software. Right-click your desktop and select AMD Radeon Software. If you do not see it, search for it in the Start menu.
- Go to the Gaming tab. Click on the Gaming icon at the top of the software window.
- Add your game. Click Add a Game. Browse for your game’s executable file and add it.
- Set GPU profile. Select your added game from the list. Look for the Graphics Profile option.
- Choose High Performance. Select the profile that forces the dedicated GPU to run the game.
- Apply and close. Your settings are saved automatically.
AMD Radeon Software also lets you fine-tune GPU acceleration settings. You can adjust fan speeds, overclock your card, and monitor real-time performance metrics. These features help you get the most out of your graphics card during gaming sessions.
Understanding GPU Switching on AMD Laptops
Many AMD laptops use a technology called AMD Smart Access or switchable graphics. This allows the system to switch between integrated and dedicated GPUs automatically. However, manual configuration through Radeon Software ensures the right GPU is always used for your games. This is especially helpful for laptop GPU setups where both chips are present.
Troubleshooting Common GPU Switching Problems
Sometimes even after setting the correct GPU, games still use the wrong one. Here are common fixes for these issues.
Update Your Graphics Drivers
Old drivers are the number one cause of GPU switching problems. Always keep your drivers up to date. For NVIDIA, use GeForce Experience. For AMD, use AMD Software. Intel integrated GPU users can use Intel Driver & Support Assistant.
Check Your Power Plan
Windows power plans affect which GPU your system uses. To change it:
- Open Control Panel. Search for Power Options in the Start menu.
- Select High Performance. This plan ensures your dedicated GPU stays active.
- Change plan settings. Click Change plan settings next to High Performance. Set both On battery and Plugged in to High Performance.
For laptops, keeping the charger plugged in while gaming is important. Battery-saving modes often force the system to use the integrated graphics chip instead of the dedicated one.
Verify Your GPU Is Working
Before troubleshooting further, make sure your graphics card is properly recognized by Windows:
- Open Device Manager. Press Windows key plus X and select Device Manager.
- Expand Display adapters. You should see your dedicated GPU listed here.
- Check for errors. If you see a yellow triangle, your driver may need reinstallation.
You can also check your system’s overall performance. If your laptop has low memory, games may struggle regardless of which GPU is active. Consider how to increase RAM on your laptop to improve overall system performance.
Expert Tips for Maximizing GPU Performance
Once you have forced your game to use the dedicated GPU, you can take extra steps to boost performance even more.
Monitor GPU Usage While Gaming
Use the Task Manager to see if your game is actually using the right GPU. Press Ctrl plus Shift plus Esc to open Task Manager. Go to the Performance tab. Click on your GPU. Look at the utilization percentage while your game runs. If it stays low, something is still wrong with your GPU selection settings.
Adjust In-Game Graphics Settings
Even with the right GPU, in-game settings matter a lot:
- Lower shadow quality for better frame rates.
- Turn off anti-aliasing if your frame rate is too low.
- Set resolution to match your native display. Running at a lower resolution than your screen supports wastes GPU potential.
Keep Windows 11 Updated
Microsoft regularly releases updates that improve graphics performance and fix bugs related to GPU switching. Go to Settings, click Windows Update, and install any pending updates. This simple step can resolve many GPU-related issues.
Consider Your Integrated GPU
Some processors come with capable integrated graphics that can handle lighter games well. For example, the Ryzen 7 5700G has strong built-in graphics. To understand how your processor’s GPU compares to a dedicated card, check out what GPU is the Ryzen 7 5700G equivalent to for a detailed comparison.
Key Takeaways
- Windows 11 Graphics Settings: The easiest way to set a preferred GPU for any game or app.
- NVIDIA Control Panel: Offers advanced options for NVIDIA GPU users to force dedicated GPU usage.
- AMD Radeon Settings: AMD users can configure GPU preferences through the Radeon software.
- Battery vs. Performance: Switching from power-saving mode to high-performance mode helps your laptop use the right GPU.
- Driver Updates: Keeping your graphics drivers updated ensures smooth GPU switching and better game performance.
- Per-App Configuration: You can set different GPUs for different apps, giving you full control over system resources.
Frequently Asked Questions
Can I set a different GPU for each app on Windows 11?
Yes, absolutely. Windows 11 lets you set a preferred GPU for every individual app. Go to Settings, then Display, then Graphics. Add each app and choose its preferred graphics processor. This means you can set your browser to use integrated graphics and your game to use the dedicated GPU.
Why does my game still use the integrated GPU even after I changed the settings?
This usually happens when your graphics drivers are outdated. Update your GPU drivers first and try again. Also make sure you selected High Performance and not Power Saving in the graphics settings. Restarting your laptop after making changes can also help apply the new settings correctly.
Do I need to be plugged in to use the dedicated GPU?
For laptops, yes. Most laptops switch to integrated graphics when running on battery to save power. Plug in your laptop while gaming to ensure the dedicated GPU stays active. You can also change your power plan to High Performance for the best results.
Will forcing the dedicated GPU drain my laptop battery faster?
Yes, it will. Dedicated GPUs use significantly more power than integrated graphics. This is why laptops default to the integrated GPU for light tasks. Always plug in your laptop when gaming to avoid battery drain and to keep your game performance at its best.
Can I use both GPUs at the same time on Windows 11?
Windows 11 does not typically run both GPUs simultaneously for gaming. The system assigns one GPU per app. However, your integrated GPU may still handle display output while the dedicated GPU handles rendering. This is normal and does not reduce performance.
How do I know which GPU my game is currently using?
Open Task Manager by pressing Ctrl plus Shift plus Esc. Go to the Performance tab and click on your GPU. While your game runs, check the utilization percentage. If the dedicated GPU shows high usage, your settings worked correctly. If the integrated GPU shows high usage instead, go back and double-check your GPU preference settings.
=== CONCLUSION ===
Forcing your game to use the dedicated GPU on Windows 11 is one of the simplest ways to dramatically improve your gaming experience. You have several methods available, from the built-in Windows Graphics Settings to NVIDIA Control Panel and AMD Radeon Software. Each method gives you control over which GPU runs each app on your system.
Start with the Windows 11 Graphics Settings for a quick fix. Use NVIDIA or AMD software for more advanced control. Keep your drivers updated and your power plan set to High Performance. These small changes make a huge difference in game performance and frame rates.
Now that you know how to take control of your GPU switching, go ahead and apply these steps. Your games will run smoother, look better, and respond faster. Enjoy the full power of your dedicated graphics card and never let Windows guess which GPU to use again.