How To Let Standard Users Run Programs With Admin Rights

Running programs with admin rights as a standard user in Windows 11 or 10 is easier than you think. You can use built-in tools like the Local Security Policy, Group Policy Editor, or a simple shortcut trick to grant elevated permissions without giving away full admin access. This guide walks you through every method safely and clearly.
Have you ever handed your laptop to someone using a standard account and watched them struggle to open a program? They click, they double-click, and nothing happens. A tiny shield icon appears, and they get stuck. This is a common frustration in households and offices where not everyone has an administrator account.
The good news is that you do not need to give full admin rights to every user. Windows 11 and Windows 10 offer several built-in ways to let standard users run specific programs with admin rights. You can do this through the Local Security Policy, the Group Policy Editor, or even a simple shortcut trick. Each method has its own use case, and I will walk you through all of them.
Before we dive in, let me explain why this matters. Running programs as an administrator gives them elevated permissions. This means the program can make changes to your system that a normal user cannot. It is powerful, but it also comes with risks. So, we will cover not just how to do it, but how to do it safely.
Key Takeaways
- Multiple Methods Available: You can enable standard user admin rights through Local Security Policy, Group Policy Editor, or a simple shortcut trick.
- Safety First: Always understand the risks before granting elevated permissions to a standard account.
- Windows 11 and 10 Compatible: Every method works on both Windows 10 and Windows 11.
- No Third-Party Software Needed: All solutions use built-in Windows tools.
- Reversible Changes: You can undo any changes you make at any time.
- Best for Shared Computers: Ideal for family PCs or office setups where multiple users need specific access.
📑 Table of Contents
- Why Standard Users Need Admin Rights for Certain Programs
- Method 1: Use the Local Security Policy Editor
- Method 2: Use the Group Policy Editor
- Method 3: Create a Shortcut with Elevated Privileges
- Method 4: Use the Built-in Administrator Account
- Comparison of Methods
- Common Mistakes to Avoid
- Expert Insights and Best Practices
- Conclusion
Why Standard Users Need Admin Rights for Certain Programs
Every Windows computer has different types of user accounts. The two main ones are the administrator account and the standard user account. An administrator can change anything on the system. A standard user can only use the computer for everyday tasks like browsing the web or writing documents.
But here is the problem. Some programs need elevated permissions to work correctly. They might need to write to system folders, modify the registry, or access protected drives. When a standard user tries to open such a program, Windows blocks it. This is where User Account Control, or UAC, steps in.
UAC is a security feature that asks for permission before allowing changes. When you see that UAC prompt asking “Do you want to allow this app to make changes,” that is admin approval mode at work. For standard users, this prompt is different. They may not have the credentials to approve it.
Granting admin rights for specific programs solves this issue. It lets trusted users run the tools they need without compromising the overall security of the system. Think of it like giving someone a key to one room instead of the entire building.
Method 1: Use the Local Security Policy Editor
The Local Security Policy Editor is one of the most reliable ways to let standard users run programs with admin rights. It is built into Windows 11 Pro, Enterprise, and Education editions. Unfortunately, it is not available in the Home edition by default. But there is a workaround for that.
Step-by-Step Guide
Follow these steps carefully. Each one moves you closer to the solution.
- Press the Windows key and type secpol.msc.
- Press Enter to open the Local Security Policy window.
- On the left panel, expand Local Policies and click Security Options.
- Scroll down until you find User Account Control: Admin Approval Mode for the Built-in Administrator account.
- Double-click it and set it to Enabled.
- Click OK and restart your computer.
After the reboot, the built-in administrator account will run in admin approval mode. This means standard users can use it to launch programs with elevated permissions. However, you must set a password for the built-in admin account first. Without a password, this method will not work.
Important Notes
This method affects the built-in administrator account, not your regular admin account. It is a subtle but important distinction. Also, be careful when using this approach. The built-in admin account has full system access, so protect it with a strong password.
If you are on Windows 11 Home and cannot find the Local Security Policy Editor, do not worry. Move on to the next method. There are other ways to achieve the same result.
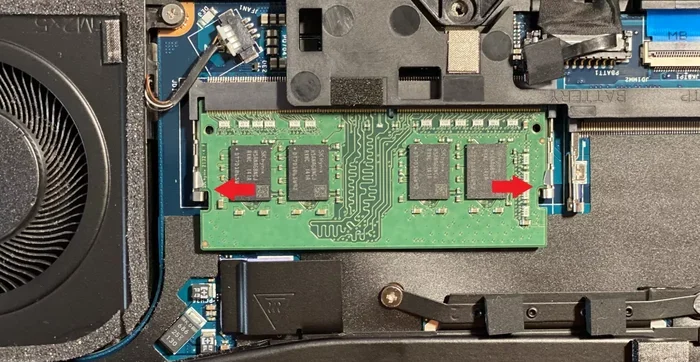
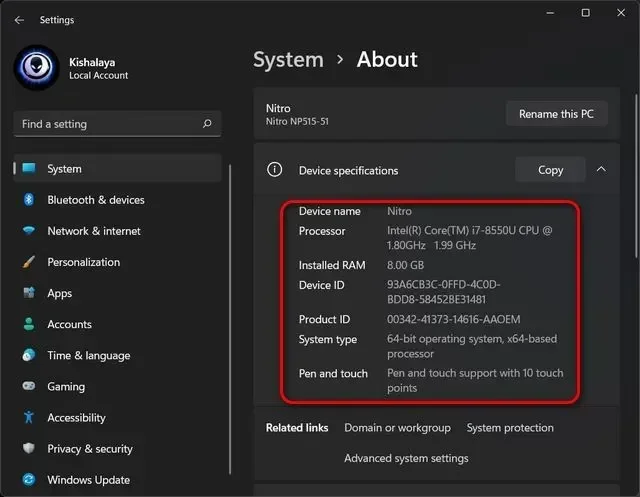
Before trying any of these methods, it is a good idea to check your current RAM and system specs to make sure your computer can handle the changes smoothly. If your system feels sluggish, consider how to upgrade your laptop RAM for better performance.
Method 2: Use the Group Policy Editor
The Group Policy Editor, also known as gpedit.msc, is another powerful built-in tool. It gives you fine-grained control over how Windows behaves. This method works on Windows 11 Pro, Enterprise, and Education editions.
How to Access the Group Policy Editor
Getting to the Group Policy Editor is straightforward. Press Windows key plus R to open the Run dialog. Type gpedit.msc and press Enter. The editor window will open with a tree-style menu on the left side.
Configuring Standard User Elevation
Once you are in the Group Policy Editor, follow these steps:
- Navigate to Computer Configuration on the left panel.
- Expand Windows Settings, then click Security Settings.
- Click on Local Policies and select Security Options.
- Look for User Account Control: Behavior of the elevation prompt for standard users.
- Double-click it to open the properties window.
- Change the setting to Elevate without prompting.
- Click OK and restart your PC.
This setting tells Windows to automatically elevate standard user requests without showing a prompt. It is convenient, but it reduces the security layer that UAC provides. Use this method only on trusted computers where you control all the users.
When to Use This Method
The Group Policy Editor method works best in office or school environments. If you manage multiple computers, you can apply these settings across the network. It saves time and ensures consistency. For a single home PC, the shortcut method might be simpler and safer.
Remember, you can always revert these changes. Simply go back to the same setting and choose a different option. Windows keeps track of your previous configurations, so you are never locked in.
Method 3: Create a Shortcut with Elevated Privileges
This is the simplest and most accessible method. It works on all editions of Windows 10 and Windows 11, including Home. You do not need any special tools or editor windows. Just a few clicks and you are done.
Step-by-Step Instructions
Here is how you create an elevated shortcut for any program:
- Right-click on your desktop or in any folder.
- Select New and then click Shortcut.
- In the location field, type the path to the program executable. For example, C:\Program Files\AppName\app.exe.
- Click Next and give the shortcut a name.
- Right-click the new shortcut and select Properties.
- Go to the Compatibility tab.
- Check the box that says Run this program as an administrator.
- Click Apply and then OK.
Now, when a standard user double-clicks this shortcut, Windows will ask for admin credentials. The user will need the admin username and password to proceed. This keeps your main admin account secure while still allowing the program to run with elevated rights.
Tips for Managing Elevated Shortcuts
You can pin this shortcut to the taskbar or Start menu for easy access. If you have multiple programs that need admin rights, create separate shortcuts for each one. Label them clearly so users know which ones require admin credentials.
Also, consider placing these shortcuts in a dedicated folder. This keeps them organized and prevents accidental clicks on the wrong program. A little organization goes a long way in keeping your system clean and secure.
Keep in mind that this method requires the standard user to know the admin password. If you are setting this up for a family member, make sure they understand the importance of keeping that password private. You do not want anyone running random programs with full system access.
Method 4: Use the Built-in Administrator Account
Windows hides a built-in administrator account that is disabled by default. You can enable it and use it to run programs with full admin rights. This method is useful when you need temporary elevated access without changing any group policies.
How to Enable the Built-in Administrator
Open Command Prompt as an administrator. Type the following command and press Enter:
net user administrator /active:yes
Now, log out of your current account and sign in with the built-in administrator. You can run any program with full elevated permissions from this account. When you are done, log back into your standard or admin account.
Security Considerations
This method is powerful but risky. The built-in admin account has no UAC protection. Every program you run from this account gets full system access. If you accidentally install malware, it can damage your system without any warning prompts.
Always disable the built-in admin account after you are finished. Use this command in an elevated Command Prompt:
net user administrator /active:no
Treat this account like a master key. Only use it when absolutely necessary and never leave it logged in unattended.
Comparison of Methods
Each method has its strengths and weaknesses. Here is a quick comparison to help you choose the right one for your situation.
| Method | Works on Windows Home | Difficulty | Security Level |
|---|---|---|---|
| Local Security Policy | No (Pro and above only) | Medium | High |
| Group Policy Editor | No (Pro and above only) | Medium | Medium |
| Elevated Shortcut | Yes | Easy | High |
| Built-in Administrator | Yes | Easy | Low |
For most home users, the elevated shortcut method is the best choice. It is simple, safe, and works on every edition of Windows. For IT professionals managing multiple machines, the Group Policy Editor or Local Security Policy offers more control and scalability.
Common Mistakes to Avoid
Even with the best intentions, mistakes can happen. Here are some common errors people make when granting admin rights to standard users.
- Giving away the admin password: Never share your primary admin password. Use a separate admin account or the built-in admin for elevation purposes.
- Skipping the disable step: If you enable the built-in administrator, always disable it when you are done.
- Running every program as admin: Only grant admin rights to programs that truly need it. Running everything elevated weakens your system security.
- Ignoring UAC prompts: If you see a UAC prompt you do not recognize, do not approve it. It could be a sign of malware trying to gain access.
- Not testing after changes: Always test the new settings with a standard user account before relying on them. Make sure the program runs as expected.
Avoiding these mistakes keeps your system secure and your users happy. A little caution goes a long way in maintaining a healthy Windows environment.
Expert Insights and Best Practices
Managing user permissions is an ongoing responsibility. Here are some expert tips to keep your system running smoothly.
First, create a dedicated admin account just for system management. Do not use your daily admin account for everything. When you need to install software or change system settings, switch to the dedicated admin account. This limits your exposure to potential threats.
Second, keep your system updated. Windows updates often include security patches that fix vulnerabilities related to privilege escalation. An up-to-date system is a safer system.
Third, consider using standard user accounts as the default for everyone. Only elevate permissions when absolutely necessary. This follows the principle of least privilege, which is a cornerstone of good security practice.
Finally, if your computer is running slowly or struggling with multiple user accounts, check your system resources. Sometimes a RAM upgrade can make a huge difference. If you are not sure what RAM your laptop supports, you can check which RAM is compatible with your laptop before making any purchases.
Conclusion
Letting standard users run programs with admin rights in Windows 11 or Windows 10 is a practical skill that every PC user should know. Whether you use the Local Security Policy, Group Policy Editor, elevated shortcuts, or the built-in administrator account, each method gives you a way to balance convenience with security.
The key is to understand what each method does and to choose the one that fits your needs. The shortcut method is great for quick, simple fixes. The policy-based methods offer more control for advanced users. And the built-in admin account works well for temporary tasks.
Always remember to reverse any changes when you no longer need them. Keep your admin credentials secure and your system updated. With the right approach, you can give standard users the access they need without putting your system at risk.
Try the method that feels most comfortable for you. Test it with a standard user account, and make sure everything works as expected. Once you see it in action, you will wonder how you ever managed without it.
Frequently Asked Questions
Can I enable admin rights for a standard user on Windows 11 Home?
Yes, you can. The elevated shortcut method works on all editions, including Windows 11 Home. You do not need the Local Security Policy or Group Policy Editor for this approach. Simply create a shortcut and enable the “Run as administrator” option in the Compatibility tab.
Is it safe to let standard users run programs as admin?
It can be safe if you follow best practices. Only grant admin rights to trusted programs and users. Never share your primary admin password. Use the built-in administrator account or a separate admin account for elevation, and disable it when you are done.
What happens if a standard user tries to run a program without admin rights?
Windows will block the program or show a UAC prompt asking for admin credentials. The standard user will not be able to approve the prompt unless they have the admin username and password. The program will remain closed until someone with admin rights provides the credentials.
Can I undo these changes easily?
Absolutely. Every method described in this guide is reversible. You can disable the built-in admin account, revert Group Policy settings, or simply delete the elevated shortcut. Windows keeps your system flexible and allows you to change permissions at any time.
Do I need to restart my computer after making these changes?
In most cases, yes. A restart ensures that all new policy settings take effect. For the shortcut method, no restart is needed since it works immediately. But for Local Security Policy and Group Policy changes, always reboot your PC before testing.
How do I know which programs need admin rights?
Programs that modify system files, write to protected folders, or change the registry typically need admin rights. If a program keeps crashing or showing permission errors, it might need elevated access. Check the program’s documentation or try running it as an administrator to see if the issue is resolved.