If your NVMe SSD falls out or becomes loose, your computer will almost certainly fail to boot or crash immediately. This physical disconnection causes instant system instability and can lead to severe data corruption or permanent loss on the affected drive. The primary risk isn’t just the disconnection itself, but the potential for physical damage to the SSD’s connectors or the motherboard slot during the event. Prevention through proper mounting and regular checks is the only reliable strategy to avoid this catastrophic failure.
You’ve just finished building a sleek new gaming PC or upgraded your laptop for a speed boost. That tiny, powerful NVMe SSD is your pride and joy, holding your operating system, games, and precious files. But what happens if that high-performance drive, seemingly so secure in its M.2 slot, actually falls out? It’s a nightmare scenario that’s more common than you might think, and the consequences range from a simple boot error to permanent, catastrophic data loss. This guide will walk you through exactly what happens in that moment of disconnection, why it occurs, and most importantly, how to prevent it from ever happening to you.
First, let’s establish what we’re talking about. An NVMe SSD (Non-Volatile Memory Express Solid State Drive) connects via the M.2 interface, a small, gumstick-shaped slot on your motherboard. Unlike a traditional SATA drive with its thick cables, the M.2 SSD is screwed directly into the board. This direct physical connection is a marvel of modern design, but it also means the drive’s security relies almost entirely on one tiny screw. When that connection is compromised—when the SSD falls out or becomes loose—the entire digital world that depends on it comes to a screeching halt. The effects are immediate, severe, and often misunderstood. We’re going to dissect the entire chain reaction, from the physical “pop” to the potential loss of your digital life.
Key Takeaways
- Immediate System Failure: A dislodged NVMe SSD causes an instant boot failure, POST error, or sudden system crash because the primary operating system drive is no longer communicating with the motherboard.
- High Risk of Data Corruption: Even a partial, intermittent connection during operation can corrupt file systems and specific files, making data inaccessible even if the SSD is reseated.
- Potential Physical Damage: The act of the SSD falling out can bend or break the delicate pin connectors on the SSD or the M.2 slot on the motherboard, requiring costly repairs.
- Prevention is Paramount: Proper installation with the correct screw, use of standoffs or support brackets, and avoiding system movement are the most effective ways to prevent an NVMe SSD from falling out.
- Thermal Pads Can Be a Factor: Incorrectly sized or placed thermal pads can create upward pressure, slowly working an SSD loose over time, especially under thermal cycling.
- Laptops Are Particularly Vulnerable: The frequent movement and jostling of laptops make NVMe SSDs more susceptible to vibration-induced loosening compared to desktop systems.
- Reseating is the First Step, Not the Solution: While reseating the drive may restore function, it does not guarantee data integrity; a full backup and system check are mandatory afterward.
📑 Table of Contents
- The Moment of Dislodgement: What “Falling Out” Really Means
- The Domino Effect: What Happens to Your System
- Data Loss and Corruption: The Real Cost
- Hardware Damage: Beyond the Lost Connection
- Troubleshooting and Recovery Steps
- Prevention: How to Secure Your NVMe SSD for Life
- Conclusion: Respect the Tiny Powerhouse
The Moment of Dislodgement: What “Falling Out” Really Means
The phrase “an NVMe SSD falls out” conjures an image of the drive physically dropping out of the slot and onto the motherboard or case floor. While that dramatic scenario can happen, especially during transport or a major jolt, the reality is often more subtle and equally dangerous. “Falling out” is a spectrum of connection failures, and understanding this spectrum is key to diagnosing the problem.
Partial vs. Complete Disconnection
A complete disconnection is straightforward: the SSD is no longer making electrical contact with the M.2 slot. The system powers on, but the BIOS/UEFI doesn’t list the drive. You get a “No Boot Device Found” or “Operating System Not Found” error. It’s a clean, obvious failure. However, a partial or intermittent disconnection is a stealthier villain. The SSD might be slightly askew, with only some of its gold contact pins (the “fingers”) touching the slot. This can cause:
- Intermittent Crashes: The system works fine until a vibration or thermal expansion slightly shifts the drive, causing a blue screen of death (BSOD) or a sudden freeze.
- Slow Performance and Errors: The drive might be recognized but operates at a fraction of its speed, with constant I/O errors in the system logs and files failing to copy or open.
- Corruption During Critical Writes: This is the most dangerous. If the connection drops while the drive is writing a crucial system file, a game save, or a document, that file can become permanently corrupted.
The Culprits: Why Does an NVMe SSD Become Loose?
It doesn’t just happen randomly. Several factors contribute to an SSD working its way loose over time or during an event.
- Improper Installation: This is the number one cause. The retaining screw must be snug but not overtightened. Too loose, and the drive can pivot. Too tight, and you risk stripping the screw hole or warping the motherboard.
- Vibration and Movement: Desktops are generally safe on a stationary desk. But if you frequently move your PC case (LAN parties, cleaning), the constant jostling can slowly back the screw out. Laptops are in a constant state of vibration from travel and use, making them prime candidates for this issue.
- Thermal Expansion and Contraction: Under heavy load, an NVMe SSD can get very hot. Metal expands when hot and contracts when cool. If the screw is too tight, this cycling can create micro-movements. More commonly, poorly designed or incorrectly placed thermal pads are a major offender. A thick, squishy pad between the SSD and a heatsink or backplate can create upward pressure as it compresses and expands, literally pushing the drive up and out of its seat over weeks or months.
- Shock and Impact: A drop, a heavy object hitting the case, or even a forceful bump can instantly dislodge a marginally secured drive.
- Motherboard Flex: In large, heavy cases or during rough handling, the motherboard itself can flex slightly, putting stress on the M.2 slot and its solder points, potentially leading to a loose connection.
The Domino Effect: What Happens to Your System
The moment the electrical connection is broken, a cascade of failures begins. The severity depends entirely on what the drive was doing at that exact second and whether it was your boot drive.
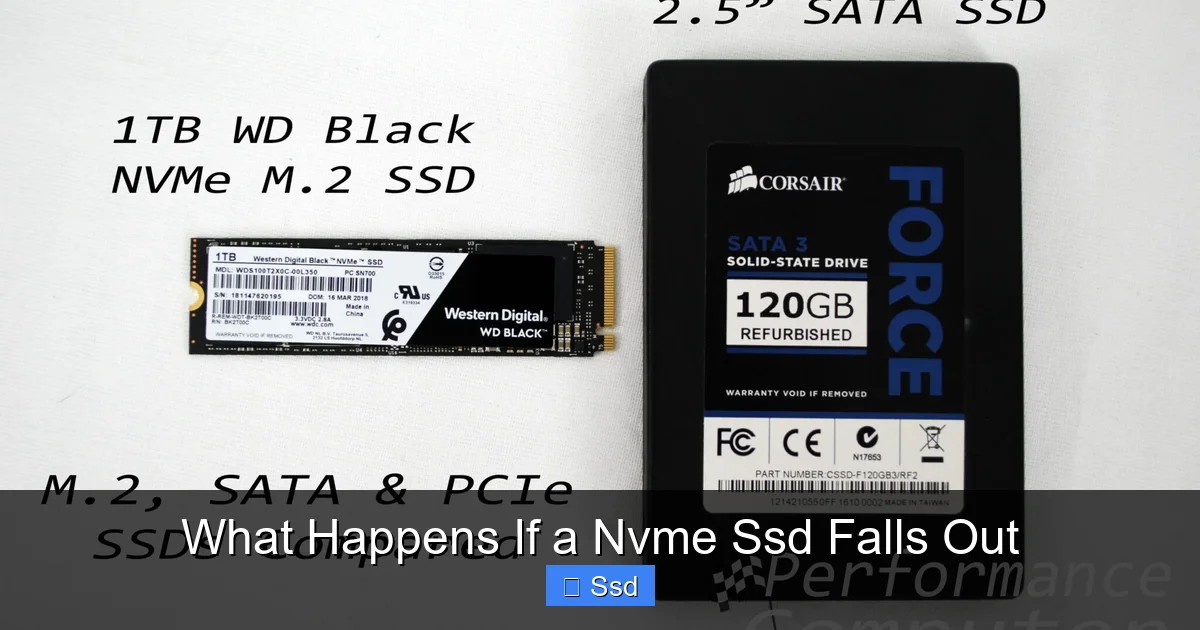
Visual guide about What Happens If a Nvme Ssd Falls Out
Image source: driveshero.com
Scenario 1: Your Boot Drive Goes Dark
If the NVMe SSD that falls out contains your operating system (Windows, Linux, macOS), the effect is immediate and total. You press the power button. Fans spin, lights come on, but the screen remains black or displays a manufacturer logo followed by an error. You’ve entered the world of “no bootable device.” The system has no instructions on what to do next because its brain—the OS on that SSD—is inaccessible. This is a hard stop. Nothing happens until the drive is reconnected.
Scenario 2: A Secondary Drive Disappears
If the dislodged SSD is a secondary drive used for games, media, or work projects, your system will likely still boot from your primary drive. However, you’ll quickly notice that your massive game library, your video editing projects, or your important documents are missing. The drive letter in File Explorer (Windows) or mount point (macOS/Linux) is gone. Any application trying to access files on that drive will freeze or crash. It’s a partial, but still major, failure.
Scenario 3: The Silent Corruptor (Intermittent Connection)
This is the worst-case scenario for data integrity. The drive is technically “in” but not properly seated. The system sees it, you can browse files, but every read/write operation is a gamble. You might experience:
- Files that won’t open, with error messages like “The file is corrupted and cannot be opened.”
- Applications that crash when trying to save progress.
- A gradual degradation of the drive’s file system, where more and more files become inaccessible until the drive is finally rejected by the OS altogether.
- In the background, the drive’s internal controller might be struggling with failed write cycles, leading to bad sectors and long-term damage to the NAND flash memory.
Data Loss and Corruption: The Real Cost
The immediate system failure is an inconvenience. The potential loss of your data is the true tragedy. When an NVMe SSD falls out during operation, the risk to your files is extreme and multifaceted.
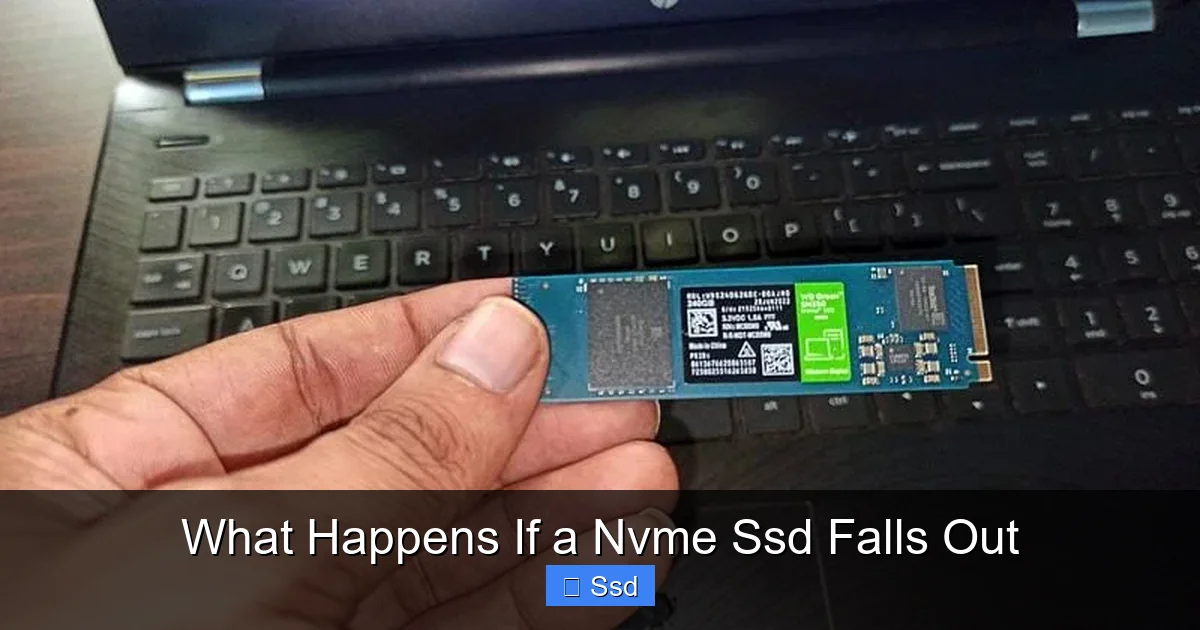
Visual guide about What Happens If a Nvme Ssd Falls Out
Image source: storedbits.com
How Data Gets Wrecked
Solid-state drives have sophisticated controllers that manage data writes. They don’t just magically store bits; they perform wear leveling, garbage collection, and write amplification behind the scenes. A sudden loss of power or connection during a write cycle is one of the most damaging events for an SSD’s data integrity. Here’s what can happen:
- File System Corruption: The master file table (like NTFS’s $MFT or ext4’s inode table) can be left in an inconsistent state. The OS knows *a* file exists but has no idea where its data blocks are, rendering it lost. Entire directories can vanish.
- Partial File Writes: Imagine saving a 10GB video project. The write gets 8GB in when the connection drops. You now have a 10GB file that is 80% garbage data. It’s not recoverable by standard means.
- Database and Project File Destruction: Complex files like Photoshop (.PSD), video project files (.prproj), or databases (.mdb, .sql) are not single files but complex containers with internal links. A mid-write corruption can break these links, making the entire project file a useless, unopenable blob.
- Encryption Key Loss: If you use full-disk encryption (like BitLocker or FileVault), the encryption metadata is stored on the drive. Corruption here can make the entire drive permanently inaccessible, even with the correct password, because the key to decrypt it is damaged.
The Myth of “Just Reseating”
Your first instinct after a crash will be to open the case, check the screw, and reseat the SSD. The system might boot up normally! This is dangerously deceptive. The act of disconnection and the subsequent electrical instability may have already corrupted critical sectors. Your system might appear to work, but you could have:
- Corrupted system files causing random future crashes.
- A failing SSD with a growing list of bad blocks that will eventually cause more data loss.
- Silently corrupted personal files you haven’t opened yet.
- The boot process might complete, but Windows Update or other background services could fail because core files are damaged.
Reseating is a diagnostic step, not a cure. After reseating, your first and only priority must be to back up all accessible data from that drive immediately and plan to replace it.
Hardware Damage: Beyond the Lost Connection
We often think of the SSD as a sealed, robust chip. But the physical act of it becoming dislodged can cause tangible damage to both the drive and your motherboard.
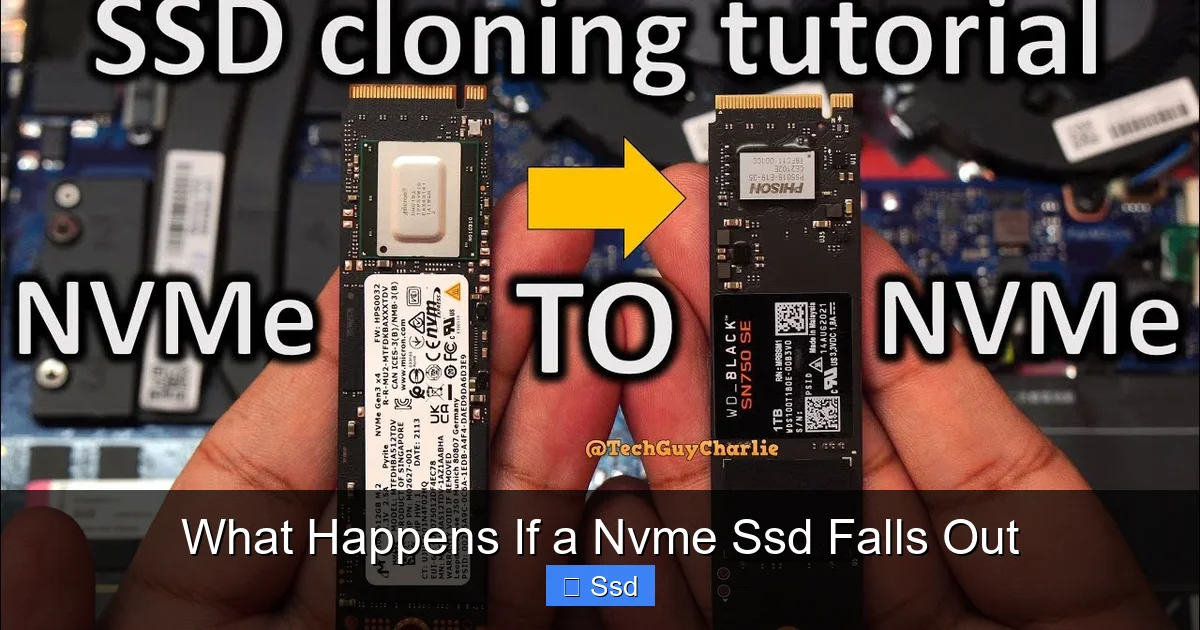
Visual guide about What Happens If a Nvme Ssd Falls Out
Image source: driveshero.com
Damage to the SSD Itself
The M.2 SSD has a series of gold-plated electrical contacts on its edge. If the drive is pushed sideways or at an angle while partially engaged, these delicate pins can bend. A bent pin might still make contact, causing intermittent issues, or it might break off entirely. While the NAND chips and controller are soldered and safe, a damaged PCB trace (the tiny copper lines on the circuit board) from impact can render the entire drive dead. The SSD’s own PCB can also crack if it strikes a metal standoff or screw.
Damage to the Motherboard’s M.2 Slot
This is often the more expensive problem. The M.2 slot is soldered directly onto the motherboard. The plastic housing and the tiny metal pins inside are fragile. If an SSD falls out with force, it can:
- Bend or Break Pins: One or more of the tiny pins in the slot can be bent sideways. This might affect only one PCIe lane, reducing speed, or break multiple pins, killing the entire slot.
- Crack the Solder Joints: The shock can cause the microscopic solder balls connecting the slot to the motherboard to develop hairline cracks. This leads to a perfectly seated SSD that still doesn’t work because the electrical connection is broken under the surface. These cracks can be invisible to the naked eye.
- Damage the Slot’s Retention Mechanism: The plastic notch that holds the SSD in place can crack, meaning even with the screw tightened, the drive has play and will work loose again.
The Hidden Cost of Thermal Pads
We must revisit thermal pads. Many modern motherboards with M.2 heatsinks come with pre-applied pads. If these pads are too thick, too soft, or incorrectly positioned (e.g., pushing against the *side* of the SSD instead of just the top), they create a constant force. As the SSD heats up and expands, this force can slowly push it upward, millimeter by millimeter, until the connection is compromised. It’s a slow-motion failure that mimics a “loose screw” but is actually a pressure issue. Always verify that a heatsink’s thermal pad only makes contact with the top surface of the NAND chips and controller, never the sides or the connector edge.
Troubleshooting and Recovery Steps
So, you’ve had the crash. You suspect the NVMe SSD has fallen out. Here is your action plan, in order of priority. Time and further power cycles can worsen data corruption.
Step 1: Power Down and Inspect
Shut down the computer completely and unplug the power cable. Open the case. Visually inspect the M.2 slot and the SSD. Is the screw missing or loose? Is the drive sitting perfectly flush with the motherboard, or is it raised at an angle? Gently try to wiggle it side-to-side. Any movement means it’s not properly engaged. Do not force it.
Step 2: Reseat with Care
Unscrew the retaining screw. Gently pull the SSD straight out by its edges—do not touch the gold contacts. Look at both the SSD’s connectors and the motherboard’s M.2 slot. Use a can of compressed air to blow out any dust or debris. Align the notch on the SSD with the key in the slot. Insert it firmly but gently at a 0-degree angle, pushing it straight in until you feel it seat fully. It should not require excessive force. Hold it in place and screw it down. Start the screw by hand to avoid cross-threading, then tighten it snugly with a screwdriver. It should be tight enough that the drive does not wiggle, but you should not need to apply significant torque.
Step 3: Boot and Assess
Power on. If it boots, fantastic. But now, the critical phase begins.
- Immediately back up all data. Do not continue using the system as normal. Copy your most important files to an external drive or cloud storage first.
- Run a disk check. In Windows, open Command Prompt as Administrator and run
chkdsk C: /f /r(replace C: with your drive letter). This will scan for and attempt to fix file system errors and bad sectors. It can take hours. On macOS, use Disk Utility’s First Aid. On Linux, usefsck. - Check the SSD’s health. Use the manufacturer’s diagnostic tool (Samsung Magician, Crucial Storage Executive, WD Dashboard, etc.) or a universal tool like CrystalDiskInfo. Look for any warnings, high “Reallocated Sectors Count,” or “Critical Warning” flags. These indicate physical damage from the event.
- Monitor for instability. Use the system normally but watch for random crashes, freezes, or files that fail to save for the next 24-48 hours.
Step 4: When Reseating Fails or Data is Gone
If the drive is not detected after reseating, or if disk check finds irreparable corruption:
- Try a different M.2 slot. If your motherboard has more than one, try the other slot. This isolates whether the problem is the SSD or the motherboard slot.
- Test the SSD in another computer. This confirms if the drive itself is dead.
- For data recovery, stop and seek professional help. If the data is irreplaceable, power down the drive. Every power-on cycle can cause further damage if the controller is failing. Professional data recovery labs have the tools to potentially read the NAND chips directly, but this is expensive (often thousands of dollars). For logical corruption (file system damage), software like Recuva, R-Studio, or DMDE might recover files if you act quickly and avoid writing to the drive.
Prevention: How to Secure Your NVMe SSD for Life
An ounce of prevention is worth a pound of cure (and a mountain of lost data). Securing your NVMe SSD is a simple process that takes five minutes but saves you from endless headaches.
The Perfect Screw: Tightness and Type
Use the screw that came with your motherboard or case. It’s specifically sized. After seating the drive, tighten the screw until it is snug. You should feel solid resistance. A good test: try to gently wiggle the SSD. There should be zero perceptible movement. If it wiggles, tighten a quarter turn. If the screw hole feels like it’s stripping or you’re meeting extreme resistance after a few turns, stop. You’re overtightening. A slightly loose screw that you check monthly is better than a stripped screw hole that offers no retention at all.
Standoffs and Support Brackets: The Unsung Heroes
Many modern cases and motherboards include small metal standoffs or plastic brackets designed to support the far end of a long M.2 SSD (like a 22110 or 2280). If your SSD is long (especially 22110), you must use this support. Without it, the unsupported end can act like a lever, slowly prizing the connector end out of the slot under thermal stress or minor vibration. This is a critical and often overlooked step in builds. If your case didn’t include one, they are cheap and widely available online.
Thermal Pad Hygiene
If your motherboard has an M.2 heatsink:
- Inspect the pre-applied pads. Are they uniform? Are they only on the top of the chips?
- If replacing pads, choose the right thickness. You want the pad to make firm contact when the heatsink is screwed down, but you should not have to force the heatsink down onto the SSD. The SSD should sit flush in the slot before the heatsink is even attached.
- Ensure pads don’t obstruct the connector. A pad that is too wide or misplaced can press against the edge of the SSD near the contacts, creating an upward force.
Build and Transport Discipline
- During Build: Install all M.2 drives as one of the very last steps, after the motherboard is securely mounted in the case. This minimizes handling and flexing of the board.
- Moving Your PC: If you need to move a desktop PC, especially a heavy one, remove all M.2 drives first. The forces involved in tilting and carrying a full-tower case are significant. For laptops, always use a padded case and handle with care. Avoid tossing it into a backpack with other heavy items.
- Regular Check-ups: Make it a habit. Every 6 months, open your case (or just the panel on a desktop) and visually confirm all M.2 screws are snug and the drives are flush. It takes 30 seconds.
Conclusion: Respect the Tiny Powerhouse
Your NVMe SSD is a technological marvel, cramming terabytes of storage and blistering speeds into a stick the size of a piece of gum. But this very form factor makes it uniquely vulnerable to physical disconnection. The lesson is clear: an NVMe SSD falling out is not a minor inconvenience; it is a critical failure point that can erase your data and damage your hardware. The chain reaction—from a loose screw to a black screen to corrupted files—is swift and devastating.
The power is in your hands. That single, tiny screw is the guardian of your digital world. Tighten it correctly. Use the support bracket. Be mindful of thermal pad pressure. Check it regularly. In the world of high-speed storage, the most important component isn’t the NAND flash or the controller; it’s the simple, mechanical security that keeps the entire system connected. Don’t wait for a crash to learn this lesson. Take five minutes today to inspect your M.2 drives. Your future self, staring at a recovering system or a data recovery quote, will thank you profusely.
Frequently Asked Questions
Can I recover data if my NVMe SSD fell out and now shows as unallocated space?
Yes, recovery is often possible. When a drive shows as unallocated, its partition table is likely corrupted. Use data recovery software like Recuva, R-Studio, or TestDisk to scan the raw drive for lost partitions and files. Immediately stop using the drive and clone it with a tool like ddrescue before attempting recovery to prevent further damage.
Will my motherboard warranty cover a damaged M.2 slot from an SSD falling out?
Usually not. Physical damage from user installation, impact, or vibration is considered user-inflicted damage and is excluded from standard warranties. You would need to check your specific motherboard manufacturer’s policy, but most will deny a warranty claim for a physically damaged slot.
Are thermal pads really a common cause of NVMe SSDs working loose?
Yes, especially with aftermarket or third-party heatsinks. A thermal pad that is too thick or misaligned creates constant upward pressure on the SSD. As the drive heats and cools, this pressure can slowly push the drive out of its seat over weeks or months, even with the screw tight.
Is a loose NVME SSD more common in laptops or desktops?
It is significantly more common in laptops. The constant vibration, movement, and thermal cycling from being moved around and used on the go create the perfect environment for a screw to gradually loosen or for thermal pads to shift. Desktop PCs on a stable desk are far less susceptible.
What’s the difference between a loose SATA cable and a loose NVMe SSD in terms of symptoms?
A loose SATA cable (power or data) can also cause boot failures and data corruption. However, SATA cables are more prone to becoming partially disconnected due to movement, causing intermittent disconnects. An NVMe SSD issue is almost always due to the physical mounting (screw/standoff) or slot damage, as the connection is solid once fully seated. NVMe failures are also more likely to cause immediate, total boot failure if it’s the OS drive.
Should I use thread-locker compound on my NVMe SSD screw to prevent it from loosening?
Generally, no. A small, precise amount of blue (removable) thread-locker *can* be used in extreme vibration environments (like a custom water-cooled loop being transported), but it’s overkill for most builds and risks making future removal difficult or damaging the screw hole. Proper installation with the correct torque and use of a support bracket is the preferred and safer method.