Checking your laptop’s RAM is a simple yet powerful way to understand its performance capabilities. With built-in tools on any operating system, you can instantly see your memory capacity, speed, and type—information critical for diagnosing slowdowns and planning upgrades. This guide provides clear, no-fuss methods for every major OS, plus expert tips on interpreting the data and knowing when an upgrade is truly worthwhile.
Key Takeaways
- RAM is your laptop’s short-term memory: It directly impacts multitasking ability and overall system responsiveness. More RAM generally means smoother performance with multiple apps or demanding software.
- Every laptop has built-in ways to check RAM: You don’t need special software. Windows, macOS, and Linux all include native utilities to show capacity, speed, and physical slot usage.
- The numbers tell a story: Understanding specs like “DDR4-3200” or “16GB (2x8GB)” reveals your RAM’s generation, speed, and configuration, which is essential for compatibility if you upgrade.
- Not all laptops can be upgraded: Many modern ultrabooks solder RAM directly to the motherboard. Always check your specific model’s service manual before purchasing new modules.
- Check RAM health, not just specs: Windows Memory Diagnostic and MemTest86 can identify faulty memory modules causing crashes or errors, which is a crucial troubleshooting step.
- Capacity vs. Speed: For most users, adding more RAM (capacity) yields a bigger performance boost than slightly faster RAM (speed), especially for general productivity and web browsing.
- Use third-party tools for deep dives: Utilities like CPU-Z or HWiNFO provide incredibly detailed information about RAM timings, channels, and manufacturer details that system tools often hide.
📑 Table of Contents
- Why Checking Your Laptop’s RAM is the First Step to a Faster PC
- How to Check RAM in Laptop Running Windows
- How to Check RAM in Laptop Running macOS
- How to Check RAM in Laptop Running Linux
- Understanding Your RAM Specifications: Beyond the Gigabytes
- When and How to Upgrade Your Laptop’s RAM
- Troubleshooting: What If Your RAM Isn’t Performing as Expected?
- Conclusion: Knowledge is the Key to Optimization
Why Checking Your Laptop’s RAM is the First Step to a Faster PC
Have you ever stared at that spinning wheel of doom on your laptop, wondering why it’s suddenly crawling? Before you blame the processor or consider a full replacement, there’s one critical component you should investigate first: your Random Access Memory (RAM). Think of RAM as your laptop’s desktop workspace. A bigger, organized desk lets you spread out multiple projects (apps, browser tabs, documents) and work on them all at once without constant shuffling. A small, cluttered desk forces you to constantly put things away, slowing everything down. Knowing exactly how much RAM you have, what type it is, and how it’s configured is the single most important piece of information for diagnosing sluggishness and planning any meaningful upgrade. This guide will walk you through how to check RAM in a laptop, no matter what operating system you use, turning you from a curious user into an informed troubleshooter.
The process is surprisingly straightforward. You don’t need to open the chassis or risk static electricity (though we’ll cover that too). Every major OS has a built-in utility that, with a few clicks or a simple command, will lay bare your memory’s specifications. We’ll explore each method in detail, from the quickest one-minute checks to the most comprehensive diagnostic commands. By the end, you’ll be able to answer these questions confidently: How much RAM do I actually have? Is it running at its rated speed? How many slots are available? And most importantly, is it time for an upgrade?
How to Check RAM in Laptop Running Windows
Windows offers multiple pathways to view your RAM information, each with a different level of detail. From a simple capacity readout to deep technical specs, you can choose your own adventure.
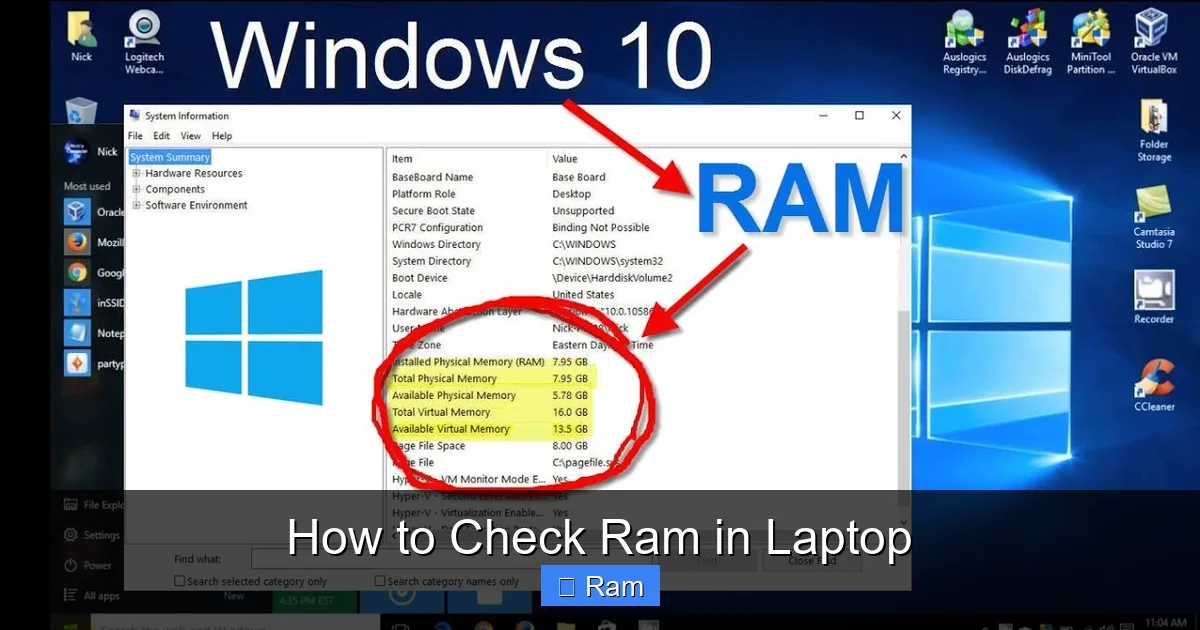
Visual guide about How to Check Ram in Laptop
Image source: i.ytimg.com
The Ultra-Fast Method: Task Manager
This is the go-to for a quick snapshot. Press Ctrl + Shift + Esc or right-click the taskbar and select “Task Manager.” Click the “Performance” tab, then select “Memory” from the left-hand pane. Here you’ll see a clean graph and key stats:
- In use (Compressed): How much RAM is currently active. Compression is a Windows trick to free up space.
- Committed: The total virtual memory (RAM + page file) your system has pledged to use.
- Cached: RAM used to store frequently accessed data for speed.
- Speed: The clock rate of your RAM modules (e.g., 3200 MHz).
- Form factor: Will almost always say “SODIMM” for laptops.
- Hardware reserved: Memory set aside for your GPU and other hardware. A high number (like 500MB-2GB) is normal.
- Total: Your installed RAM capacity (e.g., 16.0 GB).
Pro Tip: The “Speed” shown here is the *current* operating speed. To see the *rated* speed (what the module is capable of), you often need a tool like CPU-Z, as the system may default to a lower JEDEC speed without an XMP/EXPO profile enabled.
The Detailed Method: System Information
For more raw data, use the built-in System Information tool. Press Win + R, type msinfo32, and hit Enter. Navigate to Components > Memory. This section provides a text-based summary of each physical memory stick installed. You’ll see:
- Capacity: Size of each module (e.g., 8589934592 bytes = 8GB).
- Speed: The rated speed.
- Manufacturer: Brand name (Crucial, Samsung, Micron, etc.).
- Part Number: The specific model number of the DIMM.
- Serial Number: Unique ID for the stick.
- Device Locator: Tells you which physical slot it’s in (e.g., DIMM 0, DIMM 1).
This is invaluable if you’re looking to buy matching RAM for an upgrade. Note the exact part number or at least the manufacturer and specs to ensure compatibility.
The Power User Method: Command Prompt & PowerShell
If you prefer the command line, both Command Prompt and PowerShell can retrieve this info. For a quick, readable summary, open PowerShell (right-click Start menu > Windows PowerShell) and run:
Get-ComputerInfo | Select-Object CsTotalPhysicalMemory
This gives you the total RAM in bytes. For a detailed breakdown of each module, use the venerable WMIC command in Command Prompt:
wmic memorychip get BankLabel, Capacity, Speed, Manufacturer, PartNumber, SerialNumber
This outputs a clean table listing every stick’s location (BankLabel), size in bytes, speed, and identifiers. It’s the command-line equivalent of System Information and perfect for scripting or quick checks without GUI navigation.
How to Check RAM in Laptop Running macOS
Apple makes checking RAM on a MacBook or MacBook Pro delightfully simple, though the depth of information varies by chip (Intel vs. Apple Silicon).

Visual guide about How to Check Ram in Laptop
Image source: itarian.com
The Standard Method: About This Mac
Click the Apple menu in the top-left corner and select “About This Mac.” The overview tab immediately displays your “Memory” line (e.g., “16 GB 2666 MHz DDR4”). This tells you total capacity and speed. For Intel-based Macs, this is often the full story. For Macs with Apple Silicon (M1, M2, M3 chips), the RAM is unified memory and soldered, so capacity is the primary spec; speed is less user-configurable.
The Deep Dive: System Report
For granular details on Intel Macs, click “System Report…” in the About This Mac window. In the sidebar, under Hardware, select Memory. Here you’ll see a technical report for each memory slot:
- Size: Capacity per slot.
- Type: DDR3, DDR4, etc.
- Speed: Rated MHz.
- Status: Should say “OK.”
- Manufacturer: Brand info.
- Part Number: Specific module ID.
Important Note for Apple Silicon Users: On M-series Macs, the “Memory” section in System Report will simply state the total unified memory. You cannot upgrade it, and the system manages it dynamically. The only spec you need to know is the total GB (8, 16, 24, 32, etc.).
How to Check RAM in Laptop Running Linux
Linux offers powerful terminal commands to inspect your RAM. The exact command may vary slightly by distribution, but these are universal on most systems like Ubuntu, Fedora, or Mint.

Visual guide about How to Check Ram in Laptop
Image source: itarian.com
The Quick Glance: free Command
Open your terminal (Ctrl + Alt + T is a common shortcut). Type free -h and press Enter. The -h flag makes the output “human-readable” (using GB/MB). Look at the “Mem:” row in the “total” column. This shows your total usable RAM. The “-/+ buffers/cache” row shows what’s actually used and available after accounting for disk caching, which is a more accurate picture of free memory.
The Comprehensive View: dmidecode
For detailed specs on each physical module, you need sudo (administrator) privileges. Run:
sudo dmidecode -t memory
This dumps the system’s DMI (Desktop Management Interface) table for memory devices. Scroll through to find sections titled “Memory Device” for each slot. You’ll see:
- Size: Capacity (e.g., 8 GB).
- Type: DDR3, DDR4, DDR5.
- Speed: Current speed in MHz.
- Manufacturer: Vendor name.
- Serial Number: Unique ID.
- Part Number: Module model.
- Locator: Physical slot (e.g., DIMM 0).
This is the most complete native method on Linux, mirroring the detail of Windows’ System Information. If dmidecode isn’t installed, use your package manager (sudo apt install dmidecode on Debian/Ubuntu).
Understanding Your RAM Specifications: Beyond the Gigabytes
So you’ve found the numbers. Now what? “16GB” is just the start. The true compatibility and performance story is in the finer details. Let’s decode the labels.
Generation (DDR3, DDR4, DDR5)
This is non-negotiable for compatibility. A DDR4 slot will not accept a DDR3 or DDR5 module. Your system’s chipset and motherboard determine the supported generation. You can usually find this in the specs from the detailed methods above (System Information, System Report, dmidecode). If you’re upgrading, you must match the generation. DDR4 is ubiquitous in laptops from ~2015-2022, while DDR5 is now standard in newer performance models.
Speed (MHz)
Measured in megahertz (e.g., 2666, 3200, 5600), this is the data transfer rate. Faster is better, but there are caveats. First, your CPU and chipset have a maximum supported speed. Buying 5600 MT/s RAM for a laptop that only supports 3200 MT/s will cause it to run at the lower, default speed. Second, for general use, the difference between 2666 and 3200 is often imperceptible. The jump becomes noticeable in gaming, video editing, and scientific computing where data throughput is critical.
Configuration: Single vs. Dual Channel
This is a major performance factor. If you have one stick of 16GB (single-channel), your memory bandwidth is halved compared to two sticks of 8GB (dual-channel) running in pair. Dual-channel mode allows the memory controller to access both modules simultaneously, doubling the theoretical bandwidth. Most modern laptops support dual-channel. To achieve it:
- If you have 2 slots, install identical capacity modules (2x8GB, not 1x16GB).
- If you have 4 slots, install in matched pairs (2x8GB in slots A2/B2 is typical).
Your system information tools (especially CPU-Z’s “Memory” tab) will show “Dual” or “Single” under “Channel #”. For an upgrade, matching pairs are highly recommended for optimal performance.
When and How to Upgrade Your Laptop’s RAM
Armed with your RAM specs, you can now decide if an upgrade is possible and worthwhile.
Step 1: Confirm Upgradeability
This is the most critical step. Many modern ultrabooks and thin-and-lights (like most MacBooks, Dell XPS, HP Spectre) have RAM soldered to the motherboard. It is permanently attached and cannot be upgraded. You must:
- Check your laptop’s service manual: Search for “[Your Laptop Model] service manual” or “hardware maintenance guide.” It will have exploded parts diagrams.
- Look for SO-DIMM slots: If the manual shows removable memory modules, it’s upgradeable. The manual will also state the maximum supported RAM (e.g., “up to 64GB”).
- Physical inspection (if comfortable): Power down, unplug, remove the bottom panel. Look for one or two rectangular slots with small retaining clips on the sides. If you see no slots and only chips soldered to the board, upgrades are impossible.
Step 2: Choose the Right RAM
If you have slots, match these specs exactly:
- Generation: Must match (DDR4, DDR5).
- Speed: Buy modules rated for at least your system’s supported speed. Faster RAM will downclock to the system’s max, which is fine.
- Capacity per stick: To maintain dual-channel, if you have 2 slots and 1 is empty, buy an identical module to the one you already have. If both are empty, buy a matched kit (e.g., 2x16GB).
- Form Factor: Laptops use SODIMM (Small Outline DIMM), which is shorter than desktop RAM. Never buy standard DIMMs.
Step 3: Installation (If Applicable)
If you’ve confirmed upgradeability and purchased compatible SODIMMs:
- Power down completely. Unplug the charger and, if possible, remove the battery (some are internal).
- Discharge static. Touch a grounded metal object (like the laptop’s unplugged power supply) or use an anti-static wrist strap.
- Remove the bottom panel. Usually 6-10 Phillips-head screws. Keep them safe.
- Release the old module. Gently pry the retaining clips on either side outward. The module will pop up at an angle. Pull it out.
- Install the new module. Align the notch on the module with the key in the slot. Insert at a ~45-degree angle, then press firmly and evenly down until the clips snap into place.
- Reassemble and test. Reattach the panel, power on, and immediately check your system information to confirm the new capacity is recognized.
Troubleshooting: What If Your RAM Isn’t Performing as Expected?
Sometimes, the specs you read don’t match performance, or your system reports less RAM than you installed. Here’s how to diagnose.
Case 1: “Missing” RAM
You installed 16GB, but Windows only shows 15.8GB. This is normal. A portion of RAM is always reserved by the system and your integrated or discrete GPU. A 1-2GB difference is standard. If you’re missing several GB (e.g., only 8GB shows in a 16GB system), power down, re-seat the modules, and ensure they’re fully clicked in. If you have one stick in a dual-channel system, try the other slot to rule out a bad slot.
Case 2: RAM Running Slow
Your new 3200 MHz RAM shows as 2666 MHz in Task Manager. This usually means your system’s default JEDEC profile is being used, not an XMP/EXPO profile. Most laptops do not support XMP profiles and will run at the highest speed their chipset supports natively. Check your CPU/chipset documentation for the maximum supported speed. If your RAM is rated higher than that, it will downclock. There is typically no user-enabled fix on laptops.
Case 3: System Instability After Upgrade
Crashes, blue screens, or failure to boot can indicate incompatible or faulty RAM. First, test one stick at a time in each slot. If a specific stick or slot causes issues, that component is bad. If both sticks work individually but not together, they may be incompatible (different timings, ranks, or manufacturers). Use a memory testing tool:
- Windows Memory Diagnostic: Search for it in the Start menu, run it, and choose “Restart now and check for problems.” It will reboot and test your RAM, reporting any errors.
- MemTest86: A more powerful, bootable utility. Create a USB drive with the tool, boot from it, and let it run multiple passes. Any red errors mean faulty RAM.
Conclusion: Knowledge is the Key to Optimization
Learning how to check RAM in a laptop demystifies one of the most fundamental performance variables in your machine. It’s a five-minute task that pays dividends in troubleshooting, upgrade planning, and general tech literacy. You now know how to access this information on Windows, macOS, and Linux, and more importantly, how to interpret the generation, speed, capacity, and configuration data. Remember, the journey doesn’t end at checking. Use this knowledge to make informed decisions: Is your current RAM sufficient for your workflow? Is your laptop even capable of an upgrade? If so, what specific modules will give you the best performance-per-dollar? By combining this diagnostic skill with an understanding of your own usage patterns—be it casual browsing, professional video editing, or competitive gaming—you can ensure your laptop’s memory is never the bottleneck holding you back. So go ahead, run that check, and take the first step toward a faster, more responsive computing experience.
Frequently Asked Questions
Can I check my laptop’s RAM without opening it?
Yes, absolutely. All the methods described in this guide—using Task Manager, System Information, About This Mac, or terminal commands—are software-based and require no physical access to the laptop’s internals. You only need to open the case if you plan to upgrade or replace the modules.
What’s the difference between RAM and storage (SSD/HDD)?
RAM is volatile, high-speed memory used for active tasks and data the CPU needs right now. It clears when you power off. Storage (SSD/HDD) is non-volatile, permanent memory for your operating system, programs, and files. Think of RAM as your desk workspace and storage as your filing cabinet. More RAM lets you have more projects open on your desk; more storage lets you own more projects to put on the desk later.
How often should I check my laptop’s RAM?
You don’t need to check it regularly. It’s a set-it-and-forget-it component unless you’re troubleshooting a performance issue, planning to sell/buy a laptop, or considering an upgrade. If your laptop suddenly feels slower for everyday tasks, checking RAM usage (via Task Manager’s Performance tab) is a great first diagnostic step to see if you’re consistently maxing out your memory.
Can I mix RAM sizes and brands?
Technically, you can mix different sized sticks (e.g., 8GB + 16GB), and your system will likely run in “flexible” or “asymmetric” dual-channel mode. However, for best stability and performance, it’s strongly recommended to use identical modules (same capacity, speed, timings, brand, and model) in matched pairs. Mixing can lead to compatibility issues or force the system to run all modules at the speed of the slowest stick.
Is more RAM always better than faster RAM?
For the vast majority of users—those using web browsers, office suites, and casual applications—increasing capacity (e.g., from 8GB to 16GB) provides a far more noticeable improvement than increasing speed (e.g., from 2666 MHz to 3200 MHz). Capacity upgrades eliminate slowdowns caused by swapping data to the slow SSD/HDD. Speed increases offer diminishing returns and are most beneficial in specific professional workloads like 3D rendering, scientific simulation, and high-frame-rate gaming.
My laptop shows less RAM than I physically installed. Why?
This is commonly due to hardware-reserved memory. Your integrated graphics (iGPU) and other system devices need a portion of the total RAM to function, especially on laptops without a dedicated GPU. This reserved amount is shown in Task Manager and is normal. If a large amount (like 4GB+) is missing and you have a discrete GPU, try reseating the RAM modules. If the problem persists, one module may be faulty or not properly seated in its slot.