How to Check the Ram in Laptop
Knowing your laptop’s RAM is crucial for troubleshooting slowdowns and planning upgrades. You can check it quickly using built-in system tools like Task Manager on Windows or About This Mac on macOS. For detailed specs like speed and slots, use Command Prompt or system information utilities. This guide walks you through every method step-by-step, explains what the numbers mean, and helps you decide if an upgrade is right for your machine.
Key Takeaways
- Understanding how to check the ram in laptop: Provides essential knowledge
📑 Table of Contents
- Why Knowing Your Laptop’s RAM Matters
- The Easiest Methods: Quick Checks on Windows and macOS
- Getting Technical: Detailed Specs on Windows
- Getting Technical: Detailed Specs on macOS and Linux
- Understanding What You See: Making Sense of RAM Specs
- Can I Upgrade? How to Check Compatibility and Install
- Frequently Asked Questions (FAQs)
Why Knowing Your Laptop’s RAM Matters
Have you ever stared at your laptop screen, waiting impatiently for a program to open or a browser tab with too many videos to stop stuttering? That frustrating lag is often your system’s RAM crying out for help. RAM, or Random Access Memory, is your laptop’s ultra-fast, temporary workspace. It holds the data your active apps and the operating system need right now, allowing your processor to access it quickly. Think of it like your physical desk: a bigger desk (more RAM) lets you spread out all your current project papers (apps and files) without constantly shuffling things in and out of a drawer (the much slower hard drive or SSD).
Understanding exactly how much RAM you have, what type it is, and how it’s performing is the first step to diagnosing slowdowns, ensuring compatibility with new software, and planning a cost-effective upgrade. It’s not just a number for tech enthusiasts; it’s practical knowledge for any laptop user who wants their machine to run smoothly. In this complete guide, we’ll demystify the process, giving you clear, step-by-step instructions for every major laptop operating system, from the quickest glance to the deepest technical dive.
The Easiest Methods: Quick Checks on Windows and macOS
Sometimes, you just need to know the basics: how much RAM is installed and how much is being used right now. Both Windows and macOS provide incredibly simple, built-in ways to get this information in under 10 seconds. These are your go-to tools for a fast health check.
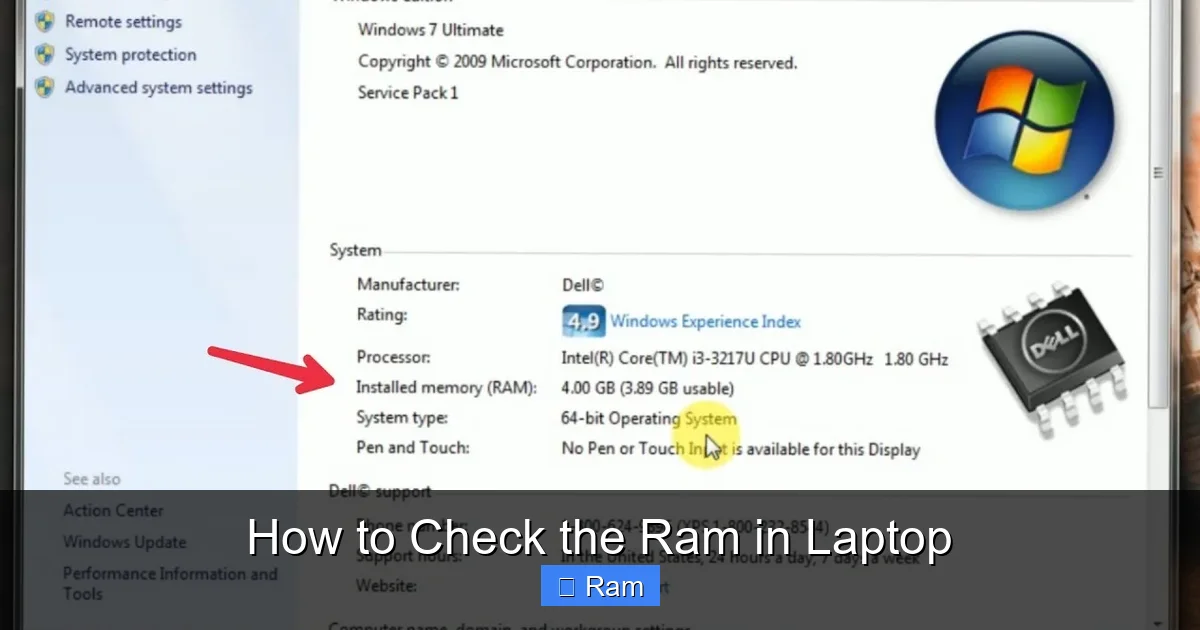
Visual guide about How to Check the Ram in Laptop
Image source: i.ytimg.com
For Windows Users: The Task Manager Method
Windows Task Manager is more than just a task killer; it’s a powerful performance monitor. To access it, the fastest way is to press Ctrl + Shift + Esc on your keyboard. Alternatively, right-click on your taskbar and select “Task Manager.”
Once open, if you see a minimalist view, click “More details” at the bottom. Navigate to the “Performance” tab. On the left-hand side, you’ll see a list of hardware components. Click on “Memory.”
The graph and statistics displayed are your RAM snapshot. Here’s what you’ll see:
- In use (Compressed): The top number shows how much RAM is actively being used by apps and the system. The number in parentheses is how much has been compressed to save space—a Windows memory management technique.
- Committed: The total amount of memory that Windows has promised to applications. It can be higher than your physical RAM because it includes the page file on your SSD.
- Cached: Memory used to store copies of files from your disk for quicker access. This is “available” to be repurposed instantly if an app needs it.
- Hardware Reserved: Memory set aside by your system BIOS and devices like your graphics card. This is not available for general use.
- Speed: The clock speed of your RAM in MHz (e.g., 3200 MHz). This is a key performance spec.
- Form Factor: Will say “SO-DIMM,” confirming it’s laptop memory.
- Hardware Reserved: Memory set aside by your system BIOS and devices like your graphics card. This is not available for general use.
At the very top, in large font, is the most important number: Total. This is your total installed physical RAM (e.g., “8.0 GB” or “16.0 GB”). This method gives you capacity, usage, and speed instantly.
For macOS Users: The “About This Mac” Method
Apple makes checking your MacBook’s RAM beautifully simple. Click the Apple menu (the icon) in the top-left corner of your screen and select “About This Mac.”
The window that pops up is a summary of your Mac’s core specs. Right at the top, you’ll see a line that reads “Memory” followed by the total installed RAM (e.g., “8 GB 2133 MHz LPDDR3”). This tells you everything in one glance: capacity (8 GB), speed (2133 MHz), and type (LPDDR3, a low-power variant common in MacBooks).
For a slightly more visual breakdown of memory usage, you can open the Activity Monitor (found in Applications > Utilities or via Spotlight Search). Go to the “Memory” tab. The “Memory Pressure” graph at the bottom is particularly useful. Green is healthy, yellow indicates some pressure, and red means your RAM is being heavily taxed, and you’re likely relying on swap memory (using your SSD as slow RAM), which hurts performance.
Getting Technical: Detailed Specs on Windows
While Task Manager is great for a quick overview, it doesn’t tell you everything you need for an upgrade. You won’t see how many RAM slots you have, the exact model number of your modules, or the specific type (DDR4 vs. DDR5). For that, you need to dig a little deeper using built-in command-line tools or third-party utilities.
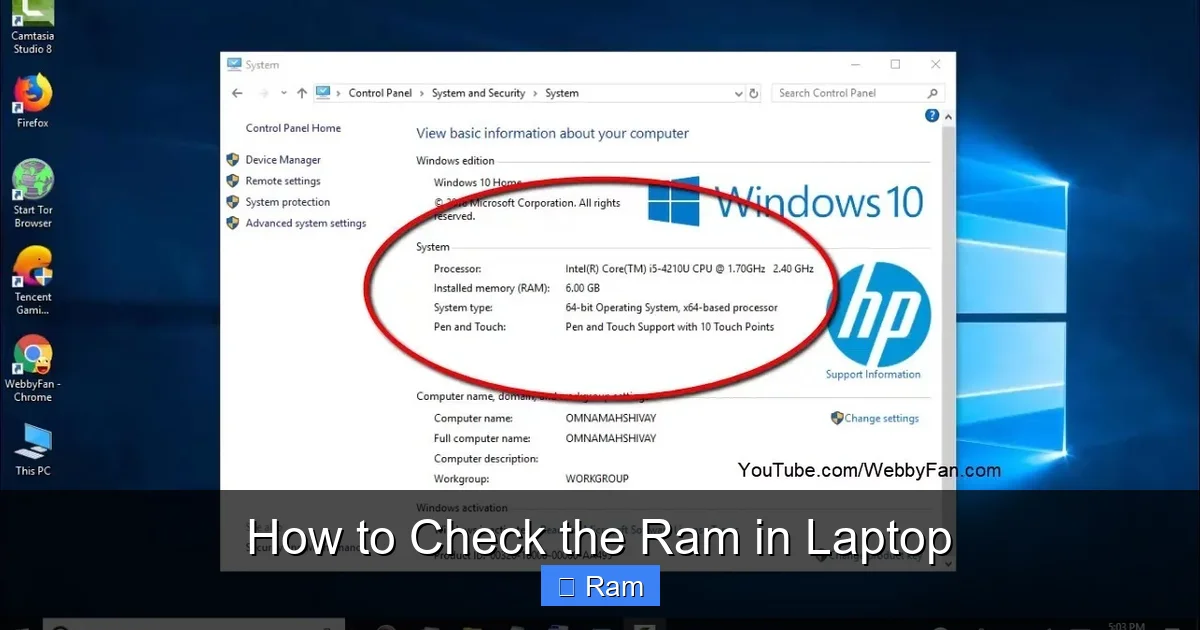
Visual guide about How to Check the Ram in Laptop
Image source: i.ytimg.com
Using Command Prompt (CMD) and PowerShell
These are powerful, no-download-required tools. Press the Windows key, type “cmd” or “PowerShell”, and run it as an administrator for full access.
- To get total physical memory: Type
systeminfo | findstr "Total Physical Memory"and press Enter. It will show the total installed RAM. - To get detailed memory configuration (the best method): Type the command
wmic memorychip get BankLabel, Capacity, Speed, MemoryType, TypeDetailand press Enter.- BankLabel: Shows which slot the module is in (e.g., BANK 0, BANK 1). This tells you how many slots are populated.
- Capacity: The size in bytes. To convert to GB, divide by 1,073,741,824. (e.g., 17179869184 / 1073741824 = 16 GB).
- Speed: The clock speed in MHz.
- MemoryType: A number code. 20 = DDR, 21 = DDR2, 24 = DDR3, 26 = DDR4, 30 = DDR5. You can look this up online.
- TypeDetail: Gives more info, like if it’s synchronous DRAM.
This command will list each RAM stick separately. If you have two 8GB sticks, you’ll see two lines. This is invaluable for matching new RAM.
Using the Windows System Information Tool
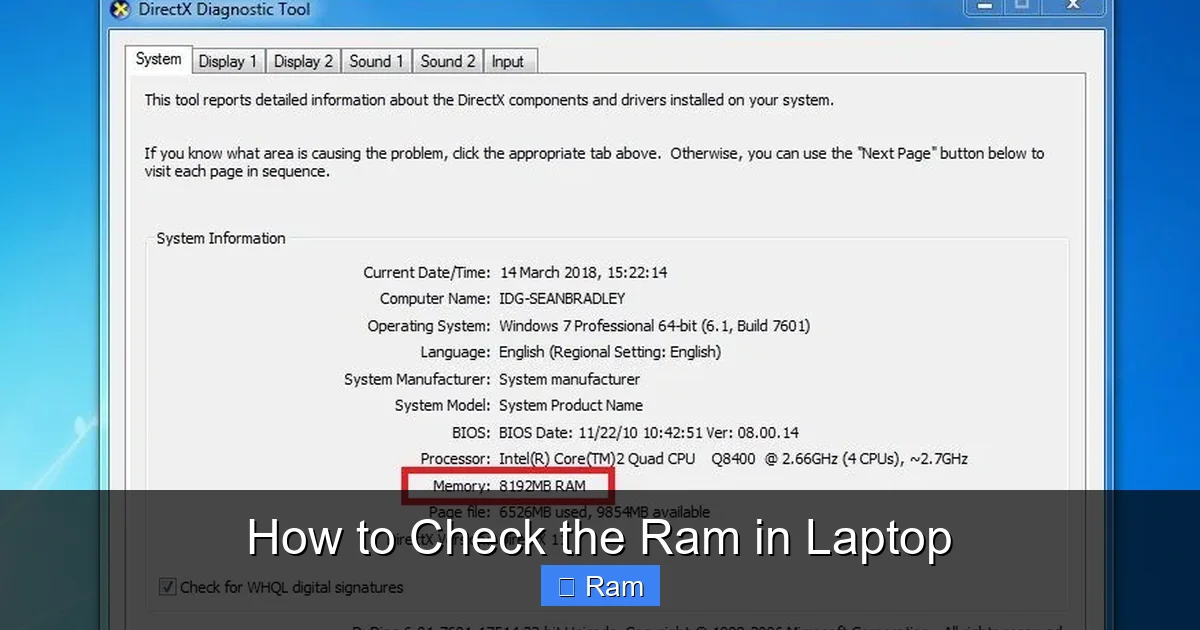
Another built-in option is the System Information utility. Press Windows + R to open the Run dialog, type msinfo32, and hit Enter. In the System Summary, look for “Installed Physical Memory (RAM).” This shows the total. To see more, expand the “Components” section on the left and click “Memory.” Here you’ll get a more readable summary, including the “Speed” and “Device Locator” (which often maps to a slot). It’s less granular than the WMIC command but more user-friendly.
When to Use a Third-Party Tool (CPU-Z)
For the absolute most detailed, beginner-friendly readout, nothing beats the free, legendary tool CPU-Z from CPUID. Download it from the official website (cpu-z.com), run it (no installation needed), and go to the “Memory” and “SPD” tabs.
- The “Memory” tab shows overall specs: Type (DDR4), Size, Channels (Single, Dual), and the timings (CL, tRCD, tRP, tRAS)—the latter being advanced timing parameters important for enthusiasts.
- The “SPD” tab is the goldmine. Use the drop-down to select “Slot #1” and “Slot #2.” This shows the exact specifications programmed into each individual RAM module’s SPD chip: manufacturer (e.g., Samsung, Micron), part number, size, speed, voltage, and the precise timings. This is the definitive way to match RAM for an upgrade or diagnose compatibility issues.
Getting Technical: Detailed Specs on macOS and Linux
macOS and Linux also offer deeper command-line methods for those who need them, though the graphical system tools are often sufficient for most users.
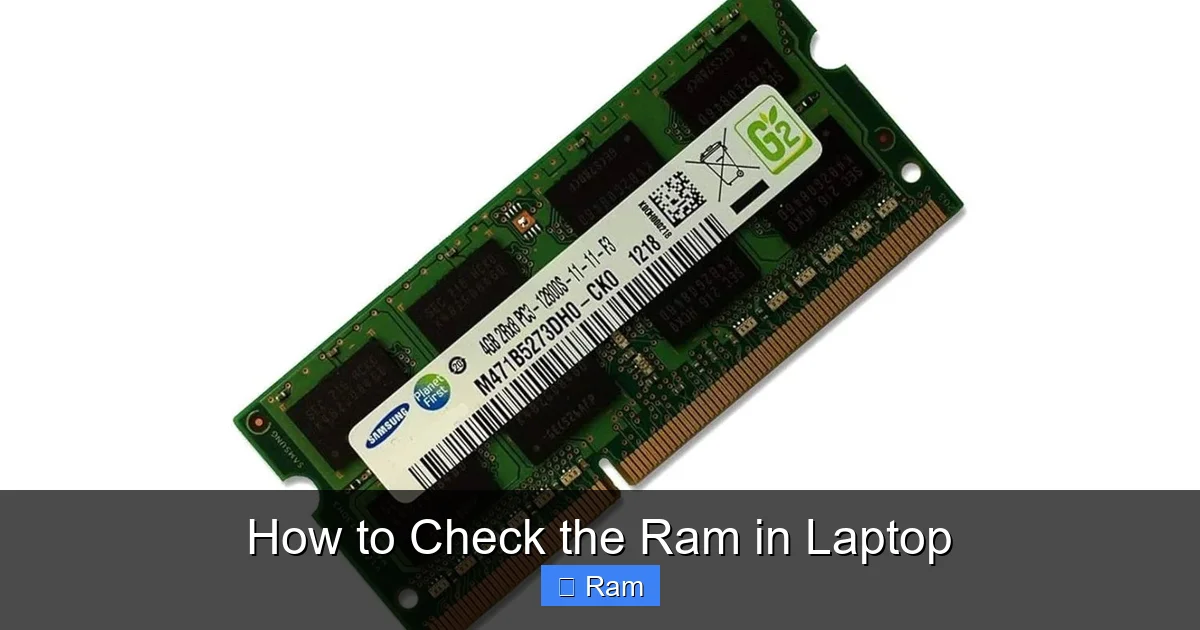
Visual guide about How to Check the Ram in Laptop
Image source: robots.net
macOS System Information
We already saw the quick “About This Mac” method. For the deep dive, hold down the Option key and click the Apple menu. Select “System Information…” (this is a more powerful version of “About This Mac”). In the hardware section, click “Memory.”
This panel lists each memory slot. You’ll see if a slot is occupied, the size of the module in that slot, its type (e.g., DDR4), its speed, and its status (OK or a warning). It will also tell you if your specific Mac model has user-upgradable memory or if it’s soldered. If it says “All memory is soldered” or shows only one “Bank” with no empty slots listed, you cannot upgrade the RAM yourself.
Linux Terminal Commands
Linux is all about the terminal. Open your terminal emulator (Ctrl+Alt+T is a common shortcut). Here are the key commands:
- To see total RAM and usage: Run the command
free -h. The “-h” flag makes it human-readable (GB). Look at the “total” row under “Mem:”. The “used” and “available” columns are also very useful. - To get detailed RAM information: Use the command
sudo dmidecode --type memory. You’ll need sudo (administrator) privileges. This dumps all the DMI (Desktop Management Interface) data for the memory devices. Scroll through to find sections for “Size” (e.g., 8192 MB), “Type” (DDR4), “Speed” (e.g., 3200 MHz), “Manufacturer,” and “Part Number.” This is the Linux equivalent of Windows’ WMIC command. - Quick summary with inxi: If you have the
inxiutility installed (common on many distros), simply runinxi -mfor a concise, readable summary of your memory.
Understanding What You See: Making Sense of RAM Specs
You’ve run the commands and have a wall of numbers and codes. Now what? Let’s decode the most important specs you’ll encounter and what they mean for performance and upgrades.
Capacity: The GB Count
This is the simplest but most important number. 8GB is the bare minimum for modern Windows/macOS and light browsing today. 16GB is the sweet spot for most users—handling dozens of browser tabs, office suites, and some light photo editing with ease. 32GB and above are for power users: video editors, 3D modelers, software developers, and those running multiple virtual machines. For a general-use laptop purchased in the last 4-5 years, 8GB is likely the starting point, and 16GB is the comfortable target for an upgrade.
Generation: DDR3, DDR4, DDR5
This is the physical and electrical generation of the RAM. You cannot mix generations. A DDR4 slot will not accept a DDR3 or DDR5 module, and vice-versa. Your laptop’s motherboard and processor determine which generation it supports. Laptops from ~2012-2015 typically use DDR3. ~2015-2020 use DDR4. The newest laptops (2021+) are starting to use DDR5, though DDR4 is still very common. Your system information tools (CPU-Z, System Information) will tell you the type. This is the first thing to check when looking for upgrade RAM.
Speed: The MHz Number
Measured in megahertz (MHz), this is how fast the RAM can operate. Common speeds for DDR4 are 2133 MHz, 2400 MHz, 2666 MHz, 2933 MHz, and 3200 MHz. For DDR5, it starts at 4800 MHz and goes up. Higher speed generally means better performance, especially with integrated graphics. However, your system’s chipset and processor will have a maximum supported speed. If you install 3200 MHz RAM but your laptop only supports 2666 MHz, the RAM will run at 2666 MHz. The speed shown in your tools is the speed at which the module is currently running.
Timings: The CL, tRCD, tRP, tRAS Numbers
These are latency timings (e.g., 16-18-18-38). They represent the number of clock cycles it takes for the RAM to perform certain internal operations. Lower numbers are better and indicate faster, higher-performance RAM. For everyday users, these are less critical than capacity and generation. But if you’re comparing two identical capacity/speed modules, the one with tighter (lower) timings will perform slightly better. When upgrading, it’s best to match the timings of your existing RAM to avoid instability, though the system will usually default to the safest (often slowest) common set of timings.
Channels: Single vs. Dual Channel
Modern laptops typically support dual-channel memory, where two identical RAM sticks (same size, speed, and timings) work in tandem for double the data throughput. This provides a noticeable performance boost, especially for integrated graphics and CPU-intensive tasks. Your system tools will tell you if you’re running in “Dual Channel” mode. If you have one stick, you’re in single channel. The easiest way to achieve dual channel is to install a second stick that is an exact match to the first. Some motherboards have a “flex” mode where mismatched sizes still run in partial dual channel, but matching is ideal.
Can I Upgrade? How to Check Compatibility and Install
Knowing your specs is useless if you can’t physically change the RAM. The upgradeability of modern laptops varies wildly.
Step 1: Determine if Your Laptop Has Accessible RAM Slots
This is the most critical check. There are two main scenarios:
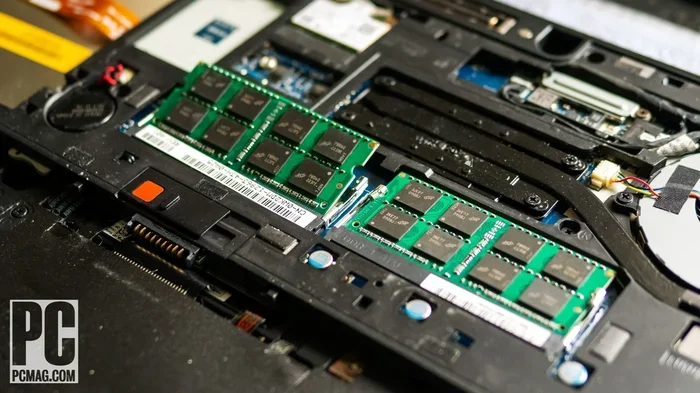
- SODIMM Slots: These are the small, rectangular memory slots you can access by removing a panel on the bottom of the laptop. You’ll see small clips on the sides holding the RAM modules in place. If you see this, you can upgrade.
- Soldered RAM: The RAM chips are permanently soldered directly onto the motherboard. There are no slots, no removable modules. You cannot upgrade this. The only way to get more RAM is to replace the entire motherboard (not cost-effective).
How to check: The most reliable way is to consult your laptop’s specific service manual or hardware maintenance manual (HMM) from the manufacturer’s support site (e.g., Dell, HP, Lenovo). Search for “[Your Laptop Model] specifications” or “[Your Laptop Model] upgrade guide.” These documents will explicitly state “User-upgradable” or “Memory soldered to motherboard.” The “System Information” tool on macOS, as mentioned, will also often state if memory is soldered. For Windows, physically opening the back panel (if you’re comfortable) is the ultimate confirmation. Power off, unplug, remove the battery if possible, and look.
Step 2: Find Your Laptop’s Maximum RAM Limit
Even if you have slots, your laptop’s chipset and BIOS impose a hard limit on the maximum RAM it can recognize (e.g., 16GB, 32GB, 64GB). A 32GB-capable laptop will not see a 64GB kit. Again, the manufacturer’s spec sheet is the final authority. You can also use tools like the Crucial System Scanner or Kingston Memory Search. These are reputable, safe tools that scan your system and list compatible upgrade kits along with your maximum supported capacity. They are excellent for a quick, reliable answer.
Step 3: Buy the Correct RAM
Once you know you have slots and your max capacity, match these specs from your existing RAM (or the manufacturer’s spec sheet for your model):
- Generation: DDR4 or DDR5? (Non-negotiable).
- Form Factor: Must be SODIMM (for laptops). No desktop DIMMs.
- Speed: Get at least the speed you already have (e.g., 2666 MHz). You can often install faster RAM, and it will run at your system’s max supported speed. It’s safe.
- Capacity per Stick: To maintain dual-channel performance, if you have one 8GB stick and a free slot, buying another identical 8GB stick is ideal. If both slots are filled with 4GB sticks, replacing both with a 2x8GB kit is the best upgrade path.
- Voltage: Standard DDR4 is 1.2V, DDR5 is 1.1V. Most laptop RAM is standard voltage. Just ensure the new kit is listed as compatible with your laptop model.
Buy from reputable brands (Crucial, Kingston, Corsair, G.Skill) and always check the compatibility list on their website for your exact laptop model number (e.g., Dell XPS 13 9310).
Step 4: The Physical Installation (If Upgradable)
If you’ve confirmed upgradeability and purchased the RAM, installation is straightforward:
- Power down completely. Shut down the laptop, unplug the charger, and if possible, remove the internal battery (or ensure it’s disconnected).
- Open the bottom panel. Usually held by 6-10 Phillips-head screws. Some have a single panel; others have multiple. Work slowly and keep screws safe.
- Discharge static electricity. Touch a grounded metal object (like the laptop’s bare metal chassis) before handling RAM.
- Remove old RAM (if replacing). Gently pull the two retaining clips on the sides of the SODIMM slot outward. The module will pop up at an angle. Pull it out straight.
- Install new RAM. Align the notch on the gold contacts of the new SODIMM with the ridge in the slot. Insert it at the same ~30-degree angle as the old one came out. Press down firmly and evenly on the top edge until the side clips snap into place automatically. You should hear/feel two clicks.
- Reassemble and test. Reattach the bottom panel, screws, and battery. Power on. Go back to Task Manager or System Information to confirm the new total RAM is recognized.
Frequently Asked Questions (FAQs)
What’s the difference between RAM and storage (SSD/HDD)?
RAM is volatile, ultra-fast temporary memory used for active tasks. Storage (SSD/HDD) is non-volatile, permanent memory for your operating system, programs, and files. Think of RAM as your desk and storage as your filing cabinet. You need both, but they serve completely different purposes.
Can I check RAM without turning on the laptop?
Yes, if the RAM is accessible (not soldered). You can physically open the bottom panel and look for the SODIMM sticks. You can also sometimes find the max supported RAM and original configuration printed on a label inside the RAM compartment or on the bottom of the laptop itself.
My laptop shows 8GB installed but only 7.8GB usable. Is this normal?
Yes, this is completely normal. The “usable” amount is slightly less than the “installed” amount because the system BIOS reserves some memory for hardware like the integrated graphics processor and other system functions. The difference is usually a few hundred megabytes, not a whole gigabyte.
Is it better to have one 16GB stick or two 8GB sticks?
For most users, two 8GB sticks (dual-channel) is better than one 16GB stick (single-channel). Dual-channel mode doubles the memory bandwidth, leading to better performance in many applications, especially those that are sensitive to memory speed like games and integrated graphics. The downside is you have no upgrade path if both slots are full. One 16GB stick leaves a slot free for a future second 16GB stick to reach 32GB in dual-channel.
How do I know if my RAM is failing?
Signs of failing RAM include frequent, random Blue Screens of Death (BSOD) with memory-related error codes (like WHEA_UNCORRECTABLE_ERROR), applications crashing unexpectedly, and the computer failing to boot (beep codes). You can run the built-in Windows Memory Diagnostic Tool (search for it in the Start menu) or the more thorough MemTest86 (requires creating a bootable USB) to stress-test your RAM for errors.
Should I upgrade RAM or my SSD for a faster laptop?
It depends on your bottleneck. If you constantly see your RAM usage at or near 100% in Task Manager when doing normal tasks, an RAM upgrade will help. If your laptop feels slow booting up, launching programs, and loading files, but RAM usage is low, an SSD upgrade (if you still have an HDD) will be a massive improvement. For a system with an SSD and 8GB of RAM that’s struggling with many browser tabs, the RAM upgrade is likely the key.
Frequently Asked Questions
What is how to check the ram in laptop?
how to check the ram in laptop is an important topic with many practical applications.