How to Add Ram to Laptop
Upgrading your laptop’s RAM is one of the simplest and most cost-effective ways to dramatically improve its performance. This guide walks you through every step, from checking your laptop’s compatibility to safely installing new memory modules. By following these clear instructions, you can say goodbye to frustrating slowdowns and enjoy a faster, more responsive machine without the expense of a new computer.
Does your laptop feel like it’s wading through mud? Do you wait impatiently for programs to launch, browser tabs to switch, or files to open? Before you start saving for a brand-new computer, there’s a powerful and remarkably affordable upgrade you should consider: adding more RAM. Random Access Memory, or RAM, is your laptop’s short-term workspace. The more of it you have, the more tasks your system can juggle at once without slowing down. Learning how to add RAM to a laptop is a valuable skill that can save you hundreds of dollars and extend the useful life of your trusted companion by years. This guide will hold your hand through the entire process, from the initial detective work to the final triumphant power-on. It’s easier than you think.
Key Takeaways
- Compatibility is everything: You must identify your laptop’s exact model, maximum supported RAM, and required RAM type (DDR3, DDR4, DDR5) and speed before purchasing anything.
- Safety first: Always power down completely, unplug the charger, remove the battery if possible, and ground yourself to prevent static electricity damage to sensitive components.
- Tools are simple: Typically, you only need a small Phillips-head screwdriver and a plastic spudger or pry tool. A clean, well-lit workspace is crucial.
- Installation is straightforward: Most modern laptops have an access panel on the bottom. The RAM slots use a simple clip mechanism—release, angle, and press until it clicks.
- Verification is key: After installation, enter the BIOS/UEFI and check your operating system’s system information to confirm the new RAM is recognized and running at the correct speed.
- It’s a powerful, cheap upgrade: Adding RAM is often far less expensive than buying a new laptop and can breathe new life into a system that’s 3-5 years old.
- Know when to stop: If your laptop has soldered RAM or a sealed chassis, this upgrade isn’t for you. Seek professional help if you’re uncomfortable with any step.
📑 Table of Contents
- Understanding RAM: The Heart of Your Laptop’s Multitasking
- The Compatibility Check: Don’t Buy Anything Until You Do This
- Gathering Your Tools and Preparing Your Workspace
- Step-by-Step: Opening the Laptop and Installing the RAM
- Reassembly and First Boot: The Moment of Truth
- Verifying the Upgrade and Optimizing Performance
- Troubleshooting Common Post-Upgrade Issues
- Conclusion: Your Faster Laptop Awaits
Understanding RAM: The Heart of Your Laptop’s Multitasking
Think of your laptop’s RAM as a large, clear desk. When you open an application like a web browser with ten tabs, a word processor, and a music player, you’re spreading all those papers, books, and tools out on your desk. The bigger the desk (more RAM), the more things you can have out and actively working on without having to constantly shuffle things into and out of a storage closet (your much slower hard drive or SSD). If your desk is too small (low RAM), everything gets cramped. You waste time putting things away and pulling them back out, which is exactly what causes that frustrating lag and stutter when you switch between tasks.
Signs Your Laptop is Begging for More RAM
How do you know if a RAM upgrade will solve your specific problems? The symptoms are often consistent:
- Constant Hard Drive Activity: You hear the fan whirring and the hard drive (if you have one) clicking constantly, even when you’re not doing much. This is your system “swapping” data from RAM to the much slower storage drive to make room.
- Slow to Wake: After your laptop sleeps, it takes a long time to become responsive again because it’s reloading everything from storage.
- Programs Stutter and Freeze: Simple actions like typing in a document or scrolling a webpage become jerky, especially with multiple programs open.
- Error Messages: Windows might pop up warnings about “low memory” or suggest closing programs to free up resources.
Before you buy anything, you need to become a detective. Your first tool is the built-in Task Manager (Ctrl+Shift+Esc in Windows). Go to the “Performance” tab and click on “Memory.” Look at the “Committed” value versus the “Commit Limit.” If your committed memory is regularly near or over the limit, your system is starved for RAM. This is your smoking gun.
The Compatibility Check: Don’t Buy Anything Until You Do This
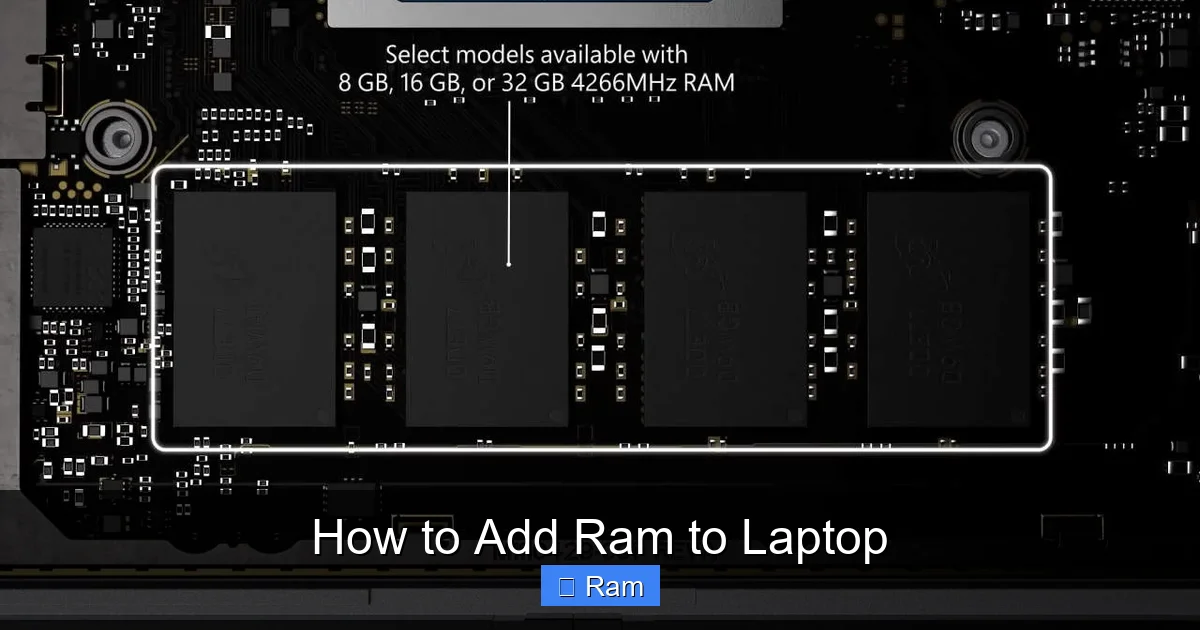
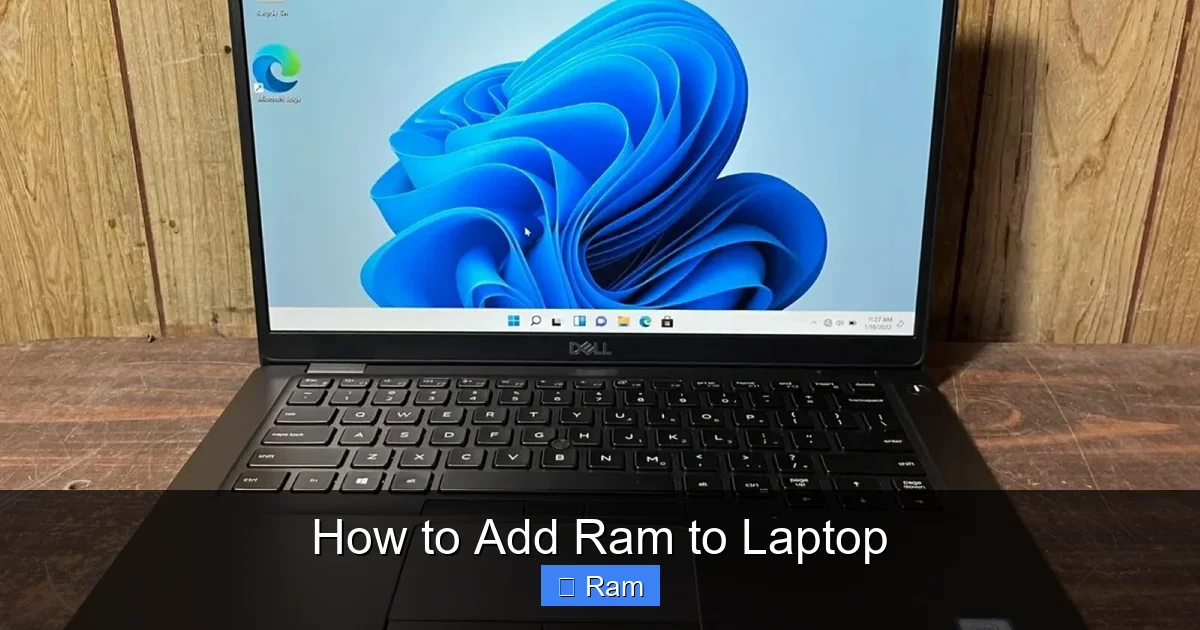
This is the most critical phase. Buying the wrong RAM is a waste of money and can potentially damage your laptop. You need three precise pieces of information: the type of RAM (DDR3, DDR4, DDR5), the speed (e.g., 2666MHz, 3200MHz), and the maximum amount your laptop’s motherboard can support. A fourth, often overlooked detail is the number of available slots and what’s currently installed.
Visual guide about How to Add Ram to Laptop
Image source: robots.net
Method 1: Using System Information Tools (Easiest)
The fastest way is to use a free, trusted system scanner utility. Websites like Crucial.com and Kingston.com offer fantastic tools that scan your system and tell you exactly what you have and what you can upgrade to. They will also recommend compatible modules for sale. This is the best starting point for most users. Just download and run their scanner; it’s safe and requires no technical knowledge.
Alternatively, on Windows, you can get some info from Task Manager (Performance > Memory) which shows the “Speed” and “Form factor” (SO-DIMM for laptops). For a deeper dive, type “msinfo32” into the Run dialog (Win+R) and look at “Installed Physical Memory (RAM)” and “System Model.” The System Model is your laptop’s exact model number—write it down!
Method 2: Manual Investigation (The Thorough Approach)
If you prefer to verify yourself or the scanner tools are unclear, you need to physically open your laptop. Do not do this until you have all other information. First, locate your laptop’s exact model number. It’s on a sticker on the bottom, often under the battery. Search “[Your Exact Model Number] specifications” on the manufacturer’s website (e.g., Dell, HP, Lenovo, ASUS). Find the official “Technical Specifications” or “Manual” page. Look for sections titled “Memory,” “Memory Specifications,” or “Upgradeable Memory.” Here you will find the gold standard: maximum supported RAM, supported types and speeds, and the number of slots.
For example, a spec sheet might read: “Memory: 16GB, 1x SODIMM slot, Supports up to 32GB, DDR4 2666MHz.” This tells you everything. It has one slot, currently has 16GB, and you can install a single 32GB DDR4 2666MHz module. If it says “2x SODIMM slots,” you can often add a second stick to double your capacity in dual-channel mode for better performance.
Gathering Your Tools and Preparing Your Workspace
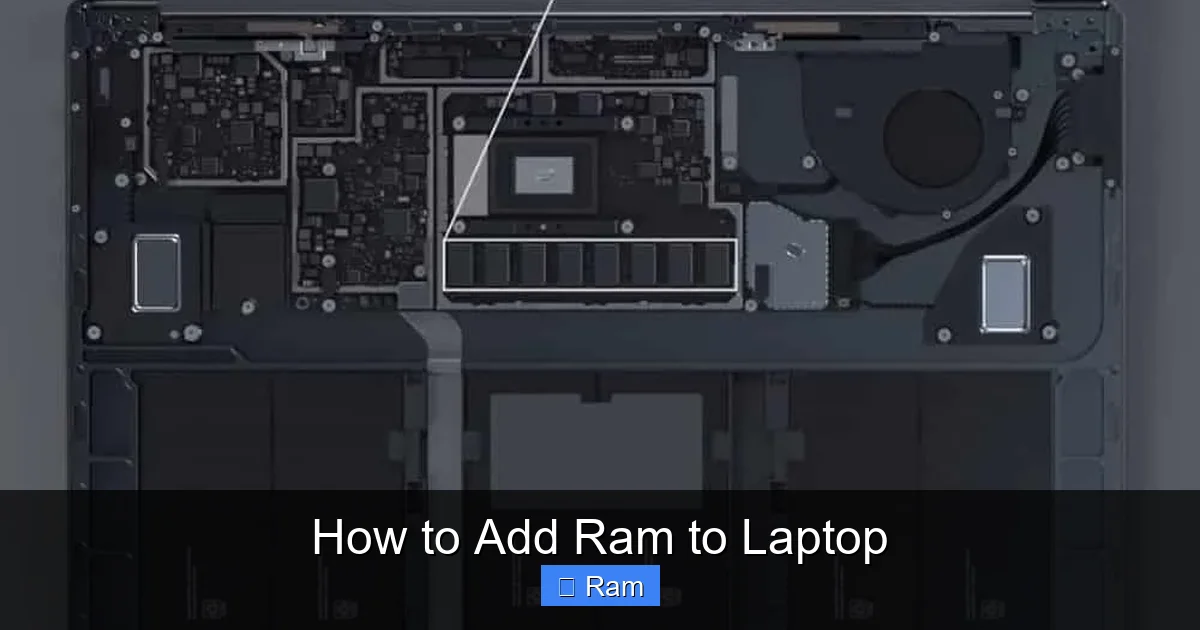
With your compatible RAM module ordered and on its way (stick to reputable brands like Crucial, Kingston, Corsair, or G.Skill), it’s time to prepare for the physical installation. A clean, organized workspace prevents lost screws and static damage.
Visual guide about How to Add Ram to Laptop
Image source: surfacetip.com
The Essential Toolkit (It’s Tiny)
You likely already have what you need:
- A small Phillips-head screwdriver (#0 or #1): This is for removing the screws on the laptop’s bottom panel. Some laptops use Torx screws; check your screws before you start.
- A plastic spudger or pry tool: For gently prying open plastic clips without scratching. An old credit card can work in a pinch.
- A container for screws: A small cup, bowl, or piece of paper with double-sided tape to keep screws from rolling away.
Optional but helpful: a static wrist strap. If you don’t have one, you can discharge static by periodically touching an unpainted metal part of the laptop’s chassis (like a port screw) while you work.
Safety Precautions: Protecting Your Investment
Static electricity is the #1 enemy of computer components. It can fry a RAM module without leaving a visible mark. Before you touch anything inside the laptop:
- Power Down Completely: Don’t just sleep or hibernate. Shut the laptop down fully via the operating system.
- Unplug Everything: Remove the AC adapter charger and any other cables or peripherals (USB drives, monitors, etc.).
- Remove the Battery (if possible): This is the single best safety step. If your laptop has a removable bottom panel and a large, easily accessible battery, unplug its connector and remove the battery pack. For modern ultrabooks with sealed batteries, this step isn’t possible, so be extra vigilant about the next steps.
- Discharge Static: Put on the static wrist strap, clipping the metal end to an unpainted part of the laptop’s metal chassis. If no strap, regularly touch the metal port areas to ground yourself.
- Work on a Non-Conductive Surface: A wooden table or a large cardboard box is ideal. Avoid carpets and blankets.
Step-by-Step: Opening the Laptop and Installing the RAM
Now, the moment of truth. This process varies slightly by manufacturer, but the core principles are universal. Most serviceable laptops have a single, large access panel on the bottom secured by multiple screws. Some business-class laptops (like older ThinkPads or Dell Latitudes) have a smaller, dedicated RAM access door. We’ll cover the common single-panel method.
Visual guide about How to Add Ram to Laptop
Image source: wepc.com
Step 1: Removing the Bottom Panel
Place your laptop upside-down on your non-conductive surface. Locate all the screws around the edge of the bottom panel. Important: Note the length and location of each screw. Some screws, especially those near the hinge or display, are often longer. Keep them in your screw container in the order you remove them. Gently pry around the panel’s edges with your plastic spudger. You should hear a series of small clicks as plastic retaining clips release. Work your way around. The panel should lift off. Be mindful of any ribbon cables (like for the Wi-Fi antenna) that might be attached to the panel—if you see them, disconnect them carefully by pulling on the plastic connector, not the wires.
Step 2: Locating and Removing the Old RAM
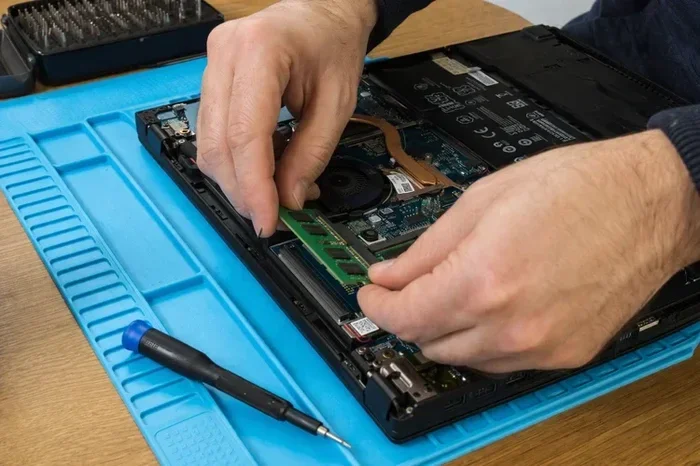
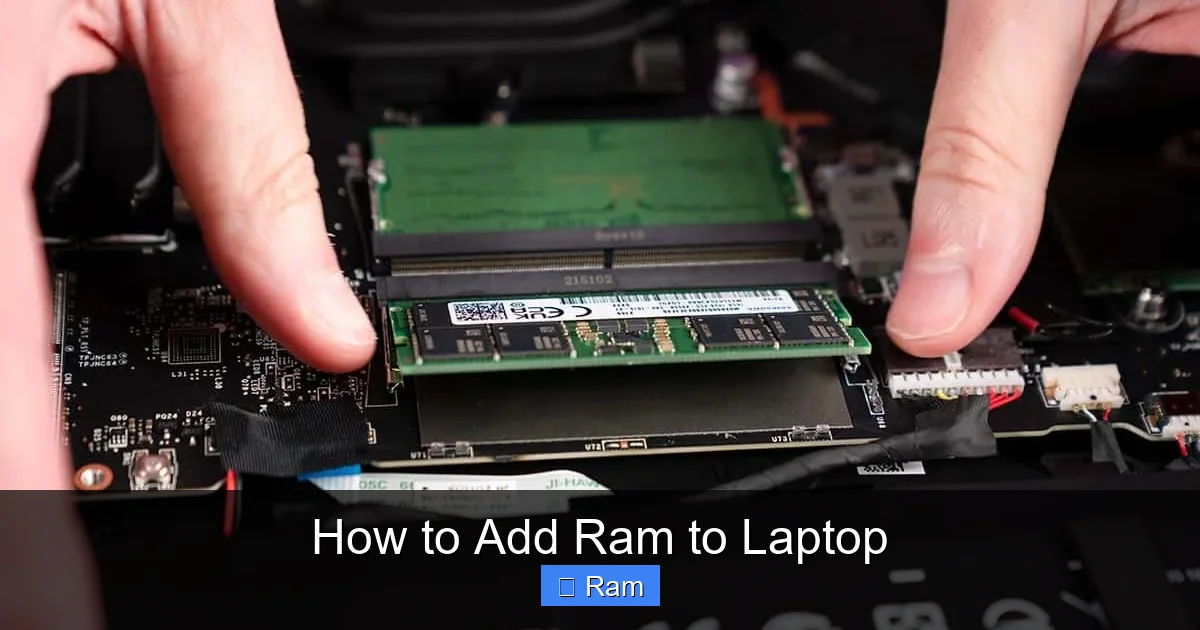
Once inside, you’ll see the RAM modules. They are small, green circuit boards with black chips on them, held in place by small metal clips on either side. They are usually easy to spot. To remove a module:
- Push the clips outward: Use your fingers or a spudger to gently push both retaining clips away from the module. They will pivot outward. This releases the module, which will pop up at an angle (usually about 45 degrees).
- Grab and pull: Grasp the module by its edges (avoid touching the gold contacts or chips) and pull it straight out. It has a notched key, so it only fits one way. Don’t force it.
- Store safely: Place the old RAM in an anti-static bag if you have one, or just set it aside safely.
If your laptop has two modules and you are replacing both or adding a second, remove both old ones. If you are adding a second stick to an empty slot, simply leave the existing one in place and proceed to install the new one in the empty slot.
Step 3: Installing the New RAM Module
This is the reverse of removal, and it’s satisfyingly simple.
- Align the notch: Hold the new RAM module by the edges. Look at the notch (the key) in the gold contacts. Align it perfectly with the key in the slot. It will only fit one way. Do not force it.
- Insert at an angle: Place one edge of the module into the slot first, then press the other edge down until the module sits flat and parallel to the motherboard at about a 30-45 degree angle.
- Press down firmly: Apply even pressure to the top edge of the module. You should hear and feel two distinct clicks as the retaining clips snap back into place, securing the module. The module should be held firmly and not wiggle at all. If it’s loose, the clips didn’t engage—try pressing a bit more firmly and evenly.
Repeat for a second module if needed. Ensure both are seated identically.
Reassembly and First Boot: The Moment of Truth
Before you put everything back together, do a quick visual check. Are both RAM modules seated perfectly flat? Are the clips fully engaged? Is there any stray screw or tool left inside? Great. Now, let’s reverse the disassembly.
Step 4: Closing Up the Laptop
If you disconnected any ribbon cables (like Wi-Fi antennas) from the bottom panel, reconnect them now. Gently lay the bottom panel back onto the chassis. It should sit flush. Press around the edges to engage all the plastic clips. You’ll hear a symphony of clicks. Now, reinstall all the screws. Do not overtighten. Screw them in snugly until they are flush with the panel’s surface. Overtightening can strip the plastic threads. Use your memory of screw lengths to put the correct screws in the correct holes.
Step 5: The First Power-On and Verification
This is the critical test. Reconnect the AC adapter but do not reconnect any other peripherals yet. Press the power button.
- If it powers on normally: Excellent! The hardware recognized the change. Let it boot to your operating system.
- If it beeps repeatedly or shows a black screen: Power it down immediately. The RAM is likely not seated correctly. Open it back up, remove the modules, re-seat them firmly, and try again.
- If the power light comes on but the screen stays black: Try reseating the RAM again. If that fails, try booting with only the new RAM (remove the old stick if you kept it). This isolates a faulty module.
Once in your OS, you must verify the upgrade worked.
Verifying the Upgrade and Optimizing Performance
Don’t just assume it worked. Confirm it.
Checking in Windows
Right-click the Start button and select “System.” Under “Device specifications,” look at “Installed RAM.” It should show your new total (e.g., “16.0 GB”). For more detail, press Ctrl+Shift+Esc to open Task Manager, go to the “Performance” tab, and select “Memory.” The top-right will show the total, speed, and form factor (should say “SO-DIMM”). The speed should match what you bought (e.g., 3200 MHz). If it shows a lower speed (like 2666 instead of 3200), your laptop’s BIOS may be defaulting to a lower speed. This is common and usually not a problem; the RAM will run at the system’s supported speed.
Checking in macOS
Click the Apple menu > About This Mac. The memory information is displayed right on the overview page. It will list the total memory and its configuration (e.g., “16 GB 2133 MHz LPDDR3”).
Stress Testing (Optional but Recommended)
Run your normal workload for a few hours. Open all the programs you typically use simultaneously. The system should feel snappier, with fewer hard drive activity lights. You can also use a free tool like MemTest86 to create a bootable USB and run a thorough memory diagnostic to ensure there are no errors. This is the ultimate peace of mind that your new RAM is healthy.
Troubleshooting Common Post-Upgrade Issues
Even with careful work, minor hiccups can happen. Here’s how to handle them.
“The Laptop Won’t Turn On At All”
This is almost always a seating issue. Power down, unplug, and open the case. Remove the RAM modules. Look at the gold contacts—if they are dirty, gently wipe them with a pencil eraser or isopropyl alcohol on a lint-free cloth. Re-seat the modules, pressing down firmly until you hear/feel the clips click securely. Try booting again. If it still fails, try booting with only one module at a time, testing each slot individually. This identifies a bad stick or a bad slot.
“The RAM Isn’t Detected / Shows Less Than I Installed”
First, double-check your compatibility research. Did you accidentally buy a RAM type (e.g., DDR4) that your laptop doesn’t support? If the RAM is physically incompatible, it might not seat properly or won’t be recognized. If the type is correct but capacity is wrong, you may have exceeded your motherboard’s maximum limit. The system will only use up to its max. Also, on some 32-bit versions of Windows, the system can only use about 3.2-4GB of RAM regardless of how much you install. You must be running a 64-bit OS to use more than 4GB.
“The System is Unstable or Crashes”
This is rare with quality RAM but can happen if the RAM is defective or if the speed/timings are incompatible. Boot into your BIOS/UEFI settings (usually by pressing F2, Del, or F12 during startup). Look for memory settings. Try disabling any XMP/DOCP profiles and setting the speed manually to a lower, standard frequency (e.g., 2666MHz for DDR4). Save and exit. If stability returns, your laptop’s memory controller doesn’t like the higher speed. Running at a slightly lower speed is perfectly fine and will still be a massive upgrade over your old, slower RAM.
Conclusion: Your Faster Laptop Awaits
You did it. By following this guide on how to add RAM to a laptop, you’ve taken control of your machine’s performance. You’ve saved money, reduced electronic waste, and gained a valuable technical skill. That sluggish feeling is now a thing of the past, replaced by the smooth, responsive experience you paid for when you first bought your laptop. Remember the core principles: research compatibility obsessively, prioritize static safety, and handle components with care. Your laptop is no longer a passive tool; it’s a system you understand and can improve. Now go enjoy those dozens of open browser tabs without a single stutter.
Frequently Asked Questions
Can I add RAM to any laptop?
No. Many modern ultrabooks and laptops have RAM that is soldered directly to the motherboard, making upgrades impossible. Some have one slot that’s soldered and one that’s accessible. You must check your specific laptop’s service manual or official specifications to see if it has user-accessible RAM slots.
What happens if I install the wrong type of RAM?
The module will physically not fit into the slot due to a different notch position. If you somehow force it, you risk bending pins and causing permanent damage to both the RAM and the motherboard. Always verify the DDR generation (DDR3, DDR4, DDR5) and form factor (SO-DIMM for laptops) before purchasing.
How much RAM do I really need?
For general web browsing, office work, and media consumption, 8GB is the modern minimum. For comfortable multitasking with many browser tabs and applications, 16GB is the sweet spot for most users. For demanding tasks like video editing, 3D rendering, or running virtual machines, 32GB or more is recommended. Check the requirements of your specific software.
Will adding RAM void my laptop’s warranty?
It depends on your manufacturer and warranty terms. Opening the chassis to access RAM often voids the warranty, especially on consumer-grade laptops. However, many business laptops (like Dell Latitude, Lenovo ThinkPad) have user-upgradeable components under a warranty that remains valid. Check your warranty documentation. In many cases, if the RAM is in a standard accessible slot, it may be covered, but any damage caused during installation would not be.
My laptop turns on but shows no display after installing RAM. What now?
First, power down and unplug. Open the case and re-seat the RAM modules, ensuring they are clicked firmly into place. If that fails, try booting with only one RAM stick installed, testing each stick individually in each slot. This process will identify if a stick is faulty or if a slot is damaged. Also, ensure you are using compatible RAM as per your laptop’s specifications.
Is it better to have one large RAM stick or two smaller ones?
If your laptop has two slots, using two identical sticks (e.g., 2x8GB) enables dual-channel mode, which can provide a noticeable performance boost (5-15% in some applications) by allowing the memory controller to access both modules simultaneously. A single stick (1x16GB) runs in single-channel mode but leaves one slot free for a future upgrade. For the best performance now, two matching sticks are ideal. For maximum future flexibility, start with one large stick.