Knowing your laptop’s RAM is crucial for performance troubleshooting and upgrade planning. You can easily check your RAM capacity, speed, and type using built-in operating system tools on Windows, macOS, or Linux. For detailed specs, third-party software provides a deeper look, while physically inspecting the memory modules is necessary for compatibility before an upgrade.
Key Takeaways
- Built-in OS tools are the fastest first step: Use Task Manager on Windows, About This Mac, or terminal commands on Linux to instantly see total RAM and usage.
- Third-party software gives detailed specs: Tools like CPU-Z or Speccy reveal RAM type (DDR4/DDR5), speed in MHz, channel configuration, and manufacturer details.
- Physical inspection is required for upgrades: To see exact model numbers and check for empty slots, you must open the laptop’s service panel.
- Check RAM before buying upgrades: Matching the new RAM’s type (DDR), speed, and voltage to your existing modules is essential for compatibility and stability.
- Low RAM causes specific slowdown symptoms: If your laptop struggles with many browser tabs or basic apps, checking RAM is a key diagnostic step.
- Integrated vs. dedicated memory matters: Some RAM is soldered to the motherboard and cannot be upgraded; checking physically confirms if slots exist.
- Monitoring usage helps optimize performance: Regularly checking RAM utilization can identify if a memory upgrade is truly needed versus other performance fixes.
📑 Table of Contents
- Why Knowing Your Laptop’s RAM Matters
- Method 1: Using Built-In Operating System Tools
- Method 2: Leveraging Third-Party System Information Software
- Method 3: The Physical Inspection (For Upgrades)
- Understanding the Specs: What All This Data Means
- When and Why You Should Check Your RAM
- Common Pitfalls and Troubleshooting
- Conclusion: Knowledge is Power (and Performance)
Why Knowing Your Laptop’s RAM Matters
Have you ever felt your laptop dragging its feet? Maybe it groans when you open too many browser tabs, or simple tasks like switching between documents feel sluggish. While there are many culprits for a slow computer, one of the most common and upgradeable components is Random Access Memory, or RAM. Think of RAM as your laptop’s short-term workspace. The more RAM you have, the more applications and files it can hold in immediate, fast-access memory. When this workspace fills up, your system has to shuffle data back and forth to the much slower hard drive or SSD, creating that frustrating lag.
This is why learning how to check ram memory in laptop is a fundamental skill for any user. It empowers you to diagnose performance issues, plan a cost-effective upgrade, or simply understand your machine’s capabilities. Whether you’re a student, a professional, or a casual user, knowing your RAM specs—like total capacity, speed, and how many slots you have—gives you control over your laptop’s performance destiny. This guide will walk you through every method, from the simplest clicks to opening the case, ensuring you get the complete picture.
Method 1: Using Built-In Operating System Tools
The easiest way to check your RAM doesn’t require any downloads. Your operating system—whether it’s Windows, macOS, or a Linux distribution—comes with powerful, built-in utilities that display your memory status. These tools are perfect for a quick check of total installed RAM and current usage. Let’s explore each one.

Visual guide about How to Check Ram Memory in Laptop
Image source: briteccomputers.co.uk
Checking RAM on Windows (10 & 11)
Windows provides several straightforward ways to view your memory information. The most user-friendly is the Task Manager.
- Via Task Manager: Press Ctrl + Shift + Esc or right-click the taskbar and select “Task Manager.” Click the “Performance” tab. On the left, select “Memory.” Here you’ll see a graph of usage, your total installed RAM (e.g., “16.0 GB”), the speed (in MHz), the form factor (typically SODIMM for laptops), and how many slots are used versus available. This is often all you need for a quick overview.
- Via System Information: Press Win + R, type msinfo32, and hit Enter. The “System Summary” will list “Installed Physical Memory (RAM).” For more detail, expand “Components” and select “Memory.” This section lists each memory stick’s capacity, speed, and manufacturer part number if the system can read it.
- Via Settings: Go to Settings > System > About. Under “Device specifications,” you’ll see “Installed RAM.” This is a simple readout but doesn’t show speed or slot usage.
Pro Tip: The Task Manager’s memory speed reading can sometimes be inaccurate or blank, especially on newer systems. For verified speed, use a third-party tool as described later.
Checking RAM on macOS
Apple makes this process beautifully simple.
- Via About This Mac: Click the Apple logo in the top-left corner and select “About This Mac.” The overview window immediately shows your total memory (e.g., “8 GB”). For more technical details, click “System Report…” In the new window, under “Hardware,” select “Memory.” This page lists the number of memory slots, size of each slot, type (e.g., DDR4), and speed. It’s a clean, comprehensive report.
- Important Note for Mac Users: Most modern MacBooks have their RAM soldered directly to the motherboard, meaning it cannot be upgraded. The “Memory” tab in System Report will confirm this. If you have an older MacBook Pro (pre-2019 for most models), it may have user-upgradable slots. This report tells you exactly what you have and if upgrades are possible.
Checking RAM on Linux
Linux offers powerful command-line tools. Open your terminal (Ctrl+Alt+T in most distributions).
- Using the free command: Type free -h. The “-h” flag makes the output human-readable (in GB/MB). Look at the “total” row under “Mem:” This shows your total usable RAM. The “+/- buffers/cache” row gives a more accurate picture of *available* RAM.
- Using the dmidecode command: For detailed, model-specific information, use sudo dmidecode -t memory. You’ll need administrator (sudo) privileges. This command parses the system’s DMI table and outputs exhaustive details about each memory module: size, type (DDR3/DDR4/DDR5), speed, manufacturer, and part number. Scroll through the output to find “Size,” “Type,” “Speed,” and “Part Number” for each DIMM.
- Using the /proc/meminfo file: Type cat /proc/meminfo. This provides a raw data dump of memory information from the kernel. Look for “MemTotal” for total RAM.
For most users, free -h is sufficient for a quick check, while dmidecode is the gold standard for full specs.
Method 2: Leveraging Third-Party System Information Software
While built-in tools are great, third-party software often provides a more polished, detailed, and easier-to-understand interface. These programs are invaluable when you need the exact part number of your RAM module for a purchase or deep troubleshooting.
Visual guide about How to Check Ram Memory in Laptop
Image source: static-src.com
CPU-Z: The Gold Standard for Hardware Details
CPU-Z is a free, lightweight, and trusted utility that reads all the low-level data from your system’s components. It’s the go-to for precise memory information.
- Download and install CPU-Z from the official cpuid.com website.
- Run the program and navigate to the “Memory” tab. Here you’ll see the “Type” (DDR), “Size” (Total & Per Channel), and “Channels #”.
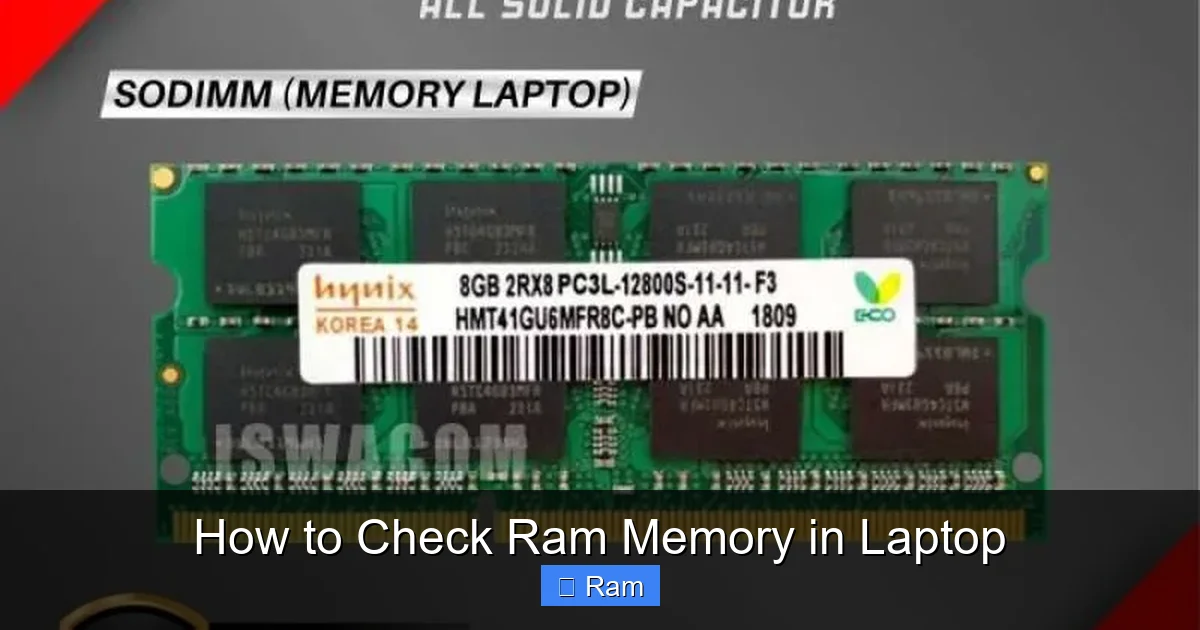
- The real treasure is in the “SPD” tab. Select each memory slot from the drop-down menu. This shows the detailed specifications for that specific RAM stick as reported by its on-board serial presence detect chip: Module Size, Max Bandwidth (e.g., DDR4-3200), Manufacturer, Part Number, and Serial Number. This part number is critical for matching new RAM.
Why CPU-Z is so reliable: It reads the data directly from the memory module’s SPD chip, which is the most accurate source. It also shows the “DRAM Frequency” (the true speed) versus the “Effective Frequency” (which is multiplied by the DDR technology).
Speccy: A User-Friendly Overview
Developed by Piriform (makers of CCleaner), Speccy offers a visually appealing and easy-to-navigate summary of all your PC’s specs.
- Download Speccy (the free version is sufficient).
- Upon launching, it provides a one-page summary. Click on “RAM” in the left sidebar.
- It displays total capacity, type, channels, and importantly, lists each individual memory slot. For each slot, it shows the size, type, speed, and manufacturer. If a slot is empty, it clearly states “Empty.”
Speccy is excellent for a quick, at-a-glance understanding of your memory configuration, especially the “Slots” section which visually maps what’s installed.
Other Notable Tools
- HWiNFO: Even more detailed than CPU-Z, favored by enthusiasts and technicians. It provides sensor readings and extremely comprehensive reports.
- Windows PowerShell/Command Prompt: You can use the command Get-WmiObject -Class Win32_PhysicalMemory | Format-List * to pull detailed memory data, but it’s less user-friendly than a GUI tool.
Safety Note: Only download these tools from their official websites to avoid bundled malware or adware.
Method 3: The Physical Inspection (For Upgrades)
If your goal is to upgrade your laptop’s RAM, software tools alone may not be enough. You need to physically see the modules to confirm the exact model, check for an empty slot, and understand the layout. This method is for when you’re ready to open your laptop.
Visual guide about How to Check Ram Memory in Laptop
Image source: maxframe.dz
Essential Precautions Before You Open
Before you touch a screwdriver:
- Power Down Completely: Shut down the laptop, don’t just sleep or hibernate it.
- Unplug Everything: Remove the charger and any connected peripherals.
- Discharge Static: Work on a non-carpeted surface. Touch a grounded metal object (like a bare desk leg) before touching internal components to discharge static electricity. An anti-static wrist strap is ideal for frequent work.
- Consult the Manual: Your laptop’s user manual or service guide (often found as a PDF on the manufacturer’s support site) is your best friend. It will show the exact location of the RAM access panel and any special screws (like Torx).
- Know Your Warranty: Opening the case may void the warranty on some models. Check first.
Step-by-Step Physical Check
- Locate the Service Panel: Turn the laptop over. Look for a small panel, often held by one or two screws, usually marked with a RAM symbol (two upright rectangles with a line at a 45-degree angle). Some ultrabooks require removing the entire bottom plate.
- Remove Screws and Panel: Use the correct screwdriver. Keep screws safe. Gently pry the panel off with a plastic spudger if needed.
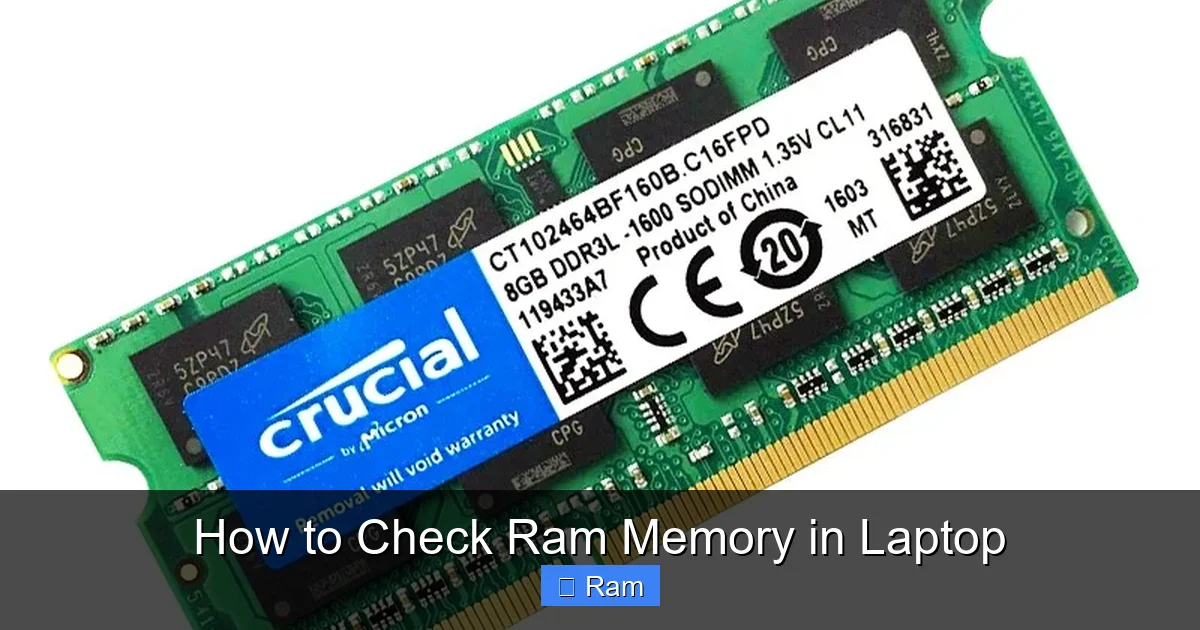
- Identify the RAM Slots: You’ll see one or two small, green circuit boards (the RAM modules) held down by small metal clips on either side. They are installed at a 30-45 degree angle and then pressed down flat.
- Read the Label: Carefully eject each module by pushing the clips outward. The module will pop up. Flip it over and look for a white sticker. This sticker contains the critical information: the part number (e.g., “HMA851S6CJR6N-XN”), the speed (e.g., “3200”), the size (e.g., “8GB”), and the type (e.g., “DDR4 SODIMM”).
- Check for Empty Slots: Simply see if a slot is unoccupied. If you have one stick and two slots, you have an upgrade path. If both slots are filled, you must replace existing modules with higher-capacity ones to upgrade.
- Reassemble: Once you’ve noted all details, gently re-insert the modules at the same angle, press them down until the clips snap into place, and reattach the panel.
Critical Insight: The part number from the sticker is the most reliable way to buy matching RAM. Search for this exact number online to find identical or compatible modules from brands like Crucial, Kingston, or Samsung.
Understanding the Specs: What All This Data Means
You’ve gathered your RAM information, but what does it all mean? Understanding these specs is key to making informed decisions.
Capacity (GB): The Most Important Number
This is the total amount of RAM, measured in Gigabytes (GB). For general use (web browsing, office apps), 8GB is the bare minimum today. For multitasking, photo editing, or light gaming, 16GB is the sweet spot. For professional video editing, 3D rendering, or heavy virtual machines, 32GB or more is recommended. When checking, note if it’s a single 16GB stick or two 8GB sticks—this affects future upgrade paths.
Type (DDR4, DDR5, LPDDR): Generational Leap
Dynamic SDRAM generations are not backward compatible. DDR4 has been standard for years. DDR5 is newer, offering higher speeds and efficiency but is currently more expensive and found in recent high-performance laptops. LPDDR (Low Power DDR) is soldered and used in ultra-thin laptops for better battery life; it cannot be upgraded. Your software check or physical label will state the type. You must match this exactly.
Speed (MHz or MT/s): Bandwidth Matters
Measured in Megahertz (MHz) or MegaTransfers per second (MT/s), this is how fast the RAM can read/write data. Common speeds are 2666MHz, 3200MHz, 4800MHz, etc. Faster RAM can improve performance in memory-intensive tasks like gaming and rendering. When upgrading, you can mix speeds, but all modules will run at the speed of the slowest stick. For best performance, use matched pairs (same capacity, speed, timings).
Timings (CL, tRCD, tRP, tRAS): The Latency Numbers
These are the “CAS Latency” (CL) and other timings, usually written as something like 16-18-18-38. They represent delays in clock cycles. Lower numbers are better and indicate faster response times. For average users, matching timings isn’t critical, but enthusiasts building high-performance systems should match them for stability. Your third-party software will show these.
Channels (Single, Dual, Flex): How RAM Talks to the CPU
Modern laptops typically use dual-channel mode, where two identical RAM sticks work in tandem for double the data bandwidth. Your software will show “Channels #: Dual.” If you have one stick, you’re in single-channel mode, which is slower. If you have an empty slot, adding a matching second stick to enable dual-channel can give a noticeable performance boost, especially with integrated graphics.
When and Why You Should Check Your RAM
Checking your RAM isn’t just a one-time task. It’s a valuable diagnostic and planning tool you should use in several key scenarios.
Diagnosing a Slow Laptop
Before you blame the hard drive or the CPU, check RAM usage. Open Task Manager (Performance > Memory) and look at the “In use (Compressed)” graph. If it’s consistently above 80-90%, your system is starved for memory. You’ll likely see “Hard Faults/sec” if the system is constantly swapping data to the disk. This is a clear sign that a RAM upgrade would help. Also, check if your RAM speed is running at its rated MHz; sometimes power settings or BIOS issues can downclock it.
Before Buying a RAM Upgrade
This is the most critical reason. Never buy RAM based solely on your laptop model. Manufacturers often use different suppliers. You must:
- Check how many slots you have (physically or via Speccy’s slot view).
- Find the exact type (DDR4/DDR5).
- Note the speed of your existing modules.
- Get the part number from the physical sticker for guaranteed compatibility.
- Use a configurator tool from a reputable RAM seller (like Crucial’s System Scanner or Kingston’s Memory Search) which cross-references your laptop model with known compatible modules.
After Buying a Used or Refurbished Laptop
You never know what’s inside a used machine. The seller might claim “8GB RAM,” but it could be slow, single-channel, or a mix of brands. Run CPU-Z or Speccy immediately to verify the actual configuration and ensure you’re getting what you paid for.
For Virtual Machines or Specialized Workloads
If you run virtual machines (like with VMware or VirtualBox), each VM needs its own chunk of RAM. Knowing your total capacity and available slots is essential to plan how many VMs you can run simultaneously without crippling your host OS.
Common Pitfalls and Troubleshooting
Even after checking, you might encounter issues. Here are solutions to common problems.
My Laptop Shows Less RAM Than I Installed
This is a classic problem, especially on 32-bit Windows systems (which max out at ~3.5GB). The solution is to install a 64-bit version of Windows. Other causes:
- Integrated Graphics Sharing: Some laptops dedicate a portion of RAM (e.g., 512MB-2GB) to the integrated GPU. This reserved memory will show as “hardware reserved” in Task Manager. This is normal and reduces available RAM.
- Faulty or Improperly Seated RAM: Power down, open the case, remove and firmly re-seat the memory modules. Clean the gold contacts with isopropyl alcohol if they look tarnished.
- Incompatible RAM: If you recently added new sticks, they might not be playing nice with the old ones. Try booting with only the new sticks installed to test them individually.
I Have an Empty Slot, But the System Won’t Recognize New RAM
- Wrong Type: You may have bought DDR4 for a DDR3-only laptop. Double-check the type.
- Speed Mismatch: While the system will downclock to the slowest module, some older chipsets have compatibility lists. Check your laptop’s official specs for supported speeds.
- Maximum Capacity Per Slot: Your laptop’s chipset or BIOS may have a per-slot limit (e.g., 16GB per slot). A 32GB stick in a 16GB-slot system won’t work. Check the manufacturer’s maximum supported RAM specification.
- BIOS/UEFI Update: An outdated BIOS can sometimes cause memory compatibility issues. Check the laptop manufacturer’s support page for a BIOS update, but follow instructions carefully as a failed update can brick the system.
My RAM Speed is Lower Than Advertised
If CPU-Z shows your 3200MHz RAM running at 2133MHz, it’s likely because the default BIOS setting is for the conservative JEDEC standard. To run at the advertised XMP/EXPO profile (the factory overclock), you may need to:
- Enter the BIOS/UEFI during boot (usually by pressing F2, Del, or F10).
- Look for an “XMP” or “Memory Profile” setting and enable it.
- Caution: Not all laptop BIOSes expose this setting. Many consumer laptops lock memory profiles to the JEDEC speed for stability. In this case, your RAM will run at its base speed, which is still perfectly functional, just not at its peak performance.
Conclusion: Knowledge is Power (and Performance)
Learning how to check ram memory in laptop transforms you from a passive user into an active manager of your technology. It’s the first, most logical step in the performance optimization journey. You started by understanding the simple “how much” from your OS, graduated to the detailed “what kind” with tools like CPU-Z, and can now confidently open the case to see the “exact model” for a guaranteed upgrade. This knowledge saves you money—no more buying the wrong RAM—and frustration—no more wondering why your laptop is slow. Make it a habit to check your RAM specs when you get a new machine, before any major purchase, or whenever your system feels sluggish. With this guide in hand, you have all the methods you need to get a complete, accurate read on your laptop’s memory, empowering every future decision about its care and feeding.
Frequently Asked Questions
What’s the difference between checking RAM via Task Manager and using CPU-Z?
Task Manager gives a quick, user-friendly overview of total RAM and current usage, but its speed reading can be inaccurate. CPU-Z reads the detailed SPD data directly from the memory module, providing the exact part number, true speed, timings, and manufacturer, which is essential for upgrades.
Can I check my RAM type without opening my laptop?
Yes, for the vast majority of cases. Use a tool like CPU-Z or Speccy. The “SPD” tab in CPU-Z or the “Memory” section in Speccy will list the RAM type (DDR4/DDR5) and speed without needing to physically access the modules. Opening the laptop is only necessary to see the physical part number label for guaranteed compatibility when buying replacements.
My laptop shows 8GB RAM, but I installed 16GB. Why?
First, ensure you installed the RAM correctly by re-seating the modules. If that fails, the most common reason is that your laptop’s chipset or BIOS has a maximum RAM limit that is lower than your new module’s capacity (e.g., it only supports 8GB per slot). Check your laptop manufacturer’s specifications for the maximum supported RAM. A faulty RAM stick is also possible.
Is it better to have one large RAM stick or two smaller ones?
For performance, two smaller sticks (e.g., two 8GB) in a dual-channel configuration is generally better than one large stick (one 16GB), as it doubles the data bandwidth to the memory controller. However, two sticks leave no room for future expansion without replacing both. One large stick leaves an empty slot for a future addition but runs in single-channel mode. The best path depends on your current needs and future upgrade plans.
How often should I check my laptop’s RAM?
You don’t need to check it regularly. Do it when: 1) Your laptop feels unexpectedly slow, 2) Before purchasing and installing new RAM, 3) After buying a used laptop to verify its specs, and 4) When setting up a laptop for a demanding new purpose like video editing or gaming.
Can I mix RAM sticks with different speeds or brands?
Technically, yes, the system will boot and run all sticks at the speed of the slowest module. However, mixing brands, speeds, and timings can sometimes cause instability or prevent the system from booting, especially on sensitive platforms. For the best results, especially in a dual-channel setup, use matched pairs (same brand, model, capacity, speed, and timings). If mixing is necessary, try to at least match the type (DDR4) and voltage.