How to Check Laptop Ram
Knowing your laptop’s RAM is crucial for troubleshooting slowdowns and planning upgrades. You can easily check your RAM using built-in operating system tools like Windows Task Manager or Mac’s Activity Monitor. For detailed specs like type and speed, free third-party utilities like CPU-Z or Speccy are your best bet. This guide walks you through every method, step-by-step, so you can confidently understand your laptop’s memory capacity, usage, and specifications.
Key Takeaways
- Checking RAM is simple: Use your OS’s built-in tools (Task Manager/Activity Monitor) for a quick look at total capacity and current usage.
- For detailed specs, use third-party tools: Utilities like CPU-Z or HWiNFO reveal exact RAM type (DDR4/DDR5), speed (MHz), and channel configuration.
- RAM capacity and speed both matter: More RAM helps with multitasking, while faster RAM (higher MHz) can improve performance in specific tasks like gaming or video editing.
- Check your laptop’s maximum supported RAM: Before buying an upgrade, consult your laptop’s manual or manufacturer’s website to find its RAM limit and available slots.
- High RAM usage isn’t always bad: Modern operating systems use spare RAM for caching to speed things up. Consistently high usage (90%+) during normal tasks signals a need for an upgrade.
- Physical inspection requires care: If you open your laptop to check RAM modules, always power down, unplug, and ground yourself to avoid static damage.
- Diagnose faulty RAM with memory tests: Tools like Windows Memory Diagnostic or MemTest86 can help identify if crashes or errors are caused by failing RAM modules.
📑 Table of Contents
- Why Checking Your Laptop’s RAM is More Important Than You Think
- The Quick & Easy Way: Using Your Operating System’s Built-In Tools
- Going Deeper: Using Free Third-Party Utilities for Full Specifications
- Understanding the Numbers: Decoding Your RAM Specifications
- When and How to Upgrade Your Laptop’s RAM
- Diagnosing Problems: Is Your RAM Faulty?
- Putting It All Together: A Practical Action Plan
- Conclusion: Knowledge is Power (and Performance)
Why Checking Your Laptop’s RAM is More Important Than You Think
Have you ever felt your laptop crawling along, with the cursor spinning interminably while you just try to open a web browser? We’ve all been there. While there are many culprits for a slow computer, one of the most common and easily fixable is insufficient or mismanaged Random Access Memory (RAM). But before you can fix it, you need to know exactly what you’re working with. That’s why learning how to check laptop RAM is a fundamental skill for any user who wants to understand their machine, troubleshoot problems, and make informed upgrade decisions.
Think of your laptop’s RAM as its immediate workspace. The CPU (the brain) uses this ultra-fast, temporary storage to hold the data and instructions for all the programs and files you have open right now. When this workspace gets too crowded, the system starts using the much slower hard drive or SSD as “virtual memory,” which grinds performance to a halt. By checking your RAM, you move from guessing to knowing. You can see if you’re truly out of space, identify what’s hogging resources, and determine if a simple RAM upgrade could breathe new life into your trusted companion. This guide will demystify the process, covering every method from the quickest click to the deepest hardware inspection, all explained in plain language.
The Quick & Easy Way: Using Your Operating System’s Built-In Tools
You don’t need to be a tech wizard to get a solid overview of your laptop’s memory. Both Windows and macOS come with powerful, built-in utilities that provide instant information about your RAM capacity and how it’s being used. These are your first stops for a rapid health check.
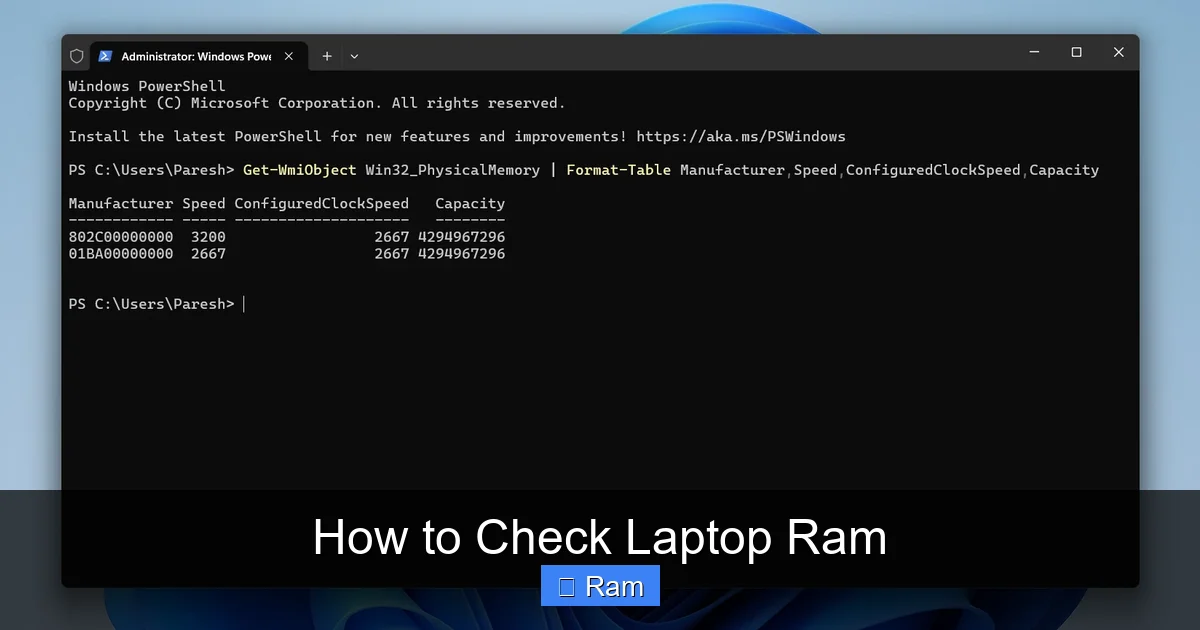
Visual guide about How to Check Laptop Ram
Image source: touchsolutionskolkata.com
For Windows Users: Mastering Task Manager
The Task Manager is more than just a program-killer; it’s a real-time performance dashboard. Here’s how to access and read it:
- How to Open It: Press the classic Ctrl + Shift + Esc keyboard shortcut. Alternatively, right-click on the taskbar and select “Task Manager,” or press Ctrl + Alt + Delete and choose it from the menu.
- Finding the RAM Info: Click on the “Performance” tab at the top. On the left-hand side, you’ll see a list of hardware components. Click on “Memory.”
What you’ll see is a graphical and numerical summary:
- Top Right (Graph): This shows your current RAM usage as a percentage. A consistently high bar (say, above 85%) during your normal workflow is a red flag that you need more RAM.
- In Use / Available: These numbers tell you exactly how many gigabytes are currently being used by your system and open applications versus what’s free and ready to use.
- Committed: This is the total amount of memory that Windows *might* need to use, combining both your physical RAM and the page file on your SSD/HDD.
- Speed, Form Factor, Hardware Reserved: Scroll down further, and you’ll see the speed (in MHz), the form factor (usually ” SODIMM” for laptops), and how much memory is reserved for hardware by your system (this is normal).
Pro Tip: The “Memory” section in Task Manager is great for spotting a specific application that’s acting like a memory hog. Switch back to the “Processes” tab, click the “Memory” column header to sort by usage, and see which program is consuming the most RAM.
For Mac Users: The Activity Monitor
Macs don’t have Task Manager; they have the equally powerful Activity Monitor. It’s your go-to tool for memory pressure.
- How to Open It: Open your “Applications” folder, then the “Utilities” folder inside it, and double-click “Activity Monitor.” You can also use Spotlight Search (Cmd + Space, type “Activity Monitor”).
- Finding the RAM Info: Click on the “Memory” tab at the top.
The key metric to focus on here is “Memory Pressure.” This is Apple’s clever, color-coded indicator of how hard your RAM is working:
- Green: Plenty of RAM available. Your system is happy.
- Yellow: Memory resources are being used, but there’s still available RAM for new apps. The system is managing memory okay.
- Red: Memory is critically low. The system is forced to use your SSD as swap memory frequently, which will cause significant slowdowns. This is your signal to consider an upgrade (if possible) or close some apps.
Below the graph, you’ll see “Physical Memory” (your total installed RAM), “Memory Used” (broken down by app, file cache, etc.), and “Swap Used.” High swap usage is a direct consequence of insufficient physical RAM.
Going Deeper: Using Free Third-Party Utilities for Full Specifications
While the OS tools tell you about *capacity* and *usage*, they often hide the nitty-gritty details: the exact model of your RAM, its speed, its generation (DDR4, DDR5), and how the modules are arranged (single-channel vs. dual-channel). For this, you need a dedicated system information tool. These programs are safe, free for personal use, and provide a level of detail the operating system withholds.

Visual guide about How to Check Laptop Ram
Image source: i.ytimg.com
CPU-Z: The Gold Standard for Hardware Details
CPU-Z is a lightweight, trusted utility that reads the SPD (Serial Presence Detect) data directly from your memory modules. It’s the best way to get a complete spec sheet.
- How to Use It: Download it from the official cpuid.com website. After installing and launching, simply click on the “Memory” tab and the “SPD” tab.
- What the “Memory” Tab Shows You:
- Type: This will say “DDR3,” “DDR4,” or “DDR5″—the generation of your RAM.
- Size: Total installed RAM.
- Channel #: This tells you if your RAM is running in single-channel (1), dual-channel (2), or flex mode. Dual-channel mode (most common with two identical sticks) offers a noticeable performance boost.
- DRAM Frequency: This is the actual speed of your RAM in MHz. Note: The “effective” speed (the number often marketed, like 3200MHz) is usually double this value for DDR RAM. CPU-Z shows the true DRAM frequency.
- What the “SPD” Tab Shows You: Click the drop-down to select “Slot #1” or “Slot #2” (if you have two sticks). Here you’ll find the exact part number of the module (e.g., “HMA851S6AFR6N-UH”), its manufacturer (Samsung, Micron, SK Hynix, etc.), the precise timings (like 22-22-22-52), and the rated voltage. This is invaluable if you need to buy an exact matching stick for an upgrade.
Speccy: The User-Friendly Overview
Developed by the makers of CCleaner, Speccy presents system information in a much more graphical, easy-to-read format than CPU-Z.
- How to Use It: Download from the official Piriform (CCleaner) website. Run it—no installation is strictly necessary for the portable version.
- What It Shows You: The “RAM” section on the main summary page gives you a clear snapshot: total capacity, type (DDR4), speed, and number of channels. Click on “RAM” in the left sidebar for even more detail on each individual slot, including the manufacturer and part number, similar to CPU-Z’s SPD tab.
Why Use Speccy? It’s perfect for beginners who want a clean, understandable summary without the dense technical tables of CPU-Z. You can easily save a snapshot of your system specs as a text file, which is handy when asking for help online or shopping for upgrades.
Understanding the Numbers: Decoding Your RAM Specifications
Now that you have all this data, what does it actually mean? Let’s break down the key specs you’ll encounter and why they matter for performance.
Capacity (GB): The Most Important Number
This is the total amount of data your RAM can hold at once. It’s measured in Gigabytes (GB). For modern use:
- 8GB: The absolute bare minimum for Windows 11/10 and basic web browsing. You’ll feel limitations with many browser tabs and any productivity software open.
- 16GB: The sweet spot for most users. Handles dozens of Chrome tabs, Office suites, light photo editing, and casual gaming with ease.
- 32GB+: For power users, professional content creators (4K video, 3D rendering), engineers, and hardcore gamers who also stream. This is where you future-proof your laptop.
Speed (MHz) and Generation (DDR4/DDR5)
Speed, measured in Megahertz (MHz), is how fast the RAM can read and write data. The current standard is DDR4 (common speeds: 2666MHz, 3200MHz) and the newer, faster DDR5 (starting at 4800MHz and up).
- Does speed matter? For general office work and web browsing, the difference between 2666MHz and 3200MHz is negligible. However, for gaming, CPU-intensive creative work, and certain scientific applications, faster RAM can provide a measurable FPS or render time boost, especially when paired with a capable CPU.
- Generation is not backward compatible: A DDR4 slot will not accept a DDR5 module, and vice-versa. Your laptop’s motherboard and CPU dictate which generation you can use. This is why checking your current RAM type is the first step before buying any upgrade.
Timings (CL, tRCD, tRP, tRAS): The Latency Numbers
You’ll see these in CPU-Z’s SPD tab, formatted like “22-22-22-52.” They represent delays in clock cycles. The first number, CAS Latency (CL), is the most cited. Lower numbers are better (e.g., CL16 is faster than CL22). However, speed often trumps tight timings. A 3200MHz CL22 kit will generally outperform a 2666MHz CL16 kit because the higher frequency wins out. For most laptop upgrades, matching the speed and capacity of your existing stick is more important than chasing the tightest timings.
When and How to Upgrade Your Laptop’s RAM
So you’ve checked your RAM, and you’ve concluded you need more. What next? Upgrading a laptop’s RAM is one of the most effective and affordable performance boosts you can give it, but it’s not always possible or straightforward.
Visual guide about How to Check Laptop Ram
Image source: robots.net
Step 1: Confirm Your Laptop is Upgradable
Not all laptops allow this. Many modern ultrabooks have RAM soldered directly to the motherboard, making it impossible to upgrade. Here’s how to find out:
- Check the Manual: Your laptop’s user guide or service manual (often found on the manufacturer’s support site) will explicitly state if memory is user-upgradable and list the maximum supported capacity.
- Use a Tool: The Crucial System Scanner (from crucial.com) is an excellent tool. It scans your system and tells you exactly what RAM is compatible and what the maximum upgrade potential is. It’s safe and reputable.
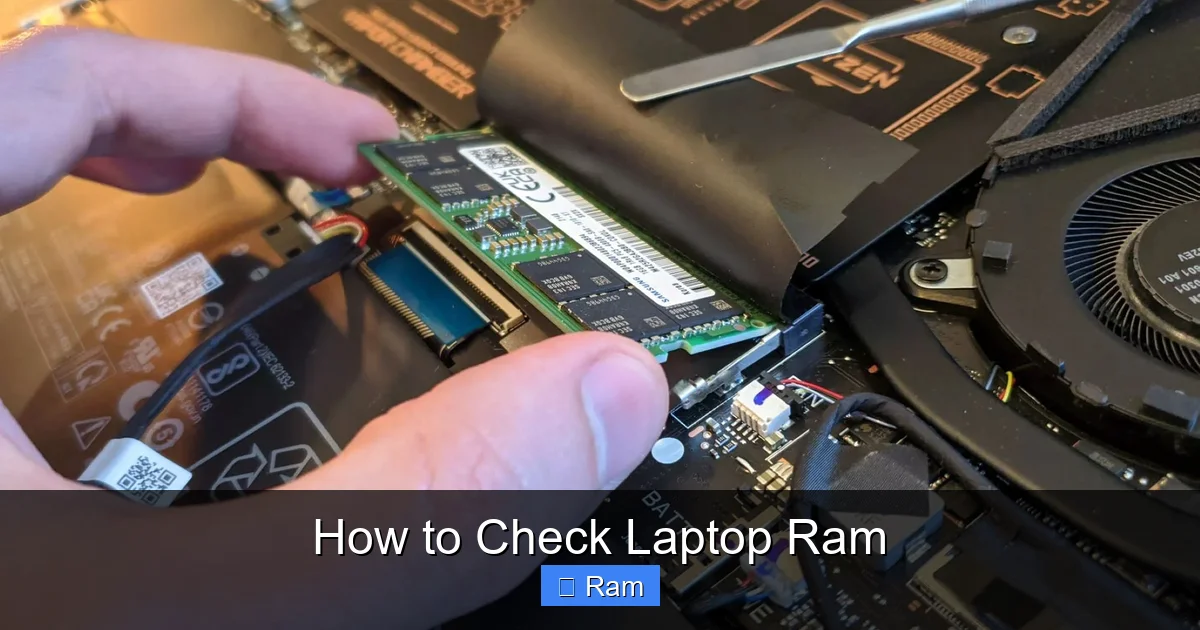
- Physical Inspection: If you’re comfortable, power off the laptop, unplug it, and remove the bottom cover (usually held by screws). Look for one or two long, narrow slots with small plastic clips on either side, holding a stick of RAM. If you see this, you can upgrade. If you see no slots and only a solid motherboard, the RAM is soldered.
Step 2: Buy the Right RAM
Once you know it’s upgradable, you need compatible RAM. The rules are:
- Match the Generation: Must be DDR4 or DDR5 as identified earlier.
- Match the Speed (or go faster if supported): Buying a 3200MHz stick to replace a 2666MHz stick will work, but it will run at 2666MHz (the speed of the slowest module and the motherboard’s limit). For best results, buy a kit (two sticks) of the same speed, capacity, and ideally, the same brand/model as your existing RAM if you’re adding to it.
- Match the Form Factor: Laptops use SODIMM modules. They are smaller than desktop DIMM sticks. Do not buy desktop RAM.
- Check Maximum Capacity per Slot: Some older laptops only support 4GB or 8GB per slot, even if the total max is higher.
Step 3: Installation (If You’re Comfortable)
The physical process is simple but requires care:
- Fully power down the laptop. Unplug the charger and, if possible, remove the battery.
- Discharge static electricity by touching a metal part of the laptop chassis or using an anti-static wrist strap.
- Remove the bottom cover. Keep screws organized.
- Release the clips on the sides of the existing RAM module. It will pop up at an angle.
- Gently pull the module out by the edges, holding it by the middle to avoid touching the gold contacts.
- Insert the new module at the same angle, aligning the notch in the module with the key in the slot. Press down firmly and evenly until the clips snap into place.
- Reassemble, power on, and verify the new RAM is recognized in Task Manager or CPU-Z.
If this makes you nervous, take it to a professional. A computer repair shop can do the upgrade for a small fee, and it’s worth the peace of mind.
Diagnosing Problems: Is Your RAM Faulty?
Sometimes, the issue isn’t a lack of RAM, but faulty RAM. Symptoms of bad memory include random crashes, blue screens of death (BSODs), corrupted files, and applications that fail to open. Here’s how to test it.
Windows Memory Diagnostic
This is a built-in tool that runs a thorough memory test.
- How to Run It: Type “Windows Memory Diagnostic” in the Start Menu and launch it. You’ll be given two options: “Restart now and check for problems” (recommended) or “Check for problems the next time I start my computer.”
- What to Expect: Your laptop will restart and boot into a blue screen that runs the test. It can take several hours, depending on your RAM size. Let it run completely. If it finds errors, it will report them after the test finishes and Windows boots back up. Any errors mean you have a bad stick and need to replace it.
MemTest86: The Industry Standard
For a more rigorous, multi-pass test, MemTest86 is the gold standard. It’s more thorough than the Windows tool.
- How to Use It: You must create a bootable USB drive with the MemTest86 software (the free version is fine). You download the image file, use a tool like Rufus to put it on a USB stick, then boot your laptop from that USB drive (you’ll need to change the boot order in BIOS/UEFI).
- What to Expect: The laptop will boot into the MemTest86 environment and immediately start running test passes. Let it run for at least 4-6 passes (this can take many hours). Zero errors is the goal. Even a single red error indicates a problem. To isolate a faulty stick if you have two, test them one at a time.
Putting It All Together: A Practical Action Plan
You now have all the tools and knowledge. Let’s create a simple workflow for when you suspect a RAM issue.
- Symptom: Laptop feels slow, especially with many apps open. Action: Open Task Manager (Win) or Activity Monitor (Mac). Check the Memory usage graph/pressure. Is it constantly high or red? Yes → Proceed to step 2.
- Symptom: You need to know what you have to upgrade. Action: Run CPU-Z or Speccy. Note your total capacity, type (DDR4/5), speed (MHz), and number of slots used. Write this down.
- Symptom: You’re ready to buy more RAM. Action: Use the Crucial Scanner or your laptop’s manual to confirm max capacity and slot count. Buy a compatible SODIMM module(s) matching your existing specs for best results.
- Symptom: Random crashes and errors. Action: Run the Windows Memory Diagnostic or MemTest86 to rule out faulty RAM before spending money on an upgrade.
- Symptom: You have the new RAM. Action: Install it carefully, following the static safety and physical steps outlined above. Reboot and verify the new total capacity is shown in your OS tool.
By following this structured approach, you transform a vague feeling of “my laptop is slow” into a concrete diagnosis and solution. You become the expert of your own machine.
Conclusion: Knowledge is Power (and Performance)
Checking your laptop’s RAM is not a task reserved for IT professionals. It’s a simple, empowering act of understanding your own technology. With the built-in tools you already have, and a couple of free, reputable utilities, you can uncover the complete story of your system’s memory—its capacity, its speed, its health, and its potential. This knowledge cuts through the frustration of a slow computer. It allows you to make smart decisions: whether that’s closing a few greedy browser tabs, investing in a cost-effective RAM upgrade, or identifying a failing component before it causes data loss. So next time your laptop stumbles, don’t just sigh. Take two minutes, open Task Manager or Activity Monitor, and start checking. The answer to your performance questions is almost always right there on the screen, waiting for you to see it.
Frequently Asked Questions
Can I check my laptop’s RAM without opening it?
Yes, absolutely. You can see your total RAM capacity and current usage instantly using built-in tools like Windows Task Manager (Ctrl+Shift+Esc) or Mac’s Activity Monitor. For detailed specifications like speed and type, use free third-party software like CPU-Z or Speccy, which all work without physically touching the hardware.
What’s the difference between RAM and storage (SSD/HDD)?
RAM is volatile, ultra-fast, temporary memory used for active tasks and programs. It’s cleared when you power off. Storage (SSD/HDD) is non-volatile, permanent memory for your operating system, applications, and files. Think of RAM as your desk workspace and storage as your filing cabinet. A bigger desk (more RAM) lets you work on more projects at once without slowing down.
My laptop shows 8GB of RAM, but only 6GB is “usable.” Is that normal?
Some “missing” RAM is normal. Integrated graphics (common in laptops without a dedicated GPU) will reserve a portion of your system RAM for video memory. Also, the motherboard and hardware devices reserve a small amount. On an 8GB system, seeing 6.5-7GB “usable” is typical. If a large chunk (2GB+) is missing, it could indicate a faulty RAM stick not being detected, or a BIOS setting issue.
Can I mix RAM sticks with different speeds or brands?
Technically, yes, but it’s not ideal. All RAM will run at the speed of the slowest module. Mixing brands and capacities can sometimes cause instability, preventing the system from booting. For best results, especially for dual-channel performance, use identical sticks (same capacity, speed, brand, and model). If adding to existing RAM, try to match the specs as closely as possible.
How do I know if my laptop’s RAM is failing?
Common signs include frequent, random crashes (Blue Screen of Death on Windows), applications crashing unexpectedly, corrupted files, and the system failing to boot (beeping sounds). The definitive test is to run a memory diagnostic tool like Windows Memory Diagnostic or MemTest86. These tools write and read data patterns to all RAM locations; any errors indicate a failing module that needs replacement.
Will adding more RAM always make my laptop faster?
Only if your current RAM is the bottleneck. If you consistently see 90%+ memory usage during normal use, adding RAM will be the single biggest performance upgrade you can make. However, if your CPU is old and slow, or you’re using a traditional hard drive (HDD), adding RAM may have a minimal noticeable effect. The upgrade provides the biggest benefit when moving from a very low capacity (e.g., 4GB) to a modern standard (e.g., 16GB).