Yes, you can often upgrade laptop RAM to significantly improve performance, but it’s not universally possible. Success depends entirely on your specific laptop model’s design, as many modern ultrabooks have soldered, non-upgradable memory. This guide will help you determine if your laptop supports an upgrade, choose the correct RAM, and install it safely. For compatible models, adding RAM is one of the most cost-effective ways to breathe new life into a slow machine, especially for multitasking and demanding applications.
Have you ever sat watching the spinning wheel of death on your laptop, waiting for a simple web browser with a few tabs open to finally respond? It’s a frustrating feeling, and it often points to one common bottleneck: insufficient RAM, or Random Access Memory. Before you start budgeting for a brand-new machine, you should ask a crucial question: Can you upgrade laptop RAM? The answer, more often than you might think, is a qualified yes. For a huge swath of laptops built in the last decade, adding more memory is not only possible but is arguably the single most effective and affordable performance upgrade you can perform. This comprehensive guide will walk you through every single step, from the initial “should I even try?” check to the final screw-tightening celebration. We’ll talk about compatibility, demystify technical specs, provide a foolproof installation walkthrough, and troubleshoot any issues that might arise. By the end, you’ll have the knowledge and confidence to determine if your laptop is a candidate for a RAM boost and exactly how to make it happen.
Key Takeaways
- Not All Laptops Can Be Upgraded: Many modern, thin-and-light laptops have RAM soldered directly to the motherboard, making an upgrade impossible. Always verify your model’s specifications first.
- Compatibility is Critical: You must match the RAM type (DDR3, DDR4, DDR5), speed (MHz), and form factor (SO-DIMM). Using incompatible RAM will cause your laptop to fail to boot.
- Check Available Slots: Even if upgradable, your laptop may have one or two slots. Often, one slot is occupied by a pre-installed stick. You may need to replace the existing stick or add a second one if a slot is free.
- Performance Gains Vary: Upgrading from 4GB to 8GB or 16GB will have a dramatic impact on multitasking and overall responsiveness. Gains from 16GB to 32GB are more subtle and only benefit specific professional workloads.
- Installation is Usually Simple: For most upgradable laptops, accessing the RAM slots involves removing a single backplate screw. The process is straightforward but requires care and anti-static precautions.
- Warranty Considerations: Opening your laptop’s case may void the warranty. Check your warranty terms before proceeding. Some manufacturers allow user-upgrades without voiding coverage.
- RAM is a Cost-Effective Upgrade: Compared to buying a new laptop, adding 8GB or 16GB of RAM typically costs between $25 and $80, offering an excellent return on investment for speed improvements.
📑 Table of Contents
- Understanding the Beast: What is RAM and Why Does It Matter?
- The Golden Question: Is My Laptop RAM Upgradable?
- Decoding the Specs: Choosing the Right RAM for Your Laptop
- The Step-by-Step: How to Physically Install Laptop RAM
- Troubleshooting: What If My Laptop Doesn’t Boot After a RAM Upgrade?
- Beyond the Upgrade: When RAM Isn’t the Answer (And What To Do Instead)
- Conclusion: Your Laptop’s Second Wind Awaits
Understanding the Beast: What is RAM and Why Does It Matter?
Before we talk about upgrading, let’s make sure we’re on the same page about what RAM actually does. Think of your laptop’s RAM as its immediate, short-term workspace. The hard drive or SSD is the filing cabinet where everything is stored permanently. When you open an application like your web browser, a word processor, or a game, the core data for that program is pulled from the storage drive and placed into the RAM. The CPU (your laptop’s brain) can then access this data from the RAM at lightning-fast speeds. The more RAM you have, the more programs and data can sit in that high-speed workspace simultaneously.
The Multitasking Memory Crunch
Modern operating systems like Windows 11 and macOS are incredibly efficient at multitasking, but they still need room to breathe. With only 4GB of RAM, your system is constantly shuffling data back and forth between the RAM and the slower storage drive—a process called “swapping” or “paging.” This is what causes those annoying freezes, stutters, and the infamous spinning cursor. When you upgrade laptop RAM, you give your operating system ample breathing room. You can have dozens of browser tabs open, a spreadsheet, a music player, and a chat app all running smoothly without the system gasping for air. It’s not about raw speed for a single task; it’s about fluidity and responsiveness across all your everyday tasks.
RAM vs. Storage: Clearing Up a Common Confusion
A frequent point of confusion is equating more storage (a bigger SSD) with more RAM. They serve entirely different purposes. Adding a 1TB SSD gives you more space for your files, photos, and programs. Adding 8GB of RAM gives your system a larger, faster temporary workspace to use those files and programs. You need both, but if your laptop feels sluggish *while you have plenty of free storage space*, RAM is the likely culprit. A great analogy: your SSD is your garage where you park all your tools (programs and files). Your RAM is the workbench where you actually use those tools. A huge garage with a tiny workbench will still lead to a cluttered, inefficient workflow.
The Golden Question: Is My Laptop RAM Upgradable?
This is the most critical step. Assuming your laptop can be upgraded will lead to frustration and potentially wasted money. The sad truth is that the trend for the past 5-7 years, especially in sleek ultrabooks and premium convertibles, has been to solder RAM directly onto the motherboard. This saves space and allows for thinner designs but permanently locks the memory capacity. So, how do you check?
Visual guide about Can You Upgrade Laptop Ram
Image source: minitool.com
Method 1: The Manufacturer’s Spec Sheet (Your First Stop)
Go to the official support page for your exact laptop model (e.g., “Dell XPS 13 9310,” not just “Dell XPS 13”). Look for the “Specifications,” “Tech Specs,” or “Memory” section. You’re looking for key phrases:
- “User-accessible” or “Upgradable”: This is the best-case scenario.
- “Soldered” or “Integrated”: This means it’s permanently attached. No upgrade possible.
- “Supports up to X GB”: This tells you the maximum capacity the motherboard/CPU can handle, but doesn’t confirm if it’s upgradable. You must cross-reference this with other methods.
Be extremely precise with your model number. A slight variation (e.g., “Dell Inspiron 15 5510” vs. “5515”) can have completely different memory architectures.
Method 2: The Physical Inspection (The Hands-On Check)
If the specs are ambiguous, you may need to look inside. This is the most reliable method.
- Power down completely: Shut down your laptop, unplug it, and remove the battery if it’s removable.
- Ground yourself: Touch a metal object (like a desk leg) to discharge any static electricity. Ideally, use an anti-static wrist strap.
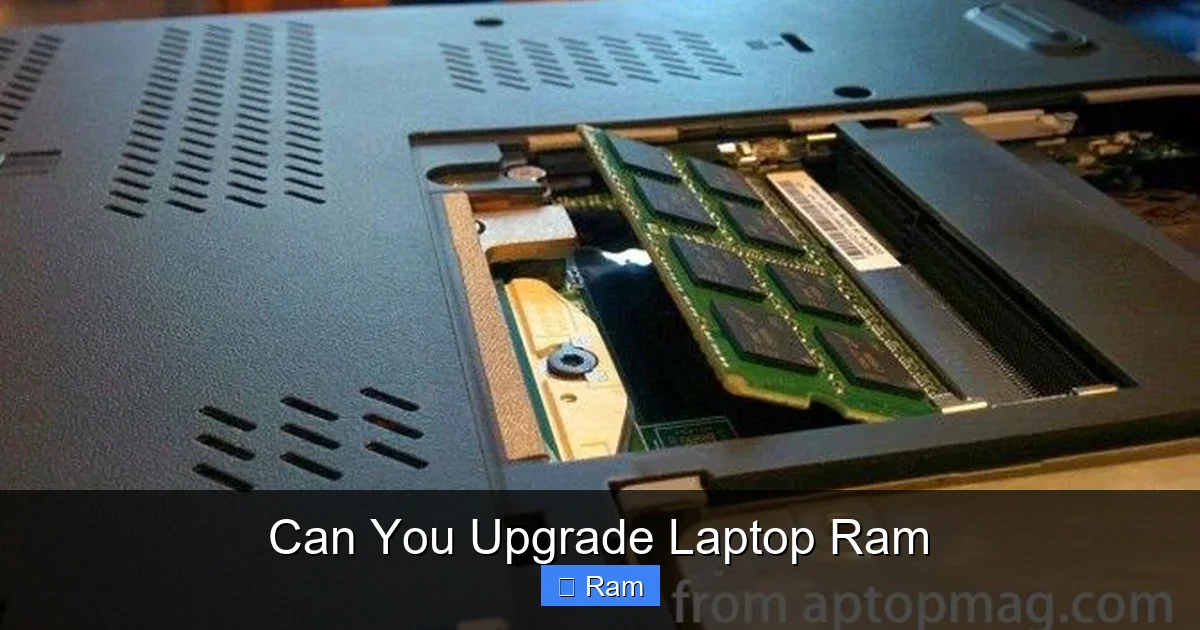
- Locate the RAM access panel: Turn the laptop over. Look for a small rectangular panel, often held by one or two Phillips-head screws. Sometimes, the entire bottom plate must be removed. Consult a service manual (like those from iFixit) for your specific model before prying anything.
- Open it up: Carefully remove the screw(s) and lift the panel. You should see one or two small circuit boards (the RAM sticks) lying flat, typically secured by small metal clips on the sides.
What you see here tells the whole story:
- You see RAM sticks with clips: Excellent! This is almost certainly user-upgradable. The sticks can be unclipped and removed.
- You see no sticks, or the area is covered by a shield: The RAM is likely soldered underneath. No upgrade path.
- You see one stick and an empty slot: Perfect! You can add a second stick (ideally matching the first for dual-channel performance).
- You see two sticks filling both slots: You can only upgrade by replacing both existing sticks with a higher-capacity matched pair (e.g., replacing two 4GB sticks with two 8GB sticks).
- 4GB: The bare minimum today. Feel constant slowdowns. Upgrade!
- 8GB: The sweet spot for most users. Handles dozens of browser tabs and light multitasking with ease.
- 16GB: The new recommended standard. Ideal for power users, those who run virtual machines, photo/video editing, and modern gaming.
- 32GB+: For professional workloads: 4K video editing, 3D rendering, large datasets, heavy development environments.
- Tools: A small Phillips-head screwdriver (#00 or #0 is common). A plastic spudger or pry tool is helpful for opening clips.
- Environment: A clean, well-lit, static-free workspace. A large, flat table is ideal.
- Safety First: Disconnect all power. Remove the battery if it’s easily removable. Ground yourself by touching a metal object or, better, use an anti-static wrist strap clipped to a grounded metal part of the laptop chassis.
- Align the notch: Look at the bottom of the new RAM stick. There’s a single off-center notch. Align this notch with the key in the slot. It only fits one way. Do not force it.
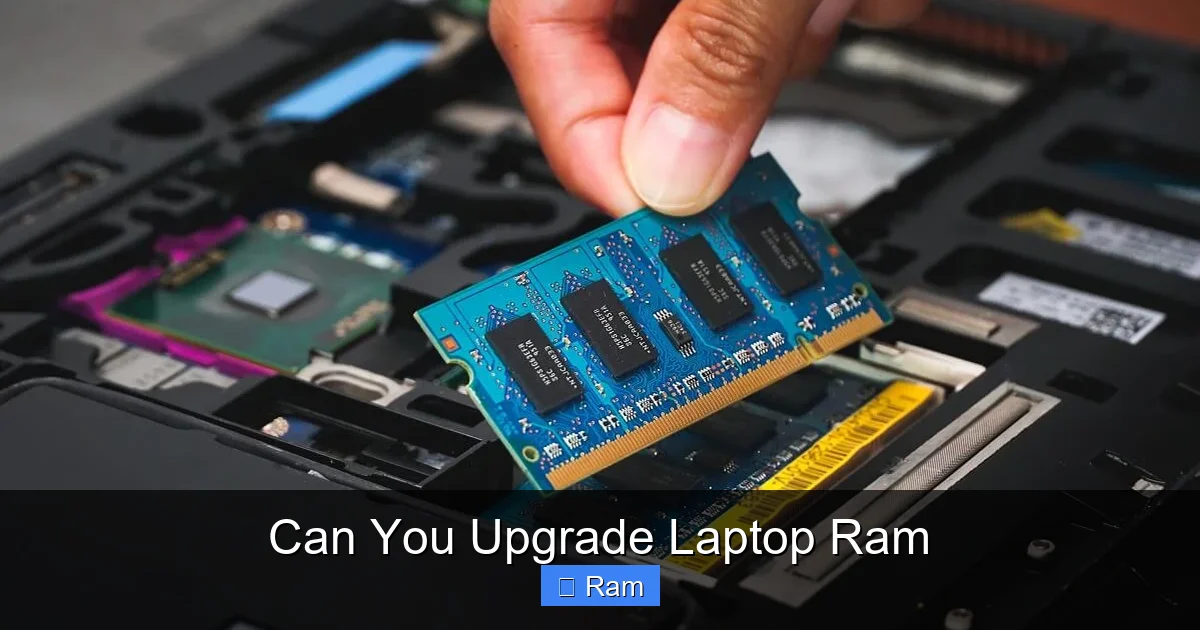
- Insert at an angle: Hold the stick by the edges and insert it into the slot at the same 30-degree angle you removed the old one. Push firmly and evenly on both ends until the gold contacts are fully inserted into the slot. You should feel it seat properly.
- Secure the clips: Press the stick down gently but firmly until the two metal clips on the sides snap back into place, locking the stick flat against the motherboard. You should hear/feel a small click. Ensure the stick is seated evenly and the clips are holding it securely on both sides.
- Wrong Generation: You accidentally bought DDR4 for a DDR3 laptop. It won’t fit. Double-check the notch position.
- Unsupported Speed/Voltage: The RAM is too fast or uses the wrong voltage (e.g., 1.35V vs. 1.5V) for your laptop’s chipset. The system may refuse to boot.
- Faulty Stick: The new RAM module itself is defective.
Method 3: Software Tools (The Non-Invasive Guess)
If you don’t want to open the laptop yet, use a system information tool. On Windows, the built-in Task Manager (Ctrl+Shift+Esc > Performance tab > Memory) will show “Slots used” (e.g., “1 of 2”). This indicates physical slots exist. For more detail, use a free tool like CPU-Z. Go to the “Memory” and “SPD” tabs. The “SPD” tab will list each slot. If a slot shows “None” or is blank, it’s empty and available. If both slots show a module, they’re both occupied. Important: This method confirms slot usage but does NOT confirm the RAM is not soldered. A laptop with soldered RAM will often show “1 of 1” or “Integrated.” Always combine this with the manufacturer’s spec check.
Decoding the Specs: Choosing the Right RAM for Your Laptop
Assuming you’ve confirmed your laptop has upgradable slots, you now face the wall of acronyms and numbers on a RAM stick’s label. Don’t panic. You need to match three things: Type, Speed, and Capacity.

Visual guide about Can You Upgrade Laptop Ram
Image source: minitool.com
DDR3, DDR4, DDR5: It’s All About the Generation
This is the non-negotiable first filter. DDR (Double Data Rate) generations are not physically compatible. A DDR4 slot will not accept a DDR3 or DDR5 stick. The notch (the missing pin area) is in a different position to prevent mistakes. Your laptop’s manual or a quick web search for your model will tell you the supported DDR generation. For most laptops from 2015-2021, it’s DDR4. Newer models from 2021+ might be DDR5. Older models (pre-2015) could be DDR3L (low voltage). You must buy the correct generation.
Speed Matters, But So Does Compatibility (MHz)
RAM speed is measured in megahertz (MHz), like 2666MHz, 3200MHz, or 4800MHz. Your laptop’s chipset and CPU will support a maximum speed. You can usually install RAM that is rated for a higher speed than your system supports—it will simply run at the lower, supported speed (this is called downclocking). However, mixing speeds can sometimes cause instability. The safest and best-performing approach is to buy RAM that matches the speed of any existing stick. If you’re adding to an empty slot, try to match the speed of the pre-installed RAM if possible. If replacing all sticks, get a kit with matched speed and timings.
Capacity: How Much Do You Really Need?
This is the fun part. For general use (web browsing, office apps, streaming):
Pro Tip: Check your current usage. In Windows Task Manager (Performance > Memory), look at the “Committed” memory. If it’s consistently near or over your total physical RAM (e.g., 7.9/8.0 GB), you are memory-bound and will see a huge improvement with an upgrade.
SO-DIMM: The Form Factor
Laptop RAM uses a smaller form factor called SO-DIMM (Small Outline DIMM). It’s shorter than the DIMM sticks used in desktop PCs. You must buy SO-DIMM modules. This is usually obvious when searching online (“Laptop RAM DDR4 16GB SO-DIMM”).
The Step-by-Step: How to Physically Install Laptop RAM
You have your compatible SO-DIMM RAM sticks. Now, let’s get them inside your laptop. This process is generally simple but requires a calm hand and attention to detail.
Visual guide about Can You Upgrade Laptop Ram
Image source: assets.yourlifechoices.com.au
Gather Your Tools and Prepare
Accessing the RAM Bay
As discussed in the inspection section, locate the RAM access panel on the bottom of the laptop. Remove the screw(s) holding it. Gently pry the panel up. It may be clipped in place; work your way around the edge with a spudger. Keep the screws in a small container so they don’t roll away.
Removing Old RAM (If Replacing)
If you are replacing existing sticks, you need to release them. The RAM sticks are held in place by two small metal clips on either side. Gently pry these clips outward (away from the RAM stick). The stick will pop up at an angle, usually about 30 degrees. Carefully pull the stick straight out, holding it by the edges. Avoid touching the gold contacts and the black chips on top.
Installing the New RAM
This is the reverse process, and it’s crucial to get the orientation right.
Final Steps and First Boot
Double-check that both sticks (if installing two) are locked in identically. Reattach the access panel and screw it back in. Don’t overtighten. Reconnect the battery if you removed it. Plug in the power adapter (this is important for the first boot after a RAM change). Power on your laptop. It may reboot once or twice as it recognizes the new memory—this is normal. Once you reach the login screen, go back to Task Manager or CPU-Z to verify your new total RAM is recognized. Congratulations, you did it!
Troubleshooting: What If My Laptop Doesn’t Boot After a RAM Upgrade?
Don’t panic. A no-POST (Power-On Self-Test) or continuous reboot loop after a RAM install is a common issue and usually has a simple fix. Follow this checklist methodically.
1. Re-Seat the RAM
The #1 cause is an improperly seated stick. The contacts aren’t fully engaged. Power down, unplug, open the case, and remove the new RAM. Re-insert it, pressing down more firmly and evenly until the retention clips click securely into place. Do this for all installed sticks, even the old ones. Sometimes the vibration of installing one stick can slightly loosen another.
2. Check Compatibility (The Silent Killer)
If re-seating fails, you likely have an incompatibility. This could be:
Solution: Test one stick at a time. Remove all but one new stick and try to boot. If it fails, try the other new stick alone. If both fail individually but your old stick still works, the new RAM is incompatible or bad. If one new stick works and the other doesn’t, you have a bad stick. You’ll need to exchange the faulty module for a compatible one.
3. The BIOS/UEFI Reset
Sometimes, the system’s memory settings need a full reset. With the new RAM installed, try resetting the BIOS to defaults. The method varies by laptop, but often involves holding a key (F2, Del, F10) during boot to enter the BIOS setup, then finding the “Load Default Settings” or “Optimized Defaults” option. Save and exit. If you can’t get to the BIOS because it won’t POST, you can try a deeper reset: unplug the laptop, remove the main battery (if possible), and hold the power button for 30 seconds to drain residual power. Then, reconnect and try again.
4. Update Your BIOS
This is a more advanced step, but sometimes older BIOS versions don’t recognize newer, higher-capacity RAM modules. If your laptop is booting with the old RAM, go to the manufacturer’s support site, download the latest BIOS update for your exact model, and install it while using the old, working RAM. After updating, power down, install the new RAM, and try booting again.
Beyond the Upgrade: When RAM Isn’t the Answer (And What To Do Instead)
We’ve sung the praises of RAM, but it’s important to recognize when it won’t solve your problem. Throwing more RAM at a system with a different fundamental bottleneck is a waste of money.
The Slow Hard Drive Hangover
If your laptop still has a traditional mechanical Hard Disk Drive (HDD), that is almost certainly the primary cause of sluggishness. The HDD is orders of magnitude slower than an SSD. The system will feel slow in boot times, program launches, and file operations, regardless of how much RAM you have. Solution: Replacing an HDD with a SATA SSD is the single greatest upgrade you can make to an older laptop. It will feel like a brand-new machine. You can do this upgrade and a RAM upgrade together for a phenomenal performance leap.
The Aging CPU/GPU
If your laptop is more than 6-7 years old, its processor (CPU) and graphics chip (GPU) may simply be too underpowered for modern software and web content. Adding RAM will help with multitasking, but you’ll still hit a ceiling in demanding tasks like video encoding, modern gaming, or running complex software. Solution: In this case, a RAM upgrade is a cheap stopgap, but a new laptop is the long-term solution. Consider a refurbished or budget-friendly newer model.
Malware and Bloatware
A system clogged with unnecessary startup programs, adware, and malware will crawl, even with 16GB of RAM. Solution: Before spending a dime on hardware, run a full virus scan with a reputable tool, use a program like Autoruns to manage startup items, and consider a clean Windows reinstall. This is free and can work wonders.
Conclusion: Your Laptop’s Second Wind Awaits
The question “Can you upgrade laptop RAM?” is one of the most empowering a user can ask. It shifts you from a passive consumer of slow technology to an active troubleshooter and optimizer. The journey, as we’ve outlined, is straightforward: Verify compatibility, purchase the correct modules, and install them with care. For the vast majority of upgradable laptops—particularly business-class models like Dell Latitudes, HP EliteBooks, and Lenovo ThinkPads, as well as many gaming and productivity laptops—this process is a guaranteed way to reclaim speed and extend the useful life of your trusted device by years. It’s a tangible, satisfying DIY project that saves you hundreds of dollars. So, flip that laptop over, find those screws, and start investigating. Your future, faster self is waiting. Just remember the golden rules: check your exact model, match your RAM specs, and always, always ground yourself. You’ve got this.
Frequently Asked Questions
Can I upgrade RAM on any laptop?
No. Many modern ultrabooks and some mainstream laptops have the RAM soldered directly to the motherboard, making an upgrade impossible. You must check your specific laptop model’s specifications or physically inspect it to confirm if it has accessible, removable SO-DIMM slots.
Will mixing RAM brands or speeds cause problems?
It can. While the system will often run with mismatched RAM, it will default to the speed of the slowest stick and may cause instability or prevent the system from booting. For best results, use identical RAM sticks (same brand, model, capacity, speed, and timings) in a matched pair, especially if using dual-channel mode.
Is 16GB of RAM enough for most people in 2024?
Yes, for the vast majority of users. 16GB is the new sweet spot for general productivity, web browsing with many tabs, office applications, and even casual photo editing. 8GB is the functional minimum for a smooth Windows 11/macOS experience today. Only professionals working with 4K video, large datasets, or multiple virtual machines should routinely consider 32GB or more.
Do I need to update my BIOS before installing new RAM?
Not usually. However, if you are installing significantly higher-capacity RAM (e.g., 32GB+ modules) than the laptop originally shipped with, a BIOS update may be required for the motherboard to recognize the new memory. Check your laptop manufacturer’s support page for any BIOS updates that mention “memory compatibility” or “memory support.”
Will upgrading my RAM void my laptop’s warranty?
It depends on the manufacturer and warranty terms. Some companies (like Dell and Lenovo on many business models) state that user-upgradable components like RAM and storage do not void the warranty, as long as you don’t damage anything. Others may consider opening the case a warranty violation. Always check your specific warranty documentation before opening your laptop.
What’s the difference between DDR4 and DDR5 laptop RAM?
DDR5 is the newer, faster generation. It offers higher base speeds (starting around 4800MHz vs. 2666-3200MHz for DDR4), better power efficiency, and higher potential capacities per module. However, DDR4 and DDR5 are physically incompatible—the notch is in a different place. Your laptop’s chipset must explicitly support DDR5 to use it. Most laptops from 2020-2021 use DDR4, while models from 2022 onward increasingly use DDR5.