Can You Install More Ram on a Laptop
Yes, you can often install more RAM on a laptop, but it’s not always simple or possible. The upgradeability depends entirely on your specific laptop model, with many modern ultrabooks having memory soldered to the motherboard. Before buying anything, you must verify your laptop’s make, model, and maximum supported RAM. This guide provides a definitive, step-by-step walkthrough to determine if your machine can be upgraded and how to do it safely yourself.
Key Takeaways
- Not All Laptops Are Upgradable: Many modern thin-and-light laptops and all Apple Silicon MacBooks have RAM soldered directly to the motherboard, making upgrades impossible.
- Compatibility is King: You must match the exact RAM type (DDR4, DDR5, LPDDR), speed, and form factor (almost always SODIMM). Mixing mismatched modules can cause failure.
- Check Manufacturer Specs First: The most reliable way to find maximum RAM and slot count is via your laptop manufacturer’s official support page for your exact model number.
- Physical Installation is Simple: If your laptop has accessible slots, the process of opening the case and clipping in new modules is straightforward and requires only basic tools.
- Safety First: Always power down completely, unplug the charger, and remove the battery (if possible). Ground yourself to prevent static electricity damage to sensitive components.
- Post-Install Verification is Crucial: After installing, enter the BIOS/UEFI and your operating system’s system information to confirm the new RAM is recognized and running at the correct speed.
- Software Tweaks Maximize Gains: After a hardware upgrade, ensure your OS is 64-bit and adjust virtual memory/page file settings for optimal performance with the new RAM capacity.
📑 Table of Contents
- Introduction: Unlocking Your Laptop’s Hidden Potential
- Section 1: The Crucial First Step – Is Your Laptop Even Upgradable?
- Section 2: Decoding the RAM Spec Sheet – What to Buy
- Section 3: The Toolbox and Preparation – Setting Up for Success
- Section 4: The Installation Process – A Step-by-Step Visual Guide
- Section 5: Verification, Troubleshooting, and Performance Testing
- Section 6: What If You Can’t Upgrade? Alternative Paths to Better Performance
- Conclusion: Empowering Your Computing Experience
Introduction: Unlocking Your Laptop’s Hidden Potential
You’re clicking through tabs, launching apps, and that familiar spinner appears. Your once-speedy laptop feels like it’s wading through mud. The natural instinct? A fresh start. But before you consider a costly new machine, a powerful and often-overlooked upgrade beckons: adding more RAM. The question “Can you install more RAM on a laptop?” doesn’t have a one-size-fits-all answer, but for a huge number of machines, the response is a resounding yes. This isn’t about magic; it’s about understanding your laptop’s anatomy and performing a precise, safe surgery to boost its memory capacity. More RAM allows your laptop to handle more applications simultaneously, load larger files into memory for faster editing, and keep your web browser with a dozen tabs open without a hitch. This guide will transform you from a curious user into a confident, capable upgrader. We’ll navigate the technical specifications, demystify the terminology, and walk you through every single step, from the initial detective work to the final triumphant power-on.
Section 1: The Crucial First Step – Is Your Laptop Even Upgradable?
Before you spend a single dollar or pick up a screwdriver, you must answer the most critical question: does your laptop allow for a RAM upgrade? The landscape has changed dramatically. A decade ago, most laptops had user-accessible RAM slots. Today, the drive for thinner, lighter, and more power-efficient designs has led manufacturers to solder memory chips directly onto the motherboard. This is the single biggest barrier.
Visual guide about Can You Install More Ram on a Laptop
Image source: slashgear.com
The Great Divide: Slot-Based vs. Soldered Memory
Laptops fall into two primary camps regarding memory. Slot-based systems feature one or two small, rectangular slots (using SODIMM modules) that are accessible by removing a panel on the bottom of the laptop. These are the upgrade-friendly models. You simply unclip the old sticks and snap in new ones. Soldered memory, technically LPDDR (Low Power DDR) or sometimes standard DDR, has its chips permanently attached to the motherboard. There are no slots, no clips, no user-serviceable parts. The RAM capacity is fixed at the factory. This is common in Apple’s M-series MacBooks, many Dell XPS models, Microsoft Surface Laptops, and a vast array of premium ultrabooks. Some laptops use a hybrid approach: a small amount of soldered RAM (e.g., 8GB) plus one empty slot for expansion. You must find out which category yours falls into.
How to Discover Your Laptop’s True Upgradability
So, how do you become a memory detective? You need your laptop’s exact model number. This is usually on a sticker on the bottom, in the battery compartment (if removable), or within the system information screen. Look for identifiers like “Dell XPS 13 9310,” “Lenovo ThinkPad T14 Gen 3,” or “HP Pavilion 15-ek1xxx.”
- Method 1: The Manufacturer’s Website (Most Reliable): Go to the support page for your laptop’s maker (e.g., support.dell.com, lenovo.com/support). Enter your serial number or model. Navigate to the “Specifications” or “Technical Specifications” sheet. Look for sections titled “Memory,” “Memory Max,” “Slots,” or “Upgradability.” It will explicitly state something like “2 SODIMM slots” or “8GB, 16GB, 32GB soldered.”
- Method 2: System Information Tools (Quick Check): Press Windows Key + R, type msinfo32, and hit Enter. The “System Summary” will show “Total Physical Memory.” To see slot usage, a more powerful tool is CPU-Z (a free download). Install it, go to the “Memory” and “SPD” tabs. The SPD tab will list each slot. If it says “Empty” for a slot, you have an upgrade path. If no slots are listed, memory is likely soldered.
- Method 3: Physical Inspection (Last Resort): If you’re comfortable, power off the laptop, unplug it, and remove the bottom panel (usually 6-10 screws). Look for small, rectangular slots near the center or edges, often with small plastic clips on the sides. If you see these, you have upgradeable RAM. If you see no slots and only a large heat spreader, it’s soldered.
Section 2: Decoding the RAM Spec Sheet – What to Buy
Assuming you’ve confirmed your laptop has an empty slot, you now face a wall of jargon: DDR4, DDR5, 3200MHz, CL22, SODIMM, 1.2V. Choosing the wrong stick is a waste of money and can cause boot failures. Let’s decode it.
DDR Generation: The Non-Negotiable Factor
DDR (Double Data Rate) generations are physically and electronically incompatible. You cannot put a DDR4 stick into a DDR5 slot. Your laptop’s generation is dictated by its age and CPU. Laptops from roughly 2015-2021 most commonly use DDR4. Laptops from 2021 onward, especially with 11th Gen Intel Core or AMD Ryzen 5000 series and newer, likely use DDR5. Some older or very low-power models use DDR3. Your manual or a CPU-Z “Memory” tab will state “DDR4-3200” or similar. This is your first filter.
Speed, Timings, and Voltage: Matching for Stability
RAM is rated for speed in megahertz (MHz), like 3200MHz or 5600MHz. Your laptop’s CPU and motherboard support a maximum speed, often listed as the “supported” speed in specs. While you can often install faster RAM (it will run at the laptop’s maximum supported speed), it’s safest to match the speed of the existing module if you’re adding to it. For a completely empty slot, buy the highest speed your laptop’s specs officially support. Timings (e.g., CL22, CL40) are latency numbers; lower is generally better, but matching the existing RAM’s timings is ideal for dual-channel mode. Voltage (V) must also match (e.g., 1.2V for standard DDR4, 1.1V for some low-power DDR4). SODIMM modules for laptops are all the same physical size, so no size confusion here.
Capacity, Channels, and The Golden Rule of Matching
Capacity is measured in gigabytes (GB). Check your laptop’s maximum supported RAM in its manual (e.g., “up to 64GB”). A crucial concept is dual-channel mode. For optimal performance, most laptops run memory in dual-channel, which requires either:
- Two identical RAM sticks (same size, speed, brand, model) installed in pairs.
- A single stick if only one slot is populated (this runs in single-channel, slightly slower).
The Golden Rule: If you are adding RAM to an existing stick, you must match the specifications exactly. A 16GB 3200MHz stick will not dual-channel properly with an 8GB 3200MHz stick, even if speeds match. The system will run in asymmetric or single-channel mode. For the best performance and stability, it’s highly recommended to buy a matched kit (two sticks sold together) if both slots are empty, or to replace the existing stick with a new, higher-capacity matched pair if you want to upgrade beyond the original size.
Section 3: The Toolbox and Preparation – Setting Up for Success
You have the right RAM. Now, prepare your workspace and tools. A rushed, cluttered upgrade is the #1 cause of damaged components.
Essential Tools: Less is More
You need very little. The primary tool is a set of small, precision screwdrivers (typically Phillips #0 or #1). Some laptops use security Torx screws (T5, T6). A good iFixit kit or similar is a wise investment for future projects. A plastic spudger or pry tool is invaluable for gently prying open plastic clips without marring the case. You will also need a static-free workspace. A large, clean wooden or glass table is ideal. Avoid carpets and pets.
Electrostatic Discharge (ESD) Safety: Don’t Let the Invisible Enemy Win
Your body can hold a static charge powerful enough to fry a RAM chip or motherboard trace with a touch. This is not paranoia; it’s physics. Before you touch anything inside the laptop, you must discharge static. The best method is to wear an ESD wrist strap clipped to a grounded metal object (like a bare desk leg or the grounded center screw of an outlet plate). If you don’t have a strap, frequently touch the laptop’s bare metal chassis (the exposed aluminum part) before handling components. This equalizes your charge. Always handle RAM modules by their edges, avoiding the gold contacts and chips.
The Pre-Removal Checklist
- Backup Your Data: While a RAM upgrade shouldn’t touch your storage, accidents happen. Have a current backup.
- Charge the Battery: Ensure your laptop has at least a 50% charge. For newer laptops with sealed batteries, this is the only power source during the process.
- Power Down Completely: Shut down the operating system fully. Do not use Sleep or Hibernate.
- Unplug Everything: Remove the charger, USB devices, docks, SD cards, and external monitors.
- Document Your Steps: If this is your first time, take a photo after removing each screw. Laptop screws are often different lengths; a photo helps you remember where each one goes.
Section 4: The Installation Process – A Step-by-Step Visual Guide
With preparation complete, it’s time for the delicate operation. The exact location of the RAM access panel varies. It’s often a small rectangular panel on the bottom, held by several screws, sometimes marked with a RAM icon. On some business laptops (ThinkPads, EliteBooks), it might be under the keyboard, which is more complex. For this guide, we assume the simple bottom-panel access.
Step 1: Gaining Access
Lay the laptop upside down on your static-free mat. Locate the RAM access panel. Using your precision screwdriver, unscrew all screws. Keep them in a small container. Some panels are held only by clips. Gently insert your plastic spudger into the seam around the panel and work your way around, releasing the clips. There may be a hidden screw under a rubber foot or a warranty sticker—be aware. Lift the panel gently and set it aside.
Step 2: Removing the Old RAM
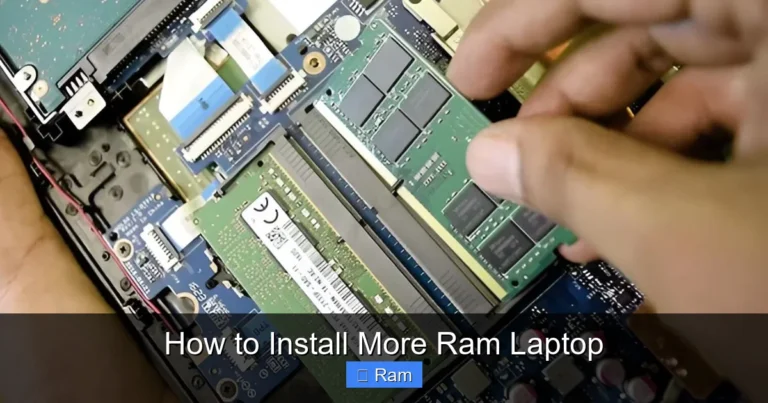
You’ll see one or two SODIMM modules held at an angle by small plastic clips on each side. To release a module, gently but firmly push the two clips outward (away from the module). The module will pop up to about a 45-degree angle. Grab the module by its edges and pull it straight out. Do not twist or lever it. Place the old RAM in an anti-static bag for safekeeping or recycling. If you’re replacing both sticks, repeat for the second module. Note which slot was which if they are different brands/models (though you shouldn’t mix them).
Step 3: Installing the New RAM
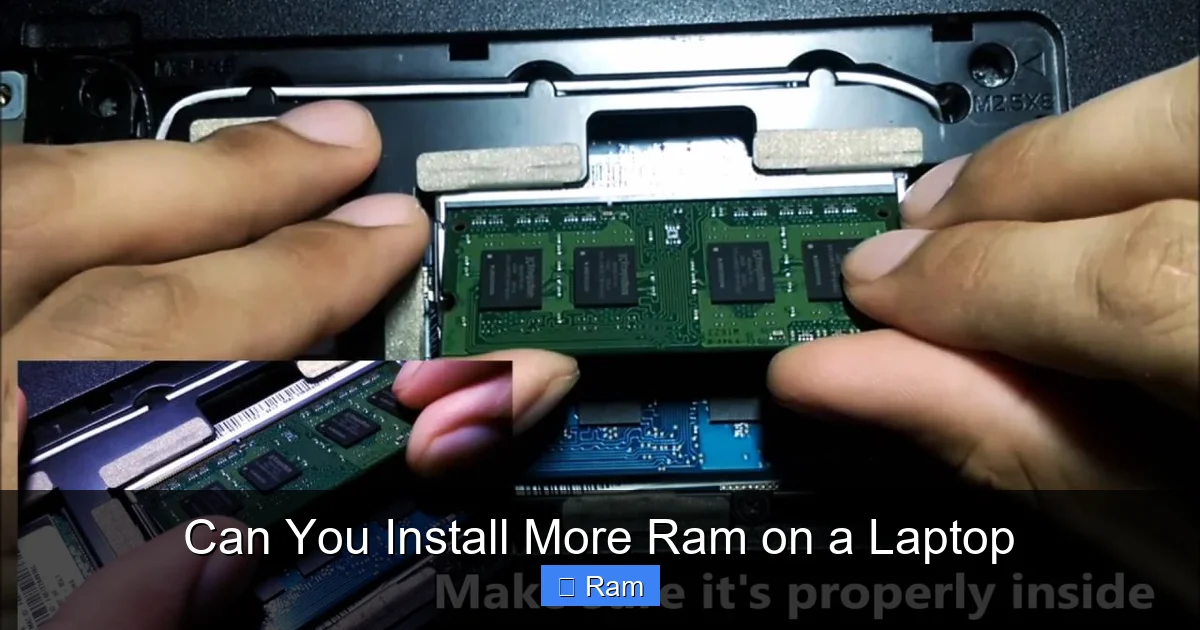
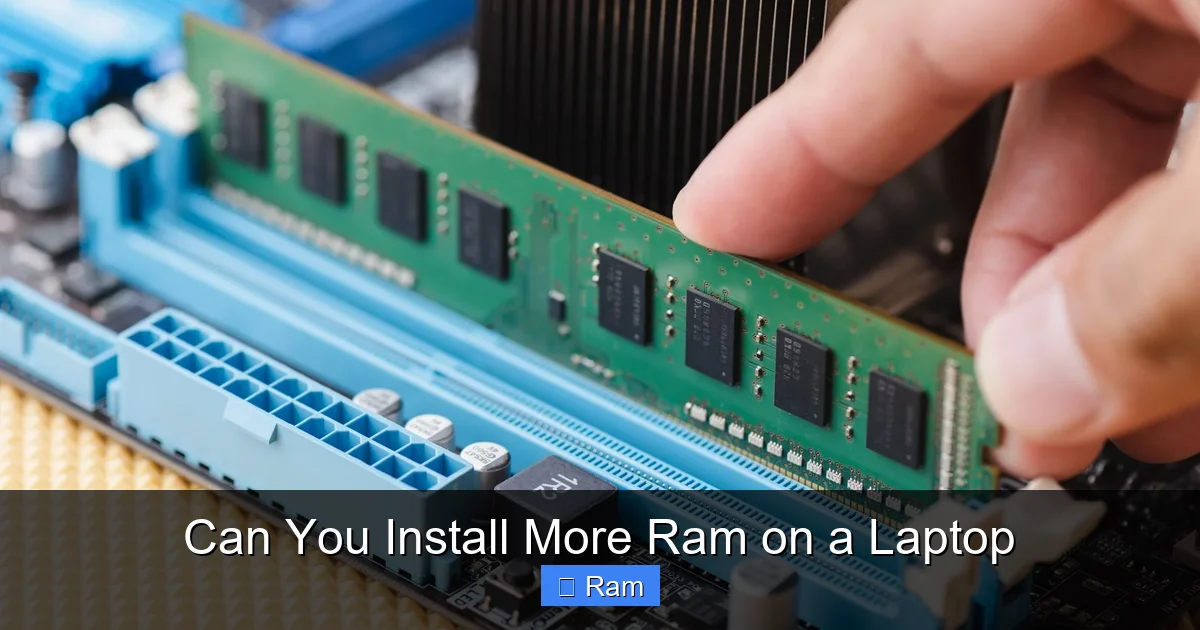
Take your new SODIMM module. Identify the notch on the bottom edge—it’s keyed to fit only one way. Align the notch with the ridge in the slot. Hold the module at the same 45-degree angle it was removed at. Insert the gold contacts firmly and evenly into the slot. You should feel it seat correctly. Now, the critical part: press down on the top edge of the module until the two plastic clips snap into place with an audible click. The module should now lie flat, parallel to the motherboard, held securely. Ensure it’s level and fully inserted. Repeat for the second module if applicable.
Step 4: Reassembly and First Power-On
Before closing the case, do a visual check. Ensure no tools or debris are left inside. No loose wires. The RAM is seated flat and clipped in. Replace the access panel, align it, and press down until all clips engage. Reinsert all screws, tightening them snugly but not with excessive force (which can strip the plastic threads). Flip the laptop over. Do not plug in the charger yet. Connect only the power cable if the battery is internal and you need power to boot (some modern laptops require it). Press the power button.
Section 5: Verification, Troubleshooting, and Performance Testing
If your laptop boots to the login screen or BIOS, the physical installation was a success! But the job isn’t done. We must verify the system sees and uses the new memory correctly.
Initial BIOS/UEFI Check
Immediately after powering on, press the key to enter your BIOS/UEFI (common keys: F2, Del, F10, F12—often shown on the splash screen). Navigate to the “System,” “Advanced,” or “Memory” tab. You should see the total installed RAM listed (e.g., “32768MB” for 32GB). It may also show the speed (e.g., “DDR4-3200”). If it shows the correct total capacity, the hardware is recognized. Exit the BIOS, saving changes if prompted (usually none needed for RAM).
Operating System Verification
In Windows, right-click the Start button and select “System.” Under “Device specifications,” look at “Installed RAM.” It should show the correct total (e.g., “32.0 GB”). For more detail, press Ctrl+Shift+Esc to open Task Manager, go to the “Performance” tab, and select “Memory.” Here you’ll see speed, form factor (should be SODIMM), and “Hardware reserved” (usually a few MB). On macOS, click the Apple menu > About This Mac > Memory. On Linux, use the free -h command in the terminal.
Troubleshooting Common Failure Scenarios
If the laptop doesn’t boot, beeps, or shows less RAM than expected, don’t panic.
- No Power, No Lights, No Beep: Likely a short or improper seating. Unplug, remove the battery if possible, open the case, and reseat the RAM modules. Ensure they are fully clicked in. Check for any stray screws touching the motherboard.
- Beeping or LED Blink Codes: This is a memory error code. Consult your laptop’s manual for the beep pattern meaning. Usually, it means incompatible or faulty RAM. Reseat again. Try booting with only one stick installed, testing each stick in each slot to isolate a bad module or bad slot.
- RAM Shows Less Than Expected (e.g., 16GB installed, shows 14GB): This is often due to “hardware reserved” memory, especially with a dedicated GPU that shares system RAM. On some systems with integrated graphics, the iGPU reserves a chunk. This is normal. If the discrepancy is huge (e.g., 32GB shows 16GB), you likely have a compatibility issue or a bad stick.
- System Bluescreens or Instability: Could be bad RAM, incompatible speed, or a BIOS that needs updating. Run a memory test. Windows has a built-in “Windows Memory Diagnostic” (search for it). For a more thorough test, use MemTest86 (create a bootable USB). Any red errors mean faulty RAM. If passes, try updating your BIOS from the manufacturer’s website, which can improve memory compatibility.
Section 6: What If You Can’t Upgrade? Alternative Paths to Better Performance
You’ve done the research. Your laptop has soldered memory, and there are no free slots. All is not lost. While you can’t add internal RAM, you can mitigate the slowdown through other means.
Software and System Optimization
Start with the free stuff. A clean Windows install can work wonders. Disable unnecessary startup programs (Task Manager > Startup tab). Use a lightweight browser like Firefox with uBlock Origin instead of Chrome with 50 tabs. Check for malware. Ensure your storage drive is not full (keep at least 15% free space) and is an SSD—a slow HDD will bottleneck even with ample RAM. Adjust your virtual memory (page file). Even with more RAM, a properly sized page file helps. Let Windows manage it, or set a custom size of 1.5x your RAM if you have an SSD.
External and Cloud-Based Solutions
For specific, memory-hungry tasks like video editing or 3D rendering, consider if you can offload the work. Use a cloud-based virtual machine (Azure, AWS, Google Cloud) with massive RAM for heavy projects, then download the finished file. For gaming, explore cloud gaming services like Xbox Cloud Gaming or GeForce Now, which run the game on powerful remote servers and stream the video to your laptop—your local RAM matters far less.
The Last Resort: Replacing the Entire Machine
If your laptop is old, has a slow HDD, a weak dual-core CPU, and soldered RAM, the cost/benefit of a RAM upgrade is low. In this case, the most effective performance leap comes from purchasing a new, budget-friendly laptop that prioritizes upgradability. Look for models that explicitly advertise “user-upgradable RAM” or have accessible panels in reviews. Sometimes, a $500 new laptop with 16GB of upgradeable RAM will feel astronomically faster than trying to salvage a 10-year-old machine with 4GB soldered.
Conclusion: Empowering Your Computing Experience
The journey to answer “Can you install more RAM on a laptop?” is a journey of empowerment. It starts with a simple check but leads to a deeper understanding of your machine. For the millions of laptops with accessible slots, a RAM upgrade is arguably the single most cost-effective performance enhancement you can make. It costs a fraction of a new laptop, takes less than an hour, and delivers a tangible, daily-use improvement in multitasking and responsiveness. The keys to success are knowledge and caution. Know your exact model. Buy the correct, compatible modules. Prepare your workspace to prevent static damage. Follow the steps methodically. Verify the results. By following this guide, you move from being a passive consumer of technology to an active maintainer and enhancer. You extend the useful life of your trusted companion, save money, and reduce e-waste. So, flip that laptop over, find that model number, and start your detective work. A faster, more capable machine is likely waiting inside, just a few screws and a new stick of memory away.
Frequently Asked Questions
Will upgrading my laptop’s RAM void the warranty?
This depends entirely on the manufacturer and laptop model. Most brands (Dell, HP, Lenovo) allow user-upgradable RAM and SSD without voiding the warranty, as these are considered customer-replaceable units (CRUs). However, if your laptop has a sealed chassis or a warranty sticker over the screws, opening it may void the warranty. Always check your specific warranty terms on the manufacturer’s website before proceeding.
Can I mix different sizes or brands of RAM sticks?
Technically, you can often mix different sizes (e.g., 8GB + 16GB) and brands, and the system will usually still boot. However, for optimal performance and stability, it’s strongly discouraged. Mixing can force the system into single-channel or asymmetric dual-channel mode, reducing performance. It can also cause compatibility issues leading to crashes. The best practice is to use identical sticks from the same kit, especially if you want dual-channel performance.
My laptop runs a 32-bit version of Windows. Can I still use more than 4GB of RAM?
No. A 32-bit operating system has a fundamental architectural limit of addressing approximately 4GB of memory, regardless of how much physical RAM is installed. To utilize 4GB or more, you must be running a 64-bit version of Windows (or Linux/macOS). Check your system type (Settings > System > About) before buying RAM. Upgrading to 64-bit Windows is a separate process that may require a clean install.
Will adding more RAM make my laptop run hotter?
Minimally, if at all. RAM modules consume a small amount of power (typically 1-3 watts per module). The increase in total system power draw and heat output from adding one or two SODIMMs is negligible compared to the heat generated by the CPU and GPU under load. Proper airflow is more critical for cooling those components. There is no significant thermal risk from a standard RAM upgrade.
Are there external RAM options for laptops with soldered memory?
No. RAM must be directly connected to the system bus on the motherboard. There is no standard, practical, or performant way to add external RAM to a laptop via USB, Thunderbolt, or any other port. Concepts like “ReadyBoost” (using a USB drive as cache) are obsolete and provide no meaningful benefit compared to actual RAM. The only external solutions are cloud-based virtual machines, which use remote server resources.
If my laptop is slow, is more RAM always the answer?
No. RAM is only one component. If your laptop is slow because it has a traditional hard disk drive (HDD), upgrading to an SSD will provide a far more dramatic improvement in boot times and app launches. If the CPU is old and weak, more RAM won’t help with intensive tasks like video encoding. Use Task Manager to check your RAM usage. If it’s consistently above 80-90% during normal use, more RAM will help. If it’s rarely above 50%, the bottleneck lies elsewhere (CPU, storage, or GPU).