Upgrading your laptop’s RAM is one of the most cost-effective ways to boost performance for multitasking, gaming, and demanding applications. This guide walks you through every critical step, from verifying your laptop’s compatibility and purchasing the right memory to safely performing the physical installation and confirming the upgrade works. With the right preparation and a steady hand, you can complete this upgrade in under 30 minutes, dramatically improving your system’s responsiveness without the cost of a new machine.
Key Takeaways
- Compatibility is King: Never assume RAM will fit. You must match the type (DDR3/DDR4/DDR5), speed (MHz), and form factor (SO-DIMM) to your laptop’s specific requirements, which are defined by the motherboard and manufacturer.
- Safety First: Always power down completely, unplug the charger, and remove the battery (if possible). Discharge static electricity by touching a grounded metal object or using an anti-static wrist strap before touching internal components.
- Tools & Prep: You typically only need a small Phillips-head screwdriver and a plastic spudger or pry tool. Have your new RAM modules ready, and work in a clean, well-lit, static-free area with a soft cloth to lay screws and parts on.
- Physical Installation: The process involves removing an access panel (often on the bottom), releasing retention clips, aligning the notch on the RAM stick with the slot’s key, and pressing firmly and evenly until the clips snap back into place.
- Verification is Crucial: After reinstalling the panel and booting up, check your system properties (Windows: Task Manager > Performance > Memory) or use a tool like CPU-Z to confirm the new RAM is recognized and running at the correct speed.
- Know the Limits: Upgrading RAM helps with multitasking and memory-hungry apps, but it won’t fix a slow processor, outdated graphics, or a traditional hard drive. Identify your true bottleneck first.
- Warranty Considerations: Opening your laptop may void its warranty. Check your manufacturer’s policy. Many modern laptops have user-upgradable RAM, but some ultrabooks have it soldered, making an upgrade impossible.
📑 Table of Contents
- Introduction: Breathe New Life Into Your Laptop
- Why Upgrade Your Laptop’s RAM? Understanding the “What” and “Why”
- Phase 1: Essential Pre-Installation Checks & Shopping
- Phase 2: Gathering Tools & Ensuring a Safe Workspace
- Phase 3: The Step-by-Step Physical Installation
- Phase 4: Post-Installation Verification & Troubleshooting
- Maximizing the Benefits & Understanding the Limits
- Conclusion: Your Laptop’s Upgrade Journey
Introduction: Breathe New Life Into Your Laptop
Is your once-snappy laptop now struggling to keep up? Do you see the “Not Responding” message more often than you’d like, especially when you have a few browser tabs, a document, and a music player open? Before you start shopping for a brand-new machine, there’s a powerful, affordable, and often-overlooked upgrade that can make a world of difference: adding more RAM. Learning how to install RAM in a laptop is a valuable skill for any computer user, and it’s surprisingly straightforward for most models.
Random Access Memory (RAM) is your system’s short-term memory. It holds the data and programs your CPU is actively using. When you run out of it, your laptop starts using the much slower hard drive or SSD as “virtual memory,” causing frustrating lag. By increasing your RAM capacity, you give your operating system and applications more breathing room, leading to smoother multitasking, faster application loading times, and better overall responsiveness. This guide will transform you from a cautious user into a confident DIY upgrader, covering everything from the initial “is this possible?” check to the final successful boot.
Why Upgrade Your Laptop’s RAM? Understanding the “What” and “Why”
Before we dive into the “how,” let’s solidify the “why.” An RAM upgrade isn’t a magic bullet for every performance issue, but it’s the most effective solution for specific, very common problems.
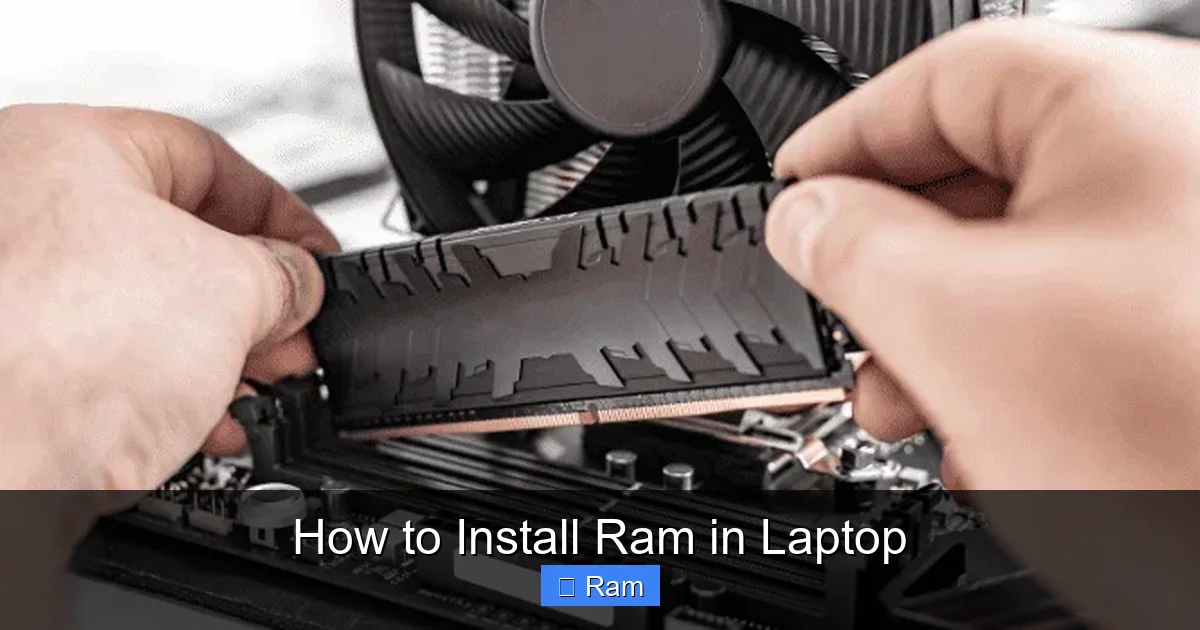
Visual guide about How to Install Ram in Laptop
Image source: techguided.com
The Tangible Benefits of More Memory
Imagine your laptop’s RAM as a physical workspace desk. A small desk (4GB-8GB) forces you to constantly put tools and papers (data and programs) away in a filing cabinet (storage drive) to make room for new ones. This process is slow. A large desk (16GB-32GB) allows you to keep everything you’re working on within arm’s reach. The result? You get more done, faster. This translates directly to:
- Smoother Multitasking: Seamlessly switch between dozens of Chrome tabs, a Word document, a spreadsheet, and Spotify without constant stuttering or reloading.
- Better Performance in Demanding Apps: Applications like photo/video editors (Adobe Photoshop, Premiere Pro), 3D modeling software (Blender), and virtual machines run significantly faster with more RAM to cache assets.
- Improved Gaming (on some laptops): While the GPU is the primary factor for gaming, many modern games use system RAM for textures and assets. More RAM can reduce stutters in open-world games and improve load times.
- Future-Proofing: Operating systems and applications become more resource-intensive over time. Upgrading from 8GB to 16GB today gives you a comfortable buffer for the next 3-5 years of typical use.
When RAM Won’t Help (The Important Caveats)
It’s crucial to diagnose the real bottleneck. If your laptop has a traditional spinning hard drive (HDD), upgrading to an SSD will feel like a far more dramatic improvement than adding RAM. Similarly, if your processor is very old and slow, more RAM won’t make it calculate faster. Use built-in tools like Windows Task Manager (Ctrl+Shift+Esc) to check your memory usage. If you’re consistently above 80-90% usage during normal tasks, an upgrade is likely worthwhile.
Phase 1: Essential Pre-Installation Checks & Shopping
This is the most critical phase. Rushing into the physical installation without proper verification is the #1 cause of failed upgrades, wasted money, and frustration. Do not skip this section.
Step 1: Identify Your Laptop’s Current RAM Configuration
You need three key pieces of information: type, speed, and current capacity.
- On Windows: Press Ctrl+Shift+Esc to open Task Manager. Go to the “Performance” tab and click on “Memory.” Here you’ll see the speed (e.g., 3200 MHz), the form factor (should say “SO-DIMM” for laptops), and the total capacity (e.g., “8.0 GB”). The “Speed” field is particularly important.
- Using System Information: Type “msinfo32” into the Windows Start menu search and run it. Under “System Summary,” look for “Installed Physical Memory (RAM).”
- Physical Inspection (If comfortable): If you’re already opening the laptop, the labels on the existing RAM sticks will have all the specs (e.g., “DDR4-2666 8GB”).
Step 2: Find Your Laptop’s Maximum Supported RAM & Available Slots
This is the most common point of failure. Your laptop’s motherboard has a hard limit on how much RAM it can address. You must find this spec.
- Manufacturer’s Website: Go to your laptop brand’s support page (Dell, HP, Lenovo, ASUS, etc.), enter your exact model number (found on a sticker on the bottom), and look for the ” Specifications” or “Tech Specs” sheet. Search for “Memory” or “RAM.” It will list the maximum supported RAM (e.g., “Up to 32GB”) and the number of slots (usually 1 or 2).
- Use a System Scanner Tool: Websites like Crucial’s System Scanner or Kingston’s Memory Search are excellent. They download a small utility that scans your system and recommends compatible upgrade kits. This is a fantastic, low-effort way to get it right.
- Check Existing Slots: If your laptop has 8GB total and two slots, it likely has one 8GB stick. If it has 4GB total and two slots, it likely has two 2GB sticks. You’ll need to open it to be sure, but the spec sheet will tell you if slots are available.
Step 3: Purchasing the Right RAM
Armed with your laptop’s specs (DDR4, 2666MHz, max 32GB, 2 slots), you can shop confidently.
- Match the Generation (DDR3/DDR4/DDR5): They are physically incompatible. DDR4 has 288 pins, DDR5 has 262, and the notch is in a different place. You must match what your laptop uses.
- Match the Speed (MHz): RAM can run at different speeds. Your new RAM should be at least as fast as your existing RAM. It’s best to match speeds exactly for dual-channel performance (if using two sticks). If mixing, all sticks will run at the speed of the slowest module.
- Capacity & Configuration: If you have one empty slot, buy one stick of the desired capacity (e.g., another 8GB). If both slots are full with 4GB each and you want 16GB total, you must replace both with two 8GB sticks. For dual-channel performance (which doubles the memory bandwidth), it’s ideal to use two identical sticks (same brand, model, size, speed).
- Buy from Reputable Brands: Stick with known manufacturers like Crucial, Kingston, Corsair, G.Skill, or Samsung. They offer better compatibility guarantees and warranties.
Phase 2: Gathering Tools & Ensuring a Safe Workspace
Now that you have the correct RAM, it’s time to prepare for the physical work. A safe, organized workspace prevents damage to your laptop and its components.
The Essential Toolkit
For most laptops, you need very few tools:
- A Small Phillips-Head Screwdriver (#0 or #00): This is non-negotiable. Laptop screws are tiny and require precision. A precision screwdriver set is a great investment for any DIY electronics work.
- A Plastic Spudger or Pry Tool: Used to gently pry open plastic clips on the laptop’s bottom cover without scratching the casing. You can often use a used gift card or a sturdy plastic guitar pick in a pinch.
- An Anti-Static Wrist Strap (Highly Recommended): This is the single best investment for protecting sensitive electronics from electrostatic discharge (ESD). Clip the metal end to a grounded object (like an unpainted metal part of your desk or the radiator). If you don’t have one, the next best thing is to frequently touch a grounded metal object (like the metal screw on a light switch plate) to discharge static.
- A Small Container or Magnetic Mat: To hold the tiny screws you remove. A piece of paper with sections drawn on it also works.
- A Soft, Lint-Free Cloth: To lay the laptop on and to gently clean the RAM contacts if needed.
Creating a Static-Free, Organized Environment
Find a clean, flat, well-lit table. Avoid carpeted floors, as they generate static. Remove any plastic bags, papers, or fabrics from the immediate area. Keep your new RAM in its anti-static bag until you are ready to install it. Have your tools laid out in order of use. This preparation will make the actual installation smooth and stress-free.
Phase 3: The Step-by-Step Physical Installation
With compatibility confirmed, tools ready, and a safe workspace set, we can begin the hands-on process. The general principle is the same for 95% of laptops, but the access point varies.
Step 1: Power Down & Disconnect Everything
This is the absolute safety rule. Do not skip.
- Shut down your laptop completely through the operating system. Do not just sleep or hibernate it.
- Unplug the AC power adapter from both the wall and the laptop.
- If your laptop has a removable battery, take it out now. This is a critical safety step for many models.
- Disconnect all peripheral devices: USB drives, external monitors, docking stations, etc.
Step 2: Locate & Remove the Access Panel
Most laptops with upgradeable RAM have a small rectangular panel on the bottom, held by one or two screws. This panel often has a RAM symbol (two blocks with lines) next to it or is simply a larger compartment.
- Flip the laptop over. Identify the panel. It may be one large panel covering the entire bottom or a smaller one near the hinge or center.
- Using your Phillips screwdriver, carefully remove all screws. Note their lengths and positions; sometimes they are different. Placing them on your labeled paper/mat is wise.
- Gently use the plastic spudger to pry the panel up. Start at a corner. You may hear faint clicks as plastic clips release. Work your way around. The panel should come off without excessive force. If it resists, double-check for any hidden screws under rubber feet or labels.
Note for Some Models: On certain ultrabooks (like some older MacBooks or specific Dell XPS models), the RAM is located under the keyboard. This is a much more complex and risky procedure involving removing the entire keyboard bezel. If you cannot find a bottom access panel, search online for “[Your Exact Laptop Model] RAM upgrade guide video]” before proceeding. If the keyboard must be removed, consider seeking professional help unless you are very confident.
Step 3: Remove Old RAM (If Replacing) & Install New RAM
Once the panel is off, you’ll see one or two small circuit boards (the RAM sticks) held down by small metal clips on either side.
- To Remove Existing RAM: Gently push the two retention clips on the sides away from the RAM module. The stick will pop up at an angle (~30 degrees). Grasp it by the edges (avoid touching the gold contacts or the chips) and pull it straight out.
- To Install New RAM: This is the most delicate part. Hold the new RAM stick by the edges. Notice the notch on the bottom edge of the stick (the gold contacts). This notch must align perfectly with the key (a small raised bump) in the slot. Do not force it. The alignment is critical.
- Place the stick in the slot at the same ~30-degree angle. Gently but firmly press down on the top edge of the stick until it is flat and the retention clips on both sides snap back into place with a satisfying click. You should feel and hear this click. Ensure it is seated evenly and fully.
- If you have a second slot, repeat the process for the second stick.
Step 4: Reassemble & Power On
- Double-check that the RAM is securely seated and the clips are locked.
- Replace the access panel, aligning it carefully. Press it down around the edges until all clips are engaged.
- Reinsert all screws in their correct holes and tighten them snugly, but do not over-tighten and strip the plastic threads.
- If you removed the battery, reinstall it now.
- Plug in the AC adapter, but do not connect any other peripherials yet.
- Press the power button. Your laptop should boot normally. The first boot after a RAM upgrade may take slightly longer as the system configures the new memory. This is normal.
Phase 4: Post-Installation Verification & Troubleshooting
If your laptop boots to the login screen, that’s a great sign! But we need to confirm the system sees and is using all your new RAM correctly.
How to Confirm Your RAM is Recognized
- Windows Task Manager: Press Ctrl+Shift+Esc, go to Performance > Memory. At the top right, it should show the total installed RAM (e.g., “16.0 GB”). It will also show the speed. If it shows the correct speed (or a slightly lower one, which is common), you’re good.
- System Information: Run msinfo32 again. Check “Installed Physical Memory (RAM).”
- CPU-Z (Gold Standard): Download and run the free CPU-Z utility. Go to the “Memory” and “SPD” tabs. The “Memory” tab shows total size and channel count (dual-channel is ideal). The “SPD” tab, when you select each slot, will show the exact specs of each stick installed. This is the best way to verify speed and timings.
Common Issues & Troubleshooting
If the laptop doesn’t boot (no lights, no fan spin) or shows a black screen with a repeating beep code:
- No Power/Black Screen: Immediately unplug the battery and AC adapter. Open the bottom panel again. Reseat the RAM: remove it and reinstall it, pressing firmly until the clips click. Ensure it’s fully inserted. Try booting with only one stick installed (test each stick in each slot) to isolate a faulty stick or bad slot.
- Beep Codes: A continuous or patterned beep on startup is a POST (Power-On Self-Test) error code. For most laptops, 1-3 beeps indicates a memory error. Reseating the RAM is the first fix. If that fails, one of the sticks may be defective, or the slot may be damaged.
- RAM Not Fully Recognized (e.g., 8GB installed, 7.9GB usable): This is usually normal. The system and integrated graphics reserve a small amount. If you’re missing a large chunk (e.g., 16GB installed, 8GB shown), you have a serious compatibility or seating issue. Reseat the RAM.
- System Runs Slow or Unstable After Install: Could indicate incompatible RAM (speed too high for the laptop’s BIOS) or a faulty stick. Try running a memory test like Windows Memory Diagnostic (search in Start menu) or MemTest86 (more thorough, requires USB boot).
Maximizing the Benefits & Understanding the Limits
Congratulations on a successful upgrade! Now, let’s talk about how to get the most from it and when an RAM upgrade isn’t the answer.
Optimizing Your New RAM
Modern operating systems manage RAM automatically, but you can ensure optimal performance:
- Check BIOS/UEFI Settings: Sometimes, RAM speed defaults to a lower setting. Enter your BIOS/UEFI (usually by pressing F2, Del, or F12 during boot) and look for memory settings. Ensure XMP/DOCP is enabled if your laptop supports it (common in gaming laptops). This allows the RAM to run at its advertised high speed.
- Manage Startup Programs: Use Task Manager’s Startup tab to disable unnecessary programs. This frees up RAM right from boot.
- Close Unused Applications: Get in the habit of closing heavy apps (like Photoshop) when you’re done, rather than just minimizing them.
When More RAM Isn’t Enough: Recognizing Other Bottlenecks
If you upgraded from 4GB to 8GB and still feel sluggish, the problem may lie elsewhere:
- The Storage Drive: An old 5400 RPM hard drive is the single biggest cause of slow boot and load times. Upgrading to a SATA or NVMe SSD will transform your laptop’s feel, often more noticeably than a RAM upgrade alone.
- The CPU (Processor): An old, low-power dual-core CPU will struggle with modern software, regardless of RAM amount. Check CPU usage in Task Manager during slow periods. If it’s consistently at 100%, the CPU is the bottleneck.
- Integrated Graphics: For gaming or GPU-intensive tasks, your laptop’s integrated graphics (Intel Iris Xe, AMD Vega) share system RAM. More RAM helps here, but a laptop with a dedicated GPU will be in a different performance class entirely.
- Overheating/Throttling: If your laptop’s cooling system is clogged with dust, the CPU and GPU will throttle performance to cool down, making the system slow. A good cleaning can help.
Conclusion: Your Laptop’s Upgrade Journey
Learning how to install RAM in a laptop empowers you to take control of your technology’s performance and lifespan. You’ve now navigated the entire process: from the meticulous research to ensure compatibility, through the careful preparation of tools and a safe workspace, to the precise physical act of installing the memory modules, and finally to the verification and troubleshooting that confirms success. This skill saves you money, reduces electronic waste, and gives you a deeper understanding of the machine you use every day.
Remember the core principles: compatibility is everything, safety is non-negotiable, and verification is mandatory. A successful RAM upgrade is a quiet victory—your laptop will feel faster, more responsive, and capable of handling your daily workflow without the constant protest of lag. It’s a tangible, rewarding DIY project that delivers real-world results. So, open that panel with confidence, handle those sticks by the edges, and enjoy the newfound speed of your refreshed machine.
Frequently Asked Questions
Can I install RAM in any laptop?
No. Many modern ultrabooks and ultra-thin laptops have the RAM soldered directly to the motherboard, making it impossible to upgrade. You must first check your specific laptop model’s specifications to see if it has accessible, user-upgradable RAM slots. Laptops designed for business or gaming often have upgradeable slots, while many consumer-focused ultrabooks do not.
Do I need to worry about static electricity?
Absolutely. Static discharge can permanently damage sensitive RAM and motherboard components. Always work on a non-carpeted surface, touch a grounded metal object before handling components, and use an anti-static wrist strap if possible. Keep the RAM in its anti-static bag until the moment you install it, and only handle it by the edges, avoiding the gold contacts.
Can I mix RAM sizes and brands?
Technically, you can mix sizes and brands, but it’s not recommended for optimal performance and stability. For best results, especially to enable dual-channel mode (which boosts performance), use two identical RAM sticks (same brand, model, capacity, and speed). If you mix, the system will run in asymmetric dual-channel or single-channel mode, and the faster stick will downclock to the speed of the slower one. It may work, but you risk compatibility issues.
Will adding more RAM always make my laptop faster?
No. Adding RAM only helps if your performance issue is caused by running out of available memory. If your laptop is slow because it has a traditional hard drive (HDD), an old processor, or poor cooling, more RAM will have little to no effect. Use Task Manager to monitor your memory usage. If you’re consistently above 85-90% usage during normal tasks, an upgrade will help. If memory usage is low but the system is slow, look elsewhere.
My laptop won’t boot after installing new RAM. What now?
First, don’t panic. Power down, unplug, and reseat the RAM modules. Ensure they are fully inserted and the retention clips are locked. If that fails, try booting with only one stick installed, testing each stick in each slot individually. This will identify if a stick is faulty or a slot is damaged. Also, double-check that the RAM you purchased is 100% compatible with your laptop model.
Is there a difference between desktop RAM and laptop RAM?
Yes, and they are not interchangeable. Laptops use a smaller form factor called SO-DIMM (Small Outline Dual In-line Memory Module). Desktop RAM uses the larger standard DIMM. They have different pin counts (260/262 for DDR4/DDR5 SO-DIMM vs. 288 for desktop DDR4/DDR5) and the notches are in different positions, so they physically cannot fit into each other’s slots. Always buy SO-DIMM for laptops.