Finding the RAM in your laptop is simple. You can check it instantly with built‑in Windows or macOS tools, peek into the BIOS, or open the case for a hands‑on look. Follow our step‑by‑step guide to confirm size, type, and upgrade options without guesswork.
Key Takeaways
- Understanding how to find ram in laptop: Provides essential knowledge
📑 Table of Contents
Introduction: Why Knowing Your Laptop’s RAM Matters
Imagine trying to run a modern game or a heavy‑duty video editor on a laptop that only has 4 GB of memory. The system slows, freezes, and you end up frustrated. Knowing exactly how much RAM you have, what type it is, and whether you can add more is the first step to a smoother experience.
Whether you’re a student, a casual user, or a tech‑savvy gamer, the process of finding RAM in a laptop is surprisingly easy. You don’t need a Ph.D. in computer engineering—just a few clicks or a quick peek inside the chassis. This guide walks you through every method, from software checks to opening the case, so you can confidently decide if an upgrade is right for you.
1. Using Built‑In Operating System Tools
Both Windows and macOS include native utilities that display RAM information instantly. These tools are perfect when you want a fast answer without opening the laptop.

Visual guide about How to Find Ram in Laptop
Image source: wallpaperaccess.com
1.1 Windows: Task Manager
1. Press Ctrl + Shift + Esc to launch Task Manager.
2. Click the Performance tab.
3. Select Memory on the left. You’ll see total size, type (e.g., DDR4), speed, and how many slots are used.
1.2 Windows: System Information
1. Press Windows + R, type msinfo32, and hit Enter.
2. Under System Summary, look for Installed Physical Memory (RAM). This shows the total amount.
1.3 macOS: About This Mac
1. Click the Apple logo > About This Mac.
2. The Overview tab lists memory size and type (e.g., 16 GB 2666 MHz DDR4).
3. For detailed slot info, click System Report** → **Memory**.
1.4 Linux: Free and lshw
Open a terminal and type:
free -h– shows total and used RAM in human‑readable format.sudo lshw -c memory– provides slot‑by‑slot details, including type and speed.
2. Checking RAM Through BIOS/UEFI
If you need to confirm what the hardware actually sees—especially after a recent upgrade—booting into the BIOS/UEFI is reliable.

Visual guide about How to Find Ram in Laptop
Image source: wallpaperaccess.com
2.1 Accessing BIOS/UEFI
Most laptops use one of these keys during power‑on: F2, Delete, Esc, F10, or F12. A quick glance at the startup screen usually tells you which key to press.
2.2 What to Look For
Once inside, navigate to sections named System Information, Memory, or Hardware Monitor. You’ll typically see:
- Total installed RAM.
- Number of slots and whether each is populated.
- Speed (e.g., 3200 MHz) and sometimes the module model.
Note the values, then exit without saving changes.
3. Physically Inspecting the Laptop
Software can sometimes misreport if a module is faulty or not fully seated. Opening the laptop gives you the most accurate picture.
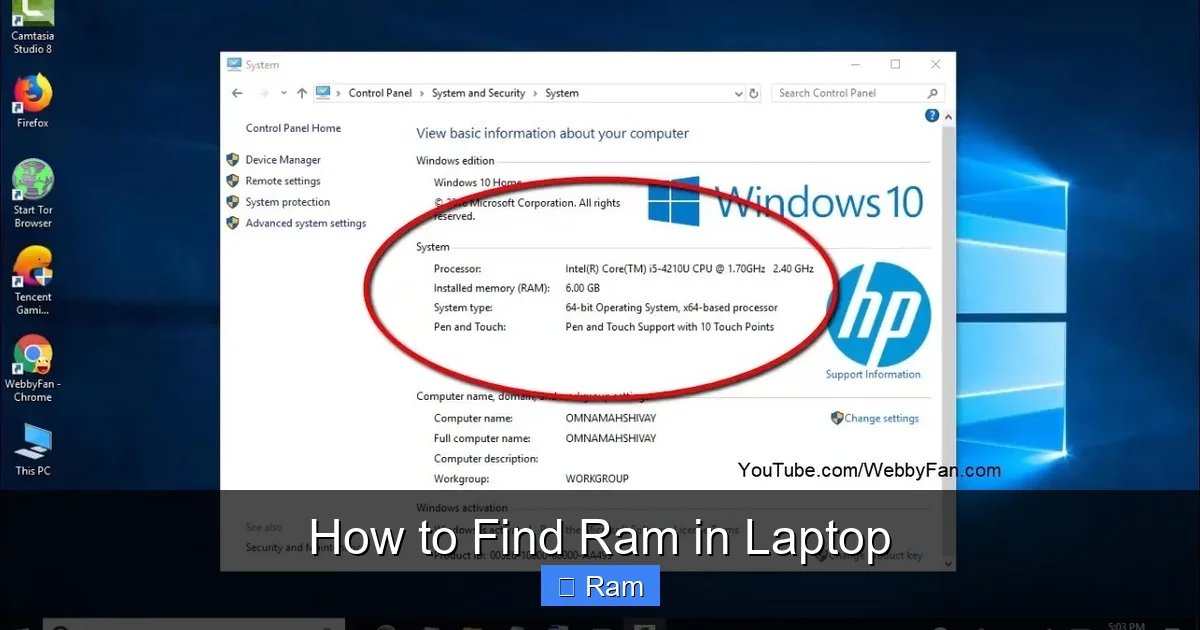
Visual guide about How to Find Ram in Laptop
Image source: i.ytimg.com
3.1 Preparing Your Workspace
- Power off the laptop and unplug the charger.
- Remove the battery if it’s removable.
- Wear an antistatic wrist strap or touch a grounded metal object.
- Gather a small Phillips screwdriver and a plastic pry tool.
3.2 Removing the Bottom Panel
Most modern laptops have a single bottom cover secured by 4‑8 screws. After unscrewing, gently pry the panel off using the plastic tool. Some models have a dedicated “RAM access” hatch—simply unscrew that.
3.3 Identifying the RAM Modules
Inside, you’ll see one or two rectangular sticks standing upright in a slot. Typical clues:
- Label: Manufacturer (e.g., Crucial, Samsung) and part number.
- Capacity: Usually printed as “8GB” or “16GB”.
- Type: “DDR4‑2666” indicates DDR4 at 2666 MHz.
- Slot status: Empty slots have a notch but no stick.
3.4 Taking Measurements for Upgrades
Measure the length of the module (most are 30 mm for SO-DIMM). Note the spacing of nearby components—cooling fans or cables can block larger modules.
4. Determining Compatibility and Upgrade Limits
Before buying new RAM, you need to know what your laptop supports.
4.1 Manufacturer Specifications
Visit the laptop maker’s support page and search your exact model number. Look for “Maximum Memory” and “Supported Memory Types”. For example, a Dell XPS 13 7390 may support up to 32 GB DDR4‑3200.
4.2 Using Third‑Party Tools
Websites like Crucial or Kingston have “System Scanner” utilities. Run the tool; it detects your laptop and recommends compatible modules.
4.3 Matching Speed, Voltage, and CAS Latency
If you’re adding a second stick, match it to the existing one:
- Speed: Same MHz (e.g., 2666 MHz).
- Voltage: Typically 1.2 V for DDR4.
- CAS Latency (CL): Lower numbers are faster, but identical CL ensures stable dual‑channel operation.
4.4 Dual‑Channel vs. Single‑Channel
Two identical sticks enable dual‑channel mode, effectively doubling memory bandwidth. If you have one 8 GB module, adding another 8 GB of the same speed yields better performance than a single 16 GB stick.
5. Installing New RAM (If You Choose to Upgrade)
Now that you know what you have and what you can add, here’s a quick guide to the actual installation.
5.1 Inserting the Module
- Align the notch on the module with the key in the slot.
- Insert at a 30‑degree angle, then press down gently until the side clips snap into place.
- Ensure both side latches are secure.
5.2 Verifying the Upgrade
Power the laptop back on and repeat the software check (Task Manager or About This Mac). The new total should appear instantly.
5.3 Troubleshooting Common Issues
- Not recognized: Reseat the module; check for dust.
- System won’t boot: Verify the module’s type matches the laptop’s spec.
- Frequent crashes: Run a memory test (Windows Memory Diagnostic or MemTest86).
Conclusion: You’ve Got the Know‑How
Finding the RAM in your laptop is a breeze when you know the right steps. From a quick glance in Task Manager to a careful hands‑on inspection, each method gives you confidence about your current memory and upgrade potential. Armed with this knowledge, you can boost performance, extend the life of your device, and avoid costly mistakes.
Remember: always double‑check compatibility, handle components with care, and enjoy the speed boost that comes with the right amount of RAM. Happy upgrading!
Frequently Asked Questions
How can I check my laptop’s RAM without opening it?
Use built‑in tools: Task Manager on Windows, About This Mac on macOS, or the free -h command on Linux. These show total size, type, and speed instantly.
What does “dual‑channel” mean and why does it matter?
Dual‑channel uses two identical RAM sticks to double the data path, improving bandwidth. It offers noticeable performance gains in gaming and content‑creation tasks.
Can I mix different brands or capacities of RAM?
Yes, you can mix brands, but matching speed, voltage, and CAS latency is crucial. For best stability, use identical modules.
My laptop says it has 8 GB of RAM, but I installed a 16 GB stick. What happened?
The new module may be incompatible (wrong type or speed) or not fully seated. Reseat it, verify specs, and run a memory diagnostic to confirm.
Is it safe to upgrade RAM on a laptop that is still under warranty?
Most manufacturers allow RAM upgrades without voiding the warranty, but check the warranty terms. Keep receipts and document the upgrade in case you need service later.
Do I need any special tools to open my laptop?
A small Phillips screwdriver and a plastic pry tool are usually enough. An antistatic wrist strap helps protect components from static discharge.