How to Install Ram in a Laptop
Learning how to install RAM in a laptop is one of the easiest and most affordable ways to speed up your computer. This guide walks you through every step, from choosing the right memory module to completing the installation safely. You do not need to be a tech expert — just follow along and your laptop will feel like new in under 30 minutes.
If your laptop feels slow, you are not alone. Many people deal with laggy performance every single day. The good news? You can fix this without spending a fortune. Learning how to install RAM in a laptop is a skill that saves time and money. It also gives your computer a real speed boost that you can feel right away.
RAM, or random access memory, is the short-term memory your laptop uses to handle tasks. More RAM means your laptop can juggle more apps at once. It also means faster load times and smoother multitasking. Whether you use your laptop for work, school, or gaming, adding memory can make a big difference.
This guide breaks down the entire process into simple, easy-to-follow steps. You will learn what tools you need, how to pick the right module, and how to put it in safely. By the end, you will feel confident doing this upgrade yourself. Let us get started.
Key Takeaways
- Installing RAM is simple: You do not need advanced technical skills or expensive tools to upgrade your laptop memory.
- Choosing the right RAM matters: Matching your laptop’s RAM type, speed, and capacity ensures the best performance boost.
- Safety first: Always disconnect power and ground yourself to prevent damage from static electricity.
- Check compatibility before buying: Not all RAM works with every laptop, so verify your model’s requirements first.
- You can verify success easily: Your laptop will show the new RAM immediately after a reboot.
- Common mistakes are avoidable: Skipping anti-static precautions or forcing modules in can cause damage.
📑 Table of Contents
What Is RAM and Why Does It Matter?
Before you dive into the actual installation, it helps to understand what RAM does and why it is so important. Think of RAM as your laptop’s short-term workspace. When you open a browser, a game, or a video editor, your laptop loads data into RAM so it can access it quickly.
Without enough RAM, your laptop has to work harder. It starts swapping data to your hard drive, which is much slower. This causes lag, freezing, and frustrating delays. Adding more memory gives your laptop the room it needs to work efficiently.
Here are some signs your laptop needs more RAM:
- Your computer takes forever to open apps
- You experience slowdowns when switching between tabs
- Videos and games stutter or freeze
- Your laptop uses a lot of memory even with few programs open
- You get low memory warnings from your operating system
If any of these sound familiar, a laptop memory upgrade is probably a smart move. It is one of the most cost-effective ways to improve performance. And the best part? You can do it yourself at home.
How to Install RAM in a Laptop: Step-by-Step Guide
Now let us get into the hands-on part. Installing RAM in a laptop is straightforward once you know what to do. Follow these steps carefully and you will have your upgrade done in no time.
Step 1: Gather Your Tools
You do not need much to complete this upgrade. Here is what you should have ready before you start:
- The new RAM module (make sure it matches your laptop type)
- A small Phillips-head screwdriver
- An anti-static wrist strap (optional but recommended)
- A clean, flat workspace
- Your laptop’s user manual (helpful but not required)
Having everything ready before you begin keeps the process smooth. You do not want to pause halfway through looking for a screwdriver.
Step 2: Power Down and Disconnect
Turn off your laptop completely. Unplug the power adapter and remove any connected devices. If your laptop has a removable battery, take it out. This is a critical safety step. Working on a powered laptop can damage both you and the machine.
Press and hold the power button for about 10 seconds after unplugging. This drains any remaining electricity from the motherboard. It is a small step that makes a big difference in safety.
Step 3: Ground Yourself
Static electricity can damage sensitive laptop components. Before touching any internal parts, ground yourself. You can touch a metal part of the laptop chassis or wear an anti-static wrist strap.
Work on a non-carpeted surface if possible. Avoid wearing clothing that generates static, like wool sweaters. These small precautions protect your laptop from unexpected damage.
Step 4: Open the Back Panel
Flip your laptop over and locate the screws holding the bottom panel in place. Use your screwdriver to carefully remove them. Keep the screws in a safe spot — a small bowl or magnetic tray works great.
Gently pry the panel off using a plastic spudger or your fingernail. Start at one corner and work your way around. Avoid using metal tools that could scratch the laptop casing.
Step 5: Locate the RAM Slots
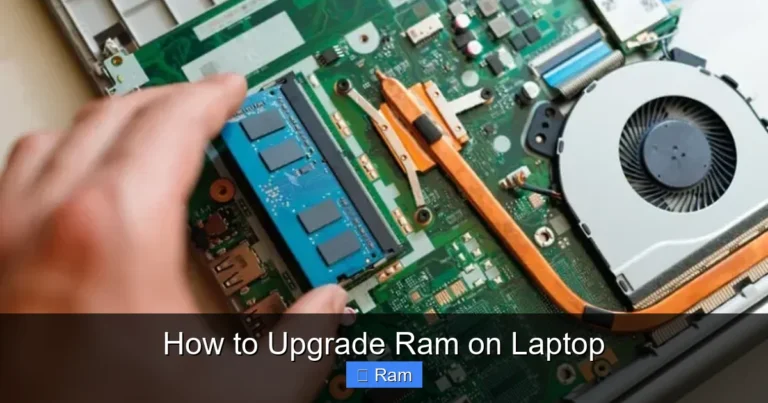
Once the panel is off, look for the RAM slots. They are long, thin slots near the center of the motherboard. Most laptops have one or two slots for memory modules.
If you are unsure where the RAM is, check your laptop manual or look for the small notches that match the shape of your RAM stick. The modules sit flat and are held in place by small clips on each end.
Step 6: Remove the Old RAM (If Needed)
If you are replacing existing RAM, you need to remove it first. Push the clips on both sides of the module outward. The RAM stick will pop up at an angle.
Gently pull the module straight out. Do not force it. If it feels stuck, double-check that the clips are fully released. Handle the RAM by the edges to avoid touching the gold contacts on the bottom.
Step 7: Insert the New RAM
Take your new memory module and align it with the slot. Match the notch on the RAM stick with the ridge inside the slot. This ensures correct orientation.
Insert the module at a 45-degree angle and press it firmly down into the slot. You will hear or feel a click when the clips lock into place. The module should sit flat and snug. If it is loose, remove it and try again.
Step 8: Close Up and Test
Replace the bottom panel and screw it back in securely. Reconnect the battery if you removed it. Plug in the power adapter and turn on your laptop.
Once your laptop boots up, check that the new RAM is recognized. You can do this by going to your system settings or using a tool to check memory. If the full amount shows up, your upgrade was a success!
Choosing the Right RAM for Your Laptop
Not all RAM is the same, and picking the wrong type can cause problems. Before you buy a new module, you need to know what your laptop supports. Here are the key factors to consider.
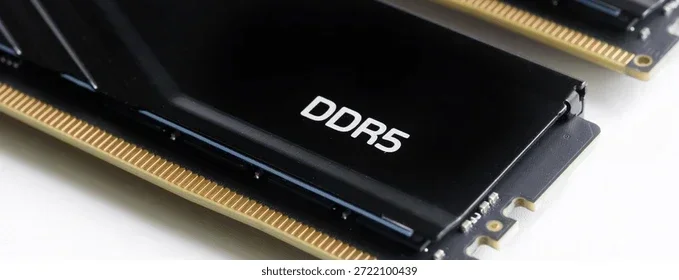
RAM Type: Most modern laptops use DDR4 RAM, but older models may use DDR3 or even DDR2. Check your laptop’s specifications to confirm the correct type. Using the wrong type will not work, even if it physically fits.
Speed: RAM speed is measured in megahertz (MHz). Higher numbers mean faster data transfer. However, your laptop can only use the speed its motherboard supports. Buying RAM that is too fast will just run at a lower speed.
Capacity: Most users benefit from 8GB to 16GB of RAM. Heavy users, gamers, and video editors may want 32GB or more. Consider what you use your laptop for when deciding on capacity.
Form Factor: Laptops use smaller RAM modules called SODIMMs. These are different from the larger DIMMs used in desktop computers. Make sure you buy the laptop-specific size.
If you are not sure what your current RAM looks like, check your existing memory before purchasing a new module. This saves time and prevents buying the wrong product.
Common Mistakes to Avoid When Installing RAM
Even a simple upgrade can go wrong if you make avoidable mistakes. Here are the most common errors people make when installing memory in a laptop:
- Skipping the grounding step: Static electricity can fry your RAM or motherboard without you even knowing it. Always ground yourself before touching components.
- Forcing the module in: RAM should slide in smoothly with firm pressure. If it resists, check the alignment. Forcing it can bend the pins and ruin the module.
- Buying incompatible RAM: Not every RAM stick works with every laptop. Always check your laptop model’s specifications before purchasing.
- Forgetting to remove power: Working on a laptop that is still connected to power is dangerous. Always disconnect everything first.
- Touching the gold contacts: Oils from your fingers can interfere with the connection. Hold RAM modules by the edges only.
Taking your time and following each step carefully will help you avoid these pitfalls. Patience is your best friend during any hardware upgrade.
How to Know If Your RAM Upgrade Worked
After you finish the installation, you will want to confirm everything is working properly. Here is how you can verify your upgrade was successful.
First, restart your laptop and enter the BIOS or UEFI settings. This is usually done by pressing F2, F12, Delete, or Esc during startup. Look for the memory information section to see if the new RAM is detected.
Next, check your operating system. On Windows, right-click the taskbar and open Task Manager. Go to the Performance tab and click on Memory. You should see the total amount of RAM reflected.
On a Mac, click the Apple menu and select About This Mac. The memory section will show your upgraded RAM. On Linux, you can use the terminal command free -h to check memory.
If the new memory shows up correctly, you are all set. Your laptop should now feel faster and more responsive. If the RAM is not detected, try reseating the module or checking for compatibility issues.
Expert Tips for a Smooth Installation
Here are some pro tips that make the process even easier and safer:
- Work in a well-lit area: Good lighting helps you see small components and avoid mistakes.
- Take photos before disassembly: Photos help you remember how things are connected when it is time to put everything back.
- Install RAM in pairs for dual-channel mode: If your laptop has two slots, matching pairs can improve performance.
- Keep your workspace organized: Use a magnetic tray for screws so nothing gets lost.
- Update your laptop BIOS if needed: Sometimes a BIOS update improves memory compatibility and stability.
- Do not rush: Take your time with each step. Rushing leads to mistakes and potential damage.
These tips come from years of experience with laptop upgrades. Following them will make your RAM installation smoother and more successful.
When to Ask for Professional Help
Most people can handle a RAM upgrade with confidence after reading this guide. However, there are times when it makes sense to seek professional help. If your laptop has a sealed battery or a design that is difficult to open, a technician may be the better choice.
Also, if you are uncomfortable working inside your laptop, there is no shame in asking for help. Many computer repair shops offer affordable RAM installation services. You can also check if your laptop manufacturer offers upgrade services directly.
Remember, the goal is to improve your laptop, not risk damaging it. Always feel free to ask for assistance if you are unsure about any step.
Conclusion
Learning how to install RAM in a laptop is a rewarding skill that anyone can pick up. It costs very little, takes just minutes, and delivers noticeable performance improvements. Whether you want faster multitasking, smoother gaming, or better overall speed, adding memory is one of the best upgrades you can make.
Follow the steps in this guide carefully, choose the right RAM for your laptop, and take your time with the process. You will be amazed at how much faster your laptop feels after the upgrade. Give it a try — your laptop will thank you.
Frequently Asked Questions
Can I install RAM myself, or do I need a professional?
Yes, you can absolutely install RAM yourself. The process is straightforward and requires only basic tools like a screwdriver. As long as you follow each step carefully, most people complete the upgrade without any issues.
How do I know which RAM is compatible with my laptop?
Check your laptop’s user manual or the manufacturer’s website for RAM specifications. You need to match the RAM type, speed, and form factor. Using a memory scanner tool can also help identify the right module for your system.
Will adding more RAM make my laptop faster?
Yes, adding RAM can significantly improve performance, especially if your current memory is low. More RAM allows your laptop to handle more apps and tasks at the same time without slowing down.
How much RAM do I actually need?
For most users, 8GB to 16GB is plenty for everyday tasks. Gamers, video editors, and heavy multitaskers may benefit from 32GB or more. Consider your usage habits when deciding on the right amount.
Is it safe to touch the RAM module directly?
It is best to handle RAM by the edges only. Avoid touching the gold contacts on the bottom of the module. Also, ground yourself before handling any internal components to prevent static damage.
What happens if I install the wrong type of RAM?
The wrong RAM type will not work and may not fit properly into the slot. Always verify compatibility before purchasing. If you are unsure, check your laptop specifications or consult the manufacturer’s website.