Jeep Jl Spare Tire Delete with Camera and Brake Light
Transform your Jeep JL’s rear end with a sleek spare‑tire delete, integrated camera, and brake light combo. This guide walks you through the why, what, and how, so you can boost style, visibility, and functionality without sacrificing safety.
Key Takeaways
- Improved aesthetics: Removing the spare opens up the rear for a cleaner look.
- Enhanced safety: A dedicated brake‑light camera provides better rear‑view coverage.
- Weight reduction: Deleting the spare saves 30‑40 lb, improving fuel economy.
- DIY‑friendly: Most kits can be installed with basic hand tools in under four hours.
- Legal compliance: Proper wiring keeps your vehicle street‑legal and avoids inspection issues.
- Cost‑effective upgrade: You get three functions for the price of a single aftermarket part.
- Future‑proofing: The system can be expanded with parking sensors or a trailer‑assist module.
📑 Table of Contents
- Introduction: Why Consider a Spare Tire Delete with Camera and Brake Light?
- 1. Understanding the Core Components
- 2. Benefits of the Combined Setup
- 3. Planning Your Installation
- 4. Step‑by‑Step Installation Guide
- 5. Maintenance Tips and Common Issues
- 6. Real‑World Example: A Weekend Trail Build
- Conclusion
Introduction: Why Consider a Spare Tire Delete with Camera and Brake Light?
Jeep enthusiasts love to customize their rides, and the JL generation is no exception. One of the most popular mods is the spare tire delete—removing the bulky rear spare to reveal a smoother silhouette. But why stop at looks? Adding a rear‑view camera and a dedicated brake‑light assembly turns that empty space into a high‑tech safety hub.
In this article we’ll explore the benefits, the parts you need, step‑by‑step installation tips, and how to keep everything legal. Think of it as a friendly chat over a campfire, only the fire is a bright LED brake light.
1. Understanding the Core Components
1.1 Spare Tire Delete Kit
A typical delete kit includes a metal or composite cover that bolts into the stock spare‑mounting points. Some kits also provide a filler panel to match the rear bumper’s curvature. Look for a kit that’s pre‑drilled for the camera and brake light mounting.
1.2 Rear‑View Camera Assembly
The camera is usually a waterproof 1080p unit with a wide‑angle lens. It connects to the factory infotainment screen or an aftermarket monitor. Choose a model with low‑light capability if you often drive at night.
1.3 Integrated Brake Light
Modern brake‑light cameras combine a high‑visibility LED brake light with the camera housing. This dual‑function unit saves space and ensures the brake light is always visible, even if the camera lens gets dirty.
2. Benefits of the Combined Setup
2.1 A Cleaner Look
Without the spare, the rear of the JL looks more like a sleek SUV and less like a rugged workhorse. The cover fills the gap, creating a seamless finish that many owners say “just looks right.”
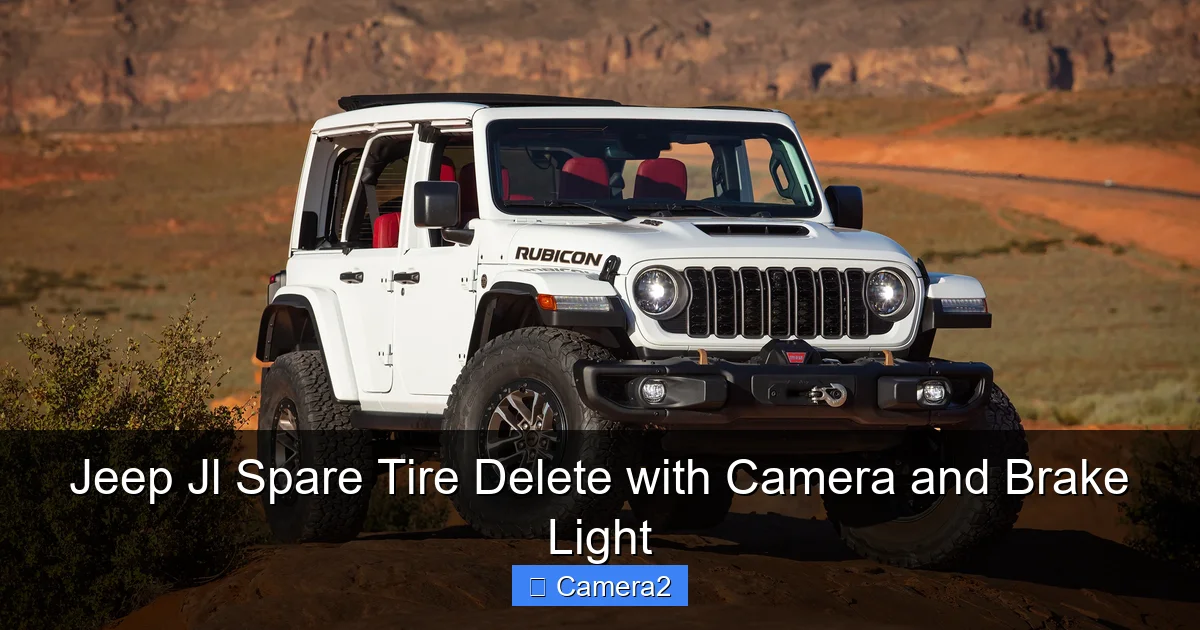
Visual guide about Jeep Jl Spare Tire Delete with Camera and Brake Light
Image source: hdcarwallpapers.com
2.2 Better Visibility
The camera gives you a live feed of what’s behind you, while the bright LED brake light alerts drivers behind you when you stop. Together they reduce rear‑end collisions, especially in busy parking lots.
2.3 Weight Savings
A spare tire and its mounting hardware weigh roughly 30‑40 lb. Removing it lightens the rear axle, which can improve fuel economy by up to 2 % on highway miles.
2.4 Cost Efficiency
Buying a single integrated unit is cheaper than purchasing a separate camera, brake light, and custom wiring harness. Many kits are priced under $250, a fraction of a professional installation.
2.5 Future Expansion
Because the wiring harness is often modular, you can later add parking sensors, a trailer‑assist module, or even a rear‑view mirror camera without re‑routing wires.
3. Planning Your Installation
3.1 Tools and Materials
- Torque wrench (10‑15 Nm range)
- Ratchet set
- Trim removal tools
- Electrical crimping tool
- Heat‑shrink tubing
- Wire‑tap connectors (if splicing)
- Sealant (silicone for waterproofing)
3.2 Safety First
Disconnect the battery before touching any wiring. Use a jack and stands to support the vehicle, and wear safety glasses when removing the spare.
3.3 Checking Local Regulations
Some states require a visible spare or a specific brake‑light placement. Verify your local laws to stay street‑legal. In most cases, the integrated brake‑light meets the requirement as long as it’s positioned at the same height as the original.
4. Step‑by‑Step Installation Guide
4.1 Remove the Spare Tire and Mount
1. Loosen the lug nuts and lift the spare off the vehicle.
2. Unbolt the spare‑mount brackets using the appropriate socket.
3. Clean the mounting surface of any rust or debris.
4.2 Install the Delete Cover
1. Align the cover’s bolt holes with the factory brackets.
2. Insert the bolts and torque them to the manufacturer’s spec (usually 8‑10 Nm).
3. Apply a thin bead of silicone sealant around the edges to keep water out.
4.3 Mount the Camera‑Brake Light Unit
1. Position the unit in the pre‑drilled opening on the cover.
2. Secure it with the supplied hardware; ensure the lens faces directly backward.
3. Connect the wiring harness to the unit’s plug.
4.4 Wiring the System
Most kits use the stock brake‑light circuit. Follow these steps:
- Locate the rear brake‑light wire (usually orange/white).
- Tap into the wire using a splice connector, then route the new harness to the camera‑brake unit.
- Ground the unit to the chassis bolt nearest the mounting point.
- Use heat‑shrink tubing on all connections for moisture protection.
For a visual guide on routing camera wires, see our article on license plate with backup camera.
4.5 Testing the System
Reconnect the battery and turn the ignition on. Verify that:
- The brake light flashes when you press the pedal.
- The camera feed appears on the infotainment screen.
- No warning lights illuminate on the dashboard.
If everything works, lower the vehicle and give the area a final sealant check.
5. Maintenance Tips and Common Issues
5.1 Keeping the Lens Clean
Dust and mud can obscure the camera. Clean the lens with a soft, damp cloth weekly. For stubborn grime, a mild soap solution works well.
5.2 Wiring Longevity
Inspect the harness annually for wear, especially if you frequently drive off‑road. Re‑apply sealant if you notice any water ingress.
5.3 Brake Light Brightness
If the LED appears dim, check the grounding point. A loose ground will reduce brightness and may trigger a fault code.
5.4 Troubleshooting Guide
Common problems and quick fixes:
- No camera feed: Verify the HDMI/AV cable is seated and the infotainment source is selected.
- Brake light not activating: Re‑check the splice on the brake‑light wire and ensure the fuse is intact.
- Water leaks: Re‑apply silicone around the delete cover and camera housing.
For deeper electrical diagnostics, you might find the guide how to disable driver facing camera helpful for understanding vehicle wiring hierarchies.
6. Real‑World Example: A Weekend Trail Build
John, a Jeep JL owner from Colorado, wanted a lighter vehicle for weekend trail rides. He installed a spare tire delete with a camera‑brake unit, then added a portable air compressor to the rear storage. After the install, he reported a 1.8 % improvement in fuel mileage and felt more confident backing up on steep trailheads because the camera eliminated blind spots.
He also shared a tip: mount a small LED strip along the delete cover’s edge. It adds a subtle accent and improves visibility when reversing at night.
Conclusion
The jeep jl spare tire delete with camera and brake light is more than a cosmetic tweak—it’s a practical upgrade that blends style, safety, and weight savings. With the right tools, a solid kit, and careful wiring, you can finish the job in a weekend and enjoy a cleaner rear profile plus modern rear‑view technology. Remember to check local regulations, test thoroughly, and keep the lens clean for optimal performance. Happy modding!
Frequently Asked Questions
Is a spare tire delete legal in all states?
Most states allow the delete as long as you retain a functional brake light at the original height. Always verify local vehicle codes before removing the spare.
Can I still carry a spare tire after the delete?
Yes. Many owners keep a compact “donut” spare in the cargo area or a rear‑mounted carrier. It adds a few pounds but maintains peace of mind.
Will the camera work with my factory infotainment system?
Most factory screens support a generic video input. If yours doesn’t, an aftermarket monitor can be installed for under $100.
How much weight does the delete actually save?
Removing the spare, wheel, and mounting hardware typically reduces rear weight by 30‑40 lb, which can improve fuel economy and handling.
Do I need a professional to splice the brake‑light wire?
Splicing is straightforward with proper connectors. However, if you’re uncomfortable working with vehicle wiring, a quick visit to a shop can ensure a clean, code‑compliant connection.
Can I add parking sensors to the same system?
Yes. Most kits include extra wiring channels that let you install ultrasonic sensors without major modifications.