Mini Camera with Sd Card
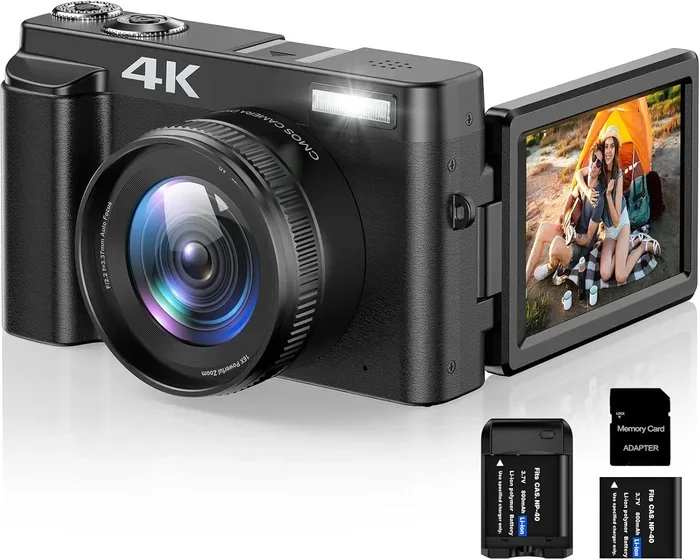
A mini camera with sd card storage gives you a simple way to record video without complex setups. These compact devices fit in small spaces and save footage directly to removable memory cards. You can use them for home security, travel vlogs, or discreet monitoring. This guide covers setup, card selection, and best practices for clear results.
Small cameras have become incredibly useful. They slip into bags, clip onto shelves, and hide in plain sight. A mini camera with sd card storage keeps things simple because you do not need a phone, a cloud account, or a complicated setup. You just insert a card, press record, and save your footage locally. That makes these devices great for quick projects, travel, home monitoring, and creative experiments.
People choose compact cameras for many reasons. Some want a discreet way to watch a doorway or a desk. Others want a tiny camcorder for vlogs, lessons, or family events. Many buyers also like the freedom of removing the card and viewing files on a computer. If you are comparing options, it helps to understand how storage, power, and image quality work together. The right choice depends on your goal, your budget, and how often you plan to review the footage.
Key Takeaways
- Compact design: A mini camera with sd card storage slips into tight spaces and stays unobtrusive.
- Simple recording: Most models save video directly to a micro SD or standard SD card without extra apps.
- Card choice matters: Pick a fast, reliable card with enough capacity for your recording length.
- Power planning: Battery life or continuous power affects how long you can record.
- Clear footage tips: Good lighting and stable placement improve video quality a lot.
- Privacy awareness: Use these cameras responsibly and follow local rules.
- Easy maintenance: Regular card checks and lens cleaning keep your footage safe and sharp.
📑 Table of Contents
- Why a Mini Camera with Sd Card Is a Smart Choice
- Understanding Sd Card Storage for Mini Cameras
- Choosing the Best Mini Camera for Your Needs
- How to Set Up and Use Your Mini Camera
- Improving Video Quality and Storage Performance
- Common Mini Camera Problems and Fixes
- Quick Tips and Common Mistakes
- Key Takeaways
Why a Mini Camera with Sd Card Is a Smart Choice
A compact camera with removable storage offers several clear benefits. First, it keeps your setup flexible. You can move the camera from one room to another without rewiring anything. Second, it saves money because you do not need a subscription to access your videos. Third, local storage gives you direct control over your files. You own the card, and you decide where the footage goes.
These cameras also work well when internet access is weak or unavailable. That matters in cabins, job sites, tents, and older buildings. If you want a simple backup recorder, a mini camera with sd card storage can run on its own. You can check the card later and pull out the clips you need. This makes the device useful for both practical monitoring and casual recording.
Great for Privacy-Focused Users
Some users prefer not to stream everything online. Local storage helps reduce exposure because the video stays on the card until you move it. That does not remove all security concerns, but it does lower the number of connected devices in your setup. If privacy is a priority, choose a model with a physical shutter or a clear indicator light. Those features help you know when recording is active.
Useful for Travel and Everyday Carry
A tiny camera is easy to carry in a pocket or small pouch. You can use it for short trips, street scenes, or quick tutorials. Because the unit is small, it does not dominate your bag. You can also mount it in a vehicle, a helmet, or a stable surface for hands-free recording. If you want to compare small recording setups, it helps to look at 1080P Mini Spy Camera Manual guides that explain basic controls and card handling.
Understanding Sd Card Storage for Mini Cameras
Not every memory card works the same way. Speed, capacity, and reliability all affect how well your camera performs. A slow card can cause dropped frames. A low-quality card can corrupt files. A card that is too small may stop recording sooner than you expect. So it is worth choosing carefully.
The first thing to check is the card type. Many compact cameras use micro SD cards, while others accept full-size SD cards with an adapter. The second thing to check is capacity. Higher capacity gives you more recording time, but it does not always improve quality. The third thing to check is speed class. Faster cards handle continuous video writes better, especially when the resolution is high.
Card Capacity and Recording Time
Recording time depends on resolution, frame rate, and compression. A smaller card may hold several hours of lower-resolution video. A larger card gives you more room for longer sessions or higher-quality clips. If you plan to record often, buy a card with enough space for your typical project. It is also smart to keep a spare card in your bag.
Speed Class and Reliability
Look for cards from reputable brands and check the speed rating. A faster card helps when the camera writes large video files. It also reduces the chance of errors during long recordings. If your camera supports higher resolutions, a better card can make the recording more stable. For trail and game camera setups, many people also review Sd Card Readers For Game Cameras to understand how to move files safely after a shoot.
Formatting and File Safety
Before using a new card, format it in the camera if the device offers that option. Formatting helps the camera create the right file structure. It also clears old data that might cause conflicts. If you reuse a card, back up your files first. After formatting, test the card with a short recording before relying on it for an important session.
Choosing the Best Mini Camera for Your Needs
The best camera depends on what you want to record. A home monitor has different needs than a travel vlog camera. A discreet recorder has different needs than a mountable action cam. Start by defining your main goal. Then compare resolution, field of view, night performance, and power options.
Resolution matters, but it is not the only factor. A higher resolution can show more detail, yet it also uses more storage. Field of view matters if you want to cover a wider area. Night performance matters if the camera will sit in dim rooms or outdoors after sunset. Power matters because long recordings need steady energy.
Home and Office Monitoring
For indoor monitoring, a small camera with a wide angle lens can cover a desk, a doorway, or a shelf. Many users place it near a power source so it can run for long periods. A stable surface and a clear view improve results more than fancy features. If you want to learn more about compact monitoring tools, you can read about a Bunker Hill Security Camera With Monitor setup for a broader security perspective.
Travel, Vlogging, and Hands-Free Recording
For personal recording, look for a camera that is easy to mount and easy to start. A compact body helps when you want a quick setup. Good lighting matters a lot, so think about where you will use it. A mini camera works best when it stays steady and faces the subject clearly. If you plan to save clips to your phone later, check out How To Save File To Camera Roll for a simple workflow.
Discreet and Specialized Uses
Some people use compact cameras for specialized projects. That might include documenting a process, monitoring a pet area, or capturing a time-sensitive event. In those cases, size and placement matter more than flashy specs. Always respect privacy and local rules when placing a camera in shared spaces. A responsible setup keeps the camera focused on the area you actually need to record.
How to Set Up and Use Your Mini Camera
Setup is usually straightforward. Insert the card, charge the battery or connect power, and aim the lens. Then test the recording before you leave the camera alone. A quick test saves time later because you can catch focus, angle, and storage issues early.
Start by checking the card slot and making sure the card is seated properly. Next, set the resolution and frame rate if your camera allows it. After that, choose the recording mode you want, such as continuous recording or motion-based recording. If the camera has a time stamp option, turn it on. Time stamps make it easier to find the right clip later.
Placement Tips for Better Footage
Good placement makes a huge difference. Keep the lens clean and free from glare. Avoid pointing the camera directly at bright windows because that can wash out the image. Try to place the camera where the subject stays in view without too much movement outside the frame. A steady mount often beats a handheld setup for clear results.
Power and Recording Length
Battery-powered cameras are convenient, but they limit recording time. If you need longer sessions, use a power cable or a reserve battery plan. Some users rotate batteries between shoots. Others keep the camera plugged in when possible. The best choice depends on how often you record and how long each session lasts.
Reviewing and Removing Files Safely
When you finish recording, turn the camera off before removing the card if the device recommends it. Then use a card reader or the camera itself to copy the files. Keep the originals until you confirm the backup is safe. If you want a simple guide for card removal, see How To Remove Memory Card From Camera for practical steps.
Improving Video Quality and Storage Performance
Great footage comes from more than just the camera body. Lighting, stability, and card health all affect the final result. A well-lit scene usually looks better than a dark scene with a high-resolution camera. A stable mount reduces blur. A healthy card reduces file errors. These basics matter every time.
If your video looks grainy, try adding more light first. If your files stop early, check the card space and speed. If your footage is shaky, improve the mount before buying a new camera. Small adjustments often solve big problems. That is why it helps to think about the whole setup, not just the device itself.
Lighting and Scene Setup
Natural light works well for many projects. Place the camera so the subject faces the light instead of turning away from it. For indoor use, a lamp or ceiling light can improve clarity. Avoid harsh backlighting unless you want a silhouette effect. A balanced scene usually records better and looks more professional.
Stabilization and Mounting
A compact camera can still produce steady video if it is mounted well. Use a flat surface, a clip, a bracket, or a small tripod depending on your needs. Make sure the mount is secure before recording. If the camera moves slightly, the footage may be hard to watch later. Stability is one of the easiest ways to improve quality.
Keeping Cards and Files Healthy
Memory cards last longer when you treat them carefully. Avoid bending them, and keep them away from heat and moisture. Eject them safely before removing them from a computer. If a card starts acting strangely, stop using it for important recordings. For trail and outdoor setups, you may also want to review Sd Card Reader For Trail Camera options so you can offload files without risking the card.
Common Mini Camera Problems and Fixes
Even a simple camera can run into trouble. The good news is that many issues are easy to fix. Most problems come from the card, the power, the lens, or the placement. Once you know what to check, you can solve them quickly.
If recording stops unexpectedly, check the card space first. Then check the card speed and condition. If the image is blurry, clean the lens and adjust the focus or distance. If the camera will not start, charge the battery or try a different power source. A calm, step-by-step check usually finds the issue.
Card Errors and Footage Loss
Card errors often happen when the card is too slow, too full, or not formatted correctly. They can also happen when the card is removed before the camera finishes writing. To reduce risk, use a reliable card and follow the camera’s shutdown steps. Back up files regularly so a single error does not wipe out important footage.
Poor Night Performance
Low light is a common challenge for small cameras. If the image turns noisy or dark, move the camera closer to a light source or reduce the distance to the subject. Some cameras handle night scenes better than others, so manage your expectations based on the model you own. A little extra light can make a huge difference.
Overheating and Long Sessions
Long recordings can make some compact devices warm. If that happens, give the camera a break between sessions. Improve airflow if the camera is enclosed. For very long projects, consider a model designed for continuous use. It is better to plan for heat than to lose footage because the device paused.
Quick Tips and Common Mistakes
A few good habits make your mini camera much easier to use. Keep the lens clean. Use a dependable card. Test the angle before a long session. Label your cards if you use more than one. These small steps save time and prevent frustration.
Avoid placing the camera where it can fall or get blocked. Do not ignore battery level before a long shoot. Do not reuse a problematic card without checking it first. And do not assume higher resolution always means better results. Sometimes a lower resolution with better light and stability looks cleaner.
Expert Insight
Think of the camera as only one part of the system. The card, the mount, the light, and the power source all affect the final footage. When you balance those pieces, a small camera can do a lot of work. Start simple, test often, and improve one part at a time.
Key Takeaways
- Match the camera to the job: Choose a setup based on your main goal, not just size.
- Use a reliable card: A good card reduces errors and improves recording stability.
- Test before you trust it: A short test recording catches angle, focus, and storage issues early.
- Plan for power: Battery or cable choices affect how long you can record.
- Protect your files: Back up important clips and remove cards carefully.
- Improve the scene: Better light and stability often matter more than extra resolution.
- Use responsibly: Keep privacy, consent, and local rules in mind.
A mini camera with sd card storage can be a practical, flexible tool for many projects. It keeps setup simple, gives you local control, and works well in places where larger systems feel awkward. If you choose a dependable card, place the camera thoughtfully, and check your footage regularly, you will get better results with less hassle. Start with a small setup, learn what works for your space, and build from there.
Frequently Asked Questions
What size sd card does a mini camera usually need?
It depends on the camera model, but many compact cameras use micro SD or standard SD cards. Start with a card that matches the manufacturer’s recommendation and gives you enough room for your typical recording session.
Can I use any sd card in a mini camera?
Not always. Some cameras work better with specific card types or speed classes. Check the camera guide first, then choose a reliable card that meets the device’s requirements.
How long can a mini camera record on one card?
Recording time varies based on resolution, frame rate, and card capacity. A larger card and lower resolution usually give you more recording time, while higher resolution uses space faster.
Do mini cameras need internet to save video?
No, many mini cameras save video directly to the sd card without internet access. That makes them useful in places where Wi-Fi is weak or unavailable.
Why does my mini camera stop recording suddenly?
This often happens when the card is full, too slow, or not seated correctly. It can also happen if the battery runs low or the camera overheats during a long session.
How do I view footage from a mini camera?
You can usually remove the card and read it with a card reader or compatible device. Some cameras also let you review files directly on the unit or through a simple connection to a computer or phone.