Sd Card for Deer Camera
Choosing the right sd card for deer camera setups makes a huge difference in tracking wildlife. You need reliable storage that handles heat, cold, and long deployment times. This guide covers everything from capacity to speed classes so you never miss a shot. We also share practical tips to keep your trail camera running smoothly in the field.
Key Takeaways
- Capacity matters: Choose at least 32GB to store thousands of photos and videos without frequent swaps.
- Speed class counts: Look for Class 10 or UHS-I ratings to ensure fast write speeds for video clips.
- Durability is key: Pick cards rated for extreme temperatures and moisture to survive outdoor conditions.
- Brand reliability: Stick with trusted brands like SanDisk, Samsung, or Lexar to avoid data loss.
- Regular maintenance: Format your card in the camera and back up data often to prevent corruption.
- Avoid cheap generics: Low-quality cards often fail in trail cameras and cause missed captures.
- Future-proof your setup: Consider 64GB or 128GB cards if you plan to run high-resolution video modes.
📑 Table of Contents
- Why the Right sd card for deer camera Matters
- Understanding Capacity Needs for Your Setup
- Speed Class and Performance Basics
- Durability and Weather Resistance
- Top Picks and Brand Considerations
- Formatting, Maintenance, and Best Practices
- Comparing Card Options for Trail Camera Use
- Expert Insights and Final Recommendations
Why the Right sd card for deer camera Matters
Wildlife tracking depends on consistent performance. Your deer camera sits in the woods for weeks at a time. It faces rain, heat, cold, and dust. The memory card inside must handle all of that without failing. A poor choice leads to corrupted files, missed triggers, or blank footage. That is frustrating when you are trying to monitor buck movement or scout for the season.
The sd card for deer camera setups is not just about storage space. It is about reliability and speed. Trail cameras write data in short bursts when motion triggers the sensor. If the card writes too slowly, the camera may drop frames or fail to save a video. You also want a card that holds up over many read-write cycles. Cheap cards often wear out fast. They also struggle in temperature swings. A quality card keeps your data safe and your camera running smoothly.
Many hunters and property managers overlook this component. They focus on camera placement, bait, or trigger speed. But the memory card is the backbone of every capture. When you pick the right one, you reduce maintenance trips. You also get clearer videos and more photos per season. That saves time and gives you better intel for your land management or hunting plans.
What Happens When You Use the Wrong Card
A slow or low-quality card causes real problems. The camera may show error messages. Files can become unreadable on your computer. Some cards fail after a few months in the field. Others stop working when temperatures drop below freezing. You might return to your camera only to find empty folders or corrupted video files. That is a waste of time and a lost opportunity to track wildlife.
How Trail Cameras Use Memory
Trail cameras save images and videos in a sequential write pattern. They do not need ultra-high speeds like a gaming laptop. However, they do need steady, reliable writes. A Class 10 card handles this well. UHS-I ratings also work fine for most models. The camera writes a file, closes it, and waits for the next trigger. Fast, consistent performance keeps every capture intact. That is why the sd card for deer camera choice matters so much.
Understanding Capacity Needs for Your Setup
Capacity depends on how you use your camera. Some users take still photos only. Others record long video clips. Video eats storage fast. A single minute of HD video can take up hundreds of megabytes. If you run multiple cameras, your needs grow quickly. You also need to think about deployment length. Will you check the camera every week or every month? Longer gaps mean you need more space.
A sd card for deer camera with 32GB handles most photo-only setups. That can store thousands of still images. If you add video, step up to 64GB or 128GB. Many modern trail cameras support 256GB or even 512GB. That gives you room for high-resolution clips and frequent triggers. Just make sure your camera manual lists the maximum supported size. Some older models stop at 32GB or 64GB.
Photo-Only vs Video Modes
Photo mode is light on storage. A 12MP image might take 3-5MB. You can fit hundreds of shots on a small card. Video mode changes everything. HD video at 1080p can use 100-200MB per minute. If your camera records three-second clips, you still need decent space. If it records longer clips, you will fill a card quickly. Match your capacity to your mode.
Multi-Camera Properties
Large properties often use several cameras. Each one needs its own card. You can standardize on one capacity to simplify swaps and backups. For example, use 64GB cards across all units. That keeps your workflow consistent. It also makes it easier to rotate cards and manage data. A uniform setup reduces mistakes in the field.
Speed Class and Performance Basics
Speed class tells you how fast a card writes data. For trail cameras, you do not need the fastest card on the market. You need a card that writes steadily and reliably. Class 10 is the minimum for most modern cameras. It handles short video clips and rapid photo bursts. UHS-I ratings also work well. They offer faster write speeds and better performance in busy conditions.
The sd card for deer camera does not need to match a smartphone or drone. Trail cameras write in short bursts. They then go idle. A card with good sustained write speed performs best. Avoid ultra-slow cards marked for basic storage. They may cause timeouts or failed saves. Stick with reputable speed ratings and trusted brands.
Reading the Label
Look for the speed class symbol on the card. Class 10 shows a C with the number 10 inside. UHS-I shows a U with a number 1 or 3. Video speed class uses a V with a number. V10 or V30 works for most trail camera video. These ratings help you compare options quickly. They also give you confidence that the card can handle your camera’s output.
Real-World Write Behavior
In the field, temperature affects performance. Cold can slow write speeds. Heat can cause errors. A quality card maintains stability across a wide range. It also handles vibration and moisture better. That matters when your camera sits on a tree stand or a fence post. Reliable write behavior keeps every trigger saved. That is the real goal.
Durability and Weather Resistance
Your camera faces the elements. The card inside does too. Temperature swings are the biggest threat. Some cards fail when they freeze or overheat. Moisture can corrode contacts over time. Dust and dirt can interfere with reading. A durable card resists these issues. It also survives long deployments without degradation.
When you shop for a sd card for deer camera, check the operating temperature range. Look for cards rated for at least -25°C to 85°C. That covers most seasonal conditions. Also consider the card’s build quality. Solid-state designs handle shock better. Some cards include protective casings or reinforced contacts. These features help in rough outdoor use.
Temperature and Moisture Tips
Store spare cards in a dry place. Keep them in a sealed bag with a desiccant packet. When you swap cards, do it in a sheltered spot. Avoid touching the gold contacts with bare fingers. Oils and dirt can cause read errors. Wipe the contacts gently with a dry, lint-free cloth if needed. These small habits extend card life.
Long-Term Deployment Considerations
Some users leave cameras out for months. That demands a card with strong endurance. Look for cards marketed for industrial or continuous use. They handle more write cycles and maintain stability longer. Even if you check your camera regularly, endurance matters. It reduces the risk of sudden failure. That keeps your wildlife data safe.
Top Picks and Brand Considerations
Brand reliability matters more than fancy features. Trail cameras need consistent performance, not gimmicks. SanDisk, Samsung, and Lexar offer solid options. They provide clear speed ratings and wide compatibility. Many hunters also trust Kingston and PNY for basic storage needs. The best sd card for deer camera is one that matches your camera’s specs and your usage pattern.
Avoid no-name generics. They often cut corners on NAND quality and controller chips. That leads to corruption and short lifespans. A slightly higher price pays off in reliability. You also get better customer support and warranty coverage. When data matters, stick with known brands.
Best Capacity by Use Case
For photo-only scouting, 32GB is a smart starting point. It balances cost and space. For video or multi-camera setups, 64GB or 128GB works better. If your camera supports larger cards and you want fewer swaps, 256GB is a good choice. Match capacity to your check schedule and media type. That keeps your workflow simple.
Price vs Performance
You do not need the most expensive card. You need a card that performs reliably in your camera. A mid-range Class 10 card from a trusted brand usually hits the sweet spot. It offers good speed, solid endurance, and reasonable cost. Save the premium cards for devices that truly need them. Your trail camera will thank you with fewer errors and more saved captures.
Formatting, Maintenance, and Best Practices
Proper care extends card life and protects your data. Always format the card in the camera, not on your computer. Camera formatting creates the file structure the device expects. It also clears hidden errors. If you notice lag or save issues, format the card again. Keep a backup of important images before you format. That way, you never lose valuable wildlife shots.
The sd card for deer camera setup works best with regular maintenance. Check your card after each deployment. Copy files to a computer or cloud storage. Inspect the card for physical damage. Replace cards that show repeated errors. Rotate spare cards through your cameras to balance wear. These habits keep your system dependable.
How to Remove and Swap Cards Safely
Power off the camera before removing the card. Open the compartment gently. Press the card slightly to eject it. Pull it out straight, without bending. Insert the new card with the label facing the correct direction. Push until it clicks into place. Close the compartment and power the camera back on. If you need a detailed walkthrough, see our guide on how to remove memory card from camera for step-by-step tips.
Formatting and File System Tips
Most trail cameras use FAT32 or exFAT. FAT32 works for cards up to 32GB. Larger cards often use exFAT. Check your camera manual for the recommended file system. If you want a quick refresher on settings, read our article on how to format sd card for trail camera. Formatting in the camera reduces compatibility issues and keeps saves reliable.
Backup and Data Management
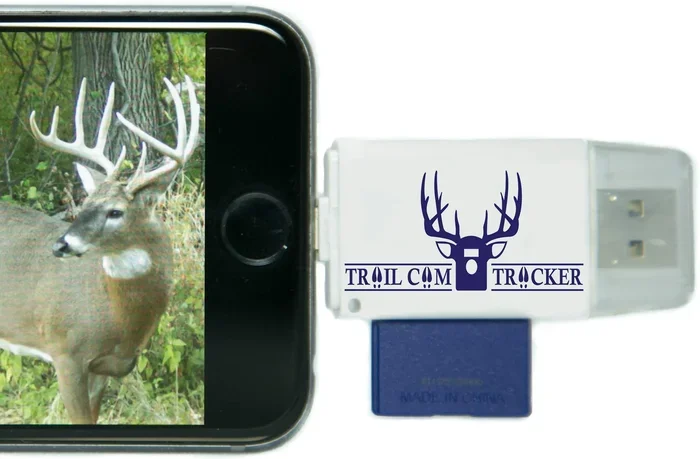
Back up your images often. Use a card reader that matches your card type. A reliable sd card reader for trail camera setups makes transfers faster and safer. Keep folders organized by date and camera location. Rename files if needed. This saves time when you review footage later. Good data habits turn raw captures into useful intel.
Quick Tips for Field Use
- Label your cards: Use a marker or label maker to track which card goes in which camera.
- Carry spares: Keep a few formatted cards in your gear bag for quick swaps.
- Check contacts: Clean gold contacts gently if you see read errors.
- Test before deployment: Format and take a few test shots to confirm everything works.
- Store properly: Keep cards dry, cool, and away from strong magnets.
Common Mistakes to Avoid
- Using uncertified generics: They fail more often and risk data loss.
- Mixing file systems: Formatting on a PC can create compatibility issues.
- Ignoring capacity limits: Exceeding your camera’s max size causes errors.
- Skipping backups: One card failure can wipe a whole season’s worth of photos.
- Touching contacts: Oils and dirt lead to read problems over time.
Comparing Card Options for Trail Camera Use
Different cards suit different needs. The table below compares common choices for trail camera setups. Use it to match capacity, speed, and durability to your workflow.
| Use Case | Recommended Capacity | Speed Class | Best For |
|---|---|---|---|
| Photo-only scouting | 32GB | Class 10 | High-volume still images, low cost |
| Mixed photo and short video | 64GB | Class 10 / UHS-I | Balanced storage and reliability |
| HD video-heavy setups | 128GB or 256GB | UHS-I / V30 | Long clips, fewer swaps |
| Multi-camera properties | 64GB standardized | Class 10 | Simple rotation and backup |
| Extreme temperature zones | 32GB-64GB | Class 10, industrial grade | Cold winters, hot summers |
Choose based on your camera’s limits and your check schedule. A larger card reduces maintenance but costs more. A smaller card saves money but needs more frequent swaps. Balance cost, convenience, and reliability. That is the smart way to pick a sd card for deer camera setup.
Expert Insights and Final Recommendations
Experienced users focus on consistency. They pick a card that works in their specific camera model. They test it before leaving it in the field. They also keep a simple log of deployments and card swaps. That helps spot patterns, like a card that fails after a certain number of uses. Small habits prevent big losses.
When in doubt, start small and scale up. Try a 32GB Class 10 card from a trusted brand. See how it performs over a few weeks. If you run video or check less often, move to 64GB or 128GB. Keep your cards organized and backed up. That approach builds a reliable system over time. It also makes troubleshooting easier if something goes wrong.
The sd card for deer camera choice is simple when you focus on the basics. Match capacity to your media type. Choose a reliable speed class. Prioritize durability and brand trust. Maintain the card regularly. Do these things, and your trail camera will deliver consistent results. You will spend less time fixing errors and more time reviewing useful wildlife data.
Frequently Asked Questions
What size sd card for deer camera should I buy?
Start with 32GB for photo-only use. Move to 64GB or 128GB if you record video or check the camera less often. Always confirm your camera’s maximum supported size before buying.
Can I use any sd card in a trail camera?
Most trail cameras accept standard SD or microSD cards with an adapter. However, you should check your camera’s manual for capacity and speed limits. Using a reliable Class 10 card from a known brand usually works best.
Do I need a fast sd card for deer camera video?
You do not need the fastest card available, but you do need steady write speeds. A Class 10 or UHS-I card handles short video clips well. Faster cards help if your camera records longer HD clips.
How often should I format my sd card for deer camera use?
Format the card in the camera before each deployment or after you back up your files. Regular formatting clears errors and keeps the file system clean. Always back up important images first.
Why does my trail camera say the sd card is incompatible?
This often happens when the card exceeds the camera’s capacity limit or uses an unsupported file system. Some older cameras do not support cards larger than 32GB. Try a smaller card and format it in the camera to fix the issue.
How can I protect my sd card for deer camera in harsh weather?
Use a card rated for wide temperature ranges and keep spare cards dry and sealed. Clean the contacts gently if you see read errors. Swap cards in a sheltered spot to avoid moisture and dirt.