Yaeger Camera Cart Compatible Accessories
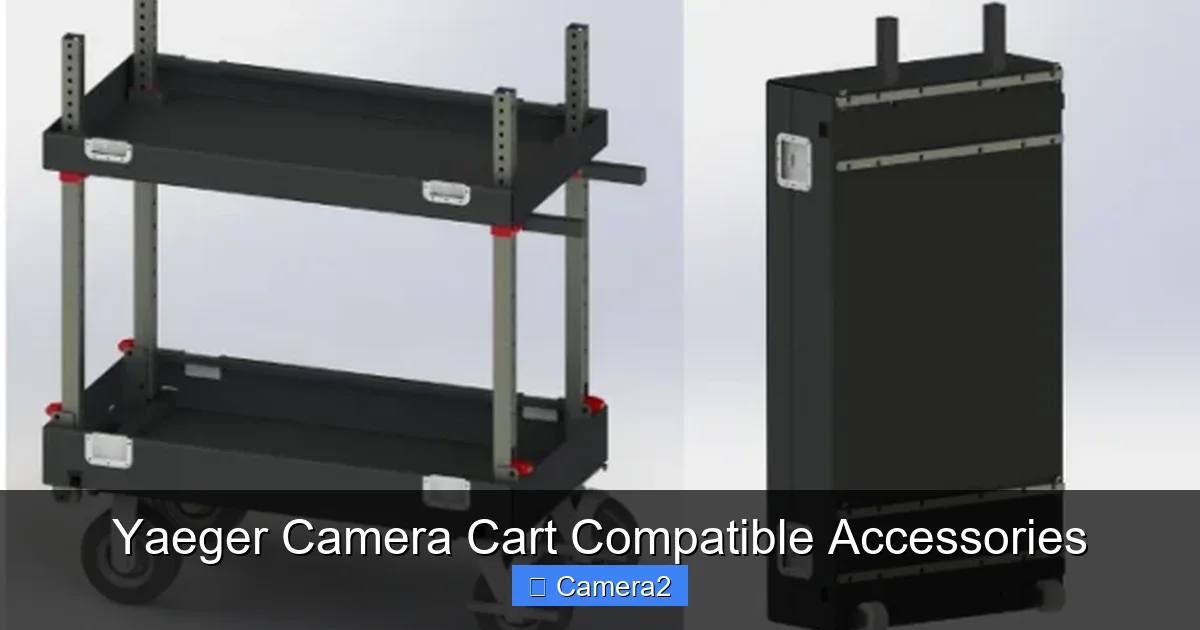
Unlock the full potential of your Yaeger camera cart with the right accessories. This guide explores essential add-ons for power, organization, mounting, and protection, transforming your cart from a simple wheeled base into a highly efficient, customized mobile production hub. Learn which accessories truly integrate seamlessly and boost your on-set productivity.
Key Takeaways
- Yaeger carts are modular platforms, not just trolleys. Their true value is unlocked through a ecosystem of compatible mounts, shelves, and power solutions.
- Power management is the #1 priority. Reliable, high-capacity V-mount or Gold Mount batteries with proper distribution are critical for all-day shoots.
- Organization prevents chaos. Dedicated cable management, tool trays, and shelving keep gear accessible and safe, saving crucial time.
- Compatibility hinges on the mounting system. Look for 1/4″-20 and 3/8″-16 threaded holes, Arri-style rosettes, and standard rail slots for maximum flexibility.
- Protection is non-negotiable. Covers, bumpers, and wheel locks safeguard your investment from the rigors of location work.
- Specialized add-ons solve unique problems. From monitor arms to follow focus mounts, tailor your cart to your specific camera package and crew role.
- Build incrementally. Start with core power and storage, then add mounting solutions based on your most frequent shooting scenarios.
📑 Table of Contents
- Why Your Yaeger Cart Needs More Than Just Wheels
- Power Solutions: Keeping the Lights (and Camera) On
- Organization & Storage: A Place for Everything
- Mounting & Articulation: Getting the Perfect Angle
- Protection & Durability: Safeguarding Your Investment
- Specialized & Niche Accessories for the Pros
- Building Your System: A Practical, Step-by-Step Approach
- Conclusion: Your Cart, Your Workflow
Why Your Yaeger Cart Needs More Than Just Wheels
You bought a Yaeger camera cart to solve a problem: moving heavy, fragile, and expensive camera gear from the truck to the set without a herniated disk. It does that job brilliantly. The sturdy frame, large pneumatic tires, and reliable brakes are a fantastic start. But let’s be honest, a bare-bones cart is just a wheeled shelf. It’s untapped potential. The magic happens when you start outfitting it with the right Yaeger camera cart compatible accessories. These aren’t just nice-to-haves; they’re the difference between a cumbersome chore and a streamlined, professional workflow.
Think about your typical shoot day. You arrive, unload the car, and begin the frantic shuffle of balancing a monitor on one arm, a battery pack on the other, while trying to remember where you put the follow focus. Cables snake everywhere, tools get lost in the bag, and you’re constantly walking back to the cart for one more thing. A properly accessorized cart centralizes everything. It becomes your mobile command center, your gear’s home base on location. It reduces physical strain, cuts down on setup/breakdown time by minutes that add up to hours, and projects an image of competence and preparedness. This guide is your blueprint for that transformation. We’ll move beyond the basics to explore the full spectrum of gear that integrates perfectly with your Yaeger’s frame, helping you build the ultimate mobile studio tailored to your specific needs.
Power Solutions: Keeping the Lights (and Camera) On
Nothing halts a shoot faster than a dead battery. Your camera, monitor, lights, and wireless video system are all hungry for juice. While some cameras use proprietary batteries, the industry standard for cart-based power is the V-mount or Gold Mount system. These large-format batteries provide high wattage and multiple d-tap outputs, making them perfect for running multiple accessories from a single source. Your Yaeger cart’s frame is designed with this in mind, featuring standard mounting patterns.
Visual guide about Yaeger Camera Cart Compatible Accessories
Image source: cleanscamerasupport.com
V-Mount & Gold Mount Battery Plates & Cradles
The first step is secure, dedicated battery storage. Yaeger carts often have pre-drilled holes or optional plates for mounting battery cradles. Look for cradles that hold two or four batteries. A dual-cradle is a great starting point, allowing you to hot-swap batteries while the other powers your rig. Brands like Core SWX, Anton Bauer, and B&L offer robust cradles that bolt directly to the cart’s standard 1/4″-20 or 3/8″-16 mounting points. Some cradles even have built-in d-tap or USB ports for easy cable routing. Ensure the cradle you choose is compatible with your specific battery brand’s locking mechanism.
Power Distribution & Management
Batteries on the cart are useless without a way to get power where it’s needed. This is where distribution boxes come in. A good distribution box (or “power hub”) mounts to your cart and takes the d-tap output from your V-mount batteries, then splits it into multiple regulated 12V/24V outputs. Look for models with individual on/off switches for each port—this is a lifesaver for troubleshooting. Popular choices include the SmallHD Power Handle (which also acts as a monitor mount), Core SWX Nano PX, or Anton Bauer P-tap Distribution Boxes. For modern gear with USB-C PD requirements, consider adding a high-wattage USB-C PD power bank or a dedicated D-tap to USB-C PD converter module mounted on the cart.
Cable Management & Strain Relief
Power is only part of the equation. Chaotic cables are a tripping hazard and make moving the cart dangerous. Use the threaded holes on your Yaeger’s frame and crossbars to install adhesive-backed cable clamps, spiral wrap, or braided sleeving. Route power cables from the battery cradle up to the distribution box, then down to your camera rig or monitor arm. Use short, dedicated cables for each device to avoid excess slack. Consider cable “drop loops” where cables hang freely from a clamp to absorb strain when the cart is moved over bumps. This simple step prevents connectors from pulling loose and extends cable life dramatically.
Organization & Storage: A Place for Everything
Your cart’s frame is essentially a grid of mounting opportunities. The key is to use that grid to impose order. A disorganized cart is a slow cart. Every second spent searching for a tool or an extra card is a second the director is waiting.
Visual guide about Yaeger Camera Cart Compatible Accessories
Image source: cleanscamerasupport.com
Shelving, Baskets, and Trays
Start with flat surfaces. Yaeger carts often have one or two fixed shelves, but you can add more. Look for adjustable shelf kits that clamp onto the vertical frame posts. These let you set the perfect height for your monitor, recorder, or a bin of lenses. For loose items like memory cards, lenses caps, and tools, attach wire mesh baskets or plastic bins using heavy-duty zip-ties or mounting brackets. A small, shallow tray mounted at waist height is perfect for holding your follow focus, matte box, and wireless transmitter during setup. The goal is to have a dedicated “home” for every item, visible and reachable without bending down.
Tool & Accessory Mounting Solutions
This is where you get creative. The standard 1/4″-20 and 3/8″-16 threaded holes on your Yaeger are your best friends. Invest in a variety of magic arms, articulating elbows, and small ball heads. Use them to mount:
- A clapperboard on a small arm for quick access.
- A wireless video receiver (like a Hollyland or Teradek) with a short antenna to keep it clear of metal.
- A tablet or smartphone running a lens control app.
- Your follow focus on a sliding arm so you can position it perfectly for the 1st AC.
For frequently used items like a monitor arm or a light stand holder, consider a more permanent solution like a rosette mount that screws directly into the cart’s frame. Rossettes (common on Arri-style equipment) provide a secure, tool-free pivot point for arms and handles.
Dedicated Monitor & Recorder Mounts
A large on-camera monitor is almost standard today. Trying to hold it while operating is a recipe for shaky shots and sore arms. A dedicated monitor arm that clamps to your cart’s frame is essential. Look for arms with long reach and counterbalance springs, like those from SmallHD, Tilta, or SmallRig. This allows you to position the screen exactly where you need it, independent of the camera’s position on the cart. If you use an external recorder (like an Atomos Ninja), mount it on a low-profile shelf or arm next to the monitor. Keep its cables short and tidy, running alongside the monitor’s power cable to your distribution box.
Mounting & Articulation: Getting the Perfect Angle
Rigging on a cart isn’t just about bolting things down; it’s about positioning them for optimal ergonomics and function. The camera operator needs to see the monitor. The 1st AC needs to reach the follow focus. The sound mixer needs a clear path. This requires flexible mounting.
Visual guide about Yaeger Camera Cart Compatible Accessories
Image source: cleanscamerasupport.com
The Magic Arm & Articulating Elbow Ecosystem
These are the duct tape of the camera world—incredibly versatile. A standard magic arm (like the SmallRig 2117) has a 1/4″-20 thread on one end and a large, squeeze-to-release clamp on the other. You can attach the threaded end to any piece of gear with a 1/4″-20 socket (most monitors, small lights, receivers) and clamp the other end to any round tube on your cart’s frame or to another arm’s clamp. Articulating elbows (like the Manfrotto 244) have two 1/4″-20 threads and a central joint that locks with a knob. They’re perfect for creating a two-point connection, giving you more stability than a single magic arm for heavier items. Use a combination: clamp an elbow to the cart frame, attach a magic arm to the elbow’s second thread, and then mount your device. This creates a strong, adjustable “truss” system.
Specialized Mounts for Specific Tasks
While magic arms are generalists, some jobs need specialists. A clamp mount with a large, rubber-padded jaw is ideal for attaching to the thick, round crossbars of a Yaeger cart without marring the finish. For a light, a small ball head mounted on a short arm gives you 360-degree tilt and pan adjustment. If you frequently use a matte box, consider a dedicated matte box support arm that clamps to the cart and holds the box’s donut, taking the weight off the camera’s lens. For a wireless focus motor (like a Tilta Nucleus), a small gear ring mount attached to a magic arm can hold the motor’s body, keeping the drive gear engaged with the lens’s focus ring without adding strain to the camera itself.
Protection & Durability: Safeguarding Your Investment
A camera cart gets abused. It goes over curbs, gets loaded into vans, sits on wet grass, and gets knocked around by crewmembers in a rush. Protecting your gear and your cart itself is a wise investment that pays for itself the first time you avoid a scratched lens or a cracked monitor.
Frame Covers & Padded Bumpers
The sharp edges of a steel cart frame are a constant threat to delicate gear. Many manufacturers and third-party companies sell foam or rubber padding kits that slip over the frame’s crossbars and vertical posts. These are easy to install and replace if they get torn. For maximum protection, especially if you often load the cart alongside other equipment, consider custom-fit padded cart covers. These are like fitted sheets for your cart, made from durable nylon with foam padding sewn inside. They zip closed, keeping dust and moisture off your gear when moving between locations and providing a soft barrier against bumps.
Wheel & Brake Enhancements
The wheels are your cart’s feet. Keep them healthy. Pneumatic (air-filled) tires are standard for a reason—they absorb shock. Always keep a tire repair kit and a small hand pump on the cart itself. Check pressure weekly. For indoor shoots on delicate floors, a set of wheel locks or chocks is mandatory. Some Yaeger models have optional wheel lock add-ons that bolt onto the axle. If yours doesn’t, simple rubber chocks that you place behind the wheels are a cheap and effective solution. Never rely on the cart’s parking brake alone on a slope or a slick surface; always use chocks.
Weather & Dust Protection
Location shooting means the elements. A simple, large plastic rain cover (like a heavy-duty painter’s tarp with grommets) can be draped over the entire cart in a sudden downpour. For more permanent protection, a custom-fitted canvas or nylon cart cover with a water-resistant coating is better. It stays on while you work, protecting gear from light rain and dust, and can be quickly thrown off when you need access. Keep a few large silica gel desiccant packs in your tool trays to absorb any moisture that might get in.
Specialized & Niche Accessories for the Pros
Once you have the core power, storage, and mounting solved, you can start tailoring your cart for specific professional roles. This is where you truly build a cart that feels like an extension of your workflow.
For the 1st AC: The Focus Puller’s Dream Setup
The 1st Assistant Camera needs a clean, stable platform for the follow focus, and easy access to lenses and tools. Mount a large, sturdy follow focus (like a SmallHD Arri or a Tilta Nucleus) on a heavy-duty magic arm or a dedicated rosette-mounted arm at a comfortable height. Attach a lens case or padded lens tray to a lower shelf. Use a small rolling tool cart that can be clamped to the side of your Yaeger for extra tools like lens wrenches, cleaning kits, and filter pouches. A wireless video system (like a Hollyland MARS) mounted high on the cart frame gives the 1st AC a clear view of the focus pull from their position, independent of the camera operator’s monitor.
For the DIT/Video Assist: The Data Hub
The Digital Imaging Technician or Video Assist needs power, storage, and multiple video feeds. A large, high-resolution on-cart monitor (like a SmallHD Cine 7) is essential, mounted on a long-reach arm. Underneath it, mount a Laptop Table or Shelf—a small, ventilated platform that holds a laptop for ingest and color grading. Ensure this area has robust power from your distribution box. Use short, high-speed HDMI or SDI cables to connect the camera’s output to the monitor and laptop. A dedicated SSD or RAID array mounted securely on a shelf provides the storage. Add a network switch powered by the cart to allow multiple devices (laptop, assistant’s tablet) to connect to the camera’s video feed simultaneously.
For the Gaffer/Electrician: The Light Powerhouse
While lights often have their own stands, a cart can support smaller, flexible fixtures. Install a heavy-duty light stand holder or C-stand clamp on a sturdy arm to hold a small LED panel for fill or a tiny Fresnel for a specific accent. More importantly, use your cart’s massive power capacity. Mount a high-amperage power strip with long, heavy-gauge cables that can feed multiple larger lights from your V-mount batteries via a powerful D-tap to AC inverter (if needed). Keep extra extension cords, gaffer tape, and clamps in organized bins on the lower shelves. A small, dedicated AC outlet box mounted on the cart, fed by an inverter, can be a central hub for all your electric department’s small tools and chargers.
Building Your System: A Practical, Step-by-Step Approach
Don’t get overwhelmed. Building the perfect cart is a marathon, not a sprint. Trying to buy everything at once leads to buyer’s remorse and unused gear. Follow this phased approach.
Phase 1: The Foundation (Power & Core Storage)
Your first purchases must be power-related. Start with two high-quality V-mount batteries (like the Core SWX Nano 98) and a dual-battery cradle that mounts securely to your cart. Then, get a reliable distribution box with at least 4-6 d-tap outputs. This alone will revolutionize your day. Next, add one adjustable shelf for your monitor/recorder and one large mesh basket for cables, cards, and tools. This is your minimum viable product for a functional mobile setup.
Phase 2: The Ergonomics (Mounting & Positioning)
Now, make it comfortable. Buy a long-reach monitor arm with a counterbalance spring. Get a kit of magic arms and articulating elbows (start with 3-4 of various lengths). Use these to position your follow focus, wireless receiver, and clapperboard exactly where you need them. Experiment. The goal is to have everything within arm’s reach without twisting or stretching. Add a small rolling tool pouch that clamps to the frame for your 1st AC.
Phase 3: The Polish (Protection & Specialization)
Once the workflow is smooth, protect your investment. Get frame padding and a good cart cover. Add wheel chocks. Now, look at your specific pain points. Are you a documentary shooter who needs a tablet mount for logging? Add it. Do you shoot a lot of interviews with a prompter? Mount a dedicated prompter arm. This phase is all about customizing for your unique niche. Remember, every accessory you add should solve a clear, recurring problem. If it’s just “cool” but you never use it, take it off. A cluttered cart is a slow cart.
Conclusion: Your Cart, Your Workflow
Your Yaeger camera cart is more than transportation; it’s the nucleus of your on-set operation. By thoughtfully selecting and integrating compatible accessories, you transform it from a passive piece of hardware into an active, intelligent partner in your creative process. You reduce fatigue, minimize the risk of gear damage, and project a level of professionalism that clients and crew notice immediately. Start with the power foundation—it’s non-negotiable. Then build out your storage and mounting solutions based on your actual, daily needs, not hypothetical ones. The most effective cart is the one that feels intuitive to you and your team. Take the time to layout your gear, mock up cable routes, and understand your movement patterns on set. The right Yaeger camera cart compatible accessories don’t just hold your gear; they empower your entire crew to work smarter, faster, and with greater focus on what truly matters: capturing the shot.
Frequently Asked Questions
Are all camera accessories compatible with a Yaeger cart?
No. Compatibility depends on the mounting standard. Most Yaeger carts use industry-standard 1/4″-20 and 3/8″-16 threaded holes, as well as Arri-style rosette mounts and rail slots. Always check an accessory’s mounting base against your specific Yaeger model’s frame diagram before purchasing. Generic “magic arms” with 1/4″-20 screws are almost always compatible.
What’s the single most important accessory to buy first?
Without question, a dual V-mount or Gold Mount battery cradle and two high-capacity batteries. Power is the lifeblood of a modern digital camera setup. A reliable, hot-swappable power source on the cart eliminates the constant anxiety of batteries dying and powers all your other accessories (monitors, lights, transmitters) from a central source.
How do I prevent my cart from tipping over when fully loaded?
Yaeger carts are designed for stability, but proper weight distribution is key. Keep heavier items (batteries, large monitors) as low to the ground as possible, ideally on the bottom shelf. Avoid stacking very tall, narrow items on the top shelf. Use the cart’s built-in wheel brakes religiously, and always use wheel chocks on any slope or uneven surface. Never leave a loaded cart unattended on a grade.
Can I use my Yaeger cart for lighting equipment too?
Yes, but with caution. The cart’s weight capacity is primarily for camera and monitoring gear. Small, lightweight LED panels (like 1×1 or 2×1 panels) can be safely mounted on sturdy arms. However, do not mount heavy, traditional tungsten or HMI fresnels directly on the cart unless you have a specifically rated heavy-duty light holder and are certain the total weight is within your cart’s rated capacity. Large lights should remain on their own dedicated C-stands or combos.
What’s the best way to manage all the cables on my cart?
Use a multi-pronged approach: 1) Short, dedicated cables for each device to avoid slack. 2) Adhesive-backed cable clamps or zip-tie mounts on the frame to route cables along specific paths. 3) Spiral wrap or braided sleeving to bundle multiple cables together neatly. 4) Strain relief loops where cables hang freely from a clamp to absorb movement. Label both ends of every cable with colored tape.
Is a custom cart cover worth the money?
For professional use, absolutely. A good cover protects your thousands of dollars in gear from rain, dust, and scratches during transport and while set up on location. It also deters casual theft and keeps your entire setup looking clean and professional. Look for covers made from durable, water-resistant material with padded sections, zippered access panels, and reinforced corners. It’s a relatively small cost for significant peace of mind and gear longevity.