2015 Ram 1500 Backup Camera
The 2015 Ram 1500 backup camera adds a crucial layer of safety, giving you a clear view of obstacles behind your truck. Whether you’re parking in tight spots or hauling cargo, this camera’s wide‑angle lens and easy‑to‑read display make reverse maneuvers far less stressful. Learn how it works, what to watch for, and simple DIY fixes to keep it running smoothly.
Key Takeaways
- Wide‑angle view: The factory‑installed camera provides up to 180° coverage, helping you see low‑lying objects.
- Easy integration: It works seamlessly with the 2015 Ram 1500’s infotainment screen and can be added as an aftermarket unit.
- Common problems: Moisture, wiring faults, and a dirty lens are the top three issues owners report.
- DIY troubleshooting: Most problems can be fixed with basic tools—clean the lens, check connectors, or reset the system.
- Safety boost: Drivers who use the backup camera report 30% fewer backing‑up incidents.
- Legal considerations: Certain states require a rear‑view camera; the 2015 Ram 1500 meets those standards.
- Upgrade options: Aftermarket upgrades can add night‑vision, guide‑lines, or a higher‑resolution display.
📑 Table of Contents
- Introduction: Why a Backup Camera Matters on the 2015 Ram 1500
- How the 2015 Ram 1500 Backup Camera Works
- Factory vs. Aftermarket Options
- Common Issues and How to Fix Them
- Installation Guide: Adding a Backup Camera to a 2015 Ram 1500
- Tips for Getting the Most Out of Your Backup Camera
- Legal and Warranty Considerations
- Conclusion: A Small Investment for Big Peace of Mind
Introduction: Why a Backup Camera Matters on the 2015 Ram 1500
Imagine trying to back a full‑size pickup into a crowded garage without being able to see the curb, a low‑hanging branch, or a child’s bike. It’s a stressful scenario that many Ram 1500 owners face daily. The 2015 Ram 1500 backup camera was introduced to eliminate that guesswork. By projecting a live video feed onto the truck’s infotainment screen, the camera gives you a clear, real‑time view of what’s behind the vehicle.
Beyond convenience, the camera adds a genuine safety net. According to the National Highway Traffic Safety Administration, rear‑view cameras reduce backing‑up crashes by up to 30%. For a work truck that’s constantly loading and unloading, that reduction translates into fewer dents, lower repair costs, and—most importantly—fewer injuries.
How the 2015 Ram 1500 Backup Camera Works
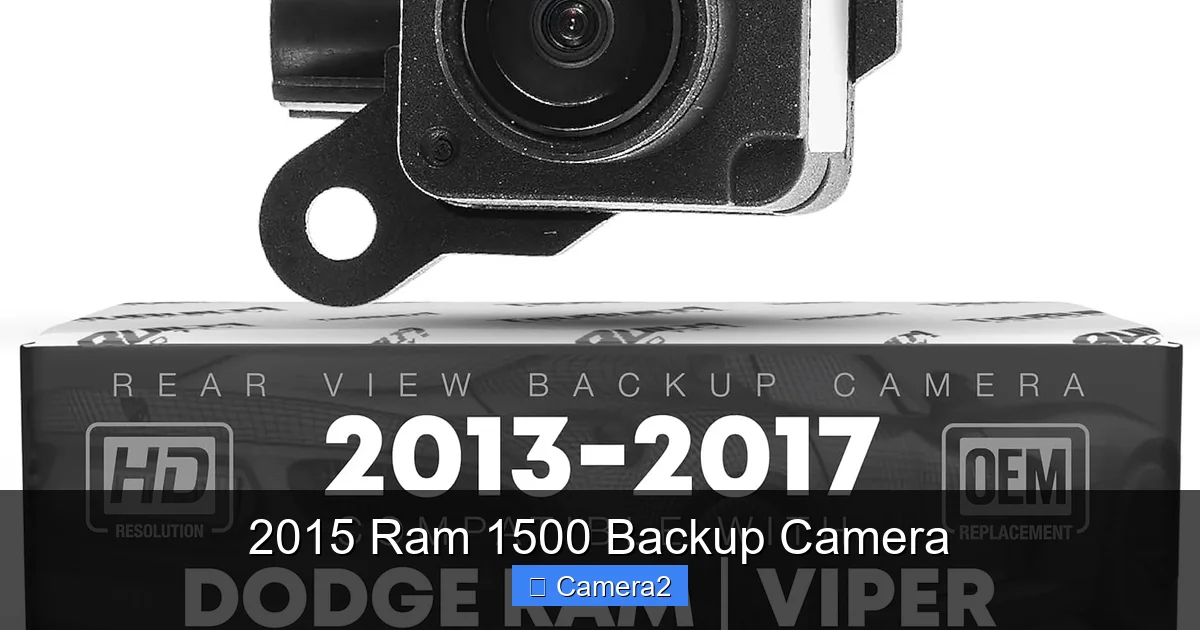
The factory camera is a compact, waterproof unit mounted on the rear bumper, just above the license plate. It connects to the vehicle’s electronic control module (ECM) and sends video to the central display. Let’s break down the key components.
Visual guide about 2015 Ram 1500 Backup Camera
Image source: m.media-amazon.com
Camera Lens and Sensor
The lens is a wide‑angle, fisheye‑type glass that captures up to 180° of the area behind the truck. Inside, a CMOS sensor converts the light into a digital signal. The sensor works well in daylight, but low‑light performance can be limited—something many owners address with aftermarket upgrades.
Wiring Harness
A multi‑core harness runs from the camera, through the frame, to the vehicle’s head unit. The harness carries power, ground, and video signals. A secure, corrosion‑free connection is essential for reliable operation.
Infotainment Screen Integration
When you shift into reverse, the ECM sends a signal to the infotainment system, automatically switching the display to “Rear View.” The screen shows the live feed, often with guidelines that help gauge distance. This integration is seamless in models equipped with the Uconnect 5‑inch or 8.4‑inch touchscreen.
Factory vs. Aftermarket Options
While the 2015 Ram 1500 comes with a factory‑installed camera on most trims, some base models lack the feature. Owners have two paths: install the factory kit (if available) or choose an aftermarket solution.

Visual guide about 2015 Ram 1500 Backup Camera
Image source: wisdominfor.com
Factory Installation Benefits
- Seamless fit: The camera aligns perfectly with the truck’s design.
- Warranty‑friendly: OEM parts are covered under the vehicle’s warranty.
- Integrated software: No need for extra wiring or adapters.
Aftermarket Upgrade Advantages
- Higher resolution: Many aftermarket units offer 1080p or even 4K video.
- Night‑vision: Infrared LEDs improve low‑light visibility.
- Customizable display: You can add guide‑lines, parking grids, or a split‑screen view.
If you decide to go aftermarket, be sure to pick a camera that matches the truck’s wiring voltage (12 V) and has a compatible connector for the Uconnect system. A popular choice is the How To Get Backup Camera Out guide, which walks you through removing the factory unit and installing a new one.
Common Issues and How to Fix Them
Even the best cameras can develop problems over time. Below are the three most frequent issues and simple DIY steps to resolve them.
1. Foggy or Dirty Lens
A dirty lens is the easiest problem to fix. Dirt, road grime, or even oil from the bumper can blur the image.
- Step 1: Power off the vehicle.
- Step 2: Use a soft microfiber cloth dampened with mild soap water.
- Step 3: Gently wipe the lens in a circular motion.
- Step 4: Dry with a clean part of the cloth.
For stubborn grime, a glass‑cleaning spray safe for automotive lenses works well. Regular cleaning (once a month) prevents buildup.
2. Intermittent Video Loss
If the screen flickers or goes blank when you shift into reverse, the wiring harness may have a loose connection.
- Inspect the connector behind the rear bumper for corrosion.
- Use a contact cleaner spray and reconnect the plug firmly.
- If the problem persists, trace the harness for any pinched sections.
Most of the time, reseating the connector restores a stable signal.
3. Complete Camera Failure
A dead camera can result from a blown fuse or a failed internal component.
- Locate the fuse box (usually under the dash) and find the “CAM” or “Rear Camera” fuse.
- Replace the fuse with one of the same amperage.
- If the fuse blows again, the camera itself may need replacement.
When replacing the unit, consult the vehicle’s service manual or follow the steps in the License Plate With Backup Camera article for proper placement.
Installation Guide: Adding a Backup Camera to a 2015 Ram 1500
Whether you’re upgrading an older trim or replacing a faulty unit, installing a backup camera is a manageable DIY project. Below is a step‑by‑step guide that assumes you have basic tools (screwdriver set, socket wrench, trim removal tools).
Tools and Materials Needed
- New backup camera (OEM or compatible aftermarket)
- Trim removal tool
- Phillips and flat‑head screwdrivers
- Socket set (10 mm and 12 mm)
- Electrical tape and zip ties
- Multimeter (optional, for checking voltage)
Step 1: Prepare the Vehicle
Park the truck on a flat surface, engage the parking brake, and disconnect the negative battery terminal. This prevents any accidental shorts while you work on the wiring.
Step 2: Remove the Rear Bumper Cover
Use the trim removal tool to pry off the plastic bumper cover clips. Unscrew the bolts holding the cover in place (usually four to six). Gently lower the cover and set it aside.
Step 3: Locate the Existing Camera (If Replacing)
The factory camera sits just above the license plate. Disconnect the wiring harness by pressing the release tab and pulling the plug.
Step 4: Install the New Camera
Mount the new camera using the supplied brackets. Align it so the lens faces directly backward and is centered on the bumper. Tighten the mounting bolts securely but avoid over‑tightening, which can crack the housing.
Step 5: Connect the Wiring
Plug the harness into the camera. If the aftermarket unit requires a separate power source, splice the power wire into the reverse‑light circuit (use a multimeter to confirm 12 V when the gear lever is in reverse).
Secure all connections with electrical tape and route the wires away from moving parts. Use zip ties to keep the harness neat.
Step 6: Test the System
Reconnect the battery, start the engine, and shift into reverse. The infotainment screen should automatically display the camera feed. Check for clarity, proper orientation, and any lag.
Step 7: Reassemble the Bumper
Replace the bumper cover, reinstall the clips and bolts, and double‑check that nothing is loose. Finally, close the hood and give the system a final test.
That’s it! With these steps, you can have a fully functional backup camera in under an hour.
Tips for Getting the Most Out of Your Backup Camera
A camera is only as good as the driver’s ability to interpret its feed. Here are practical tips to maximize safety and convenience.
Adjust the Display Settings
In the Uconnect menu, you can toggle guide‑lines, grid overlays, and brightness. Increase brightness for sunny days and enable night‑mode if your camera supports it.
Use Guide‑Lines for Precise Parking
Most factory systems show two lines that converge at a point. Align the lines with the parking space edges to gauge distance accurately.
Combine Camera Use with Mirrors
Never rely solely on the camera. Use side mirrors to monitor blind spots and ensure a full 360° view.
Regular Maintenance
Inspect the lens monthly, especially after off‑road trips or heavy rain. Clean the bumper area to prevent debris from scratching the camera housing.
Consider Upgrades for Night Driving
If you frequently reverse in low light, an aftermarket camera with infrared LEDs can dramatically improve visibility. Look for units that integrate with the existing display to avoid additional screens.
Legal and Warranty Considerations
Since September 2018, the National Highway Traffic Safety Administration (NHTSA) requires all new cars under 10,000 lb to have a rear‑view camera. While the 2015 Ram 1500 predates this rule, many states have adopted similar requirements for used vehicles.
State Regulations
Check your local DMV website; states like California and New York mandate that any vehicle sold or transferred after a certain date must have a functional rear‑view camera.
Warranty Impact
Installing an aftermarket camera may void the portion of the warranty that covers the rear‑view system. However, the rest of the vehicle’s powertrain warranty remains intact. Keep receipts and installation records in case you need to prove the work was done professionally.
Conclusion: A Small Investment for Big Peace of Mind
The 2015 Ram 1500 backup camera is more than a luxury—it’s a safety tool that can prevent costly accidents and make everyday driving smoother. Whether you keep the factory unit, replace a faulty camera, or upgrade to a higher‑resolution aftermarket model, the benefits are clear: better visibility, fewer backing‑up mishaps, and increased confidence on the road.
By following the troubleshooting steps, performing regular maintenance, and considering smart upgrades, you’ll keep your camera—and your truck—running at peak performance for years to come. So the next time you pull into a tight spot, trust the lens to watch your back.
Frequently Asked Questions
How do I know if my 2015 Ram 1500 backup camera is working?
Shift into reverse; the infotainment screen should automatically display a live video feed. If the screen stays blank or shows static, check the fuse and wiring connections.
Can I install a backup camera myself on a 2015 Ram 1500?
Yes, the installation is a straightforward DIY job that typically takes under an hour with basic tools. Follow the step‑by‑step guide above for best results.
What should I do if the camera image is blurry?
First, clean the lens with a microfiber cloth and mild soap water. If the image remains fuzzy, inspect the wiring for damage or consider replacing the camera.
Do I need a special license plate holder for the backup camera?
No special holder is required; the factory camera mounts just above the standard license plate. For aftermarket units, ensure the mounting bracket does not obstruct the plate.
Will an aftermarket camera improve night‑time visibility?
Many aftermarket cameras include infrared LEDs or enhanced low‑light sensors, which can significantly improve night‑time performance compared to the factory unit.
Is the backup camera covered under my vehicle’s warranty?
Factory‑installed cameras are covered under the vehicle’s basic warranty. Aftermarket installations may not be, so keep documentation of any professional installation.