Having trouble seeing behind your Ford F150? A dead backup camera can be frustrating, but most issues are simple to diagnose and repair. This guide walks you through quick checks, DIY fixes, and tips for avoiding future problems so you can get back on the road with confidence.
Key Takeaways
- Check the basics first: A blown fuse or dirty lens often explains a blank screen.
- Wiring is the usual suspect: Corrosion, loose connectors, or damaged harnesses cause intermittent loss.
- Software matters: Firmware glitches or incorrect settings can hide the image.
- DIY fixes are doable: Most owners can replace a camera or repair a connector in under an hour.
- Know when to seek help: Persistent problems or crash‑related damage require professional diagnosis.
- Prevent future failures: Regular cleaning and protective covers extend camera life.
- Safety first: Always disconnect the battery before working on electrical components.
📑 Table of Contents
Introduction
Imagine pulling into a tight garage, pressing the reverse gear, and staring at a black screen. For many Ford F150 owners, a backup camera that refuses to work is more than an inconvenience—it’s a safety risk. Fortunately, the problem is usually solvable without a trip to the dealership.
In this article we’ll break down every reason a Ford F150 backup camera might stop displaying an image, from the obvious (a dirty lens) to the more technical (faulty wiring or software glitches). You’ll get clear, step‑by‑step instructions you can follow at home, along with tips on how to keep the system healthy for years to come.
1. Understanding How the Backup Camera System Works
Basic components
The backup camera system in a Ford F150 consists of three main parts:
Visual guide about Ford F150 Backup Camera Not Working
Image source: img.alicdn.com
- Camera unit: Usually mounted on the rear bumper or tailgate, it captures a wide‑angle view.
- Wiring harness: Carries power, video signal, and sometimes a ground wire back to the vehicle’s head unit.
- Display module: Integrated into the infotainment screen, it processes the video feed and shows it when you shift into reverse.
Signal flow
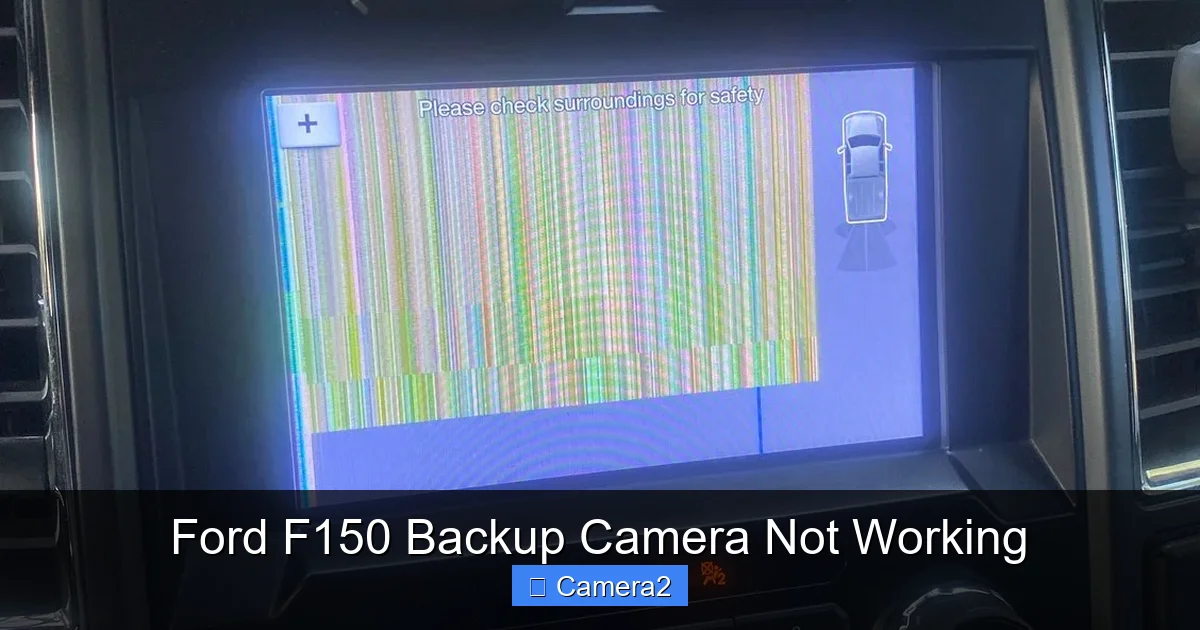
When you engage reverse, the transmission sends a signal to the infotainment system, which in turn powers the camera. The camera sends a video signal back through the harness to the display. Any break in this chain—lost power, a bad connection, or a corrupted video signal—will result in a blank screen.
2. Common Reasons the Backup Camera Stops Working
2.1. Dirty or obstructed lens
It sounds simple, but a layer of mud, snow, or even a windshield wiper splash can block the view. Over time, road grime builds up and reduces image clarity.
Visual guide about Ford F150 Backup Camera Not Working
Image source: cimg1.ibsrv.net
2.2. Blown fuse
Most F150 models protect the camera circuit with a fuse in the interior fuse box. A blown fuse cuts power to the camera entirely.
2.3. Faulty wiring or connectors
Vibrations, accidental impacts, or corrosion can loosen the connector pins or break the harness. Look for:
- Corroded terminals
- Frayed wires
- Connector pins that don’t “click” into place
2.4. Software or firmware glitches
Sometimes the infotainment system needs a reset, or a firmware update has introduced a bug that prevents the video feed from displaying.
2.5. Camera failure
Like any electronic component, the camera can burn out. Heat, water intrusion, or a manufacturing defect can cause the camera to stop sending a signal.
2.6. After‑market accessories interference
If you’ve installed a trailer hitch camera, parking sensors, or an aftermarket rear‑view mirror with a built‑in screen, they can conflict with the factory system.
3. Step‑by‑Step Diagnosis
3.1. Visual inspection of the lens
Park the truck on a level surface, turn off the engine, and walk around to the rear of the vehicle. Use a soft cloth and mild glass cleaner to wipe the camera lens. Check for cracks or water inside the housing.

Visual guide about Ford F150 Backup Camera Not Working
Image source: velog.velcdn.com
3.2. Check the fuse
Locate the interior fuse box (usually under the dash on the driver’s side). Refer to the owner’s manual for the exact fuse number—often labeled “CAM” or “Rear View Camera.” Pull the fuse with a fuse puller and inspect it. A blown fuse will have a broken metal strip. Replace it with a fuse of the same amperage.
3.3. Test power at the camera
If the fuse is good, you’ll need a multimeter. Disconnect the battery first (see safety note below). Remove the rear bumper cover (or tailgate panel) to expose the camera connector. With the key in the “ON” position, measure voltage between the power and ground pins. You should see 12 V. No voltage means a wiring issue upstream.
3.4. Scan for video signal
Some multimeters have a “frequency” setting that can detect a video signal on the signal wire. If you see a fluctuating voltage, the camera is sending data; the problem is likely in the infotainment unit.
3.5. Reset the infotainment system
Press and hold the power button on the screen for about 10 seconds, or disconnect the battery for 5 minutes. Reconnect and see if the camera image returns when you shift into reverse.
3.6. Look for software updates
Ford frequently releases SYNC updates that address camera bugs. Navigate to Settings → System → Software Update and follow the prompts.
4. DIY Repairs You Can Do at Home
4.1. Replacing a blown fuse
Fuses are inexpensive (under $1). Always replace with the same amperage rating. After replacing, test the camera again.
4.2. Cleaning or replacing the camera lens
If the lens is scratched, you can purchase a replacement camera unit from an OEM parts dealer. The average cost is $70‑$120. Installation steps:
- Disconnect the battery.
- Remove the rear bumper cover (usually held by a few bolts and clips).
- Unplug the camera connector.
- Unscrew the camera housing and pull the unit out.
- Swap in the new camera, reconnect, and reassemble.
4.3. Fixing corroded connectors
Use contact cleaner spray and a small brush to remove corrosion. After cleaning, gently bend the pins back into shape and re‑insert the connector until you hear a click.
4.4. Repairing a damaged wiring harness
If you find a broken wire, you can splice a new section using heat‑shrink tubing. Strip about ¼ inch of insulation from each end, twist the wires together, solder if possible, then cover with heat‑shrink. Make sure the repair is away from moving parts.
4.5. Updating SYNC firmware
Connect a USB drive with at least 8 GB of free space, download the latest SYNC update from Ford’s website, and follow the on‑screen instructions. The update process may take 15‑20 minutes; keep the engine running.
5. When to Call a Professional
5.1. Persistent black screen after all DIY steps
If you’ve checked the fuse, power, and wiring, and the screen still stays dark, the infotainment module itself may be faulty. This usually requires a dealer or a qualified automotive electrician.
5.2. Crash or water damage
Impact damage can misalign the camera housing or bend the harness beyond repair. Similarly, a flood can cause hidden corrosion. Professionals have diagnostic tools to test each component under load.
5.3. Warranty considerations
If your F150 is still under the factory warranty, a dealer repair will be covered. Even out‑of‑warranty, a dealer can guarantee the work with OEM parts.
6. Preventive Maintenance Tips
6.1. Regular cleaning
Wipe the camera lens every 2‑3 months, especially after winter road treatment. Use a microfiber cloth to avoid scratching.
6.2. Protective covers
Consider a clear, UV‑resistant camera cover. It shields the lens from rocks and road debris while allowing a clear view.
6.3. Keep the wiring dry
If you frequently drive through deep water, inspect the rear harness for signs of moisture. Apply dielectric grease to the connector pins for added protection.
6.4. Software vigilance
Set a reminder to check for SYNC updates every 6 months. An up‑to‑date system reduces the chance of glitches.
6.5. Document any modifications
If you add an aftermarket trailer camera, note the wiring route and keep the factory harness intact. This makes troubleshooting easier later on.
Conclusion
A non‑functioning backup camera on your Ford F150 doesn’t have to be a nightmare. By following the diagnostic steps—checking the lens, fuse, power, and software—you can often pinpoint the issue quickly. Simple DIY fixes like cleaning the lens, replacing a fuse, or repairing a connector can restore the view in under an hour.
When the problem persists, don’t hesitate to seek professional help, especially if the vehicle has suffered an impact or water exposure. Regular maintenance, such as cleaning the lens and keeping the wiring dry, will keep your camera reliable for the long haul, helping you back up safely every time you hit reverse.
Frequently Asked Questions
Why does my Ford F150 backup camera show a black screen only sometimes?
Intermittent black screens are usually caused by a loose connector or a partially broken wire that loses contact when the vehicle vibrates. Checking and reseating the connector often solves the issue.
Can a blown fuse affect other features besides the backup camera?
Yes. The same fuse may also protect the rear parking sensors or the rear‑view mirror display, so a blown fuse can cause multiple systems to stop working.
How do I know if the camera itself is faulty?
If you have verified that power and video signal are present at the camera connector, but the screen stays dark, the camera’s internal electronics have likely failed and need replacement.
Is it safe to drive with a non‑functioning backup camera?
While you can still back up using mirrors, the camera provides a wide‑angle view that helps avoid blind spots. It’s best to repair it promptly for safety.
Can I replace the factory camera with an aftermarket unit?
Yes, but you’ll need a compatible wiring harness and may have to re‑program the infotainment system. Keep the original camera for resale value.
Where can I find instructions on removing the camera for replacement?
Our guide on How To Get Backup Camera Out walks you through removing the unit safely and reinstalling a new one.