Backer boxes give ceiling speakers a solid, vibration‑free mount, improving bass response and protecting the ceiling. They’re easy to install, come in various sizes, and can be customized for any speaker model. Follow our guide to pick the right box, install it safely, and get the best sound from your home theater.
Key Takeaways
- Why use a backer box: It isolates vibrations, reinforces the ceiling, and enhances low‑frequency performance.
- Choosing the right size: Match the box dimensions to your speaker’s diameter and depth for a snug fit.
- Material matters: Medium‑density fiberboard (MDF) and plywood are the most common, each with pros and cons.
- Installation tips: Locate joists, use proper fasteners, and seal gaps to prevent air leaks.
- Customization options: Add internal bracing, acoustic foam, or a port for tuned bass response.
- Safety first: Turn off power, wear eye protection, and follow local building codes.
- Maintenance: Periodically check for loose screws and re‑seal any gaps that develop over time.
📑 Table of Contents
What Is a Backer Box and Why Does It Matter?
When you mount a speaker in a ceiling, the speaker’s weight and vibration are transferred directly to the drywall or plaster. Over time this can cause cracks, sagging, or a muffled sound. A backer box is a solid frame—usually made of MDF, plywood, or composite wood—that sits between the speaker and the ceiling. It spreads the load across a larger area, reduces vibration, and creates a sealed air chamber that improves bass response.
Think of it like the foundation of a house. Without a strong base, even the best speaker will sound thin and the ceiling will suffer. With a proper backer box, you get clearer highs, tighter lows, and a longer‑lasting installation.
Types of Backer Boxes
1. Pre‑Molded Plastic Boxes
These are lightweight, inexpensive, and easy to snap together. They work well for small 4‑inch speakers but can flex under heavier loads.
Visual guide about Backer Box for Ceiling Speakers
Image source: loxone.com
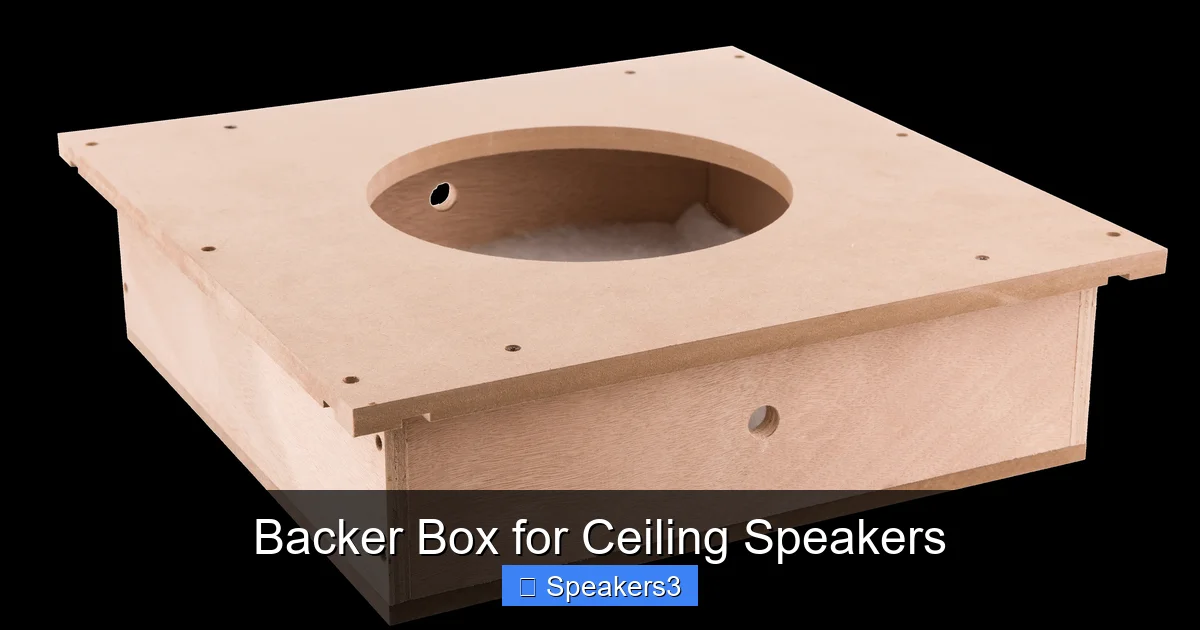
2. MDF (Medium‑Density Fiberboard) Boxes
MDF is the most popular choice for home‑theater installations. It’s dense enough to damp vibrations and easy to cut to custom dimensions. The downside is that it can absorb moisture, so sealing is important.
3. Plywood Boxes
Plywood offers superior strength and resistance to humidity. It’s a bit pricier and harder to finish, but it’s ideal for larger 6‑inch or 8‑inch speakers in high‑traffic areas.
4. Custom‑Built Boxes
For audiophiles who want the perfect fit, you can design a box from scratch using CAD software and cut it with a CNC router. This lets you add internal bracing, acoustic foam, or a tuned port for extra bass.
How to Choose the Right Backer Box
Match the Speaker Diameter
Measure the speaker’s outer rim (including any grill). Most ceiling speakers come in standard sizes: 4″, 5″, 6″, or 8″. Choose a box whose inner opening matches this diameter within 1/16 inch.
Visual guide about Backer Box for Ceiling Speakers
Image source: soundproofguide.com
Depth and Clearance
Check the speaker’s total depth from the front grille to the back of the magnet. Add at least ¼‑inch clearance for wiring and mounting hardware. A common rule is: Box depth = speaker depth + ½ inch.
Weight Capacity
Look at the speaker’s weight rating. A 6‑inch speaker can weigh 2‑3 lb, while a high‑power 8‑inch model may be 4‑5 lb. Choose a box rated for at least 1.5 × the speaker’s weight to ensure safety.
Material Preference
- MDF: Best for budget‑friendly, moderate‑size speakers.
- Plywood: Ideal for large, heavy speakers or humid environments.
- Plastic: Good for lightweight, decorative installations.
Acoustic Features
If you want deeper bass, consider a box with an internal port (bass reflex) or fill the cavity with acoustic foam. Just remember that adding a port changes the tuning frequency, so you may need to calculate the correct port size.
Step‑by‑Step Installation Guide
Tools and Materials You’ll Need
- Backer box (pre‑made or custom‑cut)
- Stud finder
- Drywall saw or keyhole cutter
- Measuring tape and pencil
- Drill with appropriate bits
- Wood screws (1‑1/4″ to 1‑1/2″)
- Silicone sealant or acoustic caulk
- Safety glasses and dust mask
1. Locate the Joists
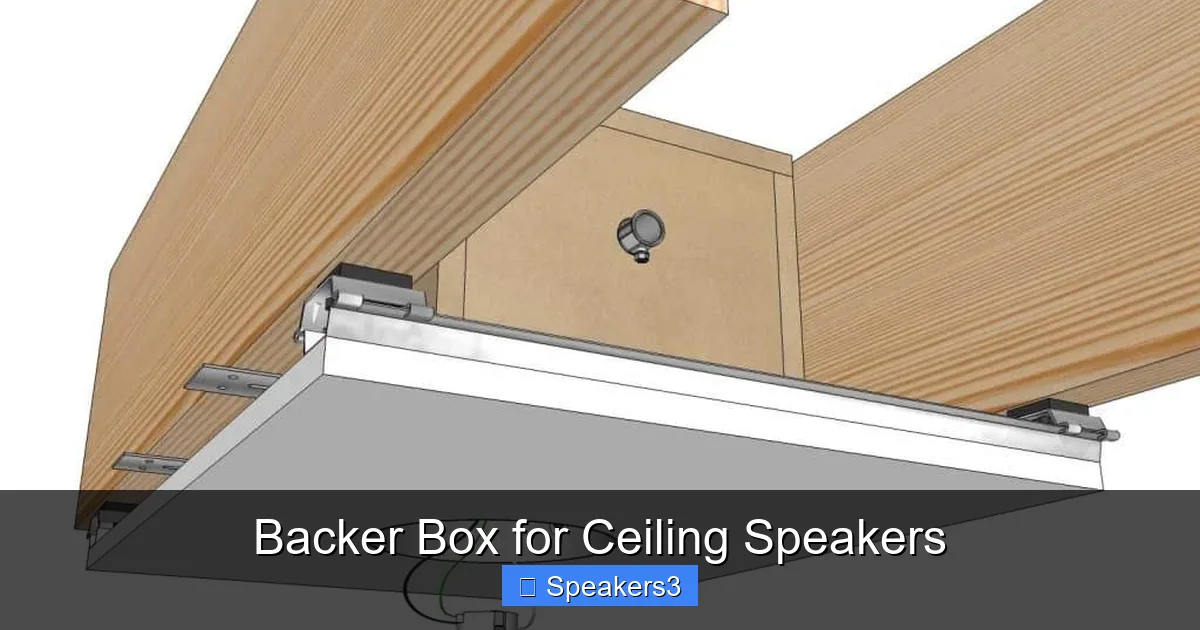
Use a stud finder to locate the ceiling joists. Mark the center of the joist where you plan to mount the box. If the speaker’s location doesn’t line up with a joist, you’ll need to add a wooden support brace between two joists.
2. Mark and Cut the Opening
Place the backer box on the ceiling and trace its outer edge. Double‑check that the opening is centered on the joist. Cut the hole with a drywall saw, keeping the cut smooth to avoid ragged edges that can damage the speaker grill.
3. Install the Support Brace (If Needed)
Cut a 1×4 piece of lumber to span the distance between two joists. Secure it with 3‑inch wood screws. This brace will hold the backer box firmly if the joist isn’t directly under the speaker.
4. Attach the Backer Box
Place the box into the opening. Using the pre‑drilled holes (or drill your own), secure the box to the joist or support brace with wood screws. Make sure the box sits flush with the ceiling surface.
5. Seal the Edges
Apply a thin bead of silicone sealant around the perimeter of the box. This prevents air leaks, which can degrade bass response, and stops moisture from seeping into the MDF.
6. Wire the Speaker
Run speaker wire through the box’s back opening. Pull the wire through the back panel, leaving enough slack to connect to your amp. If your speaker has a built‑in crossover, keep the wiring neat to avoid interference.
7. Mount the Speaker
Slide the speaker into the backer box’s front opening. Most ceiling speakers snap into place with mounting clips. Tighten the clips or screws as directed by the manufacturer.
8. Test the System
Turn on your receiver or amp and play a familiar track. Listen for clear highs, balanced mids, and tight bass. If you notice rattling, check that the box is securely fastened and that the seal is intact.
Tips for Optimizing Sound Quality
Use Acoustic Foam Inside the Box
Line the interior walls with thin acoustic foam to absorb unwanted resonances. This is especially helpful in larger boxes where standing waves can cause boomy peaks.
Consider a Bass‑Reflex Port
Adding a tuned port can extend low‑frequency response. Use an online calculator to determine the correct diameter and length based on box volume and desired tuning frequency.
Seal All Gaps
Even small air leaks can turn a sealed box into a leaky one, reducing efficiency. Run a bead of caulk around the speaker’s mounting flange and any screw holes.
Match Impedance and Power
Make sure the speaker’s impedance matches your amplifier’s output. A mismatch can cause distortion or damage. For more on matching speakers to amps, see our article on does wattage matter for car speakers for a clear explanation of power handling.
Keep the Ceiling Structure Stable
If you’re installing multiple speakers in a row, use a continuous wooden rail across the joists. This distributes weight evenly and reduces the chance of ceiling sag.
Common Mistakes to Avoid
Skipping the Joist Check
Mounting a heavy speaker directly to drywall can cause the ceiling to crack over time. Always secure the box to a joist or brace.
Using the Wrong Box Size
A box that’s too small will compress the speaker’s magnet, leading to distortion. Too large, and you’ll get a “boxy” sound with weak bass.
Neglecting Sealing
Air leaks turn a sealed enclosure into a semi‑open one, ruining the intended tuning. A quick line of silicone makes all the difference.
Over‑Tightening Screws
Screws that are too tight can crush the MDF and create gaps. Hand‑tighten until snug, then give a final quarter turn with a screwdriver.
Maintenance and Longevity
After a year or two, inspect the backer box for loose screws or cracked sealant. Re‑apply silicone where needed and tighten any hardware. If you live in a humid climate, consider repainting the box with a moisture‑resistant sealant to protect the MDF.
For those who love DIY upgrades, swapping out the acoustic foam or adding a new port can refresh your sound without replacing the whole speaker.
When to Consider Professional Help
If your ceiling is made of plaster, contains electrical wiring, or you’re installing speakers in a commercial space, it’s wise to consult a contractor or an acoustic specialist. They can ensure the structure meets local building codes and that the installation won’t interfere with fire‑rating requirements.
Conclusion
A backer box may seem like a small accessory, but it plays a huge role in the performance and durability of ceiling speakers. By selecting the right material, sizing it correctly, and following a careful installation process, you’ll enjoy richer bass, clearer highs, and a ceiling that stays intact for years. Remember to seal, brace, and test—simple steps that make a world of difference. Happy listening!
Frequently Asked Questions
What is the main purpose of a backer box for ceiling speakers?
The backer box provides a solid mounting surface, reduces vibration, and creates a sealed enclosure that improves bass response and protects the ceiling.
Can I use a plastic backer box for a heavy 8‑inch speaker?
Plastic boxes are best for lightweight speakers. For an 8‑inch model, MDF or plywood is recommended to handle the extra weight and vibration.
Do I need to seal the backer box after installation?
Yes. Sealing with silicone or acoustic caulk prevents air leaks, which can degrade sound quality and allow moisture into MDF.
How do I know if my ceiling can support a backer box?
Locate a joist with a stud finder and ensure the box is anchored to it or to a wooden brace between joists. If you’re unsure, consult a professional.
Is it possible to add a bass‑reflex port to an existing backer box?
Yes, but you’ll need to calculate the correct port size based on the box volume and desired tuning frequency. Online calculators can help you get the right dimensions.
Can I paint or finish the backer box after it’s installed?
Absolutely. Use a moisture‑resistant paint or sealant, especially if the box is made of MDF, to protect it from humidity and improve aesthetics.