Adding a mouse to your laptop is a simple process that dramatically improves comfort and productivity. You can connect via USB, Bluetooth, or a wireless receiver, and your laptop’s operating system will typically handle the driver installation automatically. This guide walks you through every step for Windows and Mac, from unboxing to customization, and includes troubleshooting for common problems.
Key Takeaways
- Connection Types: The three main ways to add a mouse are USB (wired), Bluetooth (wireless), and RF wireless with a USB dongle/receiver.
- Plug-and-Play: Modern laptops (Windows 10/11, macOS) almost always automatically install the necessary drivers for standard mice upon connection.
- Bluetooth Pairing: For Bluetooth mice, you must put the mouse in pairing mode and then search for and connect to it in your laptop’s system settings.
- Check Batteries & Power: Wireless mice need fresh batteries or a charged battery; some have an on/off switch to conserve power when not in use.
- Customize Settings: Use your OS’s settings (Windows Settings > Bluetooth & devices, macOS System Preferences > Mouse) to adjust pointer speed, scroll direction, and button functions.
- Troubleshooting First Steps: If a mouse doesn’t work, try reconnecting it, replacing batteries, restarting the laptop, or trying a different USB port.
[FEATURED_IMAGE_PLACEHOLDER]
📑 Table of Contents
- Why Add an External Mouse to Your Laptop?
- Understanding Your Mouse Connection Options
- Step-by-Step: How to Add a Wired USB Mouse
- Step-by-Step: How to Add a Bluetooth Mouse
- Step-by-Step: How to Add a Wireless RF Mouse (with Dongle)
- Customizing Your Mouse Settings in Windows & macOS
- Troubleshooting Common “Mouse Not Working” Problems
- Advanced Tips and Best Practices
- Conclusion: Your Laptop, Upgraded
Why Add an External Mouse to Your Laptop?
Let’s be honest: the built-in trackpad on your laptop is a marvel of engineering. It’s compact, always with you, and works great for basic tasks. But if you’ve ever spent a few hours typing a long document, editing photos, or playing a game, you know its limitations. Your hand cramps up. Precision feels tricky. That’s where adding an external mouse comes in. It’s one of the easiest and most impactful upgrades you can make to your laptop setup. An external mouse offers better ergonomics, superior precision for design work, faster navigation, and a more natural feel for extended use. Whether you’re a student, a professional, or a casual user, learning how to add a mouse to your laptop is a fundamental digital skill that pays off immediately.
The process has become incredibly simple, but the variety of mice and connection methods can be confusing for a first-timer. Should you get a cheap wired one or invest in a wireless model? What’s the difference between Bluetooth and a USB dongle? Don’t worry. By the end of this guide, you’ll know exactly how to add a mouse to your laptop, regardless of whether it’s a Windows PC or a MacBook. We’ll cover everything from unboxing to customization and troubleshooting, ensuring you have a smooth, frustration-free experience.
Understanding Your Mouse Connection Options
Before you even buy a mouse, it’s crucial to understand the three primary ways it connects to your laptop. Your choice here affects convenience, performance, and setup steps. Here’s a breakdown of each type.

Visual guide about How to Add Mouse to Laptop
Image source: wallpaperaccess.com
1. Wired USB Mouse
This is the most straightforward option. The mouse has a cable ending in a USB-A plug (the classic rectangular port). You simply plug it into an available USB port on your laptop. There’s no battery to worry about, and the connection is rock-solid with zero input lag. It’s perfect for gaming, graphic design, or any task where reliability is key. The downside is the cable, which can create clutter and limit your movement. Setup is literally just plugging it in.
2. Wireless Bluetooth Mouse
These mice connect directly to your laptop’s built-in Bluetooth radio. They are truly wireless, with no dongle to lose. They run on batteries (often a single AA or AAA, or a built-in rechargeable pack). The setup requires a pairing process in your operating system’s settings, but once paired, they connect automatically when powered on and in range. They are ideal for minimalist setups and travelers. Performance is excellent for general use, though some high-end gaming Bluetooth mice can occasionally have minor latency compared to their dongle-based counterparts.
3. Wireless RF Mouse with USB Dongle
Often called a “wireless mouse” in stores, this type uses a small USB receiver (a dongle) that plugs into your laptop. The mouse communicates with this dongle via radio frequency (RF), usually on the 2.4GHz band. Like Bluetooth mice, they use batteries. The advantage over Bluetooth is that the dedicated dongle often provides a more consistent, lower-latency connection, which gamers and professionals prefer. The downside is that the dongle occupies a USB port and can be easily misplaced. Many modern laptops have few USB ports, so this is a consideration.
Step-by-Step: How to Add a Wired USB Mouse
This is the easiest method. Here’s exactly what to do.
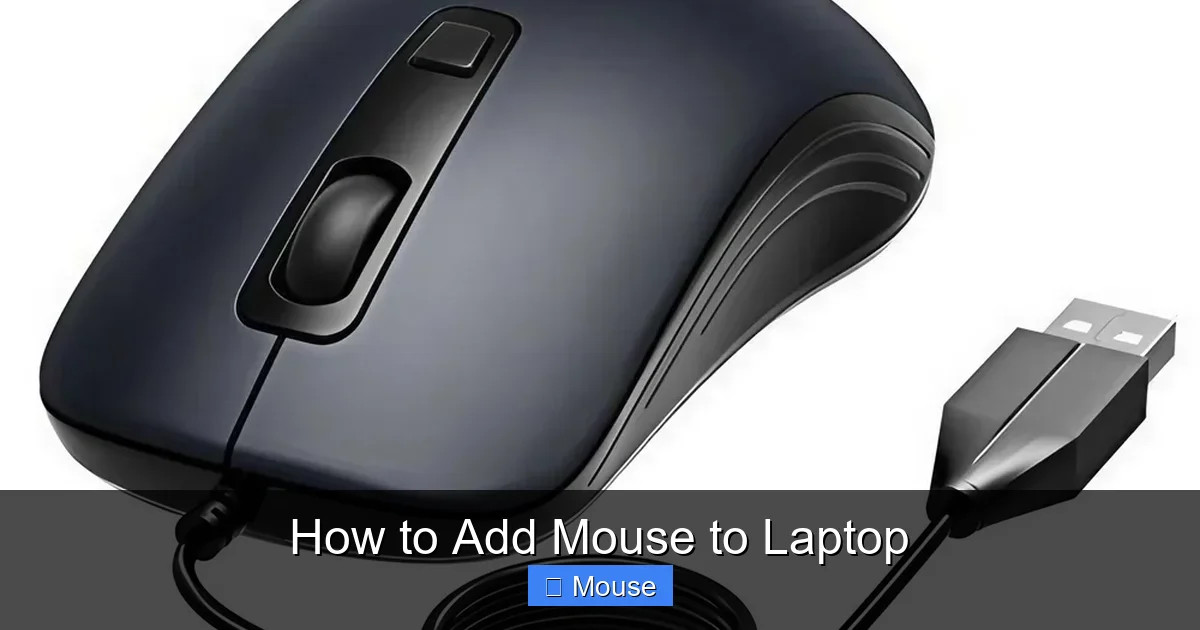
Visual guide about How to Add Mouse to Laptop
Image source: 5.imimg.com
Locate an Available USB Port
Look at the sides or back of your laptop. You’re looking for a USB-A port, which is the standard flat, rectangular port. Most laptops have at least one or two. If your laptop only has newer, smaller USB-C ports (oval-shaped), you will need a USB-A to USB-C adapter or a USB-C hub with a USB-A port. These are inexpensive and widely available.
Connect the Mouse
Take the USB plug from your mouse and firmly insert it into the USB port. There’s only one way it fits, so don’t force it. You should feel a slight click as it seats properly.
Wait for Driver Installation
As soon as you plug it in, look at your laptop’s screen. On Windows, you might see a small notification in the bottom-right corner that says “Setting up a device” or “Your device is ready.” On a Mac, you might see a similar notification or a mouse icon appear in your menu bar. Your operating system is automatically downloading and installing the generic driver it needs to recognize the mouse. This usually takes 5-15 seconds. You can start using the mouse almost immediately, even if the notification is still processing.
Test the Mouse
Move the mouse on your mouse pad or desk. The cursor on your screen should move correspondingly. Click the left and right buttons. Try the scroll wheel. If everything works, you’re done! If the cursor doesn’t move, try unplugging it and plugging it back in firmly. Ensure the USB port isn’t disabled in your BIOS/UEFI settings (rare, but possible).
Step-by-Step: How to Add a Bluetooth Mouse
This process has a few more steps but is still very manageable. The key is putting the mouse into “pairing mode.”
Visual guide about How to Add Mouse to Laptop
Image source: i.ytimg.com
Prepare Your Mouse for Pairing
Turn your mouse over. Look for a small power switch and turn it ON. Next, look for a button labeled “Pair” or a Bluetooth symbol (the stylized “B”). On many mice, this is a small, recessed button you press with a pen tip. On others, you hold the primary power button for a few seconds until an LED starts blinking. Consult your mouse’s manual if you’re unsure. The blinking light indicates the mouse is discoverable by your laptop.
Open Bluetooth Settings on Your Laptop
On Windows 10/11: Click the Start Menu > Settings (gear icon) > Bluetooth & devices > Add device.
On a Mac: Click the Apple menu > System Preferences (or System Settings) > Bluetooth. Ensure Bluetooth is turned ON.
Search and Pair
In the “Add device” window on Windows, select “Bluetooth.” Your laptop will start scanning. In the list of available devices, you should see your mouse’s name (e.g., “Logitech M720,” “HP Z3700”). Click on it.
On Mac, your mouse should appear in the “Devices” list. Click its name and then click Connect.
Your laptop and mouse will exchange a secure handshake. You might see a pairing code on screen to confirm—just click “Yes” or “Connect” if prompted. The blinking light on your mouse should turn solid or turn off, indicating a successful connection.
Finalize and Test
Once paired, the mouse will automatically reconnect whenever it’s powered on and within range (typically 10-30 feet). Move the mouse to test the cursor. Open the Bluetooth settings again; your mouse should now be listed under “Connected devices” or “My Devices.” You can rename it or disconnect it from here.
Step-by-Step: How to Add a Wireless RF Mouse (with Dongle)
The process here is a hybrid between the wired and Bluetooth methods.
Insert the USB Dongle
Take the small USB receiver that came with your mouse. Plug it directly into an available USB-A port on your laptop. If your laptop only has USB-C, you’ll need a USB-A to USB-C adapter.
Power On the Mouse
Turn the mouse on using its power switch. Most RF mice will connect automatically once powered on, as the dongle and mouse are pre-paired at the factory. There is no separate pairing process needed in 99% of cases.
Check for Connection
You should see a small LED light on either the mouse or the dongle light up (often green or blue) to indicate a live connection. Move the mouse. The cursor should move instantly. If it doesn’t, try these steps: 1) Ensure the mouse’s power switch is on. 2) Check the dongle is fully inserted. 3) Press the “Connect” or “Reset” button on the mouse (if it has one) and/or on the dongle (sometimes a tiny pinhole button). 4) Replace the mouse batteries.
Storage Tip for the Dongle
Many mice have a small compartment on the underside to store the dongle when not in use. Use this! It prevents you from losing the tiny receiver, which is notoriously easy to misplace.
Customizing Your Mouse Settings in Windows & macOS
Once your mouse is connected, you can tweak its behavior to suit your preferences. This is where you make it truly yours.
Windows Mouse Settings
Go to Start Menu > Settings > Bluetooth & devices > Mouse. Here you’ll find:
- Mouse pointer speed: Slider to make the cursor move faster or slower across the screen.
- Scroll lines: Choose how many lines of text scroll with each wheel “click.”
- Scroll inactive windows: Turn this ON if you want to scroll a window even when it’s not the active/focused window.
- Primary mouse button: Switch between left-handed and right-handed configuration.
For more advanced settings, like pointer precision (enhances accuracy for fine movement), double-click speed, or button remapping, go to Control Panel > Hardware and Sound > Mouse. Here, you can also adjust wheel scrolling to “One screen at a time.”
macOS Mouse Settings
Go to Apple Menu > System Preferences (or System Settings) > Mouse. Options include:
- Tracking speed: Controls how fast the cursor moves.
- Double-Click: A slider to adjust how quickly you must double-click for it to register.
- Scrolling direction: The famous “Natural Scrolling” toggle. Turning it off makes scrolling behavior match Windows (pushing the wheel down scrolls the page down).
- Primary mouse button: Swap left and right clicks.
If you have a multi-button mouse from Logitech, Razer, etc., you should download the manufacturer’s software (Logi Options+, Razer Synapse) for full button customization, DPI sensitivity control, and profile management.
Troubleshooting Common “Mouse Not Working” Problems
Even with simple setups, things can go wrong. Here’s your systematic checklist.
For Wired USB Mice:
- Try a different USB port. The port might be faulty.
- Restart your laptop. A simple reboot fixes many temporary driver glitches.
- Check Device Manager (Windows). Press Win+X, select Device Manager. Expand “Mice and other pointing devices.” If you see a yellow exclamation mark on your mouse, right-click it and select “Uninstall device.” Then unplug and replug the mouse to reinstall the driver.
- Test on another computer. This isolates the problem to your mouse or your laptop.
For Bluetooth & RF Mice:
- Replace or recharge the batteries. This is the #1 cause of failure. Use fresh, high-quality batteries.
- Toggle Bluetooth off and on. In your system Bluetooth settings, turn Bluetooth OFF, wait 10 seconds, turn it back ON. Then re-pair or wait for reconnection.
- Remove and re-pair the device. In your Bluetooth devices list, select the mouse and choose “Remove device” or the “X” button. Then go through the full pairing process again from scratch.
- Check for interference. 2.4GHz devices (Wi-Fi routers, cordless phones, microwaves) can interfere with Bluetooth and RF. Move the mouse dongle/receiver to a USB port on the front/back of the laptop, away from the laptop body, or use a USB extension cable to get it into clearer space.
- Update Bluetooth drivers (Windows). Go to your laptop manufacturer’s support website and download the latest Bluetooth driver for your specific model.
Advanced Tips and Best Practices
Now that your mouse works, level up your experience with these pro tips.
Ergonomics Matter: Choose the Right Shape
Not all mice are created equal. If you use your laptop for many hours, invest in an ergonomic mouse. These are designed to fit the natural curve of your hand, reducing strain on your wrist and forearm. Vertical mice, which hold your hand in a “handshake” position, are excellent for preventing repetitive strain injury (RSI). Try to hold your mouse lightly and keep your wrists neutral.
DPI and Sensitivity: Understanding the Numbers
DPI (Dots Per Inch) measures how sensitive a mouse is. A higher DPI means the cursor moves more pixels for the same physical movement. Gamers often use high DPI (1600-3200) for fast, large-screen movement, then lower the in-game sensitivity for fine control. For general office work, a DPI around 800-1200 is often perfect. Many mice have a dedicated DPI button to cycle through preset levels on the fly.
Maintain Your Mouse for Longevity
A little care goes a long way. Clean the optical sensor (the little window on the bottom) with a dry, lint-free cloth. Dust and debris can cause tracking issues. For ball mice (rare now), you’ll need to clean the ball. Wipe the exterior with a slightly damp cloth. For wireless mice, turn them off when not in use for long periods (like overnight) to save battery life. Store the dongle in the mouse’s compartment.
Conclusion: Your Laptop, Upgraded
Adding a mouse to your laptop is a tiny action with a huge return on investment. You’ve now learned the clear differences between wired, Bluetooth, and RF wireless mice, and the exact, simple steps to connect each type to both Windows and macOS laptops. You know how to customize pointer speed and button functions to match your workflow. Most importantly, you have a troubleshooting toolkit to solve the most common connection hiccups without panic.
Don’t overthink it. For most users, a basic Bluetooth mouse offers the best blend of convenience and performance. If you’re a gamer or video editor, a high-performance wired or RF mouse with a high polling rate is worth the extra cost. The perfect mouse is the one that feels comfortable in your hand and disappears into your workflow. So, go ahead—unbox that mouse, follow these steps, and feel the immediate improvement in your computing comfort and efficiency. Your wrist will thank you.
Frequently Asked Questions
Do I need to install software for a new mouse?
Almost never. For basic functionality, modern operating systems (Windows 10/11, macOS) include generic drivers and will recognize a standard mouse instantly upon connection. You only need to install manufacturer software (like Logi Options+) if you want to reprogram buttons, adjust DPI beyond hardware presets, or use advanced features like app-specific profiles.
Why is my Bluetooth mouse disconnecting randomly?
Random disconnects are usually caused by low batteries, Bluetooth signal interference from other 2.4GHz devices (Wi-Fi routers, microwaves), or outdated Bluetooth drivers. Start by replacing the batteries. Then, try turning Wi-Fi off temporarily to see if the connection stabilizes. Finally, update your laptop’s Bluetooth drivers from the manufacturer’s website.
Can I use a mouse with a MacBook?
Absolutely. Any standard USB or Bluetooth mouse will work with a MacBook. For USB mice, you may need a USB-C to USB-A adapter. For Bluetooth, the pairing process is identical to Windows but done in System Preferences > Bluetooth. Note that button functions (like left/right click) will work as expected, but you may need to adjust “Secondary click” settings in the Mouse pane of System Preferences.
What’s the difference between a 2.4GHz wireless mouse and a Bluetooth mouse?
A 2.4GHz mouse uses its own proprietary USB dongle/receiver, while a Bluetooth mouse uses your laptop’s built-in Bluetooth radio. The 2.4GHz connection often offers slightly lower latency and a more reliable connection in crowded wireless environments, making it preferred for gaming. Bluetooth is more convenient as it doesn’t use a USB port and can pair with multiple devices (like your phone and laptop) easily.
How do I make my mouse pointer move faster or slower?
On Windows, go to Settings > Bluetooth & devices > Mouse and adjust the “Mouse pointer speed” slider. For finer control, go to Control Panel > Mouse > Pointer Options and adjust the “Select a pointer speed” slider, and uncheck “Enhance pointer precision” for a 1:1 raw movement feel. On a Mac, go to System Preferences > Mouse and adjust the “Tracking speed” slider.
My wireless mouse cursor is laggy or jittery. What should I do?
First, ensure the mouse is on a clean, non-reflective surface. A mousepad is ideal. Second, replace the batteries with fresh ones—low power is a common cause of lag. Third, check for interference: move other wireless devices away, and try plugging the USB dongle into a port on the front/back of the laptop using a short extension cable to get it away from the laptop’s internal components. If using Bluetooth, try the 2.4GHz dongle method instead if possible.