Can You Add More Ram to a Laptop
Yes, you can often add more RAM to a laptop, but it’s not always possible. The upgrade depends entirely on your specific laptop model’s design—many have accessible slots, while others have memory soldered directly to the motherboard. Before buying anything, you must verify your laptop’s maximum supported RAM, the type of RAM it uses (DDR3, DDR4, DDR5), and whether it has free slots. If compatible, a RAM upgrade is one of the most cost-effective ways to significantly improve multitasking and overall system responsiveness.
Has your trusty laptop started to feel sluggish? Do you find yourself waiting for applications to load, struggling to have more than a few browser tabs open, or seeing the dreaded “low memory” warning? Before you start saving for a brand-new machine, there’s a powerful and often overlooked upgrade that can breathe new life into your computer: adding more RAM. The question “can you add more RAM to a laptop?” doesn’t have a single yes or no answer—it’s a “it depends.” This comprehensive guide will walk you through everything you need to know, from the initial compatibility check to the final screw turn, so you can confidently decide if and how to upgrade your laptop’s memory.
Key Takeaways
- Not All Laptops Are Upgradable: Many modern ultrabooks and laptops, especially Apple’s MacBooks and some premium Windows models, have RAM soldered to the motherboard, making upgrades impossible.
- Check Compatibility First: You must identify your laptop’s exact model, its supported RAM type (DDR generation), speed, and maximum capacity using tools or manufacturer specs.
- Physical Access is Key: Upgrading requires opening the laptop’s bottom panel, which is usually simple but may void a warranty or require specific tools.
- It’s a Major Performance Boost: Adding RAM directly alleviates slowdowns caused by running out of memory and relying on slow hard drive/SSD swap space.
- Match RAM Specifications Exactly: For best results, install identical RAM sticks (same brand, model, capacity, speed, and timings). Mixing mismatched RAM can cause instability.
- 32GB is the New Sweet Spot for Most Users: For general use, content creation, and gaming, 16GB-32GB is sufficient. Only specific professional workloads (video editing, massive datasets) need 64GB+.
- Upgrading is Often Cheaper Than Buying New: A RAM kit costs a fraction of a new laptop and can extend your current machine’s useful life by 2-3 years.
📑 Table of Contents
- Understanding RAM and Why You’d Want More
- Step 1: Can Your Laptop Even Be Upgraded? (The Crucial Check)
- Step 2: Determining What RAM You Need
- Step 3: The Physical Upgrade Process
- Step 4: Troubleshooting Common Issues
- Step 5: When Upgrading RAM Isn’t the Answer (Or Isn’t Possible)
- Step 6: Real-World Performance Impact and Examples
- Conclusion: Is It Worth It?
Understanding RAM and Why You’d Want More
Let’s start with the basics. RAM, or Random Access Memory, is your laptop’s short-term working memory. When you open a program, a document, or a browser tab, the necessary data is loaded from your permanent storage (SSD or hard drive) into the lightning-fast RAM. Your processor (CPU) works directly with the data in RAM. Think of it like your desk: the bigger your desk (RAM), the more papers and projects (apps and files) you can have out and actively working on without having to constantly get up and search through a filing cabinet (your SSD).
The “Memory Pressure” Problem
When your RAM fills up, your operating system gets creative. It starts moving inactive data from the RAM to a special hidden file on your SSD, a process called “paging” or “swapping.” SSDs are fast, but they are still orders of magnitude slower than RAM. This constant shuffling of data creates a bottleneck. You experience it as lag, stuttering, and long loading times. Your system’s “memory pressure” (a metric you can see in tools like macOS Activity Monitor or Windows Task Manager) shoots up, indicating your RAM is the limiting factor. Adding more RAM directly addresses this problem by giving your system more workspace, reducing reliance on that slow SSD swap file.
What an Upgrade Can and Cannot Do
It’s crucial to have realistic expectations. A RAM upgrade is not a magic bullet that will make an old, slow CPU suddenly fast. If your laptop’s processor is the primary bottleneck, more RAM won’t help much. However, if your system is being held back by constant memory swapping, the upgrade can feel transformative. You’ll be able to keep more apps open, work with larger files in programs like Photoshop or Excel, have dozens of browser tabs without slowdown, and see smoother performance in virtual machines. It directly improves multitasking capability and system fluidity.
Step 1: Can Your Laptop Even Be Upgraded? (The Crucial Check)
This is the most important step. You must determine if your laptop’s RAM is user-upgradable. Unfortunately, the trend in modern laptop design, especially for sleek ultrabooks and premium models, is to solder RAM directly onto the motherboard to save space and improve durability. This makes upgrades impossible. So, how do you find out?
Visual guide about Can You Add More Ram to a Laptop
Image source: i.ytimg.com
How to Research Your Specific Model
Start with your laptop’s exact model number. This is usually on a sticker on the bottom of the laptop or in the system information (type “msinfo32” in Windows search or “About This Mac” on a Mac). Once you have it:
- Manufacturer’s Website: Go to the support page for your model. Look for the “Technical Specifications” or “Upgrade/Service Manual.” The manual will often have a detailed exploded view showing if RAM is accessible via a panel.
- Search for “[Your Laptop Model] RAM upgrade”: User forums, YouTube videos, and tech blogs are invaluable. Searching this phrase will often bring up teardown videos or forum posts where others have already attempted or documented the upgrade process for your exact machine.
- Use System Scanning Tools (Carefully): Tools like CPU-Z (Windows) or System Information (macOS) can show you how many RAM slots are used and total capacity. If it shows all slots are populated and the total matches the manufacturer’s maximum spec, you likely have no free slots. If it shows “Bank 0/1” etc., there might be a free slot. However, these tools cannot always distinguish between a free slot and soldered memory, so manual verification is still best.
Red Flags That Mean “No Upgrade”
Be immediately suspicious if:
- Your laptop is an Apple MacBook from 2012 onward (with very few exceptions like some older MacBook Pros). Apple has soldered RAM in all MacBooks for years.
- It’s an extremely thin-and-light Windows ultrabook (e.g., many Dell XPS 13, HP Spectre x360, Microsoft Surface Laptop models). These often have no access panel and require complete disassembly.
- The manufacturer’s spec sheet lists “soldered” or “integrated” memory.
- There is no obvious access panel on the bottom secured by one or two screws. If the entire bottom is glued or uses proprietary pentalobe screws (common on Apple and some Microsoft devices), it’s a sign of a sealed, non-upgradable design.
Step 2: Determining What RAM You Need
Assuming your laptop is upgradable, you now need to buy the correct RAM. Installing the wrong type won’t work or could damage your system. You need to match three key specifications: DDR Generation, Speed, and Capacity.
Visual guide about Can You Add More Ram to a Laptop
Image source: sweetwater.com
DDR Generation: DDR3, DDR4, or DDR5?
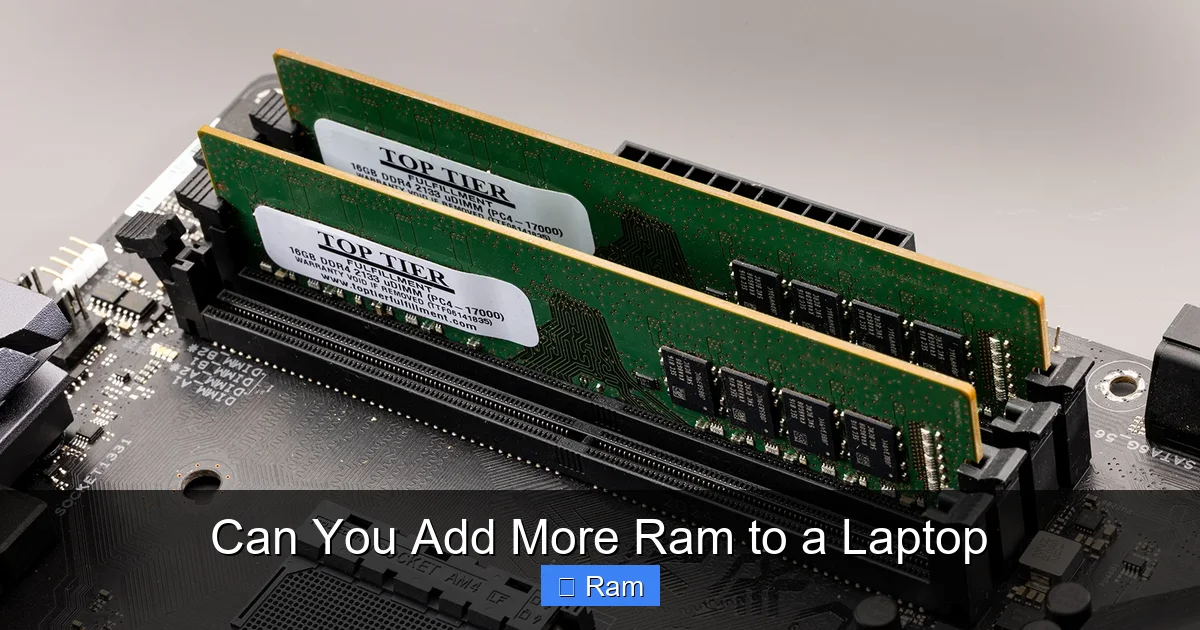
This is the physical and electrical standard. DDR3, DDR4, and DDR5 are not compatible with each other. The notch on the stick is in a different place, and the voltage and pin count differ. You must get the generation your laptop supports. Your laptop’s manual or a scan with CPU-Z will tell you. For example, CPU-Z’s “Memory” tab will show “Type: DDR4.” Laptops from roughly 2012-2015 use DDR3, 2015-2020 use DDR4, and 2020+ models use DDR5, though DDR4 is still very common.
Speed: MHz Matters (But Isn’t Everything)
RAM speed is measured in megahertz (MHz), like 2666MHz, 3200MHz, or 4800MHz. Your laptop’s chipset and CPU support a maximum speed. If you install faster RAM, it will simply run at the lower, supported speed—it won’t break anything. However, for best stability and performance, it’s ideal to match the speed of the existing RAM if you’re adding to it. If you’re replacing all sticks, get the highest speed your laptop’s specs list. Mixing speeds can cause the system to run at the speed of the slowest stick.
Capacity: How Much is Enough?
This depends on your use case:
- Basic Use (Web, Email, Office): 8GB is the absolute minimum today. 16GB is the comfortable sweet spot for future-proofing.
- Power User / Multitasker: 16GB is the starting point. 32GB allows for extreme multitasking (100+ browser tabs, multiple heavy apps).
- Content Creation & Gaming: 32GB is the recommended standard. 64GB is for professional 4K/8K video editing, 3D rendering, or working with massive datasets.
- Check the Maximum: Your laptop’s manual or support page will list a “maximum supported memory.” Do not exceed this. For example, a laptop may have two slots, each supporting 16GB, for a 32GB maximum.
SO-DIMM: The Laptop RAM Form Factor
Laptop RAM is not the same as desktop RAM. It uses a smaller form factor called SO-DIMM. Ensure you are purchasing “laptop RAM” or “SO-DIMM” modules. They are physically shorter and have a different notch position than desktop DIMMs.
Step 3: The Physical Upgrade Process
Once you have the correct SO-DIMM RAM module(s), it’s time for the physical installation. This is usually straightforward, but caution is paramount.
Visual guide about Can You Add More Ram to a Laptop
Image source: robots.net
Gather Your Tools and Prepare
You’ll need:
- The new RAM module(s).
- A small Phillips-head screwdriver (size #0 or #1 is common).
- Optional but recommended: a plastic spudger or pry tool, and an anti-static wrist strap.
Safety First: Shut down your laptop completely. Unplug the charger and, if possible, remove the battery (though in most modern laptops, it’s internal). Discharge any static electricity by touching a grounded metal object (like a desk leg) or wear an anti-static strap. Work on a clean, flat surface with good lighting.
Accessing the RAM Bay
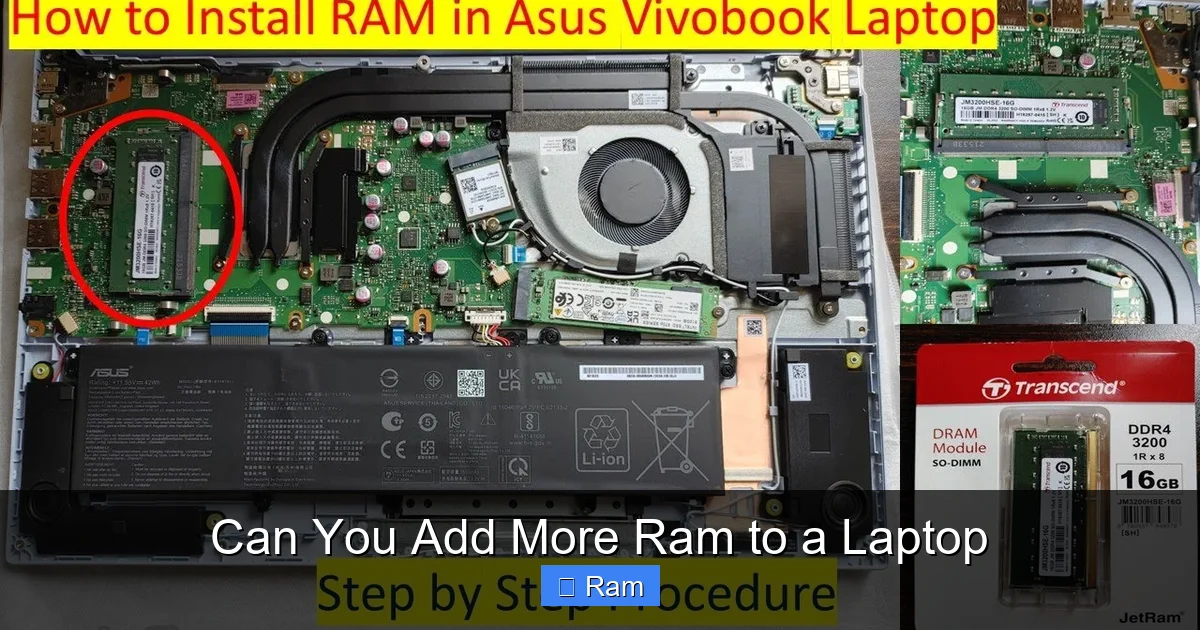
- Locate and Remove Screws: Flip the laptop over. Look for a panel secured by one or several screws. It’s often labeled with a memory stick icon. Carefully remove all screws and set them aside in a safe spot, noting their locations as they may be different lengths.
- Pry Open the Panel: Gently insert a plastic pry tool or your fingernail into the seam around the panel. Work your way around; it should pop off with gentle pressure. If it’s stuck, double-check for any hidden screws under rubber feet or labels.
- Ground Yourself: Before touching anything inside, touch an unpainted metal part of the laptop’s chassis (like a screw hole) to discharge any static.
Removing Old RAM & Installing New RAM
Inside, you’ll see one or two small circuit boards (the RAM sticks) held down by small metal clips on either side.
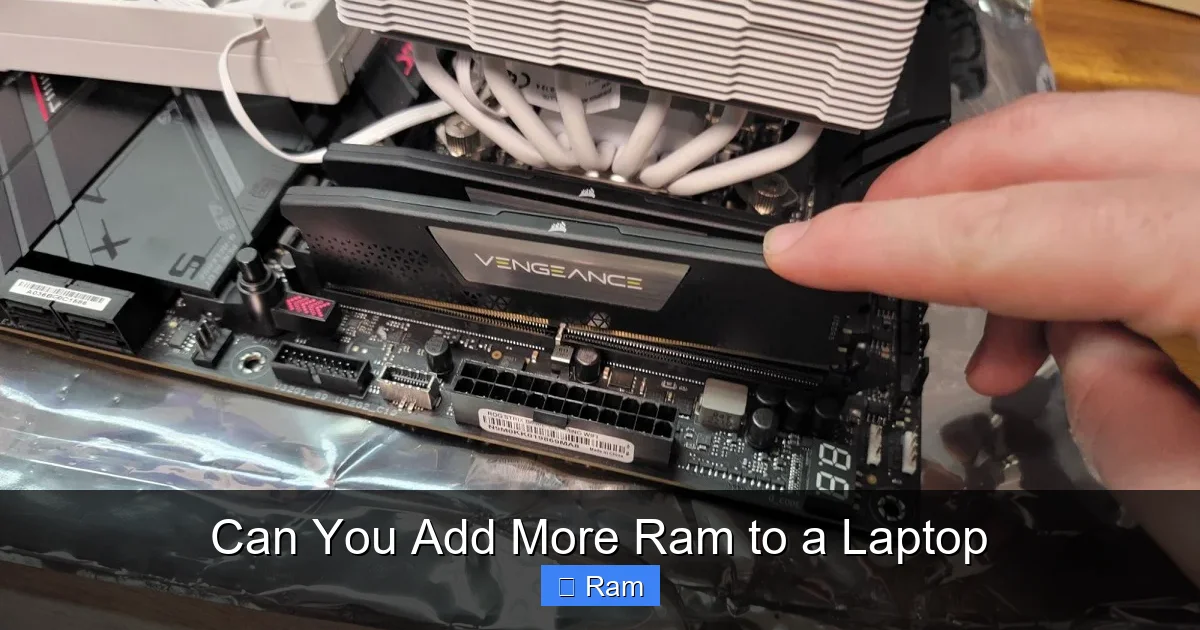
- Remove Existing RAM (if replacing): Gently but firmly push the two metal clips on the sides outward (away from the RAM stick). The stick will pop up at an angle. Pull it straight out by the edges, holding it by the middle to avoid touching the gold contacts.
- Install the New RAM: Align the notch on the new RAM stick with the ridge in the slot. It only fits one way. Place the stick in the slot at a slight angle, just like the old one came out. Press down firmly and evenly on the top edge of the stick until the side clips automatically snap into place, locking it flat. You should hear/feel a firm click. Ensure it’s seated evenly and the clips are fully engaged.
Reassembly and First Boot
- Do not force anything. If the RAM doesn’t click into place easily, you likely have it misaligned.
- Replace the access panel and screws. Do not overtighten.
- Reconnect the battery if you disconnected it.
- Plug in the charger and power on.
Your laptop should boot normally. Once in the OS, go to System Information (Windows: Settings > System > About; macOS: Apple Menu > About This Mac > System Report) to verify the new total RAM is recognized. If it is, you’re done!
Step 4: Troubleshooting Common Issues
Sometimes, things don’t go perfectly. Here’s how to handle the most common problems.
“No Boot” or “Beeping” After Installation
This is the classic sign of a RAM issue. The laptop powers on but shows a black screen, or it beeps in a pattern (consult your manual for beep codes). Don’t panic.
- Reseat the RAM: Power off, unplug, open the panel, and remove the new RAM. Reinstall it, pressing down firmly and evenly until the clips lock. Sometimes the connection isn’t solid on the first try.
- Try One Stick at a Time: If you installed two new sticks, try booting with only one in the primary slot (usually slot A or the one closest to the CPU). If it boots, the other stick or that slot may be faulty. Swap slots to test.
- Clear CMOS: On some business laptops (Dell Latitude, HP EliteBook, Lenovo ThinkPad), you may need to reset the BIOS settings after a hardware change. This is often done by removing the CMOS battery for a minute or using a dedicated reset jumper. Check your service manual.
- Incompatibility: It’s possible, though rare with modern RAM, that the specific module is not fully compatible with your laptop’s chipset. Check the QVL (Qualified Vendor List) for your laptop model online, or search for user reports of successful RAM models for your exact laptop.
System Recognizes Less RAM Than Installed
You installed 32GB, but Windows only shows 28GB. This is usually due to a 32-bit vs. 64-bit operating system limitation (all modern Windows 10/11 and macOS are 64-bit) or, more commonly, a memory remapping issue in the BIOS.
- Check BIOS/UEFI Settings: Enter your BIOS/UEFI during boot (usually by pressing F2, F10, Del, or Esc). Look for settings like “Memory Remap Feature,” “Memory Hole Remapping,” or “Above 4G Decoding” and ensure they are Enabled. Save and exit.
- Update BIOS: An outdated BIOS can have poor memory compatibility. Check the manufacturer’s support site for a newer version and update carefully (ensure laptop is plugged in!).
Instability, Crashes, or Blue Screens
If the system boots but crashes under load or gives memory-related errors:
- Run a Memory Test: Use Windows Memory Diagnostic (type in Windows search) or the more thorough MemTest86 (create a bootable USB). This will stress-test the RAM for errors.
- Check RAM Speed/Voltage: If you mixed old and new RAM or overclocked, go into BIOS and manually set the speed to the JEDEC standard speed (e.g., 2666MHz instead of an XMP profile of 3200MHz). Also ensure voltage is correct (usually 1.2V for DDR4, 1.35V for low-power DDR4).
- Clean Contacts: Rarely, oxidization on the gold contacts can cause issues. Gently rub the contacts with a pencil eraser, then clean with isopropyl alcohol.
Step 5: When Upgrading RAM Isn’t the Answer (Or Isn’t Possible)
We’ve focused on the upgrade path, but it’s equally important to know when this solution won’t help or isn’t an option.
The Soldered RAM Reality
If your research in Step 1 confirmed your laptop has all RAM soldered, you have two choices: accept the performance limitation or replace the entire laptop. There is no workaround. Some very high-end, workstation-class laptops (like certain Dell Precision or Lenovo ThinkPad P-series models) offer socketed RAM even with high capacities, but they are the exception, not the rule.
Other Bottlenecks to Consider
Before spending on RAM, diagnose the real slowdown:
- Hard Drive (HDD): If your laptop still has a spinning hard disk, that is almost certainly your #1 bottleneck. Upgrading to an SSD is a far more impactful upgrade than adding RAM to a system with an HDD. An SSD will make booting, launching apps, and loading files dramatically faster. Do this first if you have an HDD.
- Slow CPU: An old, low-power Intel Celeron/Pentium or AMD A-series processor will struggle regardless of RAM. Check CPU usage in Task Manager during slowdowns. If it’s consistently at 100%, the CPU is the limit.
- Thermal Throttling: An old, clogged with dust cooling system can cause the CPU and GPU to throttle performance to avoid overheating. A thorough internal cleaning and repasting can help.
The Cost-Benefit Analysis
Consider the age and value of your laptop. A RAM kit for an older laptop might cost $50-$100. If your laptop is 8+ years old, has a weak dual-core CPU, and a dim, low-res screen, that $100 might be better saved towards a new, more capable machine. However, for a laptop from the last 4-5 years with a decent quad-core CPU but only 8GB of RAM, the upgrade is a no-brainer and can add significant usable life.
Step 6: Real-World Performance Impact and Examples
Let’s make this concrete with some scenarios of what you can expect.
The Office Multitasker
Situation: A business laptop with an Intel i5-8250U, 8GB RAM, and a 256GB SSD. User has Chrome with 30 tabs, Outlook, 3 Word docs, and Spotify open. System feels “laggy” when switching between apps.
Upgrade: Add another 8GB stick for 16GB total (assuming a free slot).
Result: Dramatic improvement. The system no longer needs to swap data to the SSD. App switching is instant, browser tabs are responsive, and overall fluidity is greatly enhanced. This is the single most effective upgrade for this use case.
The Casual Gamer & Streamer
Situation: A gaming laptop with an RTX 3060, an i7-10750H, but only 8GB of single-channel RAM. Games stutter, and streaming while gaming is impossible.
Upgrade: Replace the single 8GB stick with a matched 16GB (2x8GB) dual-channel kit. Dual-channel (using two sticks) also provides a significant performance boost for integrated graphics and some CPU-bound tasks.
Result: Massive improvement. Dual-channel RAM provides a 10-20% FPS boost in many games. Combined with the capacity increase, the system can handle the game, streaming software, Discord, and browser without skipping a beat.
The Content Creator
Situation: A photo/video editor using a laptop with an i7-9750H, 16GB RAM, and a fast SSD. Working with 4K video in DaVinci Resolve causes constant render cache misses and “out of memory” errors.
Upgrade: Upgrade to 32GB (2x16GB).
Result: The “out of memory” warnings disappear. The software can keep more of the project and cache in fast RAM, leading to smoother timeline scrubbing and faster render times. This is a professional-grade improvement for a prosumer cost.
Conclusion: Is It Worth It?
So, can you add more RAM to a laptop? The answer is: Probably, but you must do your homework first. For a huge percentage of laptops sold in the last decade, the answer is a definitive yes. It is one of the most accessible, affordable, and impactful upgrades you can perform. A successful RAM upgrade can make a 4-year-old laptop feel like new again, all for the cost of a nice dinner out.
Your path forward is clear:
- IDENTIFY your exact laptop model.
- RESEARCH its upgradeability and specifications thoroughly.
- PURCHASE the correct, compatible SO-DIMM modules from a reputable vendor.
- INSTALL carefully, following static-safe procedures.
- ENJOY a faster, more responsive machine.
If your research reveals a soldered design, don’t force it. Instead, focus on other optimizations like an SSD upgrade (if you haven’t already), a clean OS reinstall, or managing your startup programs. But if the stars align and your laptop has that glorious accessible RAM slot, seize the opportunity. That extra memory is waiting to be unlocked, ready to transform your computing experience from frustrating to fluid.
Frequently Asked Questions
Will adding more RAM to my laptop void the warranty?
It depends on the manufacturer and laptop model. Some brands (like Dell, HP, Lenovo) allow user upgrades of RAM and storage without voiding the warranty, as these are considered customer-replaceable units (CRUs). Others, particularly Apple and some sealed ultrabooks, consider any opening of the case as voiding the warranty. Always check your specific warranty terms or contact support before opening your laptop.
Can mixing different brands or sizes of RAM cause problems?
It can, but it’s not guaranteed. Modern systems are better at handling mixed RAM. The biggest issues arise from mixing different DDR generations (e.g., DDR3 and DDR4), different speeds, or different capacities in a dual-channel setup. For best stability and performance, it’s highly recommended to use identical RAM sticks (same brand, model, capacity, and speed). If you must mix, place the larger capacity stick in the primary slot and expect the system to run at the speed of the slowest module.
How much RAM do I really need for gaming in 2024?
For modern gaming, 16GB is the new standard minimum for 1080p and 1440p gaming. Many new AAA titles recommend 16GB and perform noticeably better than with 8GB. For 4K gaming, streaming while gaming, or playing games with heavy mods, 32GB is the recommended sweet spot. 64GB is overkill for pure gaming but useful for heavy multitasking alongside gaming.
Is there a performance difference between single-channel and dual-channel RAM?
Yes, a significant one. Dual-channel mode (using two identical RAM sticks) effectively doubles the data bandwidth between the RAM and the memory controller. This provides a tangible performance boost in games (often 10-20% more FPS), integrated graphics performance, and many productivity applications that are sensitive to memory bandwidth. If your laptop has two slots and you currently have one stick, adding a second identical stick to run in dual-channel is a very worthwhile upgrade.
Can I use a higher speed RAM than my laptop’s specification?
Yes, but it will run at the lower speed supported by your laptop’s chipset and BIOS. For example, if your laptop supports up to 3200MHz and you install 4800MHz RAM, it will operate at 3200MHz. There is no benefit to buying faster RAM than your system’s maximum, but it also won’t cause harm. It’s simply an unnecessary expense. Always buy RAM that matches your laptop’s maximum supported speed.
My laptop has 8GB soldered and one empty slot. Can I add RAM?
Absolutely yes. This is a common and excellent upgradeable configuration. The 8GB soldered to the motherboard is fixed, but you can add a SO-DIMM module to the empty slot. For optimal dual-channel performance (which will boost graphics and some CPU tasks), you should try to get a RAM stick with the same capacity, speed, and timings as the soldered module. You can find this information using CPU-Z or by searching for your laptop’s full specifications. If you can’t match perfectly, a larger capacity stick (e.g., adding a 16GB stick to 8GB soldered for 24GB total) will still work in asymmetric dual-channel, just not as fast as perfect matching.