Upgrading your laptop’s RAM is one of the most effective and affordable ways to boost its performance. This guide walks you through every critical step, from verifying compatibility and gathering tools to safely installing the new memory modules and confirming the upgrade. Follow these precise instructions to avoid common pitfalls and successfully complete the RAM installation yourself.
Key steps include properly grounding yourself, locating the access panel, releasing the RAM clips, and firmly seating the new stick at a 45-degree angle before locking it down. Always verify the upgrade in your operating system’s system information after powering on.
Is your laptop feeling sluggish? Do applications take forever to load, and can you barely have a few browser tabs open without it grinding to a halt? Before you consider a costly replacement, there’s a powerful and often overlooked upgrade that can breathe new life into your machine: adding more Random Access Memory (RAM). Think of RAM as your laptop’s short-term workspace. The more RAM you have, the more tasks it can handle simultaneously without slowing down. And the great news? For many laptop models, learning how to install RAM on a laptop is a straightforward DIY project that saves you significant money. This complete, step-by-step guide will transform you from a novice to a confident upgrader, ensuring you do the job correctly, safely, and efficiently.
The process of installing new memory involves more than just popping a stick into a slot. It requires careful preparation, an understanding of your specific laptop’s requirements, and a methodical, cautious approach to handling delicate internal components. Rushing or skipping steps can lead to a non-booting laptop or, worse, permanent damage. We’ll cover everything you need to know, from the initial detective work to the final verification, ensuring your RAM installation on a laptop is a resounding success. By the end of this guide, you’ll have the knowledge and confidence to complete this upgrade and immediately enjoy a faster, more responsive computing experience.
Key Takeaways
- Compatibility is King: Your laptop’s motherboard dictates the maximum RAM capacity, type (DDR3, DDR4, DDR5), speed (MHz), and form factor (SO-DIMM). Never assume; always check your laptop’s manual or use a system scanner tool.
- Safety First: Always power off the laptop, unplug it, and remove the internal battery if possible. Ground yourself by touching a metal part of the chassis or use an anti-static wrist strap to prevent electrostatic discharge (ESD) from damaging components.
- Handle RAM Gently: RAM modules are sensitive. Hold them by the edges, avoid touching the gold contacts or the chips. When inserting, apply even pressure on the top edge until the side clips snap into place automatically.
- Check Available Slots: Many laptops have two RAM slots. Often, one is occupied by a pre-installed stick. Check your current RAM configuration via system tools to know if you are adding to an empty slot or replacing an existing module.
- Reseat Firmly, Don’t Force: The RAM must sit perfectly perpendicular to the motherboard. If it doesn’t click into place with moderate pressure, remove it, check for obstructions or debris, and try again. Forcing it can break the slot or the module.
- Verify in BIOS/OS: After installation, enter the BIOS/UEFI on boot (usually by pressing F2, Del, or Esc) to confirm the new total RAM is recognized. Then, check within your operating system (Task Manager > Performance > Memory on Windows, About This Mac on macOS).
- Know When to Seek Help: If your laptop has a sealed chassis (RAM soldered to the motherboard), if you are uncomfortable with any step, or if the laptop fails to boot after installation, consult a professional technician.
📑 Table of Contents
- Why Upgrade Your Laptop’s RAM? Understanding the Benefit
- Phase 1: Essential Preparation Before You Touch a Screwdriver
- Phase 2: Accessing the RAM Bay – Opening Your Laptop Safely
- Phase 3: The Core Procedure – Installing the New RAM Module
- Phase 4: Closing Up and First Boot Verification
- Troubleshooting: What to Do If the Laptop Won’t Boot or RAM Isn’t Detected
- When Not to DIY: Scenarios Requiring Professional Help
- Conclusion: Enjoy Your Faster, More Capable Laptop
Why Upgrade Your Laptop’s RAM? Understanding the Benefit
Before we dive into the “how,” let’s quickly address the “why.” Upgrading your RAM provides a direct, noticeable improvement in system performance for specific tasks. It’s not a magic bullet that makes your processor faster, but it removes a major bottleneck.
The Multitasking Multiplier
Every program you open—your web browser with multiple tabs, a word processor, a music streaming app, and your antivirus—consumes a portion of your available RAM. When your physical RAM fills up, your system starts using a portion of your storage drive as “virtual memory.” This process, called paging or swapping, is dramatically slower because hard drives (and even SSDs) are orders of magnitude slower than RAM. Adding more RAM means your system can keep more applications actively loaded in fast memory, drastically reducing slowdowns when switching between programs or having many things open at once.
Who Benefits Most?
Users who will see the biggest jump include:
- Casual Multitaskers: Anyone who runs a browser with 10+ tabs, has a document open, and is listening to music or watching a video simultaneously.
- Content Creators: Those working with photo editing software (like Photoshop), video editing, or 3D modeling. These applications are notoriously RAM-hungry, especially with large files.
- Students & Professionals: Anyone using multiple office applications, research tools, and communication apps at once.
- Gamers (on some titles): While the GPU is more critical for gaming, many modern games, particularly open-world titles, benefit from having ample system RAM (16GB+) to prevent stuttering and loading hiccups.
If your current RAM usage consistently sits above 80% in your task manager, an upgrade is likely a very wise move.
Phase 1: Essential Preparation Before You Touch a Screwdriver
The most critical part of any hardware upgrade happens before you even open the laptop. Proper preparation prevents compatibility issues, saves you from re-opening your laptop, and ensures a smooth process. Rushing this phase is the number one cause of failed upgrades.
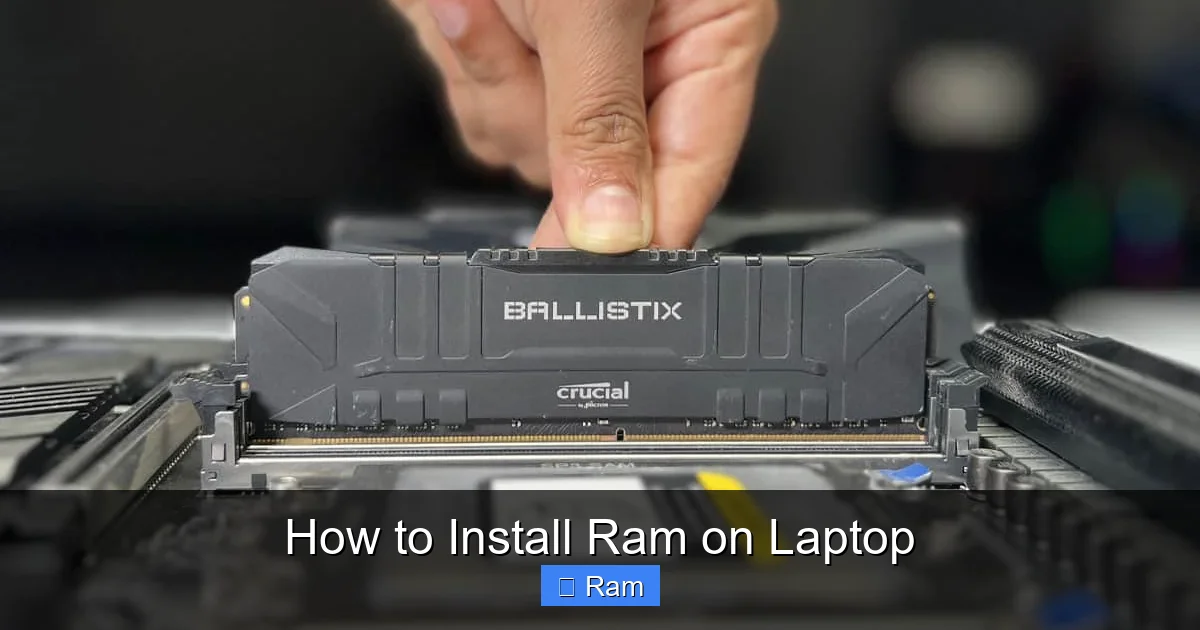
Visual guide about How to Install Ram on Laptop
Image source: technewstoday.com
Step 1: Identify Your Laptop’s Exact Model and Current RAM Configuration
You cannot buy the correct RAM without knowing precisely what your laptop supports. Here’s how to find out:
- Check the Manual/Original Specs: The manufacturer’s specification sheet for your exact model number (e.g., Dell XPS 13 9310, Lenovo ThinkPad T14 Gen 3) will list the supported RAM type, maximum capacity per slot, and total maximum RAM.
- Use System Information Tools (Easiest Method):
- Windows: Press Ctrl + Shift + Esc to open Task Manager. Go to the Performance tab, click on Memory. The top-right will show your current RAM speed (e.g., 3200 MHz) and format (e.g., DDR4). Note the “In use” and “Committed” values to gauge your need. For more detail, type msinfo32 into the Start menu and run it. Look for “Installed Physical Memory (RAM)” and “System Model.”
- macOS: Click the Apple menu > About This Mac. The “Memory” line will show your total RAM and often the type and speed.
- Use a Trusted Scanner Tool: Websites like Crucial.com or Kingston.com offer free system scanner tools that automatically detect your laptop model and list all compatible RAM upgrades. This is a highly reliable method.
Step 2: Purchase the Correct RAM Module
Laptops use a different form factor than desktops. You need a SO-DIMM (Small Outline Dual In-line Memory Module). The key things to match are:
- Generation (DDR): DDR3, DDR4, DDR5. These are not physically or electrically compatible. The notch (key) is in a different position.
- Speed (MHz): Your laptop will run all RAM at the speed of its slowest module. It’s best to match the speed of your existing stick, but you can often use faster RAM (it will downclock) or slower RAM (it will downclock the faster one). For best performance, match speeds.
- Capacity: Common sizes are 4GB, 8GB, 16GB, and 32GB per module. Ensure your laptop’s maximum supported capacity isn’t exceeded.
- Dual-Channel Consideration: If your laptop supports dual-channel memory (most do), using two identical sticks (same size, speed, brand) in the two slots will provide a significant performance boost. If you have one stick and are adding another, try to match the first stick as closely as possible for optimal dual-channel operation.
Pro Tip: When in doubt, buy from a reputable brand (Crucial, Kingston, Samsung, Micron) with a lifetime warranty and a easy return policy if the module is incompatible.
Step 3: Gather Your Tools and Create a Safe Workspace
You will need:
- A set of small, precision screwdrivers: Typically a Phillips #0 or #00. Some laptops use Torx screws.
- Plastic spudger or pry tool: For safely prying open plastic clips without scratching.
- An anti-static wrist strap (highly recommended): This grounds you to the laptop’s chassis, preventing ESD. If you don’t have one, you can periodically touch an unpainted metal part of the laptop’s casing.
- A small container or magnetic mat: To hold screws safely so they don’t get lost.
- Good lighting: A desk lamp helps immensely.
Find a clean, flat, well-lit surface with plenty of room to work. Lay down a soft cloth to protect the laptop’s lid from scratches.
Phase 2: Accessing the RAM Bay – Opening Your Laptop Safely
Now we get to the physical part. Every laptop is different, but the general principles are the same. The goal is to access the compartment where the RAM modules are housed, which is usually on the bottom of the laptop.
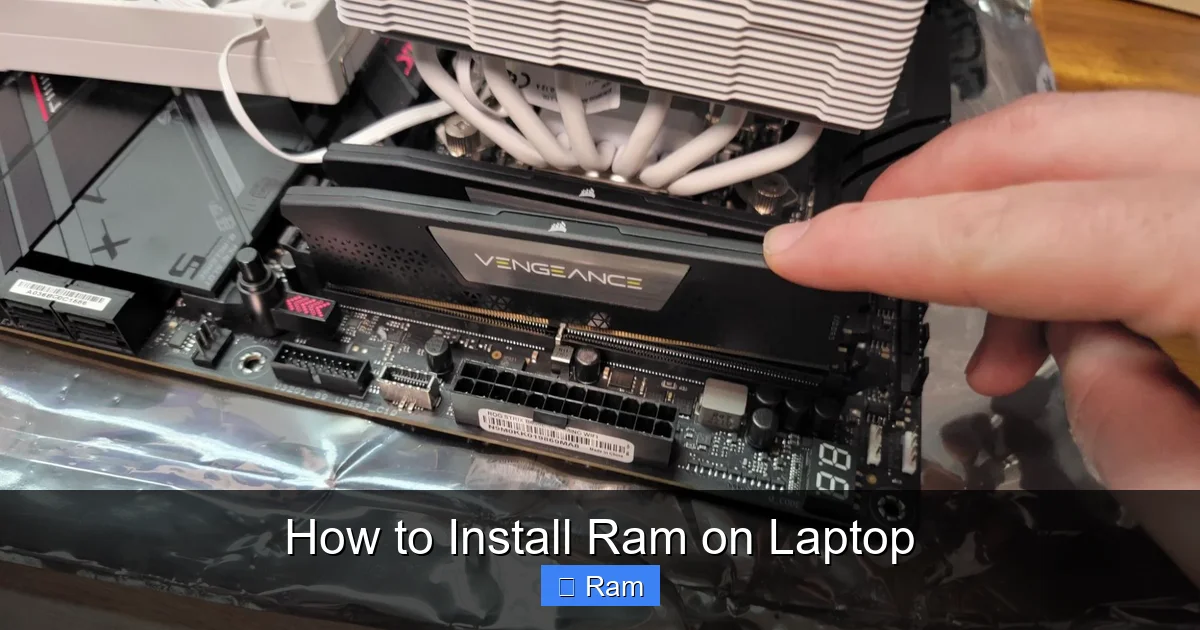
Visual guide about How to Install Ram on Laptop
Image source: robots.net
Locating the RAM Access Panel
Flip your laptop over. Look for a rectangular panel, often held down by one or two screws. It might be labeled with a memory symbol (a rectangle with a line on one side and two curved lines on the other). On some older or business-class laptops, you might need to remove the entire bottom cover. If you don’t see a dedicated RAM panel, you will likely need to remove the entire bottom case. Search online for “[Your Exact Laptop Model] RAM upgrade” or “[Your Exact Laptop Model] teardown” to find a video guide. This is the single best way to see exactly how your specific laptop opens.
The Unscrewing Protocol
Once you’ve located the panel:
- Power Down Completely: Shut down the laptop fully. Do not just put it to sleep or hibernate.
- Unplug Everything: Remove the AC adapter, any USB cables, docks, or external monitors.
- Remove the Battery (if user-removable): If your laptop has a removable bottom panel and a separate battery, remove it. This is a critical safety step.
- If the battery is internal: You must disconnect it after opening the case. Look for a battery connector on the motherboard and gently unplug it using a plastic tool. This step is mandatory for safety if the battery is not externally removable.
- Unscrew Carefully: Use the correct size screwdriver. Apply steady pressure. If a screw is stuck, don’t force it; try a gentle wiggle. Keep the screws in your container and note which hole they came from, as lengths can vary.
Prying Open the Case
With all screws removed, the panel may still be held by plastic clips. Starting at a corner, insert your plastic spudger and gently work your way around the edge, releasing the clips. You should hear a series of small snaps. Be patient and firm but never use excessive force. If it’s not coming loose, double-check for any missed screws. For laptops requiring full bottom removal, you often need to pry around the entire perimeter after removing all screws.
Phase 3: The Core Procedure – Installing the New RAM Module
This is the moment of truth. With the laptop open and the battery disconnected, you can see the RAM slots. They are long, narrow slots, typically parallel to each other, with small plastic retaining clips on either side.
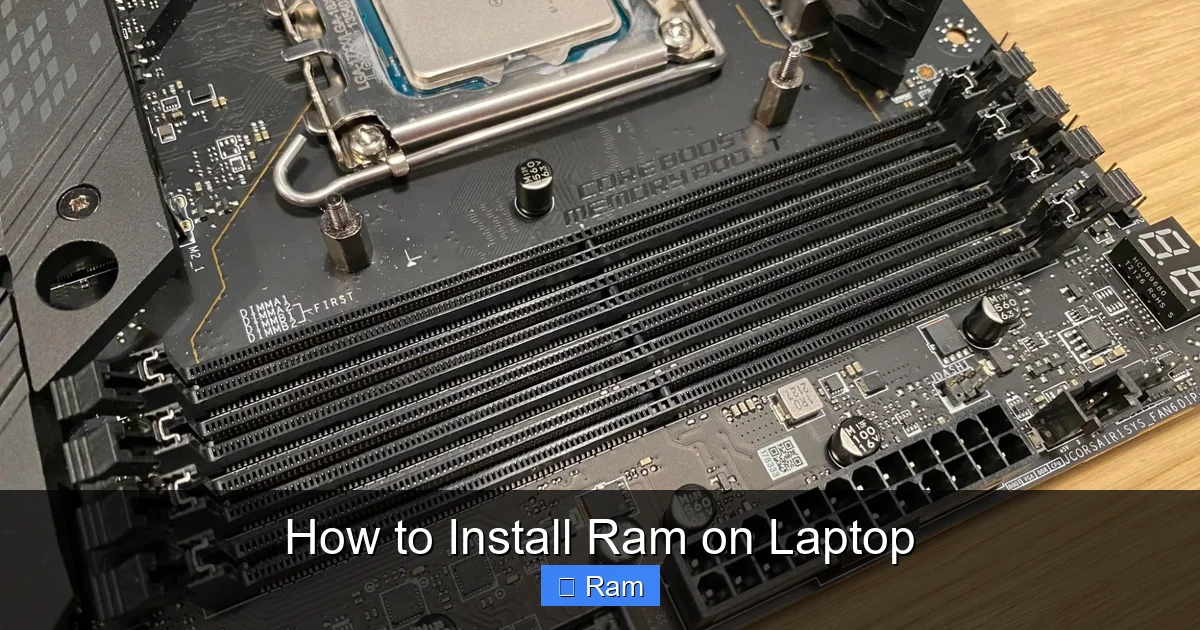
Visual guide about How to Install Ram on Laptop
Image source: cdn.mos.cms.futurecdn.net
Identifying Your RAM Slots and Existing Module
Locate the small SO-DIMM modules. They are held down by two tiny white or black plastic clips on each side. If a slot is empty, it will be completely vacant. If a slot is occupied, you will see a RAM stick lying flat, its gold contacts facing slightly outward at an angle, secured by the side clips. Note which slot is occupied if you are adding RAM, not replacing.
Removing the Old RAM (If Replacing)
To remove an existing module, you need to release the side clips. Gently, but firmly, push both clips outward (away from the module) with your fingertips or a plastic tool. You will feel them pop and the module will spring upward at about a 45-degree angle. Grasp the module by the edges and pull it straight out, keeping it parallel to the motherboard. Place it aside on an anti-static bag or its original packaging.
Installing the New RAM Module – The Critical Steps
This is where precision matters. Hold the new RAM module by the edges. Look at the notch on the bottom (the gold contact side). Align this notch with the raised key in the RAM slot. The module only fits one way. Do not force it.
- Insert at an Angle: Tilt the module to approximately a 45-degree angle and insert the gold contacts firmly but gently into the slot. Ensure all contacts are fully in the slot.
- Press Down Flat: While holding the module at the angle, press down on the top edge (the side with the chips) until the module lies flat and parallel to the motherboard. You will feel and hear a distinct click as the two side clips automatically snap back into place, locking the module securely. The clips should be holding the module firmly in the center of the slot. Do not manually close the clips; the pressure of pressing down does it for you.
- Verify the Lock: Gently try to wiggle the module side-to-side. It should have absolutely no movement. If it’s loose, the clips didn’t engage. You must remove it and try again.
Visual Confirmation: When properly installed, the module should be seated perfectly flat, with the clips gripping the small notches on the sides of the module. The gold contacts should be fully inserted, with no visible gap.
Phase 4: Closing Up and First Boot Verification
With the new RAM installed, it’s time to reverse the opening process and test your work.
Reassembling the Laptop
- Double-Check: Ensure nothing is loose inside the case. Verify no tools or extra screws are left behind. Confirm the RAM is locked in place.
- Reconnect the Battery (if disconnected): Carefully plug the battery connector back into its socket on the motherboard. Ensure it’s seated properly.
- Replace the Panel/Bottom Cover: Align the cover with the screw holes. Press down around the edges to re-engage all the plastic clips. You should feel it snap into place all around.
- Screw It Down: Replace all screws in their original holes. Do not overtighten; snug is sufficient. Overtightening can strip the plastic threads.
The Moment of Truth: Power On and Verify
- Initial Power On: Plug in the AC adapter and press the power button. The laptop should boot normally. Don’t be alarmed if it takes a little longer on the first boot; the system is initializing the new memory.
- Enter BIOS/UEFI (The Gold Standard Check): As soon as you press the power button, start tapping the key to enter your BIOS/UEFI. This is usually F2, F10, F12, Del, or Esc (the key is often shown on the splash screen). Once in the BIOS, navigate to the “System Information,” “Main,” or “Advanced” tab. Look for “Installed Memory,” “System Memory,” or “RAM.” It should now show your new total capacity (e.g., 16GB instead of 8GB). If it shows the correct amount, your hardware installation was successful. Exit the BIOS, usually by pressing F10 to save and exit.
- Check Within Your Operating System:
- Windows: Right-click the Start button > Task Manager > Performance tab > Memory. The top-right will show the total RAM (e.g., 16.0 GB).
- macOS: Apple menu > About This Mac. The “Memory” line will display the total.
If your OS shows the correct new total, congratulations! Your upgrade is complete and functional.
Troubleshooting: What to Do If the Laptop Won’t Boot or RAM Isn’t Detected
Even with careful work, issues can arise. Don’t panic; systematic troubleshooting will solve most problems.
Symptom: The Laptop Powers On But Shows No Display (Black Screen) or Beeps
This is the most common sign of a RAM-related issue.
- First, Power Cycle: Unplug the AC adapter and remove the internal battery again (if possible). Hold the power button down for 30 seconds to discharge any residual power. Reconnect the battery and AC adapter, and try booting again.
- Reseat the RAM: This is the fix 80% of the time. The module may not be fully inserted. Open the laptop again, remove the new RAM, and firmly reinstall it, ensuring it clicks into place. If you replaced an old stick, try reinstalling the old stick alone to see if the laptop boots. If it does, the new stick may be faulty or incompatible.
- Try Different Slots: If you have two slots, try installing the new RAM in the other slot. A faulty slot on the motherboard is possible but rare.
- Clean the Contacts: If you have an old module that you removed, gently wipe its gold contacts with a clean, dry, lint-free cloth or a pencil eraser. Do this carefully.
Symptom: The Laptop Boots But the OS Shows Less RAM Than Expected
- Check for 32-bit vs. 64-bit OS: A 32-bit operating system cannot use more than ~4GB of RAM. You must be running a 64-bit OS to use 8GB or more. In Windows, go to Settings > System > About. Under “System type,” it should say “64-bit operating system, x64-based processor.”
- Check for Hardware Reservation: Some of your RAM may be “reserved” for hardware (like your integrated graphics). This is normal and usually only a few hundred MB to 1-2GB. The “In use” amount in Task Manager will be higher than the “Available” amount.
- Memory Remapping in BIOS: Some older BIOSes have a setting called “Memory Remapping” or “Above 4G Decoding.” If your total RAM is not fully recognized, try enabling this in the BIOS. Also, ensure your BIOS is updated to the latest version from the manufacturer’s website.
When to Consider a Faulty Module
If you have reseated the RAM, tried different slots, and confirmed your OS is 64-bit, but the system still won’t recognize the full capacity or fails to boot, the new RAM module itself may be defective. Reputable vendors have return policies. Test with a known-good compatible module if possible, or contact the RAM manufacturer’s support.
When Not to DIY: Scenarios Requiring Professional Help
While installing RAM is a very accessible upgrade, some laptop designs make it impractical or impossible for a user to perform. Knowing these limits is part of being a responsible upgrader.
Soldered RAM: The Ultimate Limitation
Many modern ultrabooks, thin-and-lights, and some business laptops have the RAM chips soldered directly onto the motherboard. This is done to save space and increase structural rigidity. If your laptop has soldered RAM, you cannot upgrade it. The only way to increase RAM in these systems is to replace the entire motherboard, which is not cost-effective. Use the system scanner tools mentioned earlier; they will tell you if all slots are occupied or if the RAM is non-upgradable.
Sealed, Glued, or Complex Chassis
Some laptops (notably many Apple MacBooks and certain Windows ultraportables) have bottoms that are glued shut or require the removal of dozens of screws and complex disassembly of other components (like the keyboard or cooling system) to reach the RAM. In these cases, the risk of damaging delicate ribbon cables, breaking plastic clips, or improperly reassembling the device is high. The time and stress often outweigh the cost savings of a DIY upgrade. If you are not experienced with intricate electronics repair, seek a professional for these models.
Laptop is Under Warranty
Opening your laptop will almost certainly void the manufacturer’s warranty. If your device is still covered and you are experiencing performance issues, your first call should be to the manufacturer’s support. They may offer a warranty upgrade or repair. Only proceed with a DIY upgrade if you are willing to forfeit the remaining warranty coverage.
Conclusion: Enjoy Your Faster, More Capable Laptop
Congratulations! By following this guide, you have successfully navigated the process of how to install RAM on a laptop. You’ve moved from uncertainty to action, verifying compatibility, preparing your tools, safely accessing the internals, precisely installing the new memory module, and confirming a successful boot. This single upgrade can transform your daily computing experience, eliminating frustrating slowdowns and making your trusted laptop feel years younger.
Remember the core principles that made this possible: thorough research, meticulous safety precautions (especially regarding power and static), and a calm, patient approach during the physical installation. The skills you’ve learned here—identifying components, handling sensitive electronics, and methodical troubleshooting—are valuable and transferable to many other simple laptop upgrades, like replacing a storage drive or cleaning dust from the fans.
Your laptop is now more powerful. Use it to its full potential! Open those dozens of browser tabs, dive into that creative project without lag, and enjoy the smooth, responsive performance you’ve earned through your own handiwork. You’ve not only saved money but also gained a deeper understanding and connection to the machine you use every day.
Frequently Asked Questions
Can I install RAM in any laptop?
No. Many modern laptops, especially ultra-thin models and all Apple MacBooks with non-Pro branding, have their RAM soldered to the motherboard, which makes it impossible to upgrade. Always verify your specific model’s upgradability using a system scanner tool or the manufacturer’s specifications before purchasing RAM.
Can I mix different RAM sizes, brands, or speeds?
Technically, you can often mix different sizes and speeds, and the system will run all modules at the speed of the slowest one. However, for optimal performance and stability, especially in dual-channel mode, it is highly recommended to use identical modules (same size, speed, brand, and timings). Mixing can sometimes cause boot issues or prevent the system from recognizing the full capacity.
Is static electricity really a danger when installing RAM?
Yes. Electrostatic discharge (ESD) can damage sensitive electronic components like RAM chips, often without visible signs. The damage might cause immediate failure or lead to intermittent problems later. Always ground yourself by touching the laptop’s metal chassis before touching components, or use an inexpensive anti-static wrist strap clipped to the chassis.
Will more RAM fix a slow laptop?
It depends on the cause of the slowness. If your system consistently uses 80%+ of its RAM (check Task Manager), then adding more will have a dramatic positive effect. However, if the bottleneck is an old, slow hard drive (HDD) or an underpowered processor, a RAM upgrade will provide little to no noticeable improvement. An SSD upgrade is often a more impactful fix for HDD-based systems.
Do I need to update my BIOS after installing new RAM?
Not usually. A modern BIOS should automatically detect and configure new RAM. However, if you are installing a very high-capacity or high-speed module (e.g., 32GB sticks at 3200MHz), checking for a BIOS update from your laptop manufacturer’s support site is a good idea. Updates sometimes add support for newer memory technologies and capacities.
How much RAM do I actually need in 2024?
For general use (web browsing, office apps, streaming), 8GB is the absolute minimum, but 16GB is the new sweet spot for smooth multitasking and future-proofing. For content creation (video editing, 3D work), engineering software, or heavy gaming, 32GB or more is recommended. Consider your specific software requirements and budget.