How to Replace Ram in Laptop
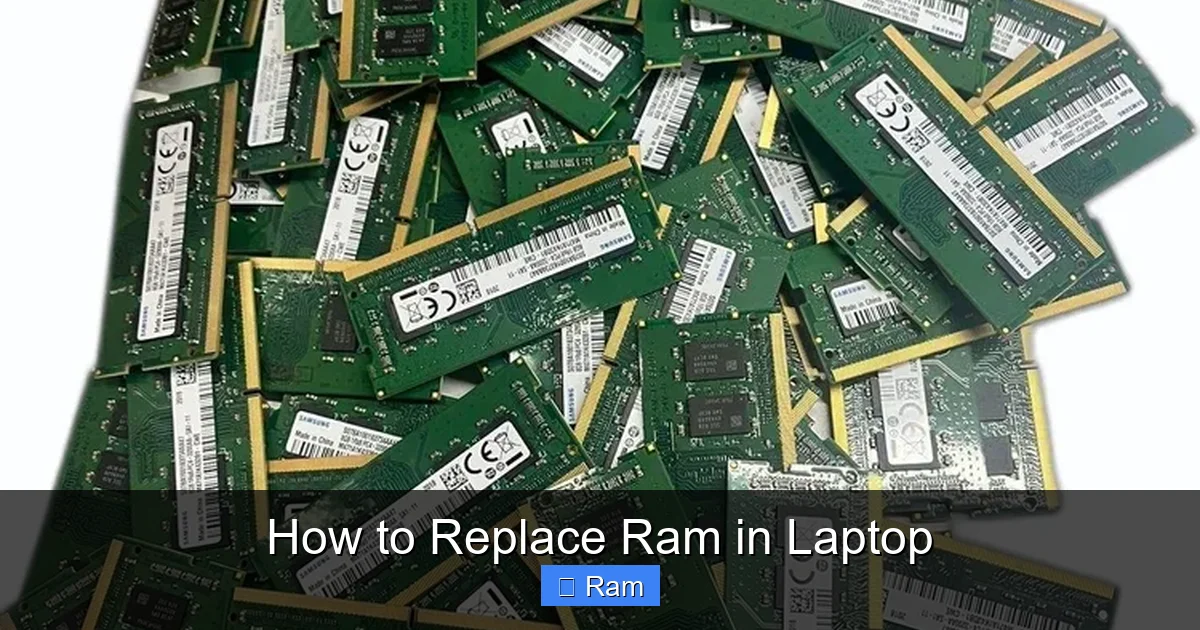
Replacing the RAM in your laptop is one of the simplest and most effective upgrades you can perform to breathe new life into a sluggish machine. This guide walks you through every step, from identifying the correct memory type to safely installing it. You’ll learn how to check compatibility, gather the right tools, and execute the physical swap without damaging your device. By the end, you’ll have the confidence to increase your laptop’s multitasking capability and overall responsiveness, often for a very low cost.
Key Takeaways
- Compatibility is King: Never assume. You must identify your laptop’s exact model and check its supported RAM type (DDR3, DDR4, DDR5), speed, and maximum capacity using tools or manufacturer specs.
- Safety First: Always power down completely, unplug the charger, and remove the battery if possible. Discharge static electricity by touching a grounded metal object or using an anti-static wrist strap.
- Access Varies Widely: Some laptops have a simple bottom panel for easy access, while others require complete disassembly. Research your specific model’s teardown process before starting.
- Handle Modules Gently: RAM sticks are fragile. Hold them by the edges, avoid touching the gold contacts, and ensure they are seated correctly and firmly in the slot until the clips snap into place.
- Verify After Installation: Boot your laptop and enter the BIOS/UEFI or check system information in your OS to confirm the new RAM is recognized and operating at the correct speed.
- Know When Not To: If your laptop has the RAM soldered directly to the motherboard, an upgrade is impossible. Also, very old systems may not see a dramatic benefit from more RAM if the CPU is the bottleneck.
📑 Table of Contents
- Why Upgrade Your Laptop’s RAM?
- Phase 1: The Detective Work – Identifying Compatible RAM
- Phase 2: Gathering Tools and Preparing Your Workspace
- Phase 3: The Step-by-Step Disassembly and Installation
- Phase 4: Verification and Troubleshooting
- Phase 5: Special Cases and Advanced Considerations
- Conclusion: Enjoy Your Faster Laptop
Why Upgrade Your Laptop’s RAM?
Have you ever sat watching the spinning wheel of death on your laptop, waiting for a simple web browser with a few tabs open to respond? Or maybe you’ve tried to edit a photo while a document is open and your machine just…stalls. Before you consider buying a whole new computer, there’s a powerful, affordable, and often overlooked solution: upgrading your Random Access Memory (RAM).
RAM is your laptop’s short-term workspace. When you open an application or a file, your system copies the necessary data from the slower, long-term storage drive (HDD or SSD) into the RAM. The CPU can then access this data in the RAM incredibly quickly. More RAM means a larger workspace. This allows your laptop to keep more applications and files active simultaneously without constantly swapping data back to the storage drive—a process that drastically slows everything down. If you regularly run multiple programs, work with large files (like photos, videos, or complex spreadsheets), or feel general sluggishness during everyday tasks, adding RAM is frequently the most cost-effective performance boost you can make.
The best part? For many laptop models, replacing the RAM is a DIY project you can comfortably complete in under 30 minutes with just a few basic tools. You don’t need to be a tech wizard. This guide will hold your hand through the entire process, from the initial detective work to the final verification, ensuring you upgrade your laptop safely and successfully.
Phase 1: The Detective Work – Identifying Compatible RAM
Rushing to buy new RAM is the number one mistake beginners make. Installing the wrong type can result in the laptop not booting, the RAM not being recognized, or even system instability. This phase is all about gathering precise intelligence about your laptop.
Visual guide about How to Replace Ram in Laptop
Image source: 5.imimg.com
Step 1: Identify Your Laptop’s Exact Model
This is your most critical piece of information. The model number is usually found on a sticker on the bottom of the laptop, often in a format like “Dell XPS 13 9310” or “HP Pavilion 15-ek1nn”. You can also find it within your operating system:
- Windows: Press Windows key + R, type msinfo32, and hit Enter. Look for “System Model” in the System Summary.
- macOS: Click the Apple menu > About This Mac. The model year and name are displayed.
Write this exact model number down. You will use it for all subsequent searches.
Step 2: Determine Your Current RAM Configuration
You need to know what’s already inside. How many slots does your laptop have? Are they occupied? What is the type (DDR3, DDR4, DDR5) and speed (e.g., 2666MHz, 3200MHz) of the existing modules?
- Using Windows Task Manager (Easiest): Press Ctrl+Shift+Esc to open Task Manager. Go to the Performance tab and click on Memory. Here you’ll see the total amount, the speed (e.g., 3200 MHz), and the form factor (usually SODIMM for laptops). It also shows the number of “Hardware Reserved” slots, which hints at used slots.
- Using a System Information Tool: Free tools like CPU-Z (from cpuid.com) are fantastic. Install and run it, then go to the Memory tab and the SPD tab. The SPD tab lists each memory slot individually, showing the type, size, speed, and manufacturer of the module installed in that slot. This is the gold standard for seeing slot usage.
Step 3: Research Official and Community Specifications
With your model number, go to the manufacturer’s support website (e.g., Dell Support, HP Customer Support). Look for the “Specifications” or “Technical Specifications” sheet for your exact model. Find the section on memory. It will list:
- Memory type (e.g., DDR4 SODIMM)
- Number of slots
- Maximum supported RAM (e.g., 32GB, 64GB)
- Speeds supported
Pro Tip: Also search for your laptop model + “RAM upgrade” or “teardown” on YouTube and forums like Reddit’s r/laptop. Seeing a video of someone else open your exact model is invaluable. You’ll learn about hidden screws, tricky clips, and whether the RAM is easily accessible under a bottom panel or buried under the keyboard or motherboard.
Step 4: Purchase the Correct RAM
Armed with the knowledge of type (DDR4/DDR5), speed (e.g., 3200MHz), and maximum capacity, you can shop. For best results and stability, especially in dual-channel mode (where two identical sticks work together), it’s recommended to buy a matched kit (e.g., a 2x8GB kit) from a reputable brand like Crucial, Kingston, Corsair, or G.Skill. These kits are tested to work together. If you’re adding to an existing stick, try to match the speed, timings, and brand as closely as possible, though modern systems are often more forgiving. Always buy from a retailer with a good return policy in case of incompatibility.
Phase 2: Gathering Tools and Preparing Your Workspace
Now that you have the right RAM, it’s time to prepare for the physical installation. A clean, organized workspace prevents lost screws and static damage.
Visual guide about How to Replace Ram in Laptop
Image source: itarian.com
Essential Tools
- Small Phillips Head Screwdriver (#0 or #1): This is your primary tool. The size varies by laptop, so having a set of precision screwdrivers is best.
- Plastic Spudger or Guitar Pick: For prying open plastic clips without scratching the chassis. A old credit card can work in a pinch.
- Anti-static Wrist Strap (Highly Recommended): This grounds you to the laptop chassis, preventing static electricity from frying sensitive components. Clip it to a grounded metal part of the laptop or a grounded outlet. If you don’t have one, frequently touch the bare metal of the laptop’s port or chassis to discharge static.
- Small Container or Magnetic Mat: To keep screws organized and prevent them from rolling away. Laptop screws are tiny and easy to lose.
- Tweezers (Optional): Helpful for retrieving dropped screws or manipulating small clips.
The Preparation Ritual
This step cannot be skipped. Static electricity is the silent killer of electronics.
- Power Down Completely: Shut down your laptop fully. Do not just put it to sleep or hibernate.
- Unplug Everything: Remove the charger, any USB devices, SD cards, and peripherals.
- Remove the Battery (If Removable): This is a critical safety step for older laptops. Flip the laptop over, locate the battery release latch, and remove the battery. For modern laptops with sealed batteries, this step is often not possible, making the next step even more important.
- Discharge Static: Put on your anti-static wrist strap. If you don’t have one, turn off all lights to reduce static, and frequently touch the metal cylinder of your charger plug (the part that goes into the wall) or another grounded metal object. Rub your hands on a cotton cloth to discharge static before handling components.
- Clean Your Workspace: Ensure your desk or table is clean, flat, and well-lit. A large, clean towel can provide a soft, non-scratch surface to place the laptop on.
Phase 3: The Step-by-Step Disassembly and Installation
Now, the moment of truth. The process varies drastically by model, so always defer to the specific guide you found in Phase 1. Below is the general workflow for the most common type: laptops with a bottom access panel.

Visual guide about How to Replace Ram in Laptop
Image source: itarian.com
Step 1: Remove the Bottom Cover
Flip the laptop over. You’ll see a series of screws, often with tiny icons next to them (like a keyboard or drive icon) indicating what they secure. Important: Some screws have different lengths. Note where each one came from or, better yet, use your small container to sort them by location. Start by removing all the screws that secure the bottom panel. Some may be hidden under rubber feet or stickers—be careful prying these up.
Once all screws are out, use your plastic spudger to gently pry around the seam of the bottom cover. Start at a corner and work your way around. Most modern laptops use plastic clips. You should hear a series of soft clicks as they release. Be patient and firm, but not violent. If a section resists, check for a missed screw. Once all clips are free, the bottom panel should lift off. Be mindful of any ribbon cables (very thin, flat cables) that might connect the bottom panel (often for Wi-Fi or a keyboard backlight) to the motherboard. If you see one, gently disconnect it by pulling the plastic tab on the connector, not the cable itself.
Step 2: Locate the RAM Slots
With the bottom panel off, you have a view of the laptop’s internals. The RAM slots are typically easy to spot: they are small, green or black circuit boards (the RAM modules themselves) held down on either side by small, white plastic clips. They are usually near the center or one side of the motherboard, often next to the Wi-Fi card. If you have two slots, one or both may be occupied by existing RAM sticks.
Step 3: Remove Existing RAM (If Upgrading/Replacing)
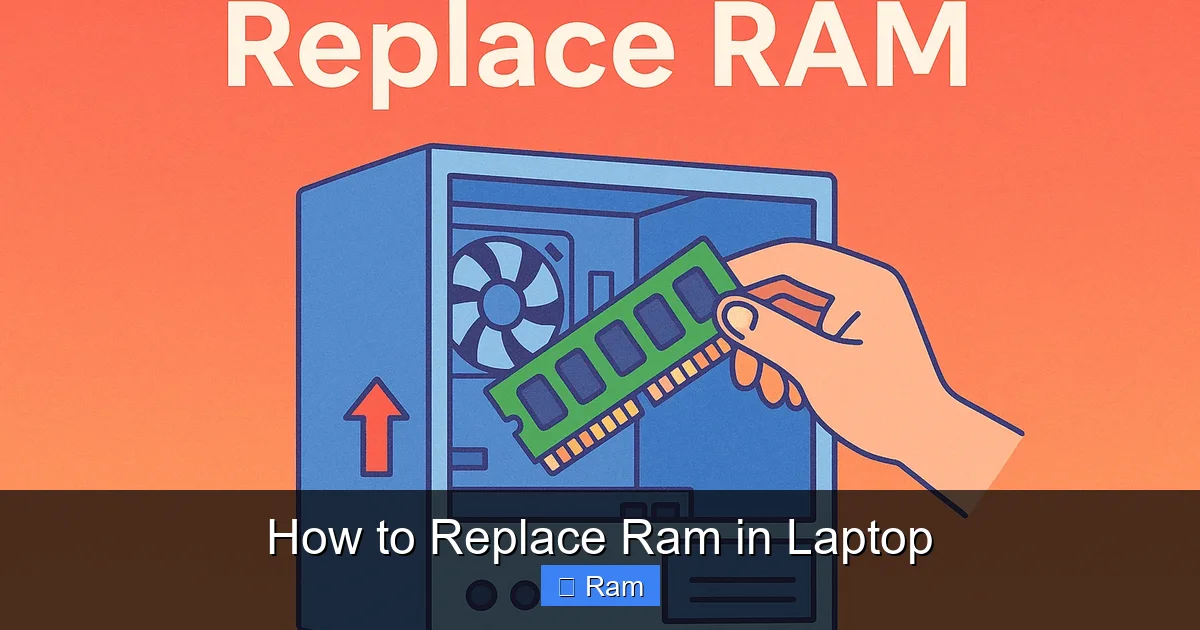
To release a RAM module, you need to gently push the two securing clips on either side outward (away from the module). They should pivot and pop up slightly. This action automatically ejects the module at an angle (usually about 30-45 degrees). Gently pull the module out by its edges, holding it by the sides. Place it somewhere safe if you plan to reuse or sell it. Avoid touching the gold contact edges.
Step 4: Install the New RAM
This is the reverse process, and it’s just as simple.
- Align the Notch: Look at your new RAM module. It has a key—a small, off-center notch in the gold contacts. Look at the slot in the laptop. It has a corresponding raised block. The notch on the RAM must align with this block. You cannot force it. If it doesn’t line up one way, flip the module over.
- Insert at an Angle: Hold the module by the edges. Align the notch and gently insert the contacts into the slot at the same 30-45 degree angle the old module came out at. Push firmly and evenly on the top edge until the module is seated deeply in the slot. You should feel it click into place.
- Seat the Module: Now, press down on the top edge of the module (the side with the chips) until it lies flat, parallel to the motherboard. You will hear (and feel) a distinct click as the two side clips automatically snap back into their locked position, holding the module securely. Ensure it is flat and the clips are fully engaged. Do not force it; if it resists, it’s likely not aligned correctly.
If you have a second slot and are adding a second stick, repeat this process for that slot. For optimal dual-channel performance, if you have two slots and are installing two sticks, install them in the recommended slots (usually slot A and B, or 1 and 3 on some boards—check your manual if possible, but often any two populated slots will work).
Step 5: Reassemble and Power On
Before putting the bottom panel back on, do a quick visual check. Ensure no tools or loose screws are left inside. The RAM should be lying flat, clipped in securely.
- Reconnect any ribbon cables you may have disconnected from the bottom panel.
- Place the bottom panel back on, aligning all the clip points. Press firmly around the edges until you hear all the plastic clips snap back into place.
- Reinsert all the screws, using your notes to put the correct length screw in each hole. Do not overtighten; snug is sufficient.
- If you removed the battery, reinstall it now.
- Plug in the charger and power on your laptop.
Phase 4: Verification and Troubleshooting
Your laptop powers on—great! But is the new RAM actually working? Let’s verify.
How to Confirm Your RAM is Recognized
- BIOS/UEFI Check: As the laptop boots, repeatedly press the key to enter setup (common keys: F2, F10, F12, Del, Esc—your laptop’s splash screen often shows it). Once in the BIOS/UEFI, navigate to the “System Information,” “Main,” or “Advanced” tab. You should see the total memory listed. It should match the sum of your installed sticks (e.g., 16GB).
- Windows Task Manager: As before, press Ctrl+Shift+Esc > Performance > Memory. The top-right will show the total installed RAM. It should also show the speed (e.g., 3200 MHz). If the speed is lower than your RAM’s rated speed (like showing 2666MHz for a 3200MHz stick), don’t panic. Many laptops run RAM at a default JEDEC speed. You may need to enable an XMP/EXPO profile in the BIOS to achieve the rated speed, but not all consumer laptops support this.
- CPU-Z: Run CPU-Z again and go to the Memory and SPD tabs. The Memory tab shows the total and channel count (should be “Dual” if you have two sticks). The SPD tab will list each stick’s details, confirming type, size, and speed for each slot.
Common Troubleshooting Scenarios
If your laptop doesn’t boot, beeps, or shows less RAM than expected:
- No Power/Beeps: The most common cause is improperly seated RAM. Power down, unplug, and open the case again. Remove the module, blow gently into the slot to dislodge any dust, reinsert the module firmly, ensuring the clips lock. Try booting with one stick at a time in each slot to isolate a bad stick or bad slot.
- RAM Speed Lower Than Expected: Check your BIOS for memory settings. Look for profiles like “XMP,” “DOCP,” or “EXPO” and enable them. If the option isn’t there, your laptop may simply be running the RAM at its base speed, which is normal and stable.
- System Instability/Crashes: This can happen with incompatible RAM or a faulty module. Ensure you bought the correct type. Run a memory test. Windows has a built-in “Windows Memory Diagnostic” (search for it in the Start menu). For a more thorough test, use MemTest86 (create a bootable USB). If errors appear, the RAM is likely defective or incompatible.
- Laptop Won’t Power On At All: Double-check that you didn’t accidentally unseat a critical cable, like the one connecting the battery or the display. Re-seat all main cables you might have touched. Ensure the battery is properly reconnected if removable.
Phase 5: Special Cases and Advanced Considerations
Not all laptops are created equal. Here’s what to do for trickier scenarios.
The Keyboard Removal
On many ultrabooks (like some Lenovo ThinkPads, Dell XPS 13, HP Spectre x360), the RAM is located under the keyboard. This is a more involved process. You must remove the entire keyboard deck. This usually involves removing screws from the bottom that secure the keyboard frame, and then carefully prying the keyboard up from the top edge (near the screen) using a plastic tool. The keyboard is connected by a delicate ribbon cable underneath. You must disconnect this cable by releasing the plastic connector latch before lifting the keyboard away. This is not for beginners. If you must do this, find a high-quality video guide for your exact model. The risk of damaging the keyboard or its ribbon cable is high.
The Soldered RAM Scenario
Unfortunately, this is becoming the norm for modern, thin-and-light laptops. In these machines, the RAM chips are soldered directly onto the motherboard during manufacturing. There are no slots. You cannot upgrade the RAM yourself. The only way to get more RAM is to replace the entire motherboard, which is cost-prohibitive and often incompatible. Before you buy a laptop with the intent to upgrade RAM, always research if its RAM is soldered or slot-based. The system information tools mentioned earlier will sometimes say “SODIMM” for slots or show a specific chip size for soldered, but a web search is definitive.
Mixing RAM Sizes and Brands
Can you add a 16GB stick to an existing 8GB stick? Technically, yes. The system will run in “flex mode” or “asymmetric dual-channel,” where the first portion of both sticks (up to the size of the smaller stick) runs in dual-channel (faster), and the remainder of the larger stick runs in single-channel. The performance difference is often negligible in real-world use. The bigger risk is instability. If you mix different speeds, the system will run all RAM at the speed of the slowest stick. Mixing different timings can sometimes cause issues. For the most stable experience, especially in a work machine, matching pairs are best. For a casual upgrade, mixing is usually fine.
Conclusion: Enjoy Your Faster Laptop
Congratulations! If you’ve followed this guide, you have successfully replaced the RAM in your laptop. You’ve taken a proactive step to extend the useful life of your trusted companion, saved money compared to buying a new machine, and gained a valuable skill. The feeling of reviving a once-sluggish computer into a responsive, multitasking powerhouse is incredibly satisfying.
Remember the core principles: research meticulously, prepare your workspace with static safety in mind, work slowly and methodically, and verify your results. That old laptop you were ready to discard might just have a new lease on life. Now, go open those dozens of browser tabs, launch your creative apps with abandon, and enjoy the smooth performance you’ve earned with your own two hands.
Frequently Asked Questions
Can I upgrade the RAM on any laptop?
No. You can only upgrade if your laptop model has accessible RAM slots (SODIMM). Many modern ultrabooks have the RAM soldered to the motherboard, making upgrades impossible. Always check your specific model’s specifications before purchasing RAM.
Is it safe to replace laptop RAM myself?
Yes, it is very safe if you follow proper procedures. The key risks are static electricity damage and physical damage from forcing components. By powering down completely, using an anti-static strap, handling modules by the edges, and ensuring correct seating, you eliminate these risks.
How do I know if my laptop needs more RAM?
Signs include constant hard drive activity (you hear it clicking/whirring) when switching between apps, programs loading very slowly, the system becoming unresponsive with multiple applications open, and seeing high memory usage (90%+) in Task Manager’s Performance tab.
Can I mix different brands or sizes of RAM?
You can mix different sizes and brands, and the system will usually work. However, for optimal stability and performance, especially in dual-channel mode, it’s best to use identical sticks (same brand, model, size, and speed). Mixing may cause the system to run at the speed of the slowest module.
What’s the maximum RAM my laptop can support?
This limit is set by the laptop’s motherboard and chipset, not the operating system. You must find your exact laptop model and check the manufacturer’s official specifications. A 64-bit OS like Windows 10/11 can theoretically support terabytes of RAM, but your laptop’s hardware will have a much lower cap, often 16GB, 32GB, or 64GB.
Will adding RAM make my laptop faster for gaming?
It can, but only if low RAM is your current bottleneck. If your laptop already has enough RAM for your games (often 8GB minimum, 16GB recommended), adding more will have little to no effect on frame rates. The primary benefit of a RAM upgrade is improved multitasking and smoother performance in memory-intensive applications like video editing, virtual machines, and having many browser tabs open.