Add Laptop Ddr 4 Ram to Desktop
Physically and electrically, laptop DDR4 RAM (SO-DIMM) is incompatible with standard desktop RAM (DIMM) slots. While specialized adapters exist to bridge this gap, they introduce potential stability and performance issues. For reliable, optimal performance, purchasing desktop-specific DDR4 DIMM modules is almost always the superior recommendation. This guide details the technical barriers, adapter workarounds, and crucial factors to consider before attempting to add laptop DDR4 RAM to a desktop PC.
So you’ve upgraded your laptop, and now you have a spare 8GB or 16GB stick of perfectly good DDR4 RAM sitting in a drawer. A perfectly reasonable question pops up: “Can I just add this laptop DDR4 RAM to my desktop PC to give it a boost?” It sounds logical—it’s the same generation, same DDR4 standard, right? Unfortunately, the world of computer memory isn’t that simple. While the underlying DRAM chips might be similar, the way they’re packaged and interfaced with the system is fundamentally different. This article will dive deep into the technical realities, practical workarounds, and sound advice on what to do with that extra laptop memory.
Key Takeaways
- Form Factor Incompatibility: Laptop DDR4 RAM uses a smaller SO-DIMM form factor with fewer pins (260) and a different notch position than desktop DDR4 DIMM (288 pins), making direct insertion impossible.
- Electrical & Signal Differences: Beyond physical size, subtle differences in signal routing, power delivery, and SPD (Serial Presence Detect) data can cause boot failures or instability even with an adapter.
- Adapters are a Compromise: SO-DIMM-to-DIMM adapter boards exist but add another layer of potential failure, often lack support for higher speeds, and may not work with all motherboard-chipset combinations.
- Performance is Not Guaranteed: Even if the system boots, you may face reduced maximum supported speeds, higher latencies, or system crashes under load, negating any cost savings.
- Check Motherboard Support First: Your desktop motherboard’s Qualified Vendor List (QVL) only lists tested DIMM modules. SO-DIMM, even via adapter, will never be on this list, removing official support.
- Practical Alternative: The most reliable and often cost-effective path is to sell the laptop SO-DIMM sticks and purchase used or new desktop DDR4 DIMMs guaranteed for your platform.
- Niche Use Cases Only: Adapter use might be justified only for temporary testing, repurposing an old mini-PC with SO-DIMM slots, or extreme budget constraints with compatible, low-speed modules.
📑 Table of Contents
- Understanding the Physical and Electrical Divide: SO-DIMM vs. DIMM
- Compatibility Check: Is Your Desktop Even a Candidate?
- Adapter Solutions: The Bridge That’s Often Shaky
- Step-by-Step Guide to the Risky Attempt
- Performance and Stability: The Real-World Reality Check
- Alternatives and The Smart Recommendation
Understanding the Physical and Electrical Divide: SO-DIMM vs. DIMM
Before we even talk about adding laptop DDR4 RAM to a desktop, we must understand that we’re dealing with two entirely different physical products designed for distinct ecosystems. The core memory technology (DDR4) is the same, but the packaging—the module itself—is not.
SO-DIMM vs. DIMM: Form Factor Breakdown
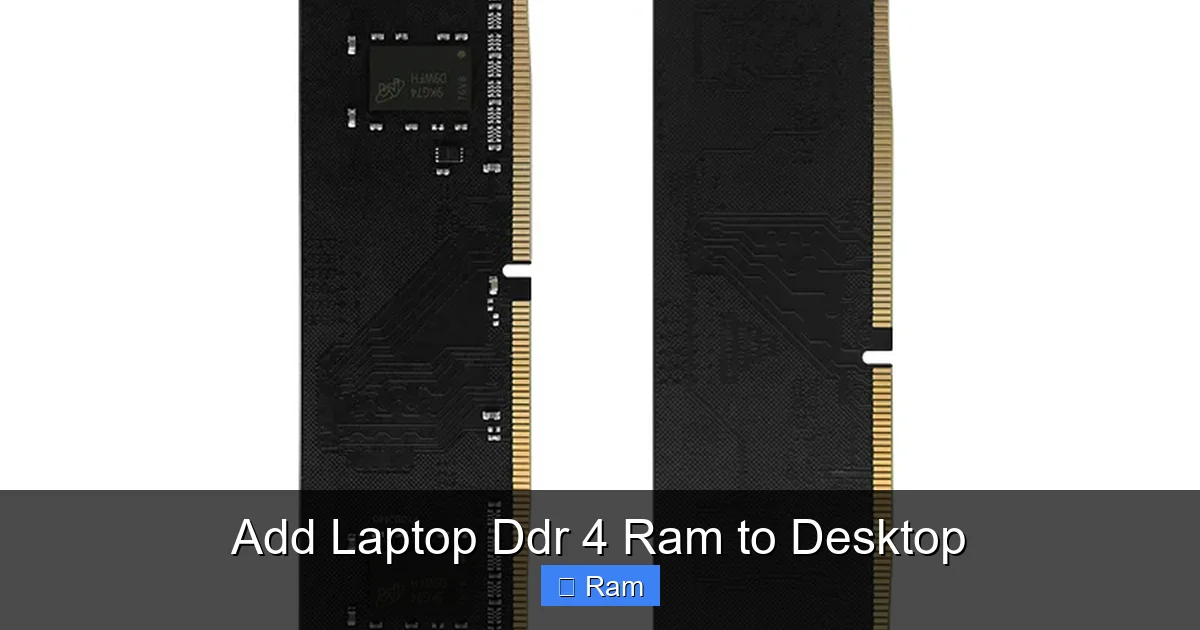
A standard desktop DDR4 module is a DIMM (Dual In-Line Memory Module). It’s roughly 133mm long, with 288 gold-plated contact pins (the “fingers”) along the bottom edge. It has two notches on the bottom to prevent incorrect insertion and is held in the slot by two side clips.
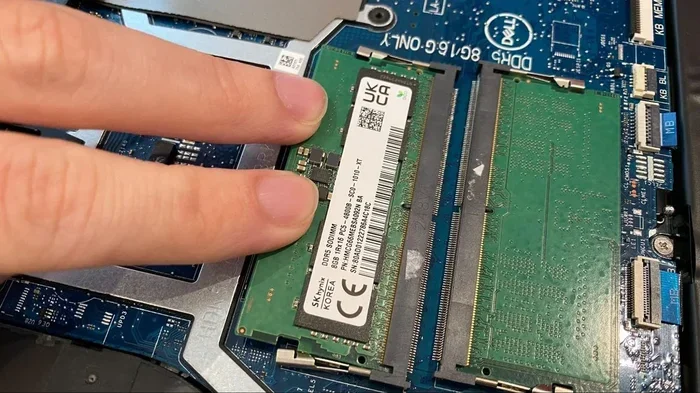
A laptop DDR4 module is an SO-DIMM (Small Outline DIMM). It’s significantly smaller, about 69mm long, with only 260 pins. The notch is in a different position relative to the pins. This physical difference is the first and most obvious barrier. You simply cannot plug a 260-pin SO-DIMM stick into a 288-pin DIMM slot on a desktop motherboard. The pins won’t align, the notches won’t match, and the module is too short.
Pin Configuration and Signal Routing
The pin count difference isn’t arbitrary. The 288-pin DIMM provides more physical pathways (signals) for power, ground, and data. The smaller SO-DIMM consolidates and routes these signals differently. Key power pins (like VDD and VDDQ) and command/address signals are assigned to different physical pins on the SO-DIMM compared to a DIMM. Even if you could physically connect the pins with an adapter, the motherboard’s memory controller expects signals on specific pins. If an adapter misroutes these, the system will not recognize the RAM or will fail to boot.
Voltage and Timing: Subtle but Critical Differences
Both DDR4 SO-DIMM and DIMM typically operate at 1.2V. However, there can be differences in supported low-power states (like DDR4L’s 1.05V) and, more importantly, in the SPD (Serial Presence Detect) chip data. The SPD is a tiny EEPROM on the RAM module that tells the motherboard its size, speed, timings, and manufacturer. Motherboard BIOSes are programmed to interpret SPD data from standard DIMMs. The data format on an SO-DIMM’s SPD is identical in standard, but some motherboard BIOSes may have quirks in how they parse this data from an unexpected form factor, leading to misconfiguration.
Compatibility Check: Is Your Desktop Even a Candidate?
Assuming you’re aware of the physical barrier and are considering an adapter, the first real step is a deep dive into your desktop’s specifications. Not all desktops are created equal in this context.

Visual guide about Add Laptop Ddr 4 Ram to Desktop
Image source: 5.imimg.com
Motherboard Support and BIOS Lockdown
Your desktop motherboard’s manual and specifications page are your primary resources. Look for the memory section. It will explicitly state support for “DDR4 DIMM” modules. It will list supported speeds (e.g., DDR4-2133, 2666, 3200), maximum capacity per slot, and total capacity. Crucially, it will have a Qualified Vendor List (QVL). This is a list of specific RAM modules (make, model, size, speed) that the manufacturer has tested and certified to work reliably. You will not find a single SO-DIMM module on a desktop motherboard’s QVL. This means the manufacturer has not tested, and does not guarantee, that such a configuration will work. You are entering unsupported territory.
Some very specific, small-form-factor desktops (like certain Intel NUC models or compact business PCs from HP/Dell) actually use SO-DIMM slots natively because they are built on laptop-class motherboards. If your “desktop” is one of these, then your laptop RAM will likely work perfectly. But for a standard ATX or micro-ATX tower, you are dealing with DIMM slots.
Checking Existing RAM Specifications
Use a tool like CPU-Z (freeware) on your working desktop to check your current RAM’s specifications. Note the type (DDR4), speed (e.g., 3200MHz), and timings (e.g., 16-18-18-38). If you are attempting to mix the laptop SO-DIMM (via adapter) with existing desktop DIMMs, they should ideally match in speed and timings to avoid the system defaulting to the lowest common denominator or causing instability. Mismatched RAM can force the memory controller to run in a more conservative “asynchronous” mode, hurting performance.
Adapter Solutions: The Bridge That’s Often Shaky
This is where the “how” comes in. The market does produce passive adapter boards designed to accept an SO-DIMM module on one side and plug into a standard DIMM slot on the other. They are essentially a small PCB that re-arranges the pin layout. Brands like “ODRIX” or generic no-name brands on Amazon and eBay are common. However, their existence does not equate to a good idea.

Visual guide about Add Laptop Ddr 4 Ram to Desktop
Image source: st1.tkcomputer.vn
How SO-DIMM-to-DIMM Adapters Work (And Their Limitations)
A passive adapter is just a piece of fiberglass with copper traces. It has no active electronics. Its sole job is to map pin A on the SO-DIMM socket to pin B on the DIMM connector. A well-manufactured adapter can do this correctly for the majority of power and ground pins and critical signal pins. However, the density of the pins and the complexity of the DDR4 signal set (which includes data lines, command/address lines, clocks, and chip selects) means there is little margin for error. A slight misalignment in the trace routing can corrupt signals at high frequencies.
Furthermore, these adapters add physical height to the RAM module. In a desktop case with a large CPU cooler, you must ensure the adapter + SO-DIMM stack doesn’t collide with the cooler or other components.
Top Adapter Brands and What to Look For
If you are determined to try, look for adapters from brands with some reputation in the PC modding or niche component space. Read user reviews meticulously, specifically looking for reviews that mention your specific motherboard chipset (e.g., Intel Z690, AMD B550). Avoid the absolute cheapest, no-brand adapters; poor soldering and trace quality are common failure points. Some higher-end adapters might include a small voltage regulator module (VRM) to help with power delivery, but these are rare and more expensive.
Installation Tips for Adapters
If you purchase an adapter, handle it with extreme care. The SO-DIMM module clicks into the adapter’s socket. Ensure it’s fully seated and the side clips are locked. Then, treat the adapter+SO-DIMM combo as a single, fragile DIMM module. Align it carefully with the desktop DIMM slot, noting the key (notch) position, and press firmly and evenly on the top edge until the side clips snap into place. Apply no bending force to the assembly.
Step-by-Step Guide to the Risky Attempt
Let’s say you’ve checked your motherboard, bought an adapter, and decided to proceed. Here is a cautious, methodical approach.

Visual guide about Add Laptop Ddr 4 Ram to Desktop
Image source: pcstudio.in
Tools and Precautions
You will need: the SO-DIMM RAM, the adapter, a Phillips-head screwdriver to open your PC case, and your motherboard manual. Most importantly, you need an anti-static wrist strap or must frequently touch the bare metal of your PC case to discharge static electricity. RAM modules are sensitive to electrostatic discharge (ESD). Work on a non-carpeted floor if possible.
The Physical Installation Process
- Power Down and Unplug: Shut down your PC completely. Flip the power supply switch on the back to “O” (off). Unplug the power cord and all other cables.
- Open the Case: Remove the side panel (usually two thumbscrews at the back).
- Locate DIMM Slots: Find the long, white or black slots to the right of your CPU socket. If all slots are occupied, you must remove one existing DIMM to make space.
- Remove Existing DIMM (if needed): Push the two plastic clips at either end of the DIMM slot outward. The module will pop up at an angle. Grip it by the edges and pull it straight out.
- Prepare the Adapter: Insert the SO-DIMM into the adapter. Listen for a click as the side clips engage.
- Install the Combo: Align the notch on the adapter/DIMM edge with the key in the slot. Place the module in the slot, ensuring the gold contacts are fully inserted. Press down firmly and evenly on the top edge until the plastic clips on the slot snap back into place and lock the module in.
- Close Up and Power On: Reconnect the power cable and monitor. Do not close the case yet, in case you need to quickly remove the module.
BIOS Setup and Verification
Power on your PC. It may reboot a few times as it attempts to train the memory—this is normal. If you get a successful POST (Power-On Self-Test) and see the BIOS splash screen or get to your operating system, immediately enter the BIOS/UEFI (usually by pressing Del or F2 during boot).
In the BIOS, navigate to the memory or overclocking section. Verify that the system recognizes the correct total capacity (e.g., your original 16GB + the new 8GB from the laptop stick = 24GB). Check the reported speed. It will likely default to the JEDEC standard speed (e.g., 2133MHz or 2400MHz) for DDR4, not the XMP/AMP profile speed printed on the laptop RAM. This is a major performance hit. Save settings and boot into your OS.
In Windows, open Task Manager (Ctrl+Shift+Esc) > Performance > Memory. Confirm the total capacity and the speed (e.g., 2400MHz). Run a memory stress test like MemTest86 for at least one full pass. Any errors mean the adapter/RAM combination is unstable and must be removed immediately. Your system will crash randomly with errors in place.
Performance and Stability: The Real-World Reality Check
Let’s assume you passed MemTest86 with zero errors. You think you’re golden. Not so fast. There are two critical, often overlooked, factors: speed and dual-channel operation.
Speed and Latency: The Invisible Handbrake
Laptop DDR4 RAM, especially from a few years ago, is often rated for lower speeds (2133MHz, 2400MHz) compared to modern desktop kits (3200MHz, 3600MHz, 4800MHz+). The adapter does nothing to enable higher speeds. Your motherboard will set the memory to the lowest common denominator—either the JEDEC standard or the highest speed both modules agree on. If your existing desktop RAM is 3200MHz with XMP, and the laptop RAM is 2400MHz without an XMP profile (most SO-DIMMs don’t have one compatible with desktop BIOSes), the entire kit will run at 2400MHz. You have effectively downclocked your entire memory subsystem to the speed of the slowest stick. For productivity tasks and gaming, this can be a significant performance regression, often worse than having less total RAM at a higher speed.
Dual-Channel Mode: Will It Work?
Modern CPUs use dual-channel (or more) memory architecture for double the data throughput. For dual-channel to work, modules must be installed in matched pairs (e.g., Slot A2 and B2) and, ideally, be identical. If you add a single SO-DIMM stick via adapter to a system that already has two matched desktop DIMMs, you will likely end up with a flex mode or asynchronous dual-channel configuration. The first 16GB (the matched pair) might run in fast dual-channel, while the additional 8GB (the odd SO-DIMM) runs in single-channel. This creates a complex performance profile where some data accesses are fast and others are slow. It’s not a disaster, but it’s not optimal. If you were trying to create a matched pair of two SO-DIMMs via two adapters, the chances of them working in stable dual-channel are even slimmer due to the added adapter variables.
Alternatives and The Smart Recommendation
Given the complexity, risk, and almost certain performance compromise, what should you actually do with that spare laptop RAM?
When to Buy Desktop-Specific RAM (Almost Always)
The most reliable, performance-oriented, and often cost-effective solution is to sell the laptop SO-DIMM sticks (on eBay, Facebook Marketplace, etc.) and use the proceeds to buy a kit of desktop DDR4 DIMMs that is on your motherboard’s QVL. A used 16GB (2x8GB) DDR4-3200 CL16 kit can often be found for a very reasonable price. This guarantees compatibility, dual-channel performance, and full speed support. You get a clean, supported system with no adapters introducing failure points.
Selling or Repurposing Old Laptop RAM
Laptop SO-DIMM DDR4 has a healthy aftermarket because millions of laptops are upgraded. There is a strong demand for it from other laptop users, small-form-factor PC builders (whose systems use SO-DIMM), and for embedded applications. Selling it is straightforward. Alternatively, if you have a friend with a laptop that needs a RAM upgrade, giving or selling it to them is a great way to ensure it gets a second life.
The Bottom Line: While the concept of add laptop DDR4 RAM to desktop is technically possible with a passive adapter, it is a hack. It is a solution fraught with potential for boot failures, instability, and guaranteed performance loss. The adapter itself is a single point of failure. For the vast majority of desktop users, the path of least resistance, highest performance, and greatest reliability is to use memory specifically designed for their platform—desktop DDR4 DIMMs. Save the adapter experiment for a spare, non-critical test bench or if you are a hobbyist who enjoys the challenge and accepts the risks. For your main machine, invest in the correct, compatible memory.
Frequently Asked Questions
Will using a SO-DIMM-to-DIMM adapter damage my desktop motherboard or RAM?
No, a passive adapter cannot actively damage components. The worst-case scenarios are a failure to boot (no damage), or if the adapter has a manufacturing defect causing a short, which is extremely rare. The primary risks are system instability, data corruption from memory errors, and wasted time troubleshooting.
Do I need an adapter, and which one is the best brand to buy?
Yes, a physical adapter is mandatory because the pin counts and notches are different. There is no single “best” brand universally. Look for adapters from companies like ODRIX or similar with numerous positive reviews specifically mentioning your motherboard’s chipset (e.g., “works with B450”). Avoid generic, no-name adapters with no reviews. Be prepared for potential incompatibility regardless of brand.
Can I mix my existing desktop DDR4 DIMMs with a new laptop SO-DIMM via an adapter?
Technically yes, but it is not recommended. Mixing different types, speeds, and capacities will force the memory to run at the speed of the slowest module (likely the laptop RAM) and may prevent optimal dual-channel operation, leading to subpar performance and potential instability.
How much performance loss should I expect if it works?
Expect significant loss if your laptop RAM is slower than your existing RAM. For example, downgrading from a 3200MHz CL16 kit to a 2400MHz CL17 laptop kit can reduce memory bandwidth by 25-30%, impacting gaming frame rates, productivity application speeds, and overall system responsiveness. The performance penalty is often greater than the capacity gain.
Are there any desktop motherboards that natively support SO-DIMM without an adapter?
Yes, but they are very rare and typically found in small-form-factor (SFF) or all-in-one PCs that use mobile Intel or AMD processors and chipsets. Examples include some Intel NUC models, certain Gigabyte Mini-ITX boards with “M” suffixes, and compact business desktops from Dell (OptiPlex Micro) or HP (ProDesk/EliteDesk Mini). Always check your specific motherboard’s spec sheet for “SO-DIMM” support.
What’s the safest, most reliable way to test this setup before committing?
The only safe way is on a non-critical system. Install the adapter and SO-DIMM on a test bench motherboard. Boot and run MemTest86 for several passes. Stress test with Prime95 Blend test for an hour. Monitor for crashes or errors. If it passes these rigorous tests, it *might* be stable. However, long-term stability under varying workloads cannot be guaranteed, and the speed limitation remains.