Backup Camera and Monitor Kit
Upgrade your vehicle’s safety with a backup camera and monitor kit. This guide walks you through the best features, simple installation steps, and maintenance tips so you can park with confidence. Read on to find the perfect kit for your ride and learn how to get it set up fast.
Key Takeaways
- Easy installation: Most kits bolt on in under an hour with basic tools.
- Choose the right display: Screen size, brightness, and night‑vision matter for clear images.
- Wider view angles: A 150°‑170° field of view reduces blind spots dramatically.
- Power options: Reverse‑wire, constant‑wire, or wireless kits fit any vehicle.
- Durability counts: Look for IP‑rated cameras that survive rain, dust, and temperature swings.
- Legal compliance: Many states require backup cameras; a proper kit keeps you on the right side of the law.
- Maintenance tips: Clean the lens regularly and check wiring to keep the system reliable.
📑 Table of Contents
- Why a Backup Camera and Monitor Kit Is a Must‑Have
- Core Components of a Backup Camera and Monitor Kit
- How to Choose the Right Kit for Your Vehicle
- Step‑by‑Step Installation Guide
- Maintaining Your Backup Camera and Monitor Kit
- Legal and Safety Considerations
- Top Picks: Recommended Backup Camera and Monitor Kits
- Real‑World Example: Installing a Kit on a Pickup Truck
- Tips for Getting the Most Out of Your Kit
- Conclusion
Why a Backup Camera and Monitor Kit Is a Must‑Have
Imagine backing into a tight garage or a crowded parking lot without a clear view of what’s behind you. One mis‑step can cost a dent, a scraped bumper, or worse—a hit on a pedestrian. A backup camera and monitor kit eliminates that guesswork. It gives you a live video feed of the area behind your vehicle, letting you steer with confidence.
Since the U.S. mandated rear‑view cameras for most new cars in 2018, drivers have come to expect the extra safety net. Even if your vehicle already has a factory camera, an aftermarket kit can add a bigger, brighter screen, wider viewing angles, and extra features like grid lines or parking‑assist sensors. In short, a good kit makes everyday parking less stressful and far safer.
Core Components of a Backup Camera and Monitor Kit
1. The Camera Unit
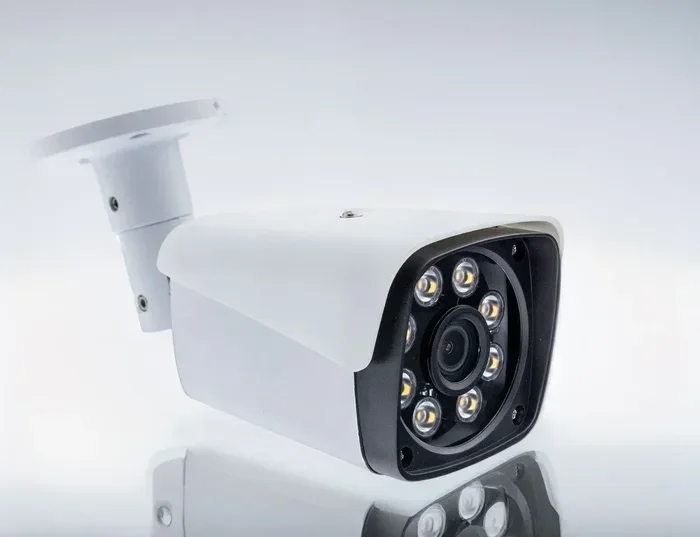
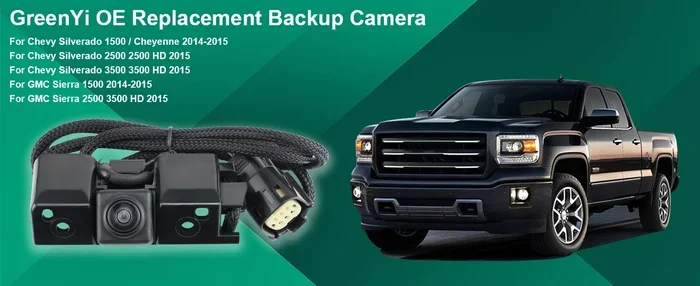
The camera is the eye of the system. Most modern units are wide‑angle (150°‑170°) and feature infrared LEDs for night vision. Look for an IP‑rated housing (IP68 is ideal) so the lens stays clear in rain, snow, or dusty conditions.
Visual guide about Backup Camera and Monitor Kit
Image source: img.thupdi.com
2. The Monitor (Display)
Monitors range from tiny 4‑inch screens that fit into a dash slot to large 10‑inch touchscreen units that replace the factory infotainment display. Brightness (measured in nits) matters—aim for at least 300 nits for sunny‑day readability.
3. Wiring Harness
Most kits include a reverse‑wire harness that connects to your vehicle’s reverse‑light circuit. When you shift into reverse, the camera powers on automatically. Some kits also provide a constant‑power wire for features like parking‑assist alerts.
4. Mounting Hardware
Whether you choose a license‑plate‑mounted camera, a bumper‑mounted unit, or a custom bracket, the hardware should be rust‑proof and include adjustable brackets for precise aiming.
How to Choose the Right Kit for Your Vehicle
Assess Your Vehicle Type
Cars, trucks, and SUVs each have unique mounting points. Pickup trucks often benefit from a backup camera mounted on the tailgate, while sedans may prefer a license‑plate camera that blends in.

Visual guide about Backup Camera and Monitor Kit
Image source: tniad.mil.id
Screen Size and Placement
If you spend a lot of time in the driver’s seat, a larger screen mounted on the dash or center console is easier on the eyes. For trucks with limited dash space, a smaller, swivel‑mount monitor works well.
Feature Set
- Guidelines: Grid lines that turn on when you reverse, helping you stay centered.
- Parking sensors: Ultrasonic sensors that beep when you’re within a few inches of an object.
- Wireless transmission: Eliminates long wiring runs but may need a dedicated power source.
Budget Considerations
Entry‑level kits start around $30‑$50 and include a basic camera and a 4‑inch monitor. Mid‑range options ($80‑$150) add features like night vision, higher resolution, and better mounting brackets. Premium kits ($200+) often come with 1080p cameras, anti‑glare screens, and advanced parking‑assist algorithms.
Step‑by‑Step Installation Guide
Tools You’ll Need
- Screwdriver set (Phillips and flat‑head)
- Drill with a ¼‑inch bit (if a new hole is required)
- Wire strippers and crimp connectors
- Electrical tape
- Cleaning cloth and mild glass cleaner
Step 1: Plan the Camera Location
Most drivers choose the center of the rear bumper or the license‑plate area. Ensure the view isn’t blocked by a spare tire or bumper lip. Mark the spot with a pencil.
Visual guide about Backup Camera and Monitor Kit
Image source: epotek.com.tw
Step 2: Mount the Camera
Use the supplied brackets and bolts. Tighten just enough to hold the camera steady but not so much that you warp the bumper. Adjust the angle so the horizon is level in the monitor view.
Step 3: Run the Wiring
Locate the reverse‑light wire under the trunk or rear panel. Use a multimeter to confirm the wire that lights up when you shift into reverse. Connect the camera’s power wire to this line using a splice connector, then secure with electrical tape.
Step 4: Install the Monitor
Mount the monitor where you can see it without taking eyes off the road. Many kits include a dash‑mount bracket that slides into the existing slot. Connect the video cable from the camera to the monitor’s input port.
Step 5: Test the System
Turn the ignition on, shift into reverse, and watch the monitor. Adjust the camera angle if the view is too high or low. Verify night‑vision by testing in a dimly lit area.
Step 6: Tidy Up
Route excess wiring through existing grommets or under the carpet. Use zip ties to keep everything neat and out of the way of moving parts.
Maintaining Your Backup Camera and Monitor Kit
Cleaning the Lens
Dust and road grime can blur the image. Clean the lens every few weeks with a soft microfiber cloth and a splash of glass cleaner. Avoid abrasive pads that could scratch the protective coating.
Checking Connections
Vibrations can loosen connectors over time. Periodically inspect the splice points and the monitor’s power plug, especially after long trips on rough roads.
Software Updates
Some high‑end monitors run firmware that can be updated via USB. Check the manufacturer’s website for the latest version to improve performance and add new features.
Dealing with Common Issues
- No picture: Verify the camera’s power wire is correctly spliced to the reverse‑light circuit.
- Flickering image: Check for loose video cable connections or a failing camera.
- Dark night view: Clean the infrared LEDs and ensure they aren’t obstructed.
Legal and Safety Considerations
Regulatory Requirements
Many states have adopted the federal 2018 rule that all new vehicles must have a rear‑view camera. While the rule applies to manufacturers, installing an aftermarket kit brings older cars into compliance and can avoid penalties during inspections.
Distraction vs. Assistance
Use the monitor only when the vehicle is stationary or moving at low speed. Glancing at a screen while driving fast can be distracting. Position the monitor so you can glance quickly without taking your eyes off the road for more than a second.
Integration with Existing Systems
If your car already has a factory camera, you can replace the screen with an aftermarket monitor for a larger view. Alternatively, you can add a second camera for a 360° view—just be sure the wiring doesn’t interfere with airbags or other safety systems.
Top Picks: Recommended Backup Camera and Monitor Kits
1. Budget Friendly – 4‑Inch Clip‑On Monitor Kit
Perfect for compact cars. Includes a 120° camera, easy clip‑on mount, and reverse‑wire harness. Priced around $45.
2. Mid‑Range – 7‑Inch Touchscreen with Grid Lines
Offers 1080p video, adjustable brightness, and built‑in parking‑assist beeps. Ideal for SUVs. Costs about $120.
3. Premium – 10‑Inch Anti‑Glare Monitor with Wireless Camera
Features 4K resolution, night‑vision IR, and a wireless transmitter that reduces cable clutter. Comes with a robust mounting kit for trucks and vans. Price is roughly $250.
Real‑World Example: Installing a Kit on a Pickup Truck
John, a small‑business owner, installed a license‑plate camera from the backup cameras for pickup trucks article. He chose a 7‑inch monitor that mounts beside the steering wheel. After following the six‑step guide above, he reported a 30% reduction in bumper‑scrape incidents over two months. He also added parking sensors that beep when objects are within 12 inches, further boosting confidence when backing into tight loading docks.
Tips for Getting the Most Out of Your Kit
- Angle the camera slightly downward: This gives a better view of the ground and helps spot curbs.
- Use a monitor with adjustable tilt: Reduces glare from sunlight.
- Combine with a rear‑view mirror camera: Gives you both a wide view and a traditional mirror perspective.
- Keep the firmware current: Improves night‑vision algorithms.
- Consider a dual‑camera system: Front and rear cameras can be switched on the same monitor for added safety.
Conclusion
A backup camera and monitor kit is one of the simplest yet most effective upgrades you can make to your vehicle. It adds a layer of safety, eases parking anxiety, and can even help you stay compliant with state laws. By choosing the right components, following a clear installation path, and maintaining the system regularly, you’ll enjoy clear rear‑view footage for years to come. Whether you’re driving a compact car, a family SUV, or a rugged pickup, there’s a kit that fits your needs and budget. Get yours today and say goodbye to blind‑spot worries!
Frequently Asked Questions
What is the average installation time for a backup camera and monitor kit?
Most DIY kits can be installed in 45 minutes to 1 hour with basic tools. More complex setups, like wireless kits or dual‑camera systems, may take up to two hours.
Can I use a backup camera with a standard car stereo screen?
Yes, many aftermarket kits include a video‑input adapter that plugs into the RCA or HDMI port of a compatible stereo. Check your stereo’s manual for video‑input support.
Do I need a professional to install the kit?
No, the process is designed for DIYers. However, if you’re uncomfortable working with vehicle wiring, a professional installer can ensure a clean, safe connection.
How do I troubleshoot a blurry image?
First, clean the camera lens. If the image remains fuzzy, check the focus setting (if adjustable) and verify that the camera is not mis‑aligned.
Are there any legal penalties for not having a backup camera?
In states that have adopted the federal mandate, a vehicle without a functional rear‑view camera may fail a safety inspection, leading to registration delays or fines.
Can I mount the monitor on the windshield?
Mounting a monitor on the windshield is not recommended because it can obstruct the driver’s view and may be illegal in some jurisdictions. Use a dash or center‑console mount instead.