Get Sound from Laptop to Tv
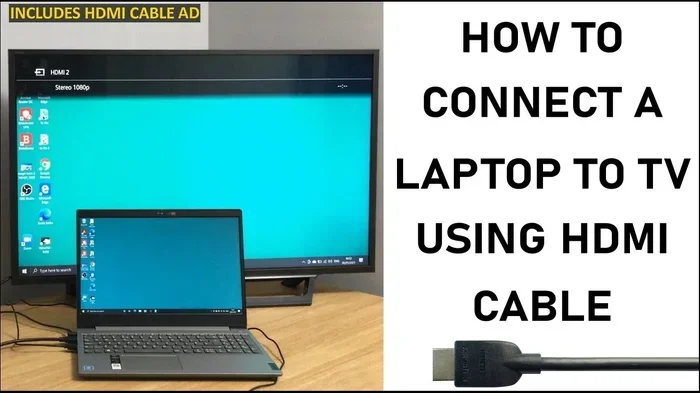
Getting sound from your laptop to your TV is easier than you think. Whether you use an HDMI cable, Bluetooth, or a simple audio jack, you can enjoy movies, games, and music on a bigger screen with rich sound. This guide walks you through every method so you can get sound from laptop to tv in minutes.
Key Takeaways
- HDMI is the simplest way: One cable handles both video and audio, making it the top choice for most users.
- Bluetooth works wirelessly: If your TV supports it, you can stream audio without any cables at all.
- 3.5mm audio cables are reliable: A classic method that works with almost any laptop and TV combination.
- Wireless streaming devices add flexibility: Tools like Chromecast or Roku let you send sound and video without direct cables.
- Check your sound settings first: Many audio issues come from wrong output settings, not hardware problems.
- Troubleshooting is straightforward: Most sound problems can be fixed with a few simple steps.
📑 Table of Contents
How to Get Sound from Laptop to Tv
There is nothing worse than watching a movie on your laptop when your TV is sitting right there begging to be used. You want the big screen. You want the big sound. And you want it all to work without a headache. The good news is that getting sound from your laptop to your TV is a simple process. You do not need to be a tech expert. In this guide, we will walk you through every method that works. Whether you have a Windows laptop or a Mac, we have you covered.
People connect their laptops to TVs for all kinds of reasons. Maybe you are hosting a movie night. Maybe you want to play games on a bigger screen. Or maybe you just enjoy the idea of surround sound coming from your living room speakers instead of tiny laptop ones. No matter the reason, getting audio from laptop to tv opens up a whole new experience. Let us dive into the different ways you can make it happen.
Before we start, let us quickly look at the tools you might need. Most of the time, you already have what you need. An HDMI cable is the most common option. If your laptop does not have an HDMI port, do not worry. We will cover alternatives like Bluetooth, audio cables, and wireless streaming devices. Each method has its own benefits, and we will help you pick the right one for your setup.
Methods to Connect Laptop Audio to Your TV
There are several ways to send sound from laptop to tv. Each method has its own advantages. Let us go through them one by one so you can choose what works best for your situation.
Using an HDMI Cable
The HDMI cable is the gold standard for connecting a laptop to a TV. It carries both video and audio through a single cable. This means you get one plug, one connection, and everything just works. Most modern laptops come with an HDMI port. If yours does, this is by far the easiest option.
Here is how to do it. First, plug one end of the HDMI cable into your laptop. Then plug the other end into any HDMI port on your TV. Switch your TV to the correct input source. Your screen should mirror right away. Next, go to your laptop sound settings and make sure the output is set to HDMI. That is it. You are now getting full-quality audio through your TV.
If your laptop does not have an HDMI port, you can use an HDMI adapter. USB-C to HDMI adapters are affordable and widely available. Just plug the adapter into your laptop, connect the HDMI cable, and you are good to go. This is a great solution for newer laptops that only have USB-C ports.
Using Bluetooth Connection
Bluetooth is a wireless option that lets you stream audio from laptop to tv without any cables. If your TV has Bluetooth built in, this method is super convenient. You do not need to worry about cables, adapters, or port compatibility.
To set this up, turn on Bluetooth on both your laptop and your TV. On your laptop, go to the Bluetooth settings and search for available devices. Select your TV from the list. Once paired, your laptop audio should route to the TV automatically. You can test it by playing a video or a song.
One thing to keep in mind is that Bluetooth audio can have a slight delay. This is called latency. For most movies and shows, it is barely noticeable. But if you are watching fast-action content or playing games, you might notice a small gap between the video and audio. In those cases, an HDMI cable is a better choice.
Using a 3.5mm Audio Cable
The 3.5mm audio cable is the old-school way to connect laptop sound to tv. It might seem outdated, but it still works great. Many TVs still have a 3.5mm headphone jack or RCA audio inputs. All you need is a cable with a 3.5mm plug on one end and the matching input on the other.
Plug the 3.5mm end into your laptop headphone jack. Plug the other end into your TV. Then go to your laptop sound settings and select the external output. Your audio will now play through the TV speakers. This method works well for quick setups. It is also handy when you do not have an HDMI cable or when Bluetooth is not available.
The downside is that a 3.5mm cable only carries audio. You will still need a separate cable or adapter for video. So if you want both sound and picture on your TV, HDMI or another all-in-one method is better.
Using Wireless Streaming Devices
If you do not want to use cables at all, wireless streaming devices are a great option. Devices like Chromecast, Roku, or Apple TV let you mirror your laptop screen to your TV and send audio at the same time. These devices connect to your TV through the HDMI port and use your home Wi-Fi network to receive content.
To use Chromecast, for example, you need the Google Home app on your laptop. Make sure your laptop and Chromecast are on the same Wi-Fi network. Open Chrome browser, click the three dots, and select Cast. Choose your TV from the list. Your laptop screen and sound will now appear on the TV. This is a clean, cable-free solution that works well for streaming content.
Roku and Apple TV offer similar features. Roku works well with Windows laptops through screen mirroring. Apple TV is a natural fit for Mac users. Each device has its own setup process, but the basic idea is the same. Connect to Wi-Fi, mirror your screen, and enjoy your content on the big screen.
Setting Up Your Laptop for TV Audio Output
Once you have your physical connection in place, the next step is to make sure your laptop is sending audio to the right place. This sounds simple, but many people skip this step and wonder why they cannot hear any sound.
Adjusting Sound Settings on Windows
If you use a Windows laptop, adjusting the sound output is quick. Right-click on the speaker icon in your taskbar. Click on Sound Settings. Under the Output section, you should see a list of available devices. Select your TV or HDMI output from the list. Your audio will now route to the TV.
If you do not see your TV listed, try clicking on the Device Properties link and make sure it is not disabled. Sometimes Windows hides devices that are not currently connected. Reconnecting the cable or re-pairing Bluetooth can make the TV reappear in the list.
Adjusting Sound Settings on Mac
Mac users have a slightly different process. Click on the Apple menu and go to System Preferences. Select Sound. Click on the Output tab. You should see your TV listed as an available output device. Select it, and your Mac audio will play through the TV.
If you are using AirPlay to connect wirelessly, make sure AirPlay is turned on in your TV settings. Your Mac should detect the TV as an AirPlay output device. Select it, and your audio will stream wirelessly. This is one of the easiest wireless methods for Mac users.
Troubleshooting Common Audio Issues
Sometimes things do not go as planned. You connect everything, but the sound does not come through. Do not panic. Most audio issues are easy to fix. Let us look at the most common problems and their solutions.
No Sound After Connecting
If you have connected your laptop to your TV but hear no sound, the first thing to check is your output settings. Your laptop might still be set to play audio through its own speakers. Go to your sound settings and make sure the TV or HDMI output is selected. This fixes the problem most of the time.
Another common cause is a muted TV or laptop. Check both volumes. It sounds obvious, but it happens more often than you would think. Also, try unplugging and replugging the HDMI cable. A loose connection can prevent audio from transmitting. If you are using Bluetooth, try unpairing and pairing the devices again.
Audio Delay or Lag
Audio delay is frustrating. You see the lips move, but the sound comes a second later. This usually happens with Bluetooth connections because of latency. If you experience this, try switching to an HDMI cable. Wired connections have almost no delay and provide a much better experience.
If you must use Bluetooth, check if your TV has an audio sync or lip-sync setting. Many modern TVs let you adjust the audio delay in the settings menu. Increasing or decreasing the delay by a few milliseconds can fix the problem. Also, make sure your Bluetooth devices are close to each other. Distance can increase latency.
Poor Audio Quality
If the sound is crackling, distorted, or just not clear, there are a few things you can try. First, check the cable quality. A cheap or damaged HDMI cable can cause audio issues. Try a different cable if you have one available. Also, make sure your TV audio settings are set to the right format. Some TVs have settings for stereo, Dolby Digital, or PCM. Try switching between these to see which sounds best.
Another tip is to update your laptop audio drivers. Outdated drivers can cause poor audio quality. Go to your laptop manufacturer website and download the latest audio drivers for your model. This simple step often resolves sound quality issues.
Tips for the Best Audio Experience
Once you have sound working from your laptop to your TV, you want to make sure you are getting the best quality possible. Here are some tips to help you get the most out of your setup.
First, use high-quality cables. A good HDMI cable makes a big difference in both video and audio quality. Look for cables that support HDMI 2.0 or higher for the best results. Cheap cables can cause signal drops and audio glitches.
Second, optimize your laptop for media playback. Make sure your laptop has enough memory to handle smooth video and audio. If your laptop is running slowly, it might struggle with high-quality content. You can learn more about how to get more ram on my laptop to improve overall performance. More memory helps your laptop handle media tasks without lag or stuttering.
Third, consider your room acoustics. The TV speakers are just the beginning. If you want a truly immersive experience, look into soundbars or home theater systems. Many modern soundbars connect to your TV via Bluetooth or HDMI ARC. They offer much richer sound than built-in TV speakers.
Fourth, keep your software updated. Both your laptop and TV receive firmware updates that can improve audio performance and fix bugs. Check for updates regularly. This keeps everything running smoothly and ensures the best possible sound quality.
Finally, if you plan to upgrade your laptop for better media performance, consider adding more RAM. Upgrading your memory can help with multitasking, media playback, and overall system responsiveness. You can find detailed guides on how to upgrade the ram of a laptop to get started. A well-optimized laptop makes a huge difference in your media experience.
Final Thoughts
Getting sound from laptop to tv is a simple process once you know the right method. HDMI cables offer the best quality and easiest setup. Bluetooth gives you wireless freedom. 3.5mm audio cables work when you need a quick and reliable connection. Wireless streaming devices add flexibility for those who want a cable-free experience.
Remember to check your sound settings after connecting. This alone solves most audio problems. If you run into issues, the troubleshooting tips in this guide should help you get back on track. With the right setup, you can enjoy movies, shows, and games on your TV with rich, clear sound.
Take some time to try each method and see what works best for your setup. You might be surprised at how easy it is to get sound from laptop to tv. Once you make the switch, you will never want to go back to laptop speakers again. Enjoy your upgraded viewing experience!
Frequently Asked Questions
Can I Get Sound from My Laptop to My TV Without an HDMI Cable?
Yes, you can. Bluetooth is the most common wireless option. If your TV supports Bluetooth, you can pair it with your laptop and stream audio without any cables. You can also use a 3.5mm audio cable or a wireless streaming device like Chromecast or Roku to send sound to your TV.
Why Is There No Sound When I Connect My Laptop to My TV?
The most common reason is that your laptop is still set to output audio through its own speakers. Go to your sound settings and select your TV or HDMI output as the default device. Also check that both your laptop and TV are not muted and that the volume is turned up on both.
Does HDMI Carry Both Video and Audio?
Yes, HDMI carries both video and audio through a single cable. This makes it the easiest and most popular way to connect a laptop to a TV. You get high-quality picture and sound without needing multiple cables or adapters.
Can I Use Bluetooth to Send Laptop Audio to My TV?
Yes, if your TV has Bluetooth support. Go to your laptop Bluetooth settings, pair it with your TV, and select the TV as your audio output device. Keep in mind that Bluetooth may have a slight audio delay, which can be noticeable during fast-action content or gaming.
What Is the Best Audio Quality for Laptop to TV Connection?
HDMI provides the best audio quality for most users. It supports high-definition audio formats and delivers crystal-clear sound. If you want even better quality, consider using an HDMI cable that supports HDMI 2.0 or higher and check your TV audio settings for formats like Dolby Digital or PCM.
How Do I Fix Audio Delay When Using Bluetooth?
Audio delay, or latency, is common with Bluetooth connections. To fix it, try moving your laptop closer to the TV. You can also adjust the audio sync or lip-sync settings in your TV menu. For the best results, switch to an HDMI cable, which has virtually no delay.