How Do Trail Cameras Work Without Wifi
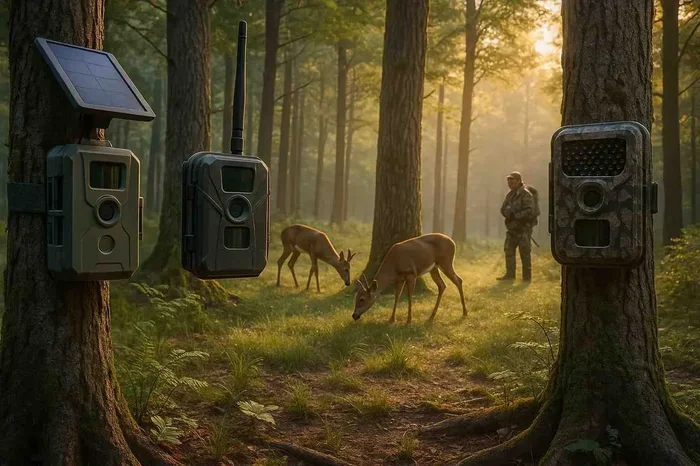
Trail cameras operate independently using motion sensors and memory cards. You do not need WiFi to capture images in remote woods. Many models use cellular networks or simple storage for later retrieval. This makes them perfect for hunters and researchers who need reliable remote monitoring.
Trail cameras are amazing tools for watching wildlife. You might wonder how they function in deep woods where no signals exist. The answer is simple yet clever. These devices do not rely on WiFi to capture images. Instead, they use built-in sensors and storage. This allows them to work anywhere animals roam.
Many people assume all modern cameras need internet. That is not true for game cameras. They are designed for remote locations. You can set them up and leave them alone. They will record everything that moves past them. Understanding how do trail cameras work without wifi helps you choose the right gear. It also ensures you get the best results from your hunt or research.
Key Takeaways
- No WiFi Required: Most trail cameras store images on SD cards without needing internet.
- Motion Activation: Passive infrared sensors trigger the camera when animals move.
- Cellular Options: Some models send photos via cell networks without WiFi.
- Power Sources: Batteries or solar panels keep cameras running in the wild.
- Night Vision: Infrared flash allows clear photos in low light conditions.
- Placement Matters: Strategic positioning improves detection and image quality.
- Maintenance Needed: Regular checks ensure batteries and storage remain functional.
📑 Table of Contents
Understanding Basic Trail Camera Mechanics
Trail cameras are standalone devices. They do not need a network connection to take pictures. The core function relies on motion detection. When something moves in front of the lens, the camera wakes up. It then captures a photo or video. This process happens instantly without outside help.
The main components work together seamlessly. A lens focuses light onto a sensor. A processor analyzes movement data. Memory stores the final image. Power supplies energy to all parts. Each part plays a vital role in operation. You do not need to connect them to a router. They are self-sufficient machines built for the outdoors.
Passive Infrared Sensors
The heart of motion detection is the passive infrared sensor. This sensor detects heat changes. Animals emit heat as they move. The sensor picks up this change in the environment. It triggers the camera to start recording. This method is very reliable in nature. It works day and night without fail.
PIR sensors have a specific range. They cover a certain angle in front of the camera. Placing the camera correctly matters greatly. You want the sensor to face animal trails. Avoid pointing it at moving leaves though. Wind can trigger false photos sometimes. Proper setup reduces wasted storage space.
Image Capture Process
Once triggered, the camera focuses quickly. It adjusts exposure based on light levels. Then it saves the file to internal storage. Most cameras use an SD card for this purpose. Some older models might use internal memory. The file is saved as a JPEG or video clip. You retrieve this data later by visiting the site.
The whole process takes seconds. The camera goes back to sleep afterward. This sleep mode saves battery life. It waits for the next trigger event. This cycle repeats until you check the device. It is an efficient way to monitor wildlife. You get evidence without being present.
Power Sources for Offline Operation
Power is critical for remote cameras. Since they are not plugged into walls, they need portable energy. Most units use AA batteries or lithium packs. Some newer models offer solar power options. Choosing the right power source depends on your location. Cold weather affects battery performance significantly.
You should plan for long deployment times. Changing batteries too often is inconvenient. Lithium batteries last longer in cold temps. Rechargeable options can save money over time. Solar panels help in sunny areas. They extend the life of the camera greatly. Always check power levels before heading out.
Battery Life Expectations
Battery life varies by model and usage. A camera taking few photos lasts longer. High traffic areas drain power faster. Infrared flash uses more energy than no glow. You should estimate your needs before buying. Understanding battery duration helps plan your trips. You do not want dead cameras in the field.
Here are common power considerations:
- Battery Type: Lithium lasts longer than alkaline.
- Flash Type: Low glow uses less power than bright flash.
- Temperature: Cold weather reduces battery efficiency.
- Usage: More triggers mean more power consumption.
Solar Charging Benefits
Solar panels are great for sunny spots. They keep batteries charged continuously. This reduces the need for frequent visits. You can leave the camera out longer. Just ensure the panel faces the sun. Trees might block the light sometimes. Clearings are best for solar setups. Solar cameras need light to function well.
Hybrid systems are also available. They use batteries with solar backups. This offers the best of both worlds. You get reliability plus extended life. It is a smart choice for long-term monitoring. Hunters often prefer this setup for season-long coverage.
Storage and Data Retrieval Methods
Without WiFi, you need physical storage. SD cards are the standard solution. They hold hundreds or thousands of images. You must remove the card to see photos. This requires traveling to the camera site. It is a simple process but takes time. Large capacity cards reduce visit frequency.
Some cameras have internal memory too. This is smaller than SD cards usually. It serves as a backup sometimes. Relying on internal memory is not ideal. You might lose data if the device fails. External cards are safer for important shots. Always format cards before new deployments.
SD Card Management
Managing your cards is key to success. Label them with dates or locations. This helps organize your photos later. Do not mix up cards from different sites. You could lose valuable tracking data. Use high-quality cards for best results. Cheap cards might fail in extreme weather.
Here is a quick tip for storage:
- Capacity: Choose 32GB or higher for video.
- Speed: Fast write speeds prevent missed shots.
- Protection: Keep cards dry and safe during transport.
Retrieving Your Images
When you return to the camera, turn it on. Remove the SD card carefully. Insert it into your computer or viewer. You can then sort and save the files. Some cameras allow USB direct connection too. This lets you download without a card reader. Both methods work well for offline data.
Check the images for quality immediately. Delete blurry shots to save space. Keep the best photos for review. This maintenance ensures the camera stays ready. You want to maximize every trip to the woods. Efficient management saves you time later.
Cellular Trail Cameras vs. Traditional Models
Some cameras offer cellular connectivity. These send photos to your phone. They do not use WiFi but use cell towers. This is different from standard WiFi cameras. You need a signal for these to work. Cellular cameras may need plans depending on the model. Traditional models do not need any signal at all.
Choosing between them depends on your needs. If you need instant alerts, go cellular. If you want zero recurring costs, go traditional. Traditional cameras are cheaper upfront too. They have no monthly fees to worry about. This makes them popular for budget hunters.
No Subscription Required
Standard trail cameras have no fees. You buy the device and use it. There are no hidden costs for data. This is a huge benefit for many users. You own the device completely. You control all the data yourself. Learning about subscription-free options helps you save money.
Cellular models often require plans. These plans cost money every month. Traditional models avoid this expense entirely. You just swap batteries and cards. It is a simple and cost-effective solution. Many researchers prefer this for long studies.
Signal Independence
Traditional cameras work anywhere. They do not care about cell towers. Deep woods are fine for these units. Mountains and valleys pose no issue. You can place them miles from civilization. This freedom is their biggest advantage. Understanding internet independence clarifies their utility.
Cellular cameras need coverage maps. You must check signal strength first. Dead zones will stop photo transmission. This limits where you can place them. Traditional cameras have no such limits. They are truly remote monitoring tools.
Night Vision and Infrared Technology
Seeing in the dark is crucial. Animals move mostly at night. Trail cameras use infrared flash for this. It illuminates the scene without visible light. This keeps the camera covert. Animals do not see the flash easily. It captures clear images in total darkness.
There are different types of IR flash. No glow is completely invisible. Low glow has a faint red shine. White flash acts like a normal camera flash. Each has pros and cons for usage. No glow is best for shy animals. White flash gives color night photos.
Infrared Sensor Range
The IR illuminator has a set range. It might reach 30 feet or 60 feet. Beyond this range, images get dark. You need to place the camera wisely. Aim it at the expected animal path. Ensure the subject falls within the range. This guarantees usable photos every time.
Weather affects IR performance too. Fog or heavy rain can scatter light. This reduces image clarity at night. Clear nights produce the best results. Always consider weather when setting up. It impacts how well the tech works.
Placement and Setup Strategies
Where you put the camera matters most. A bad spot yields few photos. A good spot captures plenty of action. Look for natural animal trails. Signs like tracks or scat help locate them. Face the camera north to avoid sun glare. This prevents false triggers from sunlight.
Height is also important for success. Mount the camera about chest high. This targets the animal’s body clearly. Too high misses the lower body. Too low might miss the whole animal. Adjust based on the species you hunt. Deer need different height than bears.
Avoiding False Triggers
False triggers waste battery and space. Moving branches can set off sensors. Heat changes from the sun cause issues. You should clear vegetation around the lens. Trim branches that sway in the wind. This reduces unnecessary triggers significantly.
Secure the camera firmly to the tree. Loose mounts can vibrate and trigger. Use a sturdy strap or screw mount. Check the angle after installation. Ensure it points where you want. Small adjustments make big differences.
Common Mistakes to Avoid
- Wrong Height: Mounting too high or low reduces detection.
- Sun Glare: Facing east or west causes false triggers.
- Obstructions: Leaves blocking the lens ruin photos.
- Poor Power: Old batteries lead to failure.
Maintenance and Troubleshooting
Regular checks keep cameras working well. Visit your sites every few months. Replace batteries before they die completely. Clear dust from the lens surface. Update firmware if the model allows. These steps prevent unexpected failures in the field.
If photos are blurry, check the focus. Some cameras have fixed focus lenses. Others allow manual adjustment. Ensure the subject distance matches the focus. Clean the lens with a soft cloth. Smudges can obscure clear images greatly.
Expert Insights
Experts recommend testing before deployment. Set up the camera in your yard first. Walk in front of it to test triggers. Verify the images look correct. This saves time when you go remote. You know the device works before leaving.
Also, label your cameras clearly. Use unique IDs for each unit. This helps when managing multiple sites. You know exactly which camera took which photo. Organization is key for successful monitoring. It streamlines your data review process.
Conclusion
Understanding how do trail cameras work without wifi opens up many possibilities. You can monitor wildlife anywhere without internet. These devices use smart sensors and storage. They run on batteries or solar power. You do not need complex networks to use them.
Choose the right model for your needs. Traditional cameras offer simplicity and low cost. Cellular options provide remote alerts if signal exists. Proper placement and maintenance ensure success. You will capture amazing wildlife moments this way. Enjoy your time in nature with confidence.
Frequently Asked Questions
Do trail cameras need WiFi to take pictures?
No, most trail cameras do not need WiFi to function. They store images on SD cards or internal memory. They rely on motion sensors to trigger photos independently.
How do trail cameras send photos without internet?
Traditional models save photos locally for you to retrieve. Cellular models send data via cell networks instead of WiFi. You must check signal strength for cellular units.
Can I use a trail camera in a remote area?
Yes, traditional trail cameras work perfectly in remote areas. They do not require any signal or internet connection. Just ensure you have power and storage available.
What power source works best for offline cameras?
Lithium batteries are best for cold weather performance. Solar panels are great for sunny locations to extend life. Choose based on your specific deployment environment.
How often should I check my trail camera?
You should check every few months for maintenance. Replace batteries and clear storage as needed. Frequent checks ensure you do not miss important data.
Do cellular trail cameras work without service?
Cellular cameras need cell service to transmit photos. They cannot send images without a signal connection. Traditional cameras work without any service at all.