How Often Should I Clean My Laptop
Regular laptop cleaning is essential for your health, your device’s performance, and its longevity. Dust and grime clog cooling systems, causing overheating and slowdowns, while keyboards harbor more germs than a toilet seat. The cleaning frequency varies by component: your screen needs weekly attention, the keyboard monthly, and internal vents quarterly. Using the wrong tools or liquids can cause permanent damage, so always use a microfiber cloth, compressed air, and isopropyl alcohol. Building simple daily habits, like eating away from your laptop and using a sleeve, drastically reduces deep cleaning needs. Ultimately, a consistent, gentle cleaning routine keeps your laptop running fast, cool, and germ-free for years.
Key Takeaways
- Health Hazard: Your laptop keyboard can be 20,000 times dirtier than a toilet seat, hosting harmful bacteria and allergens that affect your well-being.
- Performance Killer: A 1/16th inch of dust on internal components can raise temperatures by up to 30°F, triggering thermal throttling that slows your system to a crawl.
- One-Size-Doesn’t-Fit-All: Different parts need different cleaning schedules—screen (weekly), keyboard (monthly), ports/vents (quarterly), internal deep clean (yearly).
- Tools Matter: Always use a dry or slightly damp microfiber cloth, canned compressed air (held upright), and 70% isopropyl alcohol. Never use household cleaners, paper towels, or a vacuum on internals.
- Gentle is Key: Laptop components are delicate. Never spray liquid directly on the screen, use excessive force on keys, or insert objects into ports and vents.
- Prevention is Best: Simple habits—using a keyboard cover, eating elsewhere, storing in a padded sleeve, and ensuring proper ventilation—cut cleaning time in half.
- Know When to Call a Pro: If you’re uncomfortable opening your laptop, notice significant performance issues despite external cleaning, or see physical damage, seek professional servicing.
📑 Table of Contents
- Why Cleaning Your Laptop Isn’t Just About Appearances
- Component-by-Component: Your Customized Cleaning Schedule
- Recognizing the Telltale Signs: Your Laptop is Begging for Help
- The Art of Safe Laptop Cleaning: Your Step-by-Step Toolkit & Process
- Building Habits That Keep Your Laptop Young: Prevention is Everything
- Debunking Laptop Cleaning Myths: What NOT To Do
- Conclusion: A Clean Laptop is a Happy, Healthy, High-Performance Laptop
Why Cleaning Your Laptop Isn’t Just About Appearances
Let’s be honest. That fuzzy layer of dust on your laptop’s keyboard, the faint greasy smudge on the screen, and the mysterious crumbs in the crevices are easy to ignore. You wipe your hands on your pants, give it a quick once-over with a sleeve, and keep working. But what if we told you that this casual attitude is secretly sabotaging your expensive machine—and possibly your health? The question “How often should I clean my laptop?” has a far more critical answer than you might think. It’s not just about vanity; it’s a fundamental part of device maintenance.
Think of your laptop as a sealed, high-performance engine. Just like a car, it needs clean air to breathe and cool to operate efficiently. When dust, hair, and skin flakes accumulate, they act like a blanket over the internal cooling system. The fan has to work overtime, sucking in hot air and blowing out hotter air. This leads to thermal throttling—a safety feature where the processor deliberately slows down to prevent damage. The result? Your “fast” laptop suddenly feels sluggish, applications stutter, and battery life drains faster. A regular cleaning schedule is your first and best defense against this preventable performance death.
Beyond performance, there’s the invisible world of microbes. Studies have shown that the average keyboard and touchpad harbor a staggering diversity of bacteria, including potentially harmful strains like Staphylococcus and E. coli. We touch our faces, eat over our keyboards, and constantly transfer germs. For anyone with allergies or a sensitive immune system, this is a serious concern. A proper cleaning routine isn’t just caring for your tech; it’s caring for yourself.
Component-by-Component: Your Customized Cleaning Schedule
There is no single answer to “how often should I clean my laptop?” because the needs of the screen are completely different from the needs of the cooling vents. A smart approach is to break it down by component and assign a frequency based on usage and vulnerability. Here is your practical, no-nonsense guide.
Visual guide about How Often Should I Clean My Laptop
Image source: pcmecca.com
The Screen: Your Window to the World (Clean Weekly)
The display is your primary interface, and keeping it clear is crucial for eye comfort and accurate color. It’s also the most delicate surface. Dust and oils from your fingers (especially on touchscreens) build up quickly. Frequency: Aim for a light cleaning every week.
- Method: Use a high-quality, lint-free microfiber cloth. For dry dust, a gentle circular wipe is enough. For fingerprints and smudges, slightly dampen the cloth with distilled water or a 50/50 mix of distilled water and 70% isopropyl alcohol. Never spray liquid directly onto the screen. Apply to the cloth first.
- Pro Tip: Always power off and unplug your laptop before cleaning the screen. This makes smudges more visible and eliminates the risk of electrical issues.
The Keyboard & Touchpad: Germ Headquarters (Clean Monthly)
The keyboard is the most abused part of your laptop. It collects skin flakes, hair, food crumbs, and an astronomical number of germs. The touchpad gets oils and grime from constant use. Frequency: A thorough clean every month is a solid rule for average users (2-4 hours daily). Heavy users or those who eat while computing should do this bi-weekly.
- Method: First, unplug the laptop and turn it upside down. Gently tap or shake it to dislodge large debris. Use a can of compressed air to blow out particles from between the keys. Hold the can upright to avoid liquid spray. For sticky residue, lightly dampen a microfiber cloth with isopropyl alcohol and wipe each key cap and the touchpad surface. For deep grime, you can carefully remove keycaps (check your laptop’s manual first!) to clean underneath.
- Warning: Never use a vacuum cleaner directly on the keyboard. The suction can damage delicate key mechanisms and create static electricity.
Exterior Case & Ports: The First Line of Defense (Clean Quarterly)
The plastic or metal chassis and the port openings (USB, headphone jack, charging port) collect dust and lint from bags and pockets. This isn’t just unsightly; it can interfere with cable connections. Frequency: Every 3-4 months.
- Method: Use a soft, dry microfiber cloth for the main body. For ports, use short, controlled bursts of compressed air to blow out debris. You can also use a soft, dry, small paintbrush or a cotton swab (Q-tip) lightly dipped in isopropyl alcohol for stubborn dirt in port holes. Be gentle to avoid bending port pins.
Vents & Fan Intakes: The Lungs of Your Laptop (Clean Quarterly to Bi-Annually)
These are the small grilles, usually on the sides or back of the laptop. They are the intake and exhaust for your cooling system. This is the #1 priority for preventing overheating. Frequency: Every 3-6 months, depending on your environment (pet hair, carpet, dusty room means more often).
- Method: Use compressed air. This is non-negotiable. Use short, controlled bursts. You often need to angle the laptop so the dust is blown *out*, not further in. Hold the fan blades still with a toothpick or plastic tool while blasting to prevent them from spinning too fast and generating a voltage that could damage components.
- Note: This is an external clean only. It addresses the dust clogging the fins. The internal fan blades and heatsink fins will still accumulate dust over time.
Internal Components: The Deep Clean (Clean Yearly or Biannually)
This refers to opening the laptop’s case to access the internal heatsink, fan, and motherboard. Dust here is the ultimate performance killer. Frequency: Once a year for most users, or every 6 months if you have pets, work in a dusty environment, or use your laptop on a bed/couch (which sucks in fabric fibers).
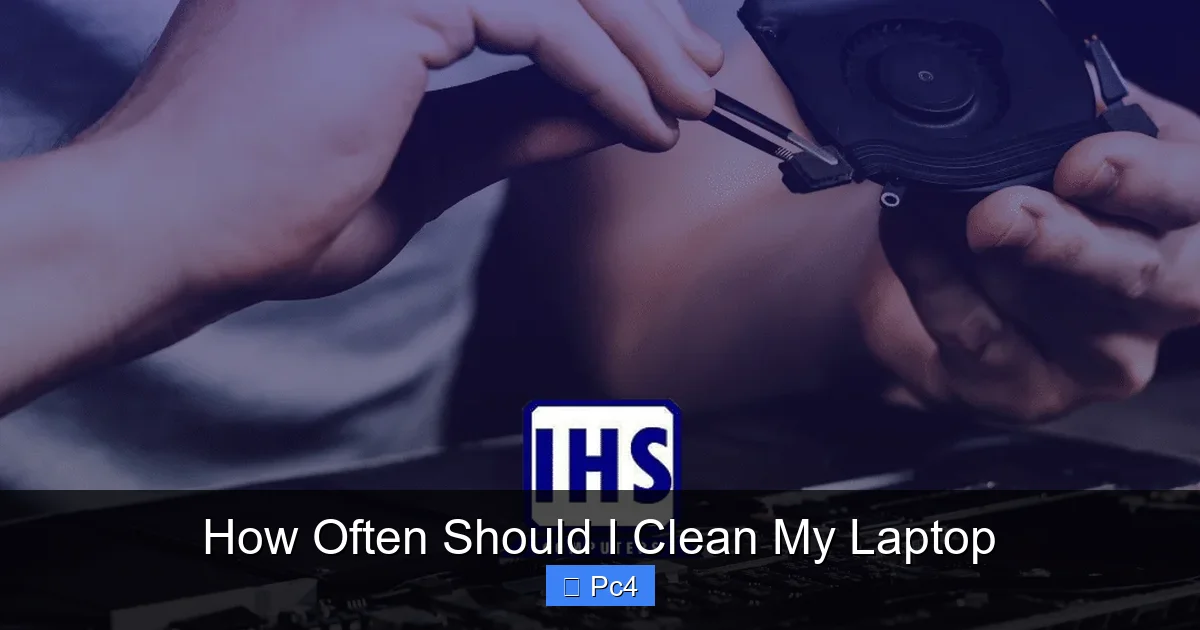
- Method: This requires more skill. You need the correct screwdrivers (usually Phillips #0 or #00), a static-free workspace, and patience. After powering off and removing the battery (if possible), open the back panel. Use compressed air to meticulously blow dust from the fan blades, heatsink fins, and motherboard. Hold the fan steady. For thick, caked-on dust on heatsinks, a soft brush can be used gently before air. If you are not 100% confident, this is the one task worth paying a professional for.
Recognizing the Telltale Signs: Your Laptop is Begging for Help
Sometimes, you don’t need a calendar. Your laptop will give you clear, audible, and performance-based signals that it’s time to clean. Ignoring these signs leads to progressive damage and costly repairs.
Visual guide about How Often Should I Clean My Laptop
Image source: pcmecca.com
Audible Cries for Help: The Fan
The most obvious sign is a change in your fan’s behavior. Has it gone from a near-silent hum to a constant, loud, jet-engine roar? Or does it seem to kick on at random times, even when you’re just browsing the web? This is your cooling system struggling. Dust has created an insulating layer, forcing the fan to spin faster and louder to move the same amount of air. A clean system should have a fan that only revs up under genuine load (gaming, video editing).
Visible Evidence: The Dust Bunny Invasion
Look at your air vents and fan exhaust. Can you see a felt-like mat of dust and lint? Shine a flashlight into the keyboard gaps—do you see a fuzzy buildup? This is the direct cause of the fan noise. What you see on the outside is a fraction of what’s inside. If it’s visible externally, the internal buildup is significant.
Performance Slowdowns: The Thermal Throttling Trap
Is your laptop inexplicably slow? Do programs take longer to open? Does it feel hot to the touch, especially on the palm rests or bottom? This is thermal throttling in action. The processor is intentionally reducing its speed to lower temperatures. A clean laptop can maintain high performance clocks for longer. If your device feels like it’s “given up” on speed, a deep clean is one of the first troubleshooting steps.
The “Sticky Key” Syndrome
When keys start to feel mushy, stick down, or don’t rebound properly, it’s often due to a film of sugars and oils from your fingers and snacks working its way under the keycap. This can eventually jam the scissor mechanism or rubber dome underneath. Regular keyboard cleaning prevents this gummy buildup from reaching critical levels.
The Art of Safe Laptop Cleaning: Your Step-by-Step Toolkit & Process
Armed with the right schedule and awareness of the signs, the next step is executing the clean without causing harm. Using paper towels or window cleaner is a recipe for scratched screens and damaged coatings. Here is your safe, effective protocol.
Visual guide about How Often Should I Clean My Laptop
Image source: i.pinimg.com
Building Your Non-Negotiable Cleaning Kit
Before you touch a screw, gather these items. Having them ready prevents you from improvising with dangerous alternatives.
- Microfiber Cloths (2-3): The single most important tool. They are soft, lint-free, and excellent at trapping dust and oils. Designate one for the screen, one for the keyboard/case, and one as a backup. Wash them regularly without fabric softener.
- Canned Compressed Air: Your best friend for dislodging debris. Buy it from an electronics or office supply store. Never shake the can or use it at an extreme angle, as this can spray liquid propellant.
- 70% Isopropyl Alcohol: The safest evaporating liquid for electronics. It evaporates quickly, leaves no residue, and kills germs. Higher concentrations (90%+) can damage some screen coatings. Always dilute with distilled water for screens (50/50).
- Distilled Water: Tap water contains minerals that can leave permanent spots. Always use distilled for any moisture-based cleaning.
- Soft-Bristled Brush: A small, clean paintbrush or makeup brush is perfect for sweeping loose debris from vents and crevices before using air.
- Cotton Swabs (Q-tips): Useful for precision cleaning around port edges and speaker grilles. Use sparingly and lightly dampened.
- Optional: Keyboard Gel/Slime: Can be fun for lifting debris from deep into a keyboard, but use with caution as it can leave a residue.
The External Deep Clean Process (Monthly/Quarterly Routine)
Follow this sequence for a complete external clean. Perform this on a clean, flat surface with good lighting.
- Power Down & Unplug: Shut down the laptop completely. Disconnect the charger and any peripherals. If it has a removable battery, take it out. This is a critical safety step.
- The Shake & Tap: With the lid open, turn the laptop upside down over a trash can or large sheet of paper. Gently tap the back and shake it side-to-side to dislodge large crumbs and particles.
- Brush & Air the Vents: Use your soft brush to sweep away any loose dust from the exterior vents. Then, use short, controlled bursts of compressed air to blow out the vent grilles. Angle the laptop so dust blows away from you and out of the machine. Hold the fan blades steady if you can see them.
- Keyboard & Touchpad Detailing: Tilt the laptop and use compressed air at a 45-degree angle to blow debris out from between the keys. Work from one side to the other. For sticky keys, slightly dampen a microfiber cloth with isopropyl alcohol and wipe each key cap. Wipe the touchpad thoroughly. For a deeper clean, consult your manual for keycap removal instructions.
- Screen & Case Wipe-Down: Using your dedicated screen cloth, wipe the display with gentle, overlapping strokes. For smudges, use the alcohol/water mix on the cloth, not the screen. Use your case cloth with or without a tiny bit of alcohol to wipe down the palm rests, lid, and bottom case.
- Port & Crevice Finale: Use compressed air to clear each port (USB, HDMI, etc.). A cotton swab lightly dabbed in alcohol can clean the inner edges of ports if needed. Be extremely gentle.
- Reassemble & Power On: Let any evaporated alcohol dissipate for a minute. Reattach the battery if removed, plug in, and power on. Enjoy the crisp, clean feeling.
The Internal Deep Clean (Annual/Biannual) – Proceed with Caution
This is for the comfortable DIYer. If you have a newer, sealed laptop (like many ultrabooks), the internal clean may be impossible without professional tools. For those with removable bottom panels:
- Research & Prepare: Find the exact service manual or a trusted iFixit guide for your specific laptop model. Identify screw locations and types. Purchase the correct screwdrivers. Work on a large, static-free mat. A magnetic screwdriver mat helps organize screws.
- Power Down & Isolate: Disconnect all power and peripherals. Remove the battery if possible. Press and hold the power button for 10 seconds to discharge residual power.
- Open the Case: Remove all screws from the bottom panel. Keep them organized by location (a piece of paper with a diagram works). Some screws have different lengths. Gently pry off the panel using a plastic spudger, starting at a corner.
- Expose & Clean: You will see the fan, heatsink, and motherboard. Use your soft brush to loosen dust caked on fan blades and heatsink fins. Then, use compressed air to blow it all out. Always hold the fan blades still with a toothpick or your brush. Blow air in the direction that pushes dust *out* of the laptop, not deeper in. Clean all surfaces.
- Reassemble Carefully: Double-check that no tools or debris are left inside. Reattach the bottom panel, screwing each screw in hand-tight to avoid cross-threading. Reinsert the battery.
- First Boot: Power on. Listen for any unusual fan noises. The system may run the fans at high speed for a moment on first boot—this is normal as it recalibrates.
Building Habits That Keep Your Laptop Young: Prevention is Everything
The goal isn’t to have a major cleaning session every month. The goal is to make the monthly session quick and the yearly session manageable. This is achieved through simple, everyday habits that prevent grime from taking hold.
The No-Food Zone Rule
The single most effective habit is to establish your laptop as a no-food, no-drink zone. Crumbs are the primary attractant for dust and the main cause of sticky, gummy keyboards. If you must eat near it, use a separate keyboard and mouse, and keep your laptop’s lid firmly closed.
Embrace the Keyboard Cover (Wisely)
A thin, silicone keyboard cover can prevent debris from settling directly on the membrane or scissor switches underneath. However, they can trap heat and moisture, and some users find them affect typing feel. If you use one, remove it regularly (weekly) to clean both the cover and the keyboard underneath. They are best for travel or very dusty environments.
Control Your Environment
Where you use your laptop matters. Avoid using it directly on beds, couches, or carpets. These surfaces are fiber factories that get sucked into vents. Always use it on a hard, flat surface like a desk or table. Consider a laptop cooling pad with its own fans; it elevates the machine and provides supplemental airflow, reducing internal dust intake.
Storage & Travel Discipline
When not in use, keep your laptop in a padded sleeve or case. This protects it from dust in your bag and from scratches. Never toss a linty cloth or candy wrapper into the same sleeve. Before closing the lid, ensure the keyboard is clear of any small particles that could transfer to the screen.
The Daily 10-Second Wipe
At the end of your workday, take 10 seconds. Use a dry microfiber cloth to give the keyboard and touchpad a quick wipe. This removes the bulk of oils and loose dust before they set in. It’s a tiny habit that makes the monthly deep clean dramatically easier.
Debunking Laptop Cleaning Myths: What NOT To Do
The internet is full of dangerous “hacks.” Let’s permanently bury these damaging myths.
Myth 1: “I Can Use Windex or Household Cleaner on My Screen.”
FALSE. Household cleaners contain ammonia, alcohol (in wrong concentrations), and solvents that will strip the anti-reflective and oleophobic (fingerprint-resistant) coatings from your screen. This causes permanent clouding, discoloration, and makes the screen a magnet for new smudges. Only use distilled water or a 50/50 water/isopropyl alcohol mix.
Myth 2: “A Vacuum Cleaner is Perfect for Sucking Out Dust from Vents.”
FALSE. This is a common and terrible idea. Vacuums generate static electricity, which can fry sensitive motherboard components the moment the nozzle gets close. They also lack the precise, directed pressure of compressed air and can suck small plastic grilles out of place. Only use canned compressed air.
Myth 3: “I Should Dampen the Keyboard with Water to Clean It.”
FALSE. Pouring or even dripping water onto a keyboard is a one-way ticket to a short circuit. Water can seep under keycaps and into the board. Moisture should be applied to your cloth, not the device. The cloth should be merely *damp*, not wet, and you should wipe quickly.
Myth 4: “If I Can’t See Dust Inside, It’s Fine.”
FALSE. The most damaging dust is the fine, particulate matter that settles in a thin layer on heatsink fins. It’s invisible to the naked eye but acts as a fantastic insulator. By the time you see significant dust on the fan blades, the heatsink is likely already clogged. A regular schedule based on time, not just visibility, is crucial.
Myth 5: “Disinfectant Wipes are Great for Germs on My Laptop.”
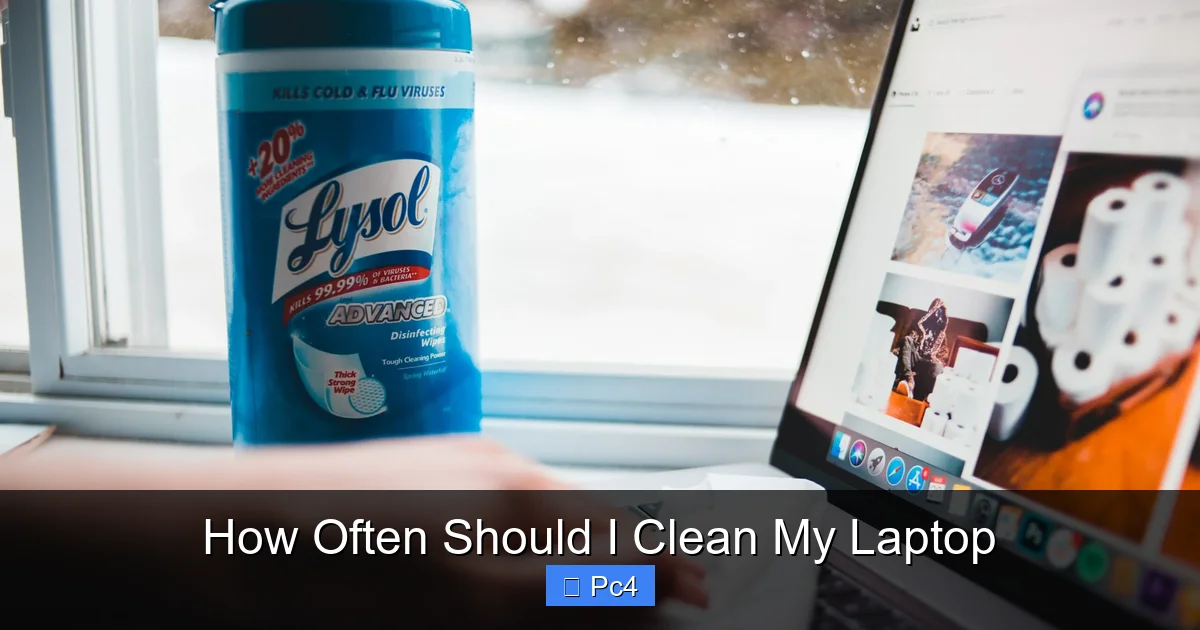
MOSTLY FALSE. While they kill germs, most disinfectant wipes (like Lysol or Clorox) contain harsh chemicals not designed for electronics. They can damage plastic, rubber key stabilizers, and screen coatings. For disinfection, use a cloth lightly dampened with 70% isopropyl alcohol. It’s equally effective against microbes and safe for electronics when used correctly.
Conclusion: A Clean Laptop is a Happy, Healthy, High-Performance Laptop
So, how often should you clean your laptop? The definitive answer is a blend of proactive scheduling and reactive awareness. Adopt the component-based schedule: screen weekly, keyboard monthly, vents quarterly, and internals yearly. Heed the warning signs—a roaring fan, sticky keys, and mysterious slowdowns—as urgent calls to action. Arm yourself with the right tools: microfiber, air, and alcohol. And most importantly, cultivate the daily habits that make cleaning a 10-minute breeze instead of a weekend chore.
This isn’t about being obsessive; it’s about being responsible. You invest in a laptop for its productivity, entertainment, and connection. Letting it degrade under a blanket of dust and grime is like buying a sports car and never changing the oil. The performance and health benefits are immediate and long-lasting. Start today. Power down, grab a microfiber cloth, and give your faithful digital companion the care it deserves. Your future self—with a fast, cool, and germ-free laptop—will thank you.
Frequently Asked Questions
Can I use baby wipes or makeup remover wipes on my laptop screen?
No. These wipes contain moisturizers, fragrances, and cleaning agents that can damage screen coatings and leave a hazy residue. Only use a dry or slightly damp microfiber cloth with distilled water or a 50/50 water/isopropyl alcohol mix.
My laptop fan is already very loud. Is it too late to clean it?
It’s never too late. Loud fan noise is the most common symptom of a dust-clogged cooling system. A thorough external and internal clean (if you’re comfortable) will almost certainly reduce the noise and improve performance. Start with the external vents and keyboard immediately.
What’s the safest way to clean between the keys on my keyboard?
The safest and most effective method is to use canned compressed air. Hold the laptop at a 75-degree angle and use short, controlled bursts of air to blow debris out from between the keys. For sticky residue, slightly dampen a microfiber cloth with isopropyl alcohol and wipe the key tops, but avoid letting liquid seep between them.
How do I clean the laptop’s touchpad without damaging it?
Use a dry microfiber cloth for daily smudges. For more stubborn grime, slightly dampen the cloth with a 50/50 mix of distilled water and 70% isopropyl alcohol. Wipe gently in circular motions. Avoid excessive moisture and never press down hard on the touchpad surface.
Should I pay for a professional internal cleaning, or can I do it myself?
If your laptop is under warranty, check the policy first—opening it may void it. If you have a newer, sealed ultrabook with no user-accessible internals, professional service is your only option. For older, serviceable laptops, you can do it yourself if you have the correct tools, are comfortable with delicate electronics, and follow a specific guide for your model. The risk of damaging ribbon cables or screws is real. When in doubt, pay a professional.
My laptop has a fan filter. How often should I clean or replace it?
If your laptop model has a removable dust filter (common on many gaming and business laptops), check it monthly. Gently remove it and clean it with compressed air or a soft brush. Depending on your environment, you may need to clean it every 1-3 months. These filters are designed to be user-serviceable and are the first line of defense against internal dust buildup.