How To Initialize New Ssd And Get Maximum Performance
Initializing a new SSD is the first step to getting your storage device running at full speed. Whether you are using Windows or a Mac, this guide walks you through every step with clear instructions. You will learn how to partition, format, and optimize your new SSD for the best possible performance right out of the box.
So you just bought a brand new SSD. Maybe it is a sleek M.2 NVMe drive or a traditional 2.5-inch SATA unit. Either way, you are probably excited to start using it. But before you can save a single file, you need to initialize new SSD drives first. This is the step that prepares your storage device for use and unlocks its full potential. Without initialization, your operating system simply cannot recognize or write to the drive.
Initializing a new SSD might sound technical, but it is actually quite simple. In this guide, we will walk you through every step. We will cover Windows and Mac instructions, explain the best file systems to choose, and share tips to get maximum SSD performance. By the end, you will feel confident and ready to set up your new drive like a pro. Let us get started.
Key Takeaways
- Initialization is essential: A new SSD must be initialized before you can store any data on it.
- Windows and Mac use different tools: Disk Management handles initialization on Windows, while Disk Utility does the same on macOS.
- Choosing the right file system matters: NTFS for Windows and APFS for Mac offer the best performance and compatibility.
- Optimization steps boost speed: Enabling TRIM, updating firmware, and disabling old HDD settings can dramatically improve SSD performance.
- Common issues are fixable: Problems like SSD not showing up or initialization errors have straightforward solutions.
- Regular maintenance keeps your SSD healthy: Simple habits like avoiding full storage and updating drivers extend your SSD lifespan.
📑 Table of Contents
What Does It Mean To Initialize A New SSD?
When you plug in a brand new SSD, it comes blank. There is no file system, no partitions, and no data on it. Initialization is the process that prepares the drive so your computer can use it. Think of it like opening a brand new notebook. Before you can write anything, you need to set it up first.
During initialization, your computer creates a partition table on the drive. This table tells the operating system where the drive is and how it is organized. It also prepares the disk so you can create partitions and format them with a file system. Once that is done, your SSD is ready to store files, run programs, and serve as your primary or secondary storage.
The good news is that modern operating systems make this process very easy. Both Windows and macOS have built-in tools that handle initialization in just a few clicks. You do not need any special software or technical skills. Just follow the steps below and your new SSD setup will be complete in minutes.
How To Initialize A New SSD In Windows
Step 1: Connect Your SSD
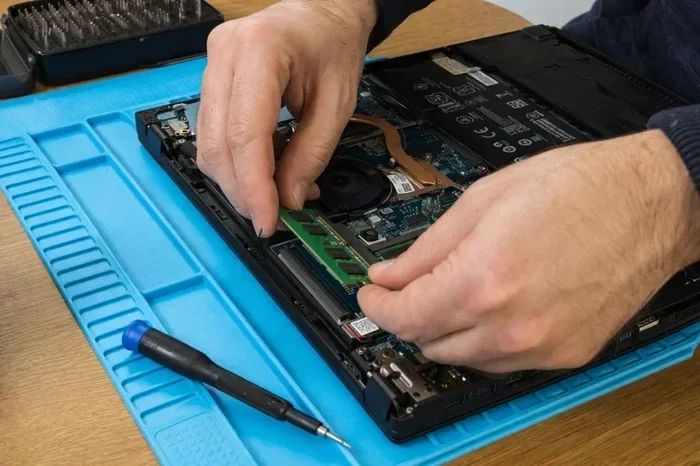
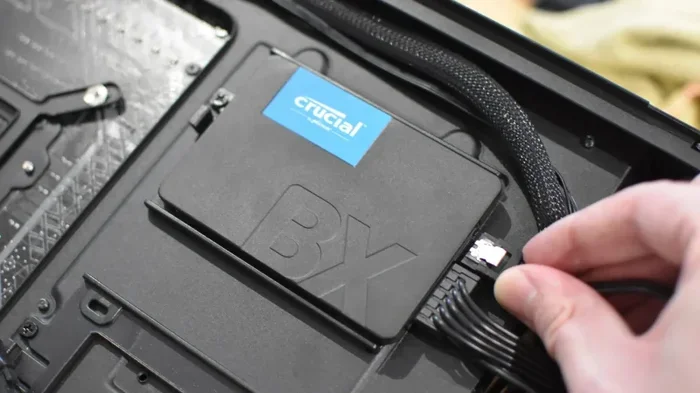
First, physically install or connect your SSD to your computer. If you have an M.2 NVMe drive, you will need to slot it into the motherboard. If you have a 2.5-inch SATA SSD, connect it using a SATA cable and a power cable. For external SSDs, simply plug it into a USB port. Once connected, turn on your computer and wait for Windows to detect the drive.
Step 2: Open Disk Management
Right-click on the Start button and select Disk Management from the menu. This built-in Windows tool shows all connected drives and their status. You should see your new SSD listed, usually marked as “Not Initialized.” You will also see a popup asking if you want to initialize the disk.
Click OK to proceed. You will then be asked to choose a partition style: MBR (Master Boot Record) or GPT (GUID Partition Table). For most modern computers, GPT is the better choice. It supports drives larger than 2 TB and offers better compatibility with newer systems. If you have an older computer or need legacy boot support, choose MBR instead.
Step 3: Initialize And Format The Drive
Once initialized, your SSD will show as unallocated space in Disk Management. Right-click on that unallocated space and select New Simple Volume. Follow the wizard to assign a drive letter, choose a file system, and format the drive. For Windows users, NTFS is the recommended file system. It offers excellent performance and supports large files.
After formatting is complete, your new SSD will appear in File Explorer and be ready to use. If you want to learn more about formatting options, check out our guide on How To Format New Nvme Ssd for detailed instructions.
How To Initialize A New SSD On Mac
Step 1: Connect The Drive
Connect your SSD to your Mac using a USB cable, Thunderbolt connection, or by installing it internally if your Mac supports it. macOS will typically recognize the drive automatically and prompt you to initialize it. If it does not, you can use the built-in Disk Utility tool to set it up.
Step 2: Open Disk Utility
Open Disk Utility by pressing Command + Space, typing “Disk Utility,” and pressing Enter. In the sidebar, find your new SSD. Click on the Erase tab at the top of the window. You will see options to choose a name, format, and scheme for the drive.
For the format, choose APFS if you are running macOS High Sierra or later. APFS is optimized for SSD storage and offers excellent performance. For the scheme, choose GUID Partition Map. This is the standard for modern Macs and ensures full compatibility.
Step 3: Complete The Setup
Click Erase and Disk Utility will format your SSD. Once the process finishes, your drive is ready to use. You can now drag files onto it, install applications, or use it as a backup drive. Mac users who want to learn about connecting external SSDs can also check out our article on M 2 Nvme To Usb C Ssd Enclosure for helpful tips on enclosures and connections.
Best File System For Your New SSD
Choosing the right file system is an important part of initializing your SSD. The file system determines how data is organized and stored on the drive. Different systems work better with different operating systems and use cases. Here is a quick comparison of the most common options.
| File System | Best For | Max File Size | Mac Compatible | Windows Compatible |
|---|---|---|---|---|
| NTFS | Windows internal drives | 16 EB | Read only | Full support |
| APFS | Mac internal drives | 16 EB | Full support | Read only (with third-party) |
| exFAT | Cross-platform drives | 16 EB | Full support | Full support |
| FAT32 | Legacy systems | 4 GB | Full support | Full support |
For most users, NTFS on Windows and APFS on Mac are the best choices. If you need to use the same SSD on both operating systems, exFAT is the way to go. It works seamlessly on both platforms and has no file size limits. Avoid FAT32 for modern SSDs because it has a 4 GB file size limit, which is very restrictive.
When you format your drive during initialization, make sure to select the correct file system. This single choice affects performance, compatibility, and how you use the drive going forward. Getting it right from the start saves you a lot of headaches later.
How To Optimize Your New SSD For Maximum Performance
Initialization is just the beginning. To get the most out of your new SSD, you need to optimize it properly. These steps ensure your drive runs at peak speed and stays healthy for years to come.
Enable TRIM
TRIM is a command that tells your SSD which data blocks are no longer in use. Without TRIM, your SSD has to work harder to manage data, which slows it down over time. On Windows, TRIM is enabled by default for most SSDs. To check, open Command Prompt and type fsutil behavior query DisableDeleteNotify. If the result is 0, TRIM is active. On macOS, TRIM is enabled automatically for Apple SSDs. For third-party SSDs, you may need to enable it manually in the terminal.
Update Your SSD Firmware
SSD manufacturers release firmware updates that improve performance, fix bugs, and enhance compatibility. Visit your SSD manufacturer’s website and check for the latest firmware for your model. Updating firmware is usually simple and can make a noticeable difference in speed and stability.
Disable Disk Defragmentation
This might sound counterintuitive, but SSDs do not need defragmentation. In fact, defragging an SSD can reduce its lifespan. Windows knows this and automatically disables defrag for SSDs. However, double-check your settings to make sure your SSD is not being defragmented unnecessarily. Go to Optimize Drives in Windows and verify that your SSD shows “OK” and “0% fragmented.”
Keep At Least 10-15% Free Space
SSDs perform best when they have free space available. This free space allows the drive to manage wear leveling and garbage collection efficiently. Try to keep at least 10-15% of your SSD free at all times. If you fill the drive completely, performance can drop significantly.
Install The Latest Drivers
Make sure your storage drivers are up to date. Visit your motherboard or laptop manufacturer’s website to download the latest chipset and NVMe drivers. Updated drivers improve compatibility and can unlock better performance from your SSD.
For a complete setup guide that includes driver installation and performance tips, you might also want to read our article on How To Set Up New Nvme Ssd for additional helpful steps.
Common Problems When Initializing A New SSD
Even though initialization is straightforward, you might run into some issues. Here are the most common problems and how to fix them.
SSD Not Showing Up: If your new SSD does not appear in Disk Management, check the physical connection first. Reseat the SATA cable or make sure the M.2 drive is properly seated. On Windows, you can also try refreshing Disk Management by pressing F5. If the drive still does not show up, it may need a driver update or could be defective.
Initialization Error: Sometimes Windows will not let you initialize the drive. This often happens when the drive has leftover partitions from a previous use. Use a third-party tool like MiniTool Partition Wizard to wipe the drive clean before initializing it again.
Drive Shows As RAW: If your SSD shows as RAW in Disk Management, it means the file system is not recognized. This usually happens when the drive was not properly formatted. Simply right-click the drive in Disk Management, select Format, and choose your preferred file system.
Slow Performance After Initialization: If your SSD is slow after setup, make sure TRIM is enabled and the firmware is updated. Also check that AHCI mode is enabled in your BIOS. AHCI allows your system to communicate with the SSD at full speed. You can find this setting in your BIOS under Storage Configuration or SATA Mode.
Key Takeaways
- Initialization is essential: A new SSD must be initialized before you can store any data on it.
- Windows and Mac use different tools: Disk Management handles initialization on Windows, while Disk Utility does the same on macOS.
- Choosing the right file system matters: NTFS for Windows and APFS for Mac offer the best performance and compatibility.
- Optimization steps boost speed: Enabling TRIM, updating firmware, and disabling old HDD settings can dramatically improve SSD performance.
- Common issues are fixable: Problems like SSD not showing up or initialization errors have straightforward solutions.
- Regular maintenance keeps your SSD healthy: Simple habits like avoiding full storage and updating drivers extend your SSD lifespan.
Final Thoughts
Initializing a new SSD is a simple but important process. It sets the foundation for everything you will do with your drive going forward. Whether you are setting up a blazing fast NVMe drive for gaming or adding a reliable SSD for extra storage, taking the time to initialize and optimize your drive pays off big time.
Follow the steps in this guide for your specific operating system, choose the right file system, and take advantage of the optimization tips we shared. Your SSD will thank you with faster boot times, quicker file transfers, and reliable performance for years to come. Do not skip the initialization step, and do not forget to maintain your drive with regular updates and good storage habits. With your new SSD properly initialized, you are ready to experience storage speeds you have never had before.
Frequently Asked Questions
What is the difference between initializing and formatting an SSD?
Initialization prepares the drive by creating a partition table, while formatting creates a file system within the partition. You must initialize first, then format, before the drive is ready to use. Think of initialization as setting up the structure and formatting as filling it with rules for storing data.
Can I initialize an SSD without losing data?
Yes, if the drive is brand new and has never been used, initialization will not erase any existing data because there is none. However, if the drive was previously used and still has data, initializing it will wipe everything. Always back up important files before initializing a used drive.
Should I use MBR or GPT when initializing my SSD?
GPT is the recommended choice for most modern computers. It supports drives larger than 2 TB and works with UEFI-based systems. MBR is an older standard that works with legacy BIOS systems and has a 2 TB size limit. Unless you have an older system, choose GPT for your new SSD.
How long does it take to initialize a new SSD?
Initialization itself takes only a few seconds to a minute. The formatting process may take a little longer depending on the drive size, but it is usually complete within a few minutes. Larger drives may take slightly longer to format fully.
Do I need to initialize my SSD every time I connect it?
No, you only need to initialize a new SSD once. After initialization and formatting, the drive retains its settings and file system. You can disconnect and reconnect it as many times as you want without needing to reinitialize it.
Is it safe to initialize an SSD on a laptop?
Yes, it is completely safe. The initialization process does not affect any other components of your laptop. It only prepares the specific SSD you are setting up. Just make sure you select the correct drive in Disk Management or Disk Utility to avoid initializing the wrong one.