How to Format New Nvme Ssd
Formatting a new NVMe SSD is essential before you can use it for storage. Whether you are on Windows or Mac, the process is simple and only takes a few minutes. This guide walks you through every step with clear instructions and helpful tips.
You just bought a shiny new NVMe SSD and you are ready to speed up your storage. But before you can save a single file, you need to format new NVMe SSD drives properly. Formatting prepares the drive for use and sets up the file system your computer needs to read and write data.
Do not worry if this sounds technical. The process is much simpler than most people think. In this guide, we walk you through every step on both Windows and Mac. You will learn the best file systems to choose, common mistakes to avoid, and tips to keep your SSD running fast for years.
Key Takeaways
- Always format a new NVMe SSD before use to ensure it works properly with your system.
- Windows and Mac have different tools for formatting, but both are easy to use.
- Choosing the right file system like NTFS, exFAT, or APFS matters for performance.
- Quick format is usually enough for a new drive, but full format checks for errors.
- Proper SSD installation and screw tightness affect long-term reliability.
- Back up any existing data before formatting, as the process erases everything.
📑 Table of Contents
Why You Need to Format a New NVMe SSD
When you pull a new NVMe SSD out of the box, it is not ready to use yet. The drive comes blank or with a factory format that may not work with your operating system. Formatting creates a file structure your computer can understand.
Think of it like setting up a new bookshelf. The shelves are there, but you need to organize them before you can store books. Formatting does the same thing for your storage drive. It sets up folders, tracks where files go, and makes sure everything runs smoothly.
Another reason to format is compatibility. A drive formatted for one system may not work well on another. For example, a drive formatted for Windows may not read properly on a Mac without extra steps. Choosing the right format during setup saves you headaches later.
When Should You Format Your NVMe SSD?
You should format your NVMe SSD in a few key situations. First, always format a brand new drive before storing any files on it. Second, format when you switch operating systems or change computers. Third, format if the drive shows errors or runs slowly.
Some users skip formatting and try to use the drive right away. This can lead to compatibility issues and slow performance. Taking five minutes to format upfront saves you hours of troubleshooting later.
How to Format New NVMe SSD on Windows
Windows makes formatting an NVMe SSD very straightforward. You do not need any special software. The built-in tools handle everything you need. Here is how to do it step by step.
Step 1: Connect the NVMe SSD
First, make sure your NVMe SSD is properly installed in your computer or connected via an external enclosure. If you just installed the drive inside your PC, restart the computer and let Windows detect it. You can check if the drive is recognized by opening Disk Management. To do this, right-click the Start button and select Disk Management.
You should see your new NVMe SSD listed as an unallocated drive. If the drive shows up but has no letter assigned, that is perfectly normal. Windows is ready for you to format it.
Step 2: Open Disk Management
Disk Management is the tool you will use to format your drive. Here is how to access it quickly:
- Right-click on the Start button.
- Select Disk Management from the menu.
- Find your new NVMe SSD in the list at the bottom.
If your drive shows as unallocated space, right-click on it and choose New Simple Volume. This wizard will guide you through the formatting process.
Step 3: Choose the File System
Windows gives you several file system options. Here is a quick comparison:
- NTFS: Best for Windows-only drives. Supports large files and has advanced features like file permissions.
- exFAT: Works on both Windows and Mac. Great if you plan to share the drive between systems.
- FAT32: Works everywhere but has a 4GB file size limit. Not ideal for large files.
For most users, NTFS is the best choice for a Windows NVMe SSD. If you need cross-platform compatibility, choose exFAT. Select your preferred file system in the formatting wizard and click Next.
Step 4: Format the Drive
Give your drive a name so you can easily identify it. Then choose between Quick Format and Full Format. For a brand new drive, Quick Format is faster and usually sufficient. Full Format takes longer but checks for bad sectors.
Click Start and wait for the process to finish. Once done, your NVMe SSD is ready to use. You can now save files, install programs, or use it as a backup drive.
How to Format New NVMe SSD on Mac
Mac users have a built-in tool called Disk Utility that makes formatting simple. The process is very similar to Windows but uses different options.
Step 1: Connect and Open Disk Utility
Make sure your NVMe SSD is connected to your Mac. Then open Disk Utility by going to Applications, then Utilities, and selecting Disk Utility. You can also use Spotlight search by pressing Command and Space and typing Disk Utility.
Find your NVMe SSD in the list on the left side of the window. Click on it to select it. Then click the Erase button at the top of the screen.
Step 2: Choose Format Settings
Mac offers several format options. Here is what you need to know:
- APFS: The best choice for modern Macs. Fast, secure, and optimized for SSD storage.
- Mac OS Extended (Journaled): Works on older Macs but lacks some modern SSD features.
- exFAT: Choose this if you want the drive to work on both Mac and Windows.
For most Mac users, APFS is the clear winner. It is designed specifically for flash storage like NVMe SSDs. Enter a name for your drive, select the format, and click Erase.
Step 3: Complete the Format
The format process takes just a few moments. Once it is done, your NVMe SSD will appear on your desktop and in Finder. You can now drag and drop files onto it just like any other drive.
Choosing the Right File System for Your NVMe SSD
Choosing the correct file system is one of the most important decisions when you format new NVMe SSD drives. The wrong choice can limit performance or cause compatibility problems. Let us break down the options clearly.
NTFS vs exFAT vs APFS
Each file system has its strengths. NTFS is the default for Windows and offers the best performance on that platform. It supports large files, encryption, and advanced permissions. However, Windows can only read APFS drives, not write to them, without extra software.
exFAT is the universal choice. It works on both Windows and Mac without any additional tools. If you plan to move your NVMe SSD between different computers, exFAT is the way to go. The tradeoff is that exFAT lacks some of the advanced features of NTFS and APFS.
APFS is Apple’s modern file system built for SSDs. It offers fast performance, strong encryption, and space sharing. If you are a Mac user, APFS gives your NVMe SSD the best possible setup.
Quick Format vs Full Format
When formatting, you will see two options: Quick Format and Full Format. Quick Format creates a new file system without scanning the drive for bad sectors. It is fast and perfect for new drives that have never been used.
Full Format does a thorough scan of every sector on the drive. It checks for errors and marks bad areas so they are not used. For a brand new NVMe SSD, Quick Format is almost always the right choice. Full Format is better for older drives or drives that have had issues.
Some users worry that Quick Format skips important checks. On a new drive, this is not a concern. The drive has no data and no bad sectors yet. Save the full format for drives that have been in use for a long time.
Common Mistakes When Formatting NVMe SSDs
Formatting an NVMe SSD is simple, but mistakes can still happen. Here are the most common errors and how to avoid them.
Formatting the Wrong Drive
This is the number one mistake people make. If you have multiple drives connected, it is easy to accidentally format the wrong one. Always double-check the drive name and size before clicking the Erase or Format button.
One way to avoid this is to disconnect all other drives before formatting. This way, only your NVMe SSD shows up in the formatting tool. You can also check the drive capacity in Disk Management or Disk Utility to confirm you are targeting the correct drive.
Skipping the Format Entirely
Some people plug in a new NVMe SSD and try to use it without formatting. This might work in some cases, but it often leads to problems. The drive may not perform at its best, or it may not be compatible with your system.
Always take the time to format properly. It takes only a few minutes and ensures your drive works correctly from day one.
Using the Wrong File System
Choosing FAT32 for a drive that will hold large files is a common mistake. FAT32 has a 4GB file size limit, which means you cannot store large videos or disk images on it. Always choose NTFS, exFAT, or APFS depending on your needs.
If you are unsure, exFAT is the safest choice for most users. It works everywhere and has no file size limits.
Tips to Keep Your NVMe SSD Running Fast
Formatting is just the beginning. Once your NVMe SSD is set up, proper care keeps it performing at its best. Here are some simple tips.
Avoid Filling the Drive Completely
NVMe SSDs perform best when they have some free space. Try to keep at least 10 to 20 percent of the drive empty. This gives the drive room to manage data and maintain fast speeds.
Keep Your Firmware Updated
SSD manufacturers release firmware updates that improve performance and fix bugs. Check the manufacturer’s website periodically to see if updates are available for your NVMe SSD model.
Handle Installation Carefully
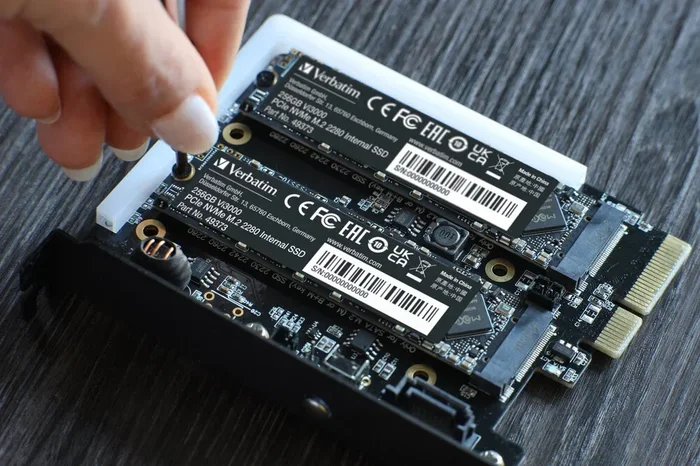
When installing your NVMe SSD inside a computer, make sure the screw is snug but not overly tight. Over-tightening can damage the drive or the motherboard slot. If you are unsure about proper installation, check the manufacturer guidelines or a trusted guide on how tight the screw should be for an NVMe SSD to avoid damage.
Monitor Drive Health
Use tools like CrystalDiskInfo or the manufacturer’s software to monitor your SSD’s health. These tools check for wear, temperature, and potential issues before they become serious problems.
When to Seek Professional Help
Most formatting tasks go smoothly without any issues. But sometimes things do not go as planned. If your NVMe SSD does not appear in Disk Management or Disk Utility, try connecting it to a different port or computer. If it still does not show up, the drive may have a hardware issue.
You should also seek help if you accidentally format the wrong drive and lose important data. Data recovery is possible in many cases, but the sooner you act, the better your chances. Stop using the affected drive immediately and contact a professional data recovery service.
Some users encounter issues after formatting where the drive runs slower than expected. This can happen if the drive is not properly seated or if the SATA/NVMe port is not working correctly. In these cases, reseating the drive or trying a different port often solves the problem.
Conclusion
Formatting a new NVMe SSD is a quick and easy process that sets the foundation for fast, reliable storage. Whether you are using Windows or Mac, the built-in tools make it simple. Just remember to choose the right file system, use Quick Format for new drives, and always double-check you are formatting the correct drive.
Taking a few extra minutes to format properly pays off in performance and longevity. Your NVMe SSD will thank you with fast load times and smooth operation for years to come. Now that you know how to format new NVMe SSD drives, you are ready to get the most out of your new storage device.
For more tips on keeping your SSD in top shape, explore our other guides and resources on SSD management and optimization.
Frequently Asked Questions
Can I use a new NVMe SSD without formatting it?
You can try using it without formatting, but it is not recommended. Most systems will prompt you to format the drive before use anyway. Formatting ensures compatibility and optimal performance from the start.
How long does it take to format an NVMe SSD?
Quick Format takes less than a minute for most NVMe SSDs. Full Format can take longer depending on the drive size, but for new drives, Quick Format is all you need.
Will formatting erase all data on my NVMe SSD?
Yes, formatting erases all existing data on the drive. Always back up any important files before you begin the format process. This is especially important if the drive has been used before.
What is the best file system for an NVMe SSD on Windows?
NTFS is the best file system for NVMe SSDs used only on Windows. It supports large files, offers advanced features, and delivers excellent performance on solid state drives.
Can I format an NVMe SSD on a Mac if it was originally formatted for Windows?
Yes, you can. Simply connect the drive to your Mac, open Disk Utility, and erase it with your preferred format. Keep in mind that Windows-formatted drives may need to be reformatted for full Mac compatibility.
How often should I reformat my NVMe SSD?
You generally do not need to reformat a healthy NVMe SSD regularly. Only reformat when switching operating systems, selling or giving away the drive, or if the drive develops file system errors.