How To Manage Allowed Blocked Apps Windows Defender Firewall
Managing allowed and blocked apps in Windows Defender Firewall is essential for keeping your PC safe and running smoothly. This guide walks you through every step, from allowing trusted apps to blocking unwanted ones. You will learn how to use both the Settings app and Control Panel to configure your firewall rules with confidence. We also cover common issues, best practices, and expert tips to help you take full control of your network security. By the end, you will know exactly how to manage your app permissions like a pro.
Windows Defender Firewall is one of the most important built-in security tools on any Windows PC. It sits between your computer and the internet, watching every bit of data that tries to enter or leave your system. But what happens when an app you trust gets blocked, or an app you do not want sneaks through? That is where knowing how to manage allowed and blocked apps becomes critical. This guide will show you exactly how to take charge of your firewall settings.
Managing your allowed and blocked apps list is not just for tech experts. Everyday users benefit from understanding how their firewall works. Whether you are installing a new program, troubleshooting connection issues, or tightening your PC security, these steps apply to Windows 10 and Windows 11 alike. Let us dive right in.
## Understanding Windows Defender Firewall and App Management
### What Is Windows Defender Firewall?
Windows Defender Firewall is a built-in security feature that monitors incoming and outgoing network traffic. It decides which data packets are allowed through and which ones get blocked. Think of it as a bouncer at the door of your PC, checking every guest before letting them in.
This firewall has been part of Windows for many years. It replaced the older Windows Firewall and now comes packed with Windows Security. The good news is that you do not need to install any extra software. Everything you need is already on your computer.
The firewall works by using a set of rules. Each rule tells the system what to do with traffic from a specific app or port. When you allow an app through the firewall, you are adding it to a whitelist. When you block an app, you are adding it to a blacklist. Understanding this basic idea makes everything else much easier.
### Why Manage App Permissions?
Not every app needs access to the internet. Some apps work perfectly fine offline, while others rely on a constant connection. When you manage app permissions in the firewall, you control which apps can communicate over your network.
This matters for two big reasons. First, it improves your security. Fewer open connections mean fewer opportunities for hackers or malware to sneak in. Second, it can improve your PC performance. Too many apps using the network at once can slow things down. If your system feels sluggish, checking your firewall settings is a great first step. You might also want to look at how you manage other system resources, like how to upgrade the RAM of a laptop, to get the most out of your machine.
## How To Allow Apps Through Windows Defender Firewall
### Using The Settings App
The easiest way to allow an app is through the Windows Settings app. This method works on both Windows 10 and Windows 11 and requires no technical skills.
Here is how to do it:
1. Press the Windows key and type “Windows Security.”
2. Open the app and click on “Firewall & network protection.”
3. Click on “Allow an app through firewall.”
4. Click the “Change settings” button. You may need admin rights.
5. Scroll through the list and check the box next to the app you want to allow.
6. Choose whether to allow it on private, public, or both networks.
7. Click “OK” to save your changes.
That is it. The app is now on your allowlist and can communicate freely through the firewall. If the app does not appear in the list, click “Allow another app” at the bottom and browse for the executable file.
### Using Control Panel For Advanced Options
Some users prefer the classic Control Panel. It offers a slightly different view and can be useful for managing multiple apps at once.
To access it, open the Start menu, type “Windows Defender Firewall,” and select it from the results. On the left side, click “Allow an app or feature through Windows Defender Firewall.” This opens a dialog box similar to the one in Settings. The advantage here is that you can also click “Customize settings” to see more details about each rule.
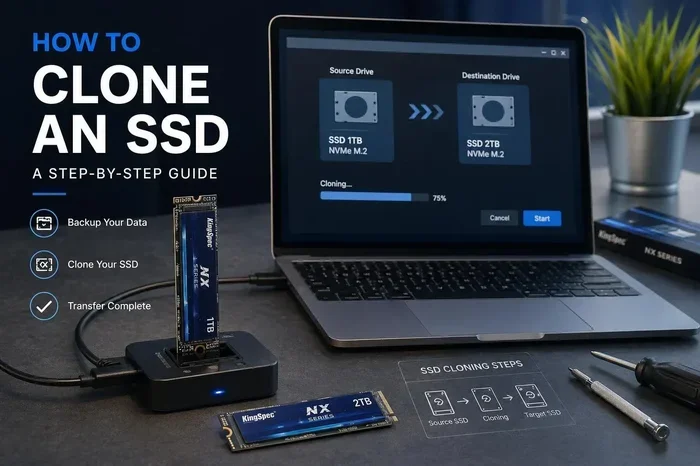
If you have ever installed an M.2 NVMe SSD in your PC, you already know that working with system-level tools takes a bit of patience. The same applies here. Take your time, read each screen carefully, and do not rush through the steps.
### Adding Apps To The Allowlist
Sometimes an app does not show up in the default list. This is common with newer or less popular programs. When this happens, you need to add the app manually.
In the Settings app, click “Allow another app.” A new window will pop up. Click “Browse” and navigate to the app’s installation folder. Most apps install to “C:\Program Files” or “C:\Program Files (x86).” Find the main executable file, select it, and click “Open.” Then check the boxes for the network types you want to allow and click “OK.”
This method works for almost any app, including portable programs that do not use a traditional installer. Just make sure you point to the correct file.
## How To Block Apps In Windows Defender Firewall
### Blocking Apps Through Settings
Blocking an app is just as simple as allowing one. The key difference is that you are removing the app from the allowlist or adding it to the blocklist.
To block an app, follow these steps:
1. Open Windows Security and go to “Firewall & network protection.”
2. Click “Allow an app through firewall.”
3. Find the app in the list and uncheck the box next to it.
4. Choose whether to block it on private, public, or both networks.
5. Click “OK.”
The app will no longer be able to send or receive data over the network. This is useful for apps you do not trust or apps that are using too much bandwidth in the background.
### Creating Inbound And Outbound Rules
For more advanced control, you can create custom inbound and outbound rules. Inbound rules control what traffic comes into your PC. Outbound rules control what traffic leaves your PC.
To create a custom rule:
1. Open Windows Defender Firewall from the Start menu.
2. Click “Advanced settings” on the left side. This opens the Windows Firewall with Advanced Security console.
3. Right-click on “Inbound Rules” or “Outbound Rules” and select “New Rule.”
4. Choose “Program” and click Next.
5. Browse to the app’s executable file.
6. Select “Block the connection” and click Next.
7. Choose which network types the rule applies to.
8. Give the rule a name and click “Finish.”
Custom rules give you granular control over your network traffic. They are especially useful for blocking specific apps without affecting others.
## Managing Firewall Rules For Network Types
### Private vs Public Network Profiles
Windows uses different network profiles to determine how strict the firewall should be. A private network is one you trust, like your home Wi-Fi. A public network is one you do not trust, like a coffee shop or airport Wi-Fi.
When you allow or block an app, you can choose which profile the rule applies to. On a public network, the firewall is stricter by default. This means fewer apps are allowed through. On a private network, you can be more relaxed since you control the environment.
It is a good practice to review your rules for each profile regularly. If you often switch between home and public networks, make sure your settings match your needs.
### Customizing Rules Per Network
You can also customize rules for each network type separately. This is helpful if you want an app to work at home but not on public Wi-Fi.
To do this, go to “Allow an app through firewall” and check or uncheck the boxes for “Private” and “Public” next to each app. This gives you fine-tuned control without creating extra rules.
## Common Firewall Issues And How To Fix Them
### Apps Not Showing In The List
Sometimes an app simply does not appear in the allowlist. This can happen for several reasons. The app might not have been installed correctly. It might be a portable app that does not register itself with the firewall. Or the app might already be blocked and hidden from the default view.
To fix this, try adding the app manually using the “Allow another app” method described earlier. If the app still does not appear, check that you are running the Settings app as an administrator. Right-click the app icon and select “Run as administrator.”
### Firewall Blocking Legitimate Software
One of the most frustrating issues is when the firewall blocks an app you trust. This often happens after a Windows update or when you reinstall an app. The firewall rules from the old installation may still be active.
To fix this, go to the firewall settings and re-allow the app. If the problem persists, you can delete the old rule using the Advanced Settings console and create a new one. This clears any conflicting rules and gives your app a clean slate.
## Best Practices For Firewall Management
### Regular Maintenance Tips
Just like maintaining your PC hardware, firewall management needs regular attention. Here are some tips to keep your firewall in top shape:
– Review your allowed apps list once a month.
– Remove any apps you no longer use.
– Check for Windows updates that may reset your rules.
– Use the Advanced Settings console for a full overview of all rules.
– Keep your antivirus software up to date alongside your firewall.
When you take care of your firewall, you take care of your entire system. Think of it like keeping your PC clean and organized. Just as you might install RAM in a laptop to boost performance, managing your firewall keeps your system secure and efficient.
### When To Allow Or Block Apps
A good rule of thumb is to allow only the apps you actively use and trust. Games, communication apps, and productivity tools usually need access. But background utilities, trial software, and unknown programs should be blocked by default.
If you are ever unsure about an app, block it first and test if it still works. You can always change the rule later. This cautious approach keeps your PC safe without breaking functionality.
## Expert Insights
Security experts recommend taking a layered approach to PC protection. The firewall is just one piece of the puzzle. Combine it with a strong antivirus, regular updates, and safe browsing habits.
One expert tip is to use the “Logging” feature in Advanced Settings. This lets you see which apps are trying to connect and whether they were allowed or blocked. Reviewing these logs once in a while can reveal suspicious activity early.
Another tip is to disable the firewall only when absolutely necessary. Some users turn it off to fix connection issues, but this leaves the PC exposed. Always try adjusting the rules first before disabling the firewall entirely.
## Key Takeaways
Key Takeaways
- Easy Access: You can manage allowed and blocked apps directly from the Windows Settings app or the classic Control Panel.
- Two-Way Control: Windows Defender Firewall lets you manage both inbound and outbound rules for every app on your system.
- Network Profiles Matter: You can set different firewall rules for private, public, and domain networks.
- Common Issues Are Fixable: Most firewall problems, like apps not showing up or being blocked incorrectly, have simple solutions.
- Best Practices Keep You Safe: Regularly reviewing your app permissions and following security guidelines ensures long-term protection.
- Custom Rules Give Power: Advanced users can create specific inbound and outbound rules for granular control over network traffic.
Key Takeaways
- Simple Access: You can manage allowed and blocked apps directly from Windows Settings or the Control Panel without any extra tools.
- Two-Way Control: The firewall manages both inbound and outbound traffic, giving you full control over app communication.
- Network Profiles: Different rules can apply to private and public networks for flexible security.
- Custom Rules: Advanced users can create specific inbound and outbound rules for precise control over network traffic.
- Common Issues Are Solvable: Apps not showing up or being blocked incorrectly can usually be fixed in a few minutes.
- Regular Reviews Matter: Periodically checking your firewall rules keeps your PC secure and running smoothly.
- Layered Security: The firewall works best when combined with antivirus software, updates, and safe browsing habits.
## Frequently Asked Questions
How do I find the list of allowed apps in Windows Defender Firewall?
Open Windows Security, click on “Firewall & network protection,” and then select “Allow an app through firewall.” This shows you every app currently on your allowlist along with the network types it is permitted to use.
Can I block a specific app from accessing the internet without uninstalling it?
Yes, absolutely. You can block any app by unchecking its box in the “Allow an app through firewall” list or by creating a custom outbound rule in the Advanced Settings console. The app stays installed but loses network access.
What is the difference between inbound and outbound firewall rules?
Inbound rules control traffic coming into your PC from the internet or network. Outbound rules control traffic leaving your PC. Both are important for complete security, and you can manage them separately in the Advanced Settings.
Will blocking an app in the firewall affect its performance?
It depends on the app. If the app needs the internet to function properly, blocking it will prevent it from working as intended. Offline apps will not be affected at all. Always check whether the app requires a connection before blocking it.
Do I need to restart my PC after changing firewall settings?
In most cases, no. The new rules take effect immediately. However, if an app was already running when you changed its rule, you may need to close and reopen it for the changes to apply.
Can I export my firewall rules and transfer them to another PC?
Yes, you can. In the Advanced Settings console, right-click on “Windows Defender Firewall with Advanced Security” at the top of the left panel and select “Export Policy.” This saves all your rules to a file that can be imported on another PC running Windows.
## Conclusion
Managing allowed and blocked apps in Windows Defender Firewall is a skill every PC user should have. It gives you direct control over your network security and helps keep your system running at its best. From the simple Settings app to the powerful Advanced Settings console, Windows provides all the tools you need.
By following the steps in this guide, you can confidently allow the apps you trust and block the ones you do not. Regular maintenance and a cautious approach will keep your PC safe for years to come. Start today, take a few minutes to review your firewall rules, and enjoy the peace of mind that comes with a well-protected system.
Frequently Asked Questions
What is How To Manage List Of Allowed Blocked Apps In Windows Defender Firewall?
How To Manage List Of Allowed Blocked Apps In Windows Defender Firewall is an important topic with many practical applications.