How to Install M 2 Nvme Ssd in Pc

Installing an M 2 NVMe SSD in your PC is one of the best upgrades you can make for speed and performance. This guide walks you through every step, from picking the right slot to verifying your drive works. You do not need to be a tech expert to get it done in under 30 minutes.
If your PC feels slow, upgrading to an M 2 NVMe SSD can make a huge difference. These tiny drives deliver blazing fast read and write speeds that transform how your computer handles everyday tasks. Whether you are a gamer, a content creator, or just someone who wants a snappier system, this upgrade is worth every minute of effort.
In this guide, we will walk you through the entire process of how to install M 2 NVMe SSD in PC. We cover everything from what you need before you start to verifying that your new drive is working correctly. No confusing jargon, no unnecessary steps. Just clear, practical instructions you can follow right now.
The best part? You do not need expensive tools or advanced technical skills. A screwdriver, your motherboard manual, and a few minutes of your time are all it takes. Let us get into it.
Key Takeaways
- M 2 NVMe SSDs are much faster than traditional hard drives and SATA SSDs.
- You only need a few basic tools and about 20 minutes to complete the install.
- Not all M 2 slots support NVMe, so check your motherboard first.
- Mounting the drive correctly prevents loose connections and performance issues.
- Installing the right driver ensures you get the full speed of your new SSD.
- Avoiding common mistakes like overtightening screws saves you from damage.
📑 Table of Contents
What Is an M 2 NVMe SSD?
An M 2 NVMe SSD is a small, flat drive that connects directly to your motherboard. Unlike traditional hard drives that use cables, M 2 drives slot right into a dedicated connector. The “NVMe” part stands for Non-Volatile Memory Express, which is a protocol that lets the drive communicate with your PC at incredibly high speeds.
Here are some key things to know about these drives:
- Size: M 2 SSDs are about the size of a stick of gum. They take up very little space inside your case.
- Speed: NVMe drives can reach speeds of 3,500 MB/s or more, far faster than SATA SSDs.
- Connector: They plug into an M 2 slot on the motherboard, which handles both data and power.
- Capacity: You can find them in sizes ranging from 250GB to 4TB or more.
If you are comparing options, check out our guide on NVMe M.2 SSDs to understand the different types available and how they fit into your build.
What You Need Before You Start
Before you open up your PC case, gather everything you need. Having the right tools and information ready saves time and prevents frustration.
Tools You Will Need
- A Phillips head screwdriver (small size works best)
- Your motherboard manual (check for M 2 slot details)
- An anti-static wrist strap (optional but helpful)
- A clean, flat workspace
Check Your Motherboard Compatibility
Not every M 2 slot on a motherboard supports NVMe drives. Some slots only work with SATA M 2 drives, and using the wrong one means your NVMe SSD will not work at full speed or at all. Open your motherboard manual or visit the manufacturer website to confirm which slots support PCIe NVMe.
Also, check the key type. Most NVMe M 2 drives use the M key slot, but some motherboards have both M and B key slots. The M key slot has one notch on the right side, and that is where your NVMe drive goes.
If you are unsure about which drive to buy, the Corsair MP600 Core XT is a popular choice that delivers excellent performance and works well in most modern PCs.
Back Up Your Data
While installing an M 2 SSD rarely causes data loss, it is always smart to back up important files first. You can use an external drive or cloud storage. This step takes just a few minutes but gives you peace of mind.
Step-by-Step Installation Guide
Now for the fun part. Follow these steps carefully and you will have your new drive installed in no time.
Step 1: Power Down and Unplug Your PC
Turn off your computer completely. Unplug the power cable from the back of the power supply. Press and hold the power button for about 10 seconds to drain any remaining electricity. This is a safety step you should never skip.
Step 2: Open Your PC Case
Remove the side panel of your case. Most cases use thumbscrews or regular screws on the back. Once the panel is off, you will have clear access to the motherboard and internal components.
Take a moment to ground yourself by touching a metal part of the case. This prevents static electricity from damaging sensitive components.
Step 3: Locate the M 2 Slot
Look at your motherboard for the M 2 slot. It is a small slot with a screw hole nearby, usually located near the CPU or along the bottom edge of the board. Your motherboard may have multiple M 2 slots, so check your manual to identify which ones support NVMe.
If your motherboard has a heatsink over the M 2 slot, you may need to remove it first. Just loosen the screw or release the latch holding it in place.
Step 4: Insert the M 2 NVMe SSD
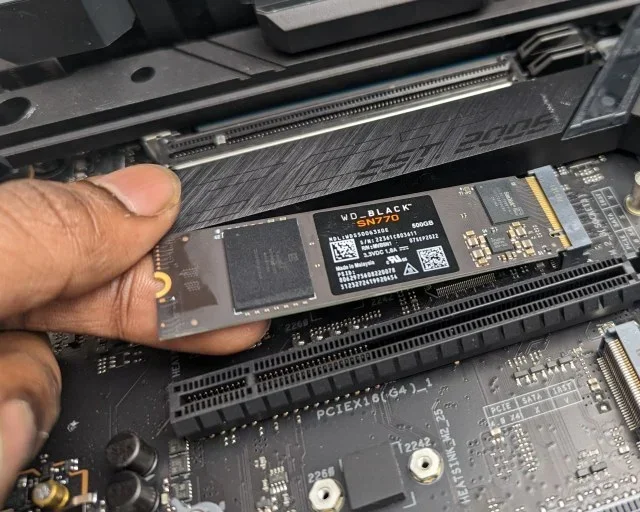
Hold your M 2 SSD at about a 30-degree angle. Align the notch on the gold connector with the key in the M 2 slot. Gently push the drive down into the slot. It should slide in smoothly without forcing it.
Once the drive is fully seated, press it down flat and use the small screw to secure the back end. Do not overtighten the screw. Just snug it up gently. Overtightening can crack the motherboard or damage the drive.
You can also check out our article on installing extra RAM in a laptop if you want to pair this SSD upgrade with a memory boost for even better performance.
Step 5: Close Up and Power On
Put the side panel back on your case. Reconnect the power cable. Turn on your PC and listen for the normal boot sounds. Your system should recognize the new drive automatically.
Step 6: Initialize and Format the Drive
On Windows, open Disk Management by right-clicking the Start button and selecting “Disk Management.” You should see your new M 2 NVMe SSD listed. If it shows as “Unallocated,” right-click the unallocated space and choose “New Simple Volume.” Follow the prompts to format the drive with NTFS and assign a drive letter.
If you are using the drive as your main system drive, you may need to reinstall Windows or clone your existing operating system onto it. For large storage needs, consider a 2TB M.2 NVMe SSD which gives you plenty of room for games, files, and applications.
Common Mistakes to Avoid
Even a simple install can go wrong if you are not careful. Here are the most common mistakes people make when installing an M 2 NVMe SSD:
- Using the wrong M 2 slot: Some slots only support SATA, not NVMe. Always double-check your motherboard manual.
- Overtightening the screw: The screw only needs to be snug. Tightening it too much can damage the drive or motherboard.
- Forcing the drive into the slot: If it does not slide in easily, check the angle and alignment. Forcing it can bend the pins.
- Skipping the driver install: Installing the NVMe driver from the manufacturer website ensures you get the full speed of your drive.
- Not enabling XMP in BIOS: While not directly related to the SSD, enabling XMP ensures your system runs at its full potential after the upgrade.
Avoiding these simple mistakes keeps your PC safe and ensures your new drive performs at its best.
How to Verify Your Installation
After you have installed and formatted your M 2 NVMe SSD, it is important to confirm everything is working correctly. Here is how to check:
- Check Disk Management: Open Disk Management and confirm the drive shows the correct capacity and file system.
- Run a Speed Test: Use a free tool like CrystalDiskMark to test read and write speeds. A healthy NVMe SSD should show speeds well above 1,000 MB/s.
- Check Device Manager: Open Device Manager and look under “Disk Drives.” Your new SSD should appear in the list without any warning icons.
- Boot Time Check: If you installed Windows on the new drive, notice how much faster your PC boots up compared to before.
If the drive does not show up, try reseating it. Remove the screw, pull the drive out slightly, and push it back in firmly. Then retest.
Optimizing Your New M 2 NVMe SSD
Once your drive is installed and working, there are a few things you can do to get the most out of it.
Install the Latest NVMe Driver
Windows includes a basic driver for NVMe drives, but installing the manufacturer driver can unlock better performance and stability. Visit the website of your SSD brand (such as Samsung, Crucial, or WD) and download the latest NVMe driver for your specific model.
Enable TRIM Support
TRIM helps your SSD maintain its speed over time by clearing out unused data blocks. Windows usually enables TRIM by default for NVMe drives, but you can verify by opening Command Prompt and typing fsutil behavior query DisableDeleteNotify. A result of 0 means TRIM is active.
Consider a Heatsink
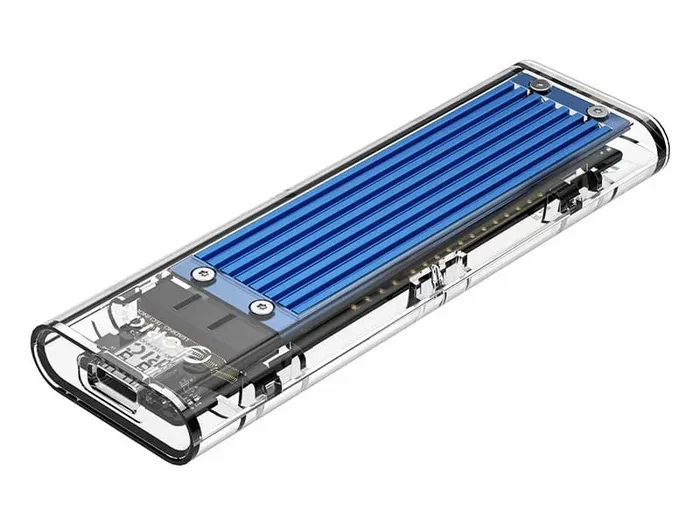
M 2 NVMe SSDs can generate heat, especially during heavy workloads. Many motherboards come with M 2 heatsinks built in. If yours does not, you can buy an M 2 NVMe enclosure with a heatsink or a standalone M 2 heatsink to attach to your drive. Keeping temperatures in check helps maintain long-term performance.
Use the Drive for the Right Purpose
For the best experience, use your NVMe SSD as your primary drive for the operating system and your most-used applications. Store large media files or backups on a secondary drive or external storage. This setup keeps your system running fast while still giving you plenty of space.
When to Consider Professional Help
Most people can install an M 2 NVMe SSD without any issues. However, there are situations where getting help makes sense. If your motherboard does not have an M 2 slot, you may need a PCIe adapter card. If you are uncomfortable opening your PC case, a local computer shop can handle the install for a small fee.
Also, if you plan to clone your existing drive to the new NVMe SSD, the process can be tricky for beginners. Using cloning software like Macrium Reflect or Samsung Data Migration makes it easier, but it is important to follow each step carefully.
Conclusion
Installing an M 2 NVMe SSD in your PC is one of the most rewarding upgrades you can do. It is fast, affordable, and makes an immediate difference in how your computer feels. From boot times to game loading speeds, the improvement is noticeable right away.
Follow the steps in this guide, avoid the common mistakes, and you will have your new drive running in under 30 minutes. Take your time, be gentle with the components, and enjoy the speed boost that comes with your new NVMe SSD.
Frequently Asked Questions
Do I need an M 2 NVMe SSD if I already have a SATA SSD?
Yes, if you want faster speeds. NVMe drives are several times faster than SATA SSDs. If you work with large files, edit video, or play demanding games, the speed difference is very noticeable.
Can I install an M 2 NVMe SSD alongside my existing hard drive?
Absolutely. You can have both drives in your PC at the same time. Use the NVMe SSD for your operating system and programs, and keep the hard drive for extra storage.
What happens if I put an NVMe drive in a SATA M 2 slot?
The drive will not work properly. SATA M 2 slots and NVMe M 2 slots use different protocols. Always check your motherboard manual to confirm which slots support NVMe.
Do I need to update my BIOS before installing an M 2 NVMe SSD?
Usually no. Most modern motherboards support NVMe out of the box. However, updating your BIOS to the latest version can fix compatibility issues and improve stability.
How do I know if my M 2 NVMe SSD is working at full speed?
Run a benchmark test using CrystalDiskMark or a similar tool. Compare your results to the advertised speeds of your drive. If speeds are much lower, check your BIOS settings and make sure the drive is seated properly.
Can I use an M 2 NVMe SSD in a laptop?
Yes, many laptops have M 2 slots for SSD upgrades. Check your laptop manual to confirm compatibility. The installation process is similar but takes place inside the laptop chassis.
=== CONCLUSION ===
Upgrading to an M 2 NVMe SSD is one of the simplest and most impactful things you can do for your PC. The process is straightforward, the cost is reasonable, and the performance gains are immediate. Whether you are a casual user or a power user, this upgrade delivers real results.
Now that you know exactly how to install M 2 NVMe SSD in PC, you have everything you need to get started. Grab your screwdriver, find that M 2 slot, and give your PC the speed boost it deserves.