How to Install a Ram in Laptop
Installing RAM in your laptop is one of the simplest upgrades you can make to significantly boost performance and multitasking speed. Adding more memory helps your laptop run smoother, load apps faster, and handle demanding tasks without freezing. This guide walks you through the entire laptop RAM installation process step by step, so you can upgrade your system quickly and confidently.
Key Takeaways
- Verify compatibility first: Learn how to install a ram in laptop by checking specs and max capacity.
- Prepare safely: Power off, unplug, and ground yourself to prevent static damage.
- Find the slot: Locate the RAM access panel on your laptop’s underside.
- Insert at an angle: Place the SODIMM stick at 45 degrees into the slot.
- Lock it in: Press down firmly until the side clips snap securely.
- Confirm recognition: Boot up and check system properties to ensure the new memory is detected.
- Boost performance: A successful how to install a ram in laptop upgrade speeds up multitasking.
📑 Table of Contents
Why Installing RAM in Your Laptop Matters
If your laptop has been running slower than a snail on a hot sidewalk, the problem might not be your processor or hard drive. It could be your RAM. Random Access Memory is basically your laptop’s short-term memory. It handles everything you’re working on right now. When you don’t have enough of it, your system struggles. Learning how to install a ram in laptop can completely transform your daily computing experience.
Upgrading your laptop’s memory is one of the simplest and most cost-effective ways to boost performance. Whether you’re a student juggling multiple tabs, a gamer running heavy titles, or a professional editing videos, more RAM means smoother multitasking. The best part? You don’t need a computer science degree to do it. With the right guidance, how to install RAM in laptop becomes a straightforward DIY project you can complete in under 30 minutes.
In this guide, we’ll walk you through everything. From understanding what type of memory your laptop needs to the actual RAM installation process, we’ve got you covered. Let’s dive in and give your laptop the boost it deserves.
How RAM Affects Your Laptop’s Speed
Think of RAM as your laptop’s workspace. The bigger the workspace, the more things you can spread out at once. When you open an application, it loads into RAM. When you switch between tasks, your laptop pulls data from memory instead of the slower hard drive. More laptop RAM means faster access to your running programs.
Here’s a quick breakdown of how different RAM capacities affect your experience:
- 4GB: Basic tasks only. Struggles with modern web browsing.
- 8GB: Handles everyday use and light multitasking.
- 16GB: Great for gaming, creative work, and heavy multitasking.
- 32GB: Ideal for professional workloads like video editing and 3D rendering.
If you’re unsure where you stand, you might want to check the RAM of your laptop before making any decisions.
Signs Your Laptop Needs More RAM
Not sure if your system needs a memory upgrade? Watch for these red flags:
- Your laptop takes forever to open new tabs or applications.
- You hear the fan working overtime even during simple tasks.
- Programs freeze or crash frequently.
- Your system uses more than 80% of memory during regular work.
- Loading times feel painfully slow, even on a solid-state drive.
If you recognize these signs, it’s time to learn how to add RAM to your laptop.
What You Need Before You Start
Before you jump into the installation process, a little preparation goes a long way. Rushing into a RAM installation without the right tools or information can lead to problems. Let’s make sure you’re fully ready.
Tools and Equipment You’ll Need
Here’s a short checklist to have on hand before you begin:
- A Phillips-head screwdriver: Most laptops require this to open the back panel.
- An anti-static wrist strap: This protects your components from static electricity. You can also just touch a metal surface frequently to ground yourself.
- A clean, flat workspace: A desk or table works great. Avoid soft surfaces like beds or couches.
- Your new RAM module: Make sure it’s compatible with your laptop model.
- Your laptop’s manual or online specs: This helps confirm the RAM type and maximum capacity your system supports.
Know Your Laptop’s RAM Type
This step is crucial. Not all memory modules fit every laptop. Most modern laptops use DDR4 SO-DIMM sticks, which are smaller versions of desktop RAM. Older models might use DDR3. You need to match the type exactly.
Here’s a quick comparison of the most common laptop RAM types:
| RAM Type | Speed Range | Form Factor | Common In |
|---|---|---|---|
| DDR3 SO-DIMM | 1333–1600 MHz | 204 pins | Older laptops (2015 and before) |
| DDR4 SO-DIMM | 2133–3200 MHz | 262 pins | Most modern laptops |
| DDR5 SO-DIMM | 4800–5600 MHz | 262 pins (different key) | Latest-gen laptops (2023+) |
Still not sure what type your laptop needs? You can find this information in your laptop’s specifications. If you want more guidance on adding RAM to your laptop, our detailed guide covers compatibility checks step by step.
Step-by-Step Guide on How to Install a Ram in Laptop
This is the part you’ve been waiting for. Let’s walk through the actual how to install a ram in laptop process. Follow these steps carefully, and you’ll have your upgraded system running smoothly in no time.
Step 1: Power Down and Prepare
Start by shutting down your laptop completely. Don’t just put it to sleep. Turn it all the way off. Unplug the power adapter and remove the battery if your model allows it. This prevents any electrical damage during the memory upgrade process.
Place your laptop on a flat, hard surface. If you have an anti-static wrist strap, put it on now. Touch a metal object to discharge any static buildup. This small step protects your sensitive components from damage.
Step 2: Access the RAM Slots
Flip your laptop over and locate the RAM access panel. On many models, it’s a small rectangular cover on the bottom, often marked with a small memory icon. Use your Phillips-head screwdriver to remove the screws holding it in place.
Some laptops, like certain Ultrabooks, might require removing the entire back panel. If that sounds intimidating, you can also refer to a guide on how to install RAM in your laptop for model-specific instructions. Every laptop is a bit different, so knowing your exact model helps.
Once the panel is off, you should see one or two RAM slots. They are long, thin slots usually positioned at an angle. Some laptops have the RAM already seated in one slot while leaving another empty. Others might have both slots filled.
Step 3: Remove the Existing RAM (If Needed)
If you’re replacing existing memory, you need to remove it first. Gently push the plastic clips on both sides of the RAM stick outward. The stick will pop up at an angle. Carefully pull it out and set it aside.
Handle the RAM by its edges only. Avoid touching the gold contacts or the circuit board. Oils from your fingers can cause connection issues over time.
Step 4: Install the New RAM
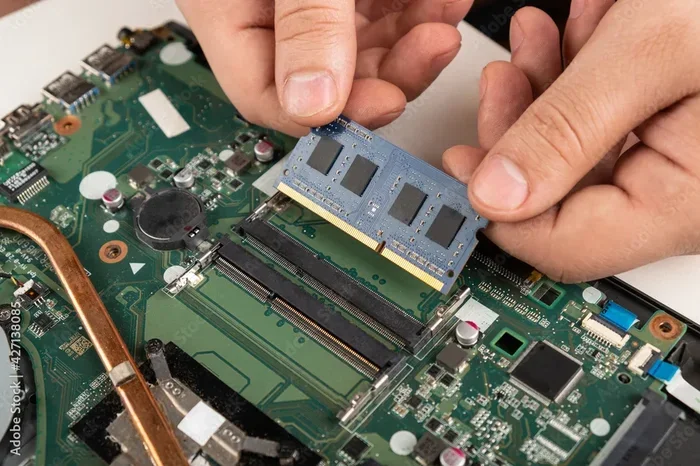
Now for the exciting part. Take your new RAM stick and align it with the empty slot. The notch on the module should match the ridge inside the slot. This ensures correct orientation.
Follow these steps for a clean install:
- Insert the stick at a 30- to 45-degree angle into the slot.
- Press it down gently until it clicks into place.
- Flip the stick flat and press it down firmly toward the slot.
- The plastic clips on both sides should snap back into position automatically.
If you’re adding a second stick alongside an existing one, make sure both sticks are seated properly. Dual-channel memory configurations can offer better performance than running a single stick alone.
Step 5: Close Everything Up and Test
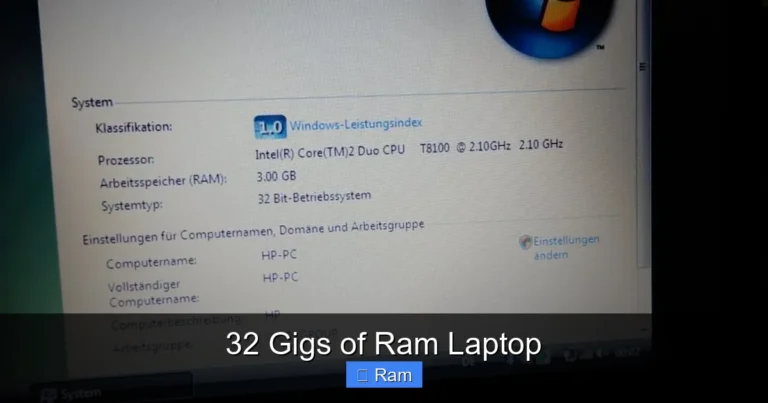
Replace the back panel or RAM cover and screw it back in. Reconnect the power adapter and turn on your laptop. Once it boots up, verify that the system recognizes the new memory. You can check this by going to your system settings or using a tool that shows your laptop’s specs. If you want to confirm everything is working correctly, learn how to check RAM of a laptop through built-in Windows tools.
Congratulations! You just completed your how to install RAM in laptop project. Your system should feel noticeably snappier now.
Common Mistakes to Avoid When Installing RAM
Even though installing memory is fairly simple, a few common mistakes can cause headaches. Let’s make sure you don’t run into any of these.
Using Incompatible RAM
This is the biggest pitfall. Not every RAM stick works with every laptop. Always double-check the type (DDR4, DDR5), form factor (SO-DIMM), and maximum capacity supported by your system. Installing incompatible memory will either not work at all or cause system instability.
Skipping the Grounding Step
Static electricity can destroy sensitive electronic components without you even noticing. Always ground yourself before handling RAM. Use an anti-static strap or frequently touch a grounded metal object. Skipping this tiny step can cost you a brand-new memory module.
Forcing the RAM Into the Slot
If the stick doesn’t slide in smoothly, stop. Something is misaligned. The notch must line up perfectly with the slot’s ridge. Forcing it can bend the pins or crack the module. Take a moment to reorient the stick and try again gently.
Ignoring Dual-Channel Configuration
If your laptop has two RAM slots, using both slots with matching sticks offers better performance than using just one. This setup is called dual-channel mode. It improves data throughput and can make a noticeable difference in tasks like gaming and video editing.
How to Get the Most Out of Your New RAM
Now that you’ve successfully learned how to install a ram in laptop, here are some tips to squeeze every bit of performance from your upgrade:
- Close unnecessary background programs: Even with more RAM, running too many apps simultaneously can still slow things down. Use Task Manager to identify resource-hungry programs.
- Update your drivers: Especially your chipset drivers. Updated drivers help your system communicate properly with the new memory.
- Use a solid-state drive: SSDs complement extra RAM beautifully. They reduce load times and free up RAM that would otherwise be used for disk caching.
- Restart your laptop after installation: This ensures the system fully recognizes the new memory and allocates resources correctly.
- Run memory diagnostics: Windows has a built-in tool to test your RAM for errors. Search for “Windows Memory Diagnostic” in the Start menu and run it to confirm everything is stable.
Expert Insight: When to Upgrade vs. Buy a New Laptop
If your laptop supports RAM upgrades and you’re on a budget, adding memory is almost always worth it. However, if your laptop has soldered, non-upgradeable RAM and you’re hitting the maximum limit, it might be time to consider a new machine. As a rule of thumb, if your laptop is over five years old and has other bottlenecks like a slow processor, a memory upgrade alone might not deliver the experience you’re looking for.
Quick Tips for a Smooth RAM Upgrade
Here are some bonus nuggets to keep in mind:
- Buy RAM from reputable brands like Kingston, Crucial, or Samsung for reliability.
- Keep your old RAM stick in a static-free bag if you plan to sell or reuse it later.
- Take photos of the inside of your laptop before disassembling. This helps when reassembling.
- Don’t panic if your system doesn’t immediately feel faster. The improvement often shows in heavy multitasking scenarios.
- Match the speed of your existing RAM if you’re adding to it. Mixing speeds is possible but your system will run all modules at the slower speed.
Final Thoughts
Learning how to install a ram in laptop is genuinely one of the most rewarding DIY upgrades you can do. It’s affordable, takes less than half an hour, and delivers a tangible improvement in your daily workflow. Whether you’re a student, professional, or casual user, more RAM can make your laptop feel like it just got a fresh start.
Remember to prepare properly, handle your components with care, and follow each step patiently. Avoid the common mistakes we covered, and you’ll have a smooth experience from start to finish. Once you’re done, take a moment to enjoy how much faster everything runs. Your laptop thanks you, and so does your productivity.
So go ahead, grab that screwdriver, and give your laptop the memory upgrade it’s been waiting for. You’ve got this!
Frequently Asked Questions
How to install a ram in laptop safely?
Start by shutting down your laptop completely and unplugging it from the power source. Remove the battery if possible, then use a screwdriver to open the back panel. Ground yourself by touching a metal surface to prevent static damage, locate the RAM slots, gently release the clips, align the new stick at a 45-degree angle, and press it down until it clicks into place.
What type of RAM do I need for my laptop?
Check your laptop’s manual or use a system information tool to find out if it needs DDR4 or DDR5 RAM and what speed is supported. Most laptops use SO-DIMM modules, which are smaller than desktop RAM sticks. Matching the RAM type and speed ensures your laptop runs smoothly without compatibility issues.
How do I know if my laptop RAM is upgradeable?
You can check by opening the back panel and looking for empty RAM slots or a removable module. Some ultra-thin laptops have soldered RAM that cannot be upgraded, so it is important to confirm this before purchasing new memory. Use a free tool like Crucial System Scanner to get instant compatibility results for your specific laptop model.
Can I mix different RAM sticks in my laptop?
Yes, you can mix RAM sticks as long as they share the same type, such as DDR4, and similar speeds. Mixing different speeds may cause both modules to run at the slower speed, so matching specifications is always the best practice. For optimal performance, it is recommended to install RAM sticks in matched pairs.
Do I need to turn off the laptop before installing RAM?
Absolutely, you must power off the laptop completely and disconnect the charger and battery to avoid electrical damage. Working on a powered device can harm both the RAM module and the motherboard. Always let the laptop sit unplugged for a few minutes before starting the installation process.
How much RAM does a laptop need for everyday use?
Most users will find that 8 GB of RAM handles everyday tasks like browsing, streaming, and office work without any issues. If you use your laptop for gaming or video editing, upgrading to 16 GB or more will provide a much smoother experience. Check your laptop’s maximum RAM capacity before buying to avoid wasting money on an incompatible module.