How to Pair Mouse with Laptop
Pairing a mouse with your laptop is a simple process that unlocks greater productivity and comfort. Whether you’re using a traditional wired mouse, a wireless USB receiver model, or a modern Bluetooth mouse, the steps are straightforward. This guide covers every connection method for both Windows and macOS, provides detailed troubleshooting for common issues, and offers tips to optimize your new setup for peak performance. You’ll be scrolling and clicking with ease in minutes.
So you just unboxed a shiny new mouse, or maybe you’re trying to reuse an old one with a different laptop. That little peripheral can make a world of difference in how you navigate your digital world, but first, you have to connect it. Don’t worry; pairing a mouse with a laptop is rarely complicated. It’s a fundamental skill that, once mastered, will serve you well every time you upgrade hardware or switch machines. This guide will walk you through every possible scenario, from the simplest plug-and-play to more finicky Bluetooth connections, ensuring you can get from unboxing to full productivity without frustration.
We’ll break it down by the mouse’s connection technology because that dictates the entire process. You’ll learn the clear, step-by-step instructions for Windows 10/11 and macOS. We’ll also dive deep into troubleshooting, because even the best guides can’t account for every unique hiccup—like a dead battery you didn’t know about or a conflicting driver from a forgotten device. By the end, you won’t just know how to pair a mouse; you’ll understand why the steps work, making you confident to solve any connection puzzle that comes your way.
Key Takeaways
- Know Your Mouse Type: Identifying if your mouse is wired, wireless with a USB dongle, or Bluetooth is the critical first step to pairing it correctly.
- Wired is Instant: Plug-and-play for USB mice means no pairing is needed; just connect the cable to an open USB port.
- Wireless Requires a Receiver or Bluetooth: USB receiver mice need the dongle plugged in, while Bluetooth mice must be put into pairing mode and discovered in your laptop’s OS settings.
- OS-Specific Paths: The menu names and settings for adding Bluetooth devices differ between Windows (Settings > Bluetooth & devices) and macOS (System Preferences > Bluetooth).
- Troubleshooting is Methodical: Basic fixes like replacing batteries, re-seating USB receivers, restarting Bluetooth, and updating drivers resolve most pairing failures.
- Optimize After Connecting: Adjust pointer speed, scroll direction, and button functions via your operating system’s mouse or accessibility settings for a personalized experience.
📑 Table of Contents
- Understanding Your Mouse: The Three Main Connection Types
- Method 1: Pairing a Wired USB Mouse (The Easiest)
- Method 2: Pairing a Wireless Mouse with a USB Receiver
- Method 3: Pairing a Bluetooth Mouse
- Troubleshooting: When Pairing Fails
- Optimizing Your Mouse Settings After Pairing
- Conclusion: Your Mouse, Your Rules
Understanding Your Mouse: The Three Main Connection Types
Before you do anything, you need to identify what kind of mouse you have. The physical design and any included accessories will give it away immediately. There are three primary technologies used in modern mice, and each has a distinct pairing process.
1. The Wired Mouse (USB)
This is the most straightforward. A wired mouse has a non-removable cable ending in a USB-A plug (the classic rectangular shape) or, less commonly now, a USB-C plug. It does not have a power switch or a battery compartment. Its advantage is zero latency and no need for batteries or pairing. The disadvantage is the tether to your laptop.
2. The Wireless Mouse with a USB Receiver (RF Dongle)
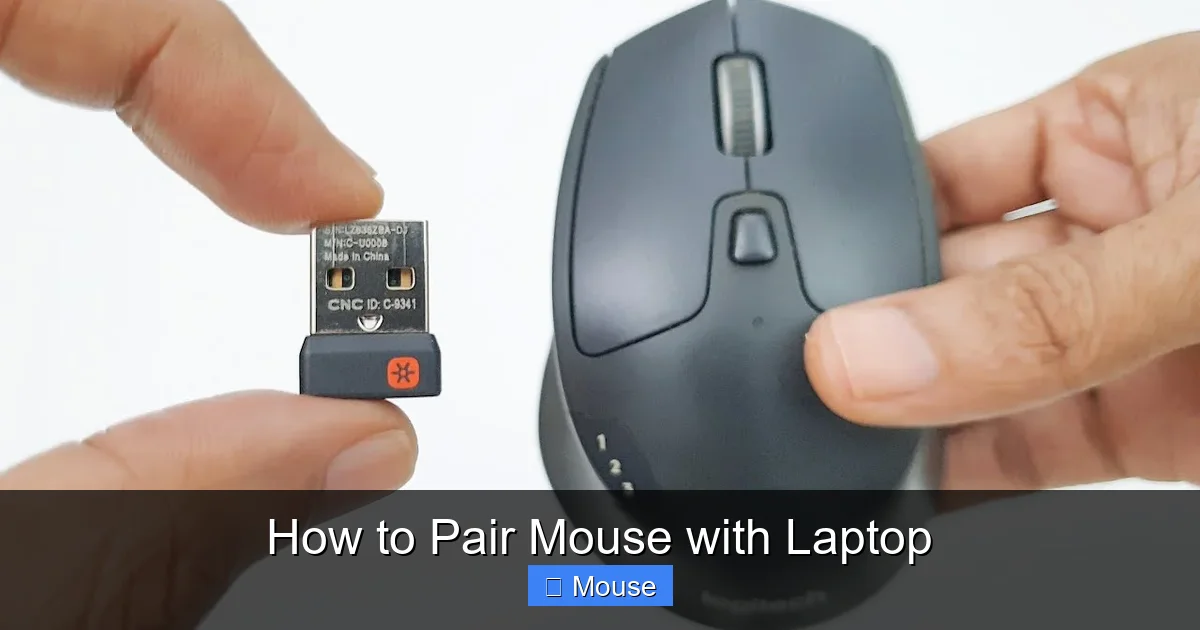
Often called a “nano receiver” or “unifying receiver” (in the case of Logitech), this mouse comes with a small, separate USB dongle. The mouse itself has a power switch and a battery compartment (usually for AA/AAA batteries or a rechargeable pack). The dongle must be plugged into your laptop’s USB port. The mouse and dongle are a pre-paired pair from the factory, meaning they are already linked to each other. Your laptop only needs to recognize the USB dongle as a standard HID (Human Interface Device) input device—which it does automatically. There is no “pairing” between the mouse and the laptop’s Bluetooth radio; the pairing is internal to the mouse and its dedicated receiver.
3. The Bluetooth Mouse
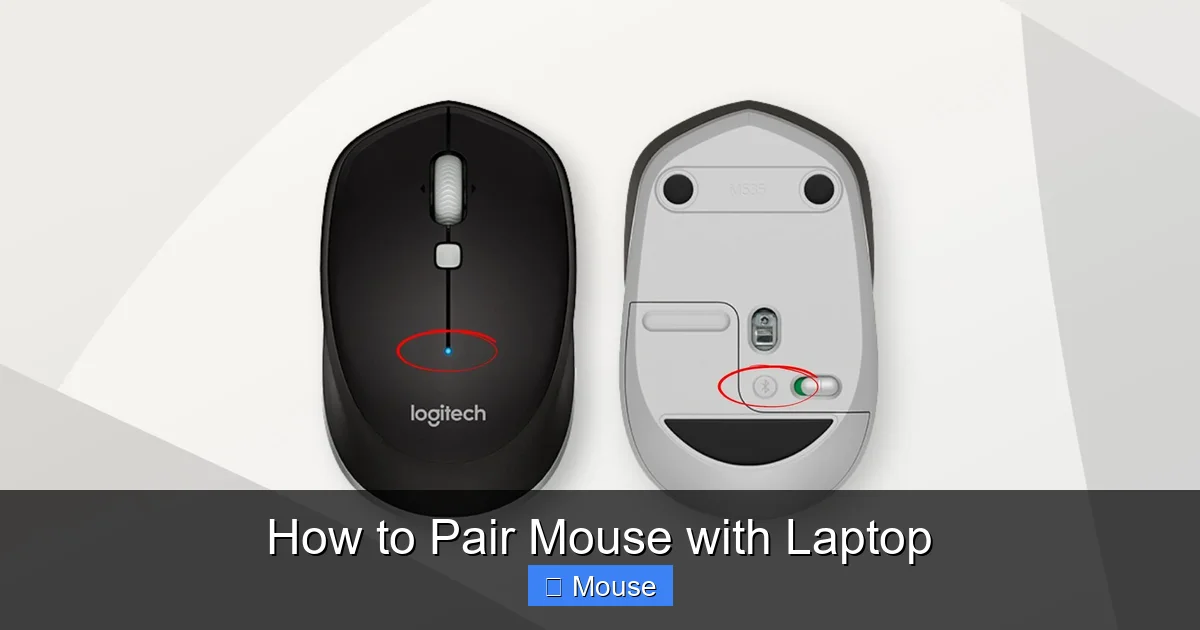
This mouse has no dongle. It connects directly to your laptop’s built-in Bluetooth radio. It will have a power switch and a dedicated “pairing” or “connect” button, often hidden under the battery cover or on the bottom. This button is crucial for initiating the discovery mode. Bluetooth mice are great for saving USB ports and often have better battery life. The pairing process involves making the laptop “see” the mouse and then establishing a bond between the two devices.
Pro Tip: Some high-end mice can use both a USB receiver and Bluetooth, allowing you to switch between devices. Always consult your mouse’s manual (often available online) to confirm its capabilities and the exact location of the pairing button.
Method 1: Pairing a Wired USB Mouse (The Easiest)
If your mouse has a cable, you’re in luck. There is no pairing process in the traditional sense. It’s a literal plug-and-play experience.
Visual guide about How to Pair Mouse with Laptop
Image source: robots.net
Step-by-Step for Windows and macOS
For Windows:
- Locate an available USB-A port on your laptop. If your laptop only has USB-C ports, you will need a USB-C to USB-A adapter or a USB-C hub.
- Plug the mouse’s USB connector firmly into the port.
- Windows will automatically detect the new hardware. You might see a notification in the bottom-right corner that says “Setting up a device” or “Your device is ready.”
- That’s it. The mouse cursor should move immediately. No restart is typically required.
For macOS:
- Plug the USB connector into your MacBook’s USB port (using an adapter if necessary for newer MacBooks with only USB-C).
- macOS will instantly recognize the mouse. You’ll see the cursor appear and be ready to use.
- If you want to adjust settings like tracking speed or double-click speed, go to System Preferences > Mouse.
What If It Doesn’t Work?
While rare, a wired mouse might not be recognized. First, try a different USB port. Second, try the mouse on another computer to rule out a faulty mouse. If it works elsewhere, the issue is with your laptop’s port or drivers. You can update your chipset or USB controllers from your laptop manufacturer’s support website.
Method 2: Pairing a Wireless Mouse with a USB Receiver
This is the most common type of wireless mouse. The key thing to remember is: you do not pair the mouse to your laptop’s Bluetooth. You simply plug in the receiver, and the mouse (which is already paired with that specific receiver) should work.
Visual guide about How to Pair Mouse with Laptop
Image source: i.ytimg.com
The Simple, Correct Process
Step 1: Insert the batteries into your mouse if it doesn’t have a pre-installed rechargeable battery. Flip the power switch to the “On” position. You might see a small LED light glow, indicating it’s powered.
Step 2: Plug the USB receiver into an open USB port on your laptop. For best performance, use a port directly on the laptop, not through a long, unpowered USB hub. Place the receiver as close to the mouse as possible (some receivers come with a small extension cable for this purpose).
Step 3: Move the mouse. The cursor should appear and move instantly. If it doesn’t, ensure the mouse is very close to the receiver during the initial connection. Some receivers have a tiny “Connect” or “Pairing” button on them. You usually only need to press this if you are replacing a lost receiver with a new, compatible one (like another Logitech Unifying receiver) and need to re-pair the mouse to the new dongle. For a brand-new mouse and its included receiver, this is almost never necessary.
Special Case: Logitech Unifying Receivers
Logitech’s “Unifying” receiver is special because it can pair with multiple compatible Logitech mice and keyboards simultaneously (up to 6). If you have a Unifying receiver and want to add a second Unifying mouse to it, you must use the Logi Bolt+ or Unifying Software from Logitech’s website. This software lets you manage which devices are paired to that single receiver. For a single mouse, just plug and play.
Method 3: Pairing a Bluetooth Mouse
This method requires a few more steps but frees up your USB ports. The process is the same for Windows and macOS at a high level: put the mouse in pairing mode, then tell your laptop to find and connect to it.
Visual guide about How to Pair Mouse with Laptop
Image source: thumbs.dreamstime.com
Step-by-Step for Bluetooth Pairing
Step 1: Prepare the Mouse
Find the pairing button. It’s often a small, recessed button on the bottom of the mouse. You may need a paperclip to press it. Sometimes, holding the power button for 3-5 seconds after turning it on will initiate pairing mode. When successful, a LED light on the mouse will start blinking rapidly (usually blue or white), indicating it is discoverable. This blinking typically lasts for 1-2 minutes before the mouse goes to sleep to save battery.
Step 2: Enable Bluetooth on Your Laptop
On Windows 10/11:
- Click the Start Menu and go to Settings (the gear icon).
- Navigate to Bluetooth & devices.
- Toggle the Bluetooth switch to On if it isn’t already.
On macOS:
- Click the Apple menu () and select System Preferences (or System Settings on newer macOS).
- Click on Bluetooth.
- Ensure Bluetooth is turned On.
Step 3: Discover and Connect
On Windows:
- In the same Bluetooth & devices settings page, click Add device.
- A pop-up window appears. Select Bluetooth.
- Wait a few moments. Your laptop will scan and list available devices. Your mouse should appear by its model name (e.g., “MX Master 3,” “HP Bluetooth Mouse”). If it shows as “Not connected” or just appears in the list, select it.
- Windows will attempt to pair. You may see a brief “Connecting” status. Once done, it will say “Connected” and show a “Connected” label under the mouse name.
On macOS:
- In the Bluetooth preferences pane, your laptop will automatically scan. Look for your mouse’s name in the list of devices.
- Click the Connect button next to the mouse’s name.
- The status may change to “Connected.” The mouse pointer should now move.
Step 4: Finalize and Test
Once connected, move the mouse to confirm the cursor responds. Click both left and right buttons to ensure they work. You can now close the settings window. The connection is usually saved, so you won’t need to repeat this unless you unpair the mouse or reset your laptop’s Bluetooth.
Troubleshooting: When Pairing Fails
Technology doesn’t always cooperate. If your mouse isn’t connecting, don’t panic. Follow this systematic checklist.
Universal First Steps
- Check Power: Replace the batteries with fresh ones. For rechargeable mice, ensure it’s charged. A weak battery is the #1 cause of connection failure.
- Re-engage Pairing Mode: Turn the mouse off and on again. For Bluetooth, re-press the pairing button to restart the discovery window. The LED must be blinking.
- Restart Bluetooth on Laptop: Toggle Bluetooth off and back on in your laptop’s settings.
- Restart Your Laptop: A simple reboot clears temporary software glitches and resets the Bluetooth radio.
- Move Closer: Bring the mouse within 1 foot of the laptop/receiver. Eliminate physical obstructions.
- Check for Interference: Move away from other USB 3.0 devices (which can emit RF noise), microwaves, or large metal objects.
Bluetooth-Specific Issues
- Is the Mouse Already Paired to Another Device? Many Bluetooth mice can only remember one paired device at a time. If it was last used with a tablet or phone, you must first unpair it from that device before your laptop can find it.
- Does Your Laptop Support Bluetooth? Very old laptops may not have Bluetooth. You can purchase an inexpensive USB Bluetooth dongle.
- Outdated Bluetooth Drivers: Go to your laptop manufacturer’s support site, enter your model number, and download/install the latest Bluetooth driver for your OS.
- Bluetooth Service Not Running (Windows): Press Win + R, type services.msc, find Bluetooth Support Service, and ensure it is Running and set to Automatic.
USB Receiver Issues
- Faulty USB Port: Try a different USB port. Avoid using a port through a non-powered hub.
- Receiver Too Far: Use the USB extension cable that often comes with the receiver to place it on your desk, closer to the mouse.
- Lost Pairing: If you have a Logitech Unifying receiver and a compatible mouse, use the Unifying Software to re-pair them. For other brands, consult their support site for a pairing utility.
- Driver Conflict: In Device Manager (Windows), look under “Mice and other pointing devices” and “Universal Serial Bus controllers.” Uninstall the mouse/receiver device (check “Delete the driver software” if prompted), unplug the receiver, restart the laptop, and plug it back in to reinstall the driver.
Optimizing Your Mouse Settings After Pairing
Once connected, don’t just start using it. A few minutes in your system settings can dramatically improve comfort and efficiency.
Pointer Speed and Precision
This is the most important setting. It controls how far the cursor moves for a given physical movement of the mouse.
- Windows: Settings > Bluetooth & devices > Mouse > Mouse pointer speed. The slider adjusts sensitivity. For precision work (graphics, coding), a slower speed is often better. For multi-monitor setups, you might need it faster.
- macOS: System Preferences > Mouse > Tracking speed. The same principle applies.
Pro Tip: Also look for “Enhance pointer precision” (Windows) or “Scrolling speed” (macOS). The former is actually mouse acceleration (disabling it is preferred by gamers and many professionals for consistent muscle memory). The latter adjusts how fast pages scroll.
Button Configuration and Scroll Direction
Modern mice have extra buttons. You can reprogram them.
- Windows: Go to Settings > Bluetooth & devices > Mouse > Additional mouse settings (on the right). This opens the legacy Mouse Properties window. The Buttons tab lets you swap primary/secondary buttons (for left-handed users). The Wheel tab adjusts scroll lines. For advanced button remapping, use the software from the mouse manufacturer (e.g., Logitech Options, Razer Synapse).
- macOS: Basic settings are in System Preferences > Mouse. For button remapping, you often need the manufacturer’s utility software (e.g., Logitech Options, SteelSeries GG).
Ergonomics and Accessibility
Don’t forget comfort. In your OS’s accessibility settings, you can enable:
- Mouse Keys: Control the pointer with the numeric keypad (useful if your mouse fails).
- Double-Click Speed: Adjust how fast you must click for it to register as a double-click.
- Hover/ClickLock: (Windows) Allows you to highlight or drag items without holding the button down.
Conclusion: Your Mouse, Your Rules
Pairing a mouse with a laptop is a fundamental digital skill that empowers you to customize your workspace. You’ve now learned that the process hinges entirely on your mouse’s technology: a wired mouse requires no pairing, a wireless dongle mouse is a simple USB plug-in, and a Bluetooth mouse needs a deliberate pairing mode and OS discovery. You have the precise steps for both Windows and macOS at your fingertips.
More importantly, you now have a troubleshooting framework. When things go wrong, you know to check batteries first, restart services, update drivers, and eliminate interference. You understand that the connection is a two-way street—sometimes the issue is with the mouse, sometimes with the laptop’s settings. Finally, you know that the job isn’t done at “connected.” Taking five minutes to adjust pointer speed, scroll behavior, and button functions tailors the experience to your personal workflow, whether you’re a gamer needing rapid response, a designer needing pixel-perfect control, or a writer wanting smooth scrolling through documents.
So go ahead, unbox that mouse, follow the guide for your specific type, and make it truly yours. A well-paired and optimized mouse isn’t just a tool; it’s an extension of your hand, making every click, scroll, and drag feel natural and effortless. Your most productive self is just a connection away.
Frequently Asked Questions
Can I pair my Bluetooth mouse with multiple laptops?
Most Bluetooth mice can only remember one paired host device at a time. To switch between your work and personal laptop, you must first unpair (or “forget”) the mouse from one laptop via its Bluetooth settings, then put it in pairing mode and connect it to the other. Some high-end mice support multi-host profiles and can switch via a button press or software.
My wireless mouse cursor is lagging or stuttering. What should I do?
First, replace the batteries with fresh ones. Second, ensure the USB receiver (if used) is plugged directly into the laptop, not a hub, and is as close to the mouse as possible. Third, check for sources of wireless interference like other USB 3.0 devices, cordless phones, or microwaves. Finally, update your mouse drivers and laptop chipset drivers from the manufacturer’s website.
Do I need special software to pair my mouse?
For basic functionality, no. Wired mice and USB receiver mice work without additional software. Bluetooth mice use your laptop’s built-in operating system settings. You only need manufacturer software (like Logitech Options or Razer Synapse) if you want to reprogram extra buttons, adjust advanced DPI settings, or manage multi-device pairing for compatible receivers.
My laptop doesn’t have Bluetooth. Can I still use a Bluetooth mouse?
Yes. You can purchase a small, inexpensive USB Bluetooth dongle (adapter). Plug it into your laptop’s USB port, and it will add Bluetooth capability. After installing any necessary drivers (often automatic), you can then pair your Bluetooth mouse through the standard OS settings, just as you would with a built-in adapter.
How do I reset my mouse or receiver to factory default to pair with a new laptop?
For a USB receiver mouse, you typically need the original receiver that came with the mouse. If you lost it, you usually cannot re-pair the mouse to a new, generic receiver unless it’s a specific brand system like Logitech Unifying. For Bluetooth, simply use the mouse’s pairing button to make it discoverable again. On the new laptop, go to Bluetooth settings and select it to connect. It may automatically unpair from the old device.
Why won’t my mouse work after a Windows update?
Updates can sometimes corrupt or conflict with drivers. First, restart your laptop. If that fails, go to Device Manager, expand “Mice and other pointing devices,” right-click your mouse or USB receiver, and select “Update driver” or “Uninstall device” (then restart to reinstall). Also, check your laptop manufacturer’s support page for the latest chipset and input device drivers specifically for your model and Windows version.