How to Remove Sticker Stain from Laptop
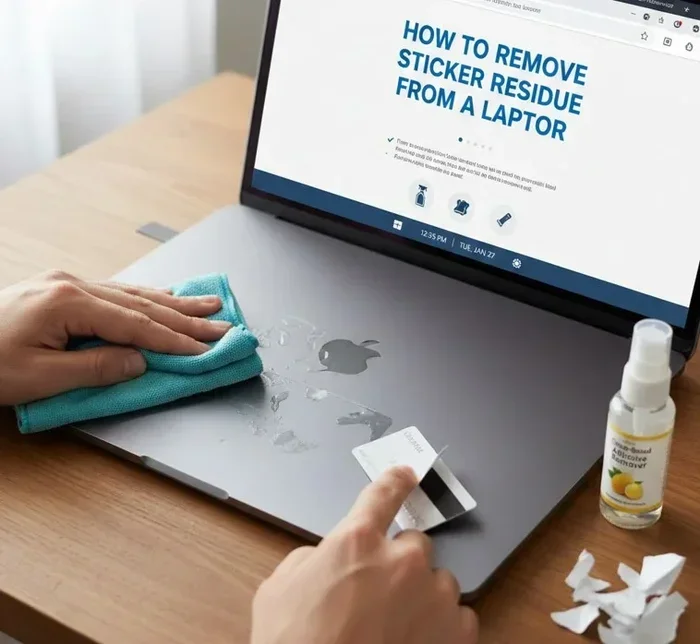
Removing sticker stains from your laptop is easier than you think. With the right tools and a little patience, you can eliminate sticky residue and keep your laptop looking brand new. This guide covers safe methods that protect your device’s surface and finish.
Stickers are fun. They show off your personality, your favorite brands, or your travel adventures. But over time, those stickers leave behind a sticky mess that can be really annoying. Whether you are peeling off an old decal or trying to clean up after a laptop makeover, sticker stains on your laptop can feel impossible to remove.
The good news is that you do not need expensive products or professional help. Most sticker stains can be removed with items you already have at home. In this guide, we will walk you through every step to get your laptop looking clean and fresh again. We will cover safe methods, common mistakes to avoid, and tips to prevent future stains.
Before you start, it is important to understand what sticker stains actually are. The sticky residue left behind is made of adhesive chemicals that bond to surfaces. These adhesives can cling to your laptop’s finish, screen, or keyboard area. The key to removing them safely is using the right technique and the right cleaning agents. Let us dive in.
Key Takeaways
- Use heat gently: A hair dryer softens adhesive and makes sticker removal much simpler.
- Try household items: Rubbing alcohol, coconut oil, and baking soda are safe and effective cleaners.
- Avoid harsh chemicals: Strong solvents can damage your laptop’s finish and screen coating.
- Be patient: Rushing the process can scratch or discolor your laptop surface.
- Clean regularly: Routine maintenance prevents buildup and keeps your laptop looking fresh.
- Test first: Always test cleaning solutions on a small hidden area before applying them everywhere.
📑 Table of Contents
Why Sticker Stains Are So Tough on Laptops
Sticker stains are not just surface-level dirt. They involve a chemical bond between the adhesive and your laptop’s surface. Over time, heat from your laptop and exposure to air cause the adhesive to harden and bond more tightly. This makes removal harder and often leaves behind a cloudy or sticky residue.
Different laptop materials react differently to adhesive. Plastic shells tend to hold onto residue more than metal surfaces. Glossy finishes can become cloudy when exposed to harsh solvents. And if your laptop has a special coating, like an anti-glare or matte finish, you need to be extra careful. Understanding your laptop’s material helps you choose the safest removal method.
One common mistake people make is trying to peel the sticker off quickly. This often stretches the adhesive and leaves more residue behind. Another mistake is using sharp objects like knives or scrapers, which can scratch the surface. The right approach combines gentle heat with safe cleaning solutions.
What You Need Before You Start
Gathering your supplies before you begin makes the process much smoother. You do not need a lot of items, but having everything ready helps you stay focused and avoid using harsh substitutes.
Essential Supplies for Sticker Stain Removal
- Hair dryer or heat gun on a low setting
- Microfiber cloths — at least two or three
- Rubbing alcohol (isopropyl alcohol, 70% or higher)
- Coconut oil or cooking oil (for stubborn residue)
- Baking soda (for tough stains)
- Cotton balls or soft cloths
- Warm soapy water (mild dish soap works great)
- Plastic scraper or old credit card (for gentle lifting)
Having these items ready means you will not have to pause mid-process and risk damaging your laptop by using whatever is nearby. A microfiber cloth is especially important because it does not leave lint or scratch your laptop’s surface.
Step-by-Step Guide to Remove Sticker Stain From Laptop
Now let us get into the actual process. Follow these steps carefully for the best results. Each step builds on the previous one, so do not skip ahead.
Step 1: Heat the Sticker Gently
Start by using your hair dryer on a low or medium heat setting. Hold it about six inches away from the sticker and move it back and forth slowly. Heat softens the adhesive and makes the sticker more pliable. This is the most important step because it reduces the chance of leaving residue behind.
Heat the sticker for about 30 to 60 seconds. You should feel the sticker becoming warm and slightly soft to the touch. Do not use high heat or hold the dryer in one spot for too long. Excessive heat can damage your laptop’s plastic or discolor the surface.
Once the sticker feels warm, try peeling it off slowly with your fingers. Pull it back at a low angle, close to the laptop surface. Go slow. If the sticker tears, apply more heat and try again. Patience is your best friend here.
Step 2: Clean Off the Remaining Residue
After removing the sticker, you will likely see some sticky residue left on the laptop surface. This is the adhesive that bonded to the laptop. Do not worry. This is completely normal and easy to deal with.
Dampen a microfiber cloth with a small amount of rubbing alcohol. Gently rub the residue in circular motions. The alcohol breaks down the adhesive without damaging most laptop finishes. For smaller spots, you can use a cotton ball dipped in rubbing alcohol.
If the residue is still sticking around, try a different approach. Apply a small amount of coconut oil to the affected area. Let it sit for about five minutes. The oil helps dissolve the adhesive. Then wipe it away with a clean cloth. You may need to repeat this once or twice for stubborn spots.
Step 3: Use Baking Soda for Stubborn Stains
For really tough sticker stains that refuse to budge, baking soda is your secret weapon. Mix a small amount of baking soda with a few drops of water to create a paste. The paste should be thick enough to stick to the cloth but not too runny.
Apply the paste to the stained area and gently rub in a circular motion. The mild abrasion in baking soda helps lift the adhesive without scratching your laptop. After a minute or two, wipe the area clean with a damp cloth. Dry it thoroughly with a dry microfiber cloth.
Be careful not to press too hard. Let the baking soda paste do the work. If the stain persists after two or three tries, move on to a different method or consider using a commercial adhesive remover designed for electronics.
Step 4: Clean and Protect the Laptop Surface
Once the sticker stain is gone, give your laptop a final wipe-down. Use a slightly damp microfiber cloth with a tiny drop of mild dish soap. Wipe the entire area gently to remove any remaining cleaning product residue. Then dry the area completely with a clean, dry cloth.
After cleaning, you may want to apply a screen protector or a laptop skin to protect the area. This is especially helpful if you plan to put new stickers on your laptop. A protective layer helps prevent future adhesive bonding and makes future sticker removal much easier.
Also, take this opportunity to clean the rest of your laptop. Wipe down the keyboard, trackpad, and screen with appropriate cleaners. Keeping your laptop clean overall reduces the buildup of grime and helps your device last longer.
Methods to Avoid When Removing Sticker Stains
Not all cleaning methods are safe for laptops. Some popular tricks can actually cause more harm than good. Here are the methods you should avoid at all costs.
Avoid Acetone and Strong Solvents
Acetone-based nail polish removers and strong chemical solvents can dissolve your laptop’s protective coating. They can cause discoloration, cloudiness, and permanent damage to plastic surfaces. Even if a method works on a sticker, it might ruin your laptop’s finish in the process. Always check that a cleaning agent is safe for electronics before using it.
Avoid Sharp Objects and Scrapers
Using knives, razor blades, or metal scrapers to pick off sticker residue is a recipe for scratches. These tools can gouge your laptop’s surface and leave visible marks that are harder to fix than the sticker stain itself. Stick to plastic scrapers or old credit cards if you need to lift stubborn bits of adhesive.
Avoid Excessive Water
While a damp cloth is fine, soaking your laptop or dripping water into openings is a bad idea. Water can damage internal components, especially if it seeps into the keyboard or ports. Always use minimal moisture and keep liquids far away from any openings on your device.
Preventing Future Sticker Stains
Once you have removed the sticker stain, you probably want to avoid dealing with this problem again. Prevention is always better than cure, especially when it comes to your laptop.
If you love decorating your laptop with stickers, consider using removable or repositionable stickers. These are designed to leave little to no residue behind. They are widely available online and in craft stores. Look for stickers labeled as “removable” or “low-residue.”
Another great tip is to apply a thin clear film or skin to your laptop before sticking anything on it. This creates a barrier between the adhesive and your laptop’s surface. When you want to remove the sticker later, the film takes the adhesive with it, leaving your laptop untouched.
Regular cleaning also helps. Wipe down your laptop once a week with a dry microfiber cloth. This prevents dust and grime from bonding with any residual adhesive and making stains harder to remove later. Think of it like brushing your teeth — a little effort every day saves you a lot of trouble down the road.
Finally, if you are planning to upgrade your laptop’s RAM or open the back panel for any reason, this is a great time to do a thorough interior cleaning. Removing dust and debris from inside your laptop keeps it running cool and prevents buildup that can affect performance. You can learn more about how to remove RAM from a laptop safely if you plan to open up your device.
When to Seek Professional Help
Most sticker stains can be removed at home with the methods described above. However, there are times when professional help is the right call. If the sticker stain has been on your laptop for years and has deeply bonded to the surface, home methods might not fully work.
Also, if you notice that your laptop’s surface is already damaged — such as deep scratches, peeling coating, or discoloration — a professional can assess whether the damage is reversible. Some laptop repair shops offer surface restoration services that can make your device look like new again.
Do not hesitate to contact a professional if you are unsure about any step in the removal process. It is always better to be safe than to risk damaging an expensive device. A quick consultation can save you from costly repairs.
Final Thoughts
Removing a sticker stain from your laptop does not have to be stressful. With the right tools, a little patience, and the correct technique, you can restore your laptop’s clean appearance in no time. Remember to always start with the gentlest method and work your way up only if needed.
Keep your supplies handy, avoid harsh chemicals, and take your time. Your laptop is an investment, and treating it with care during the cleaning process pays off in the long run. Whether you are removing an old sticker or preparing your laptop for a fresh look, these steps will help you get great results without any damage.
After you have successfully removed the stain, consider giving your laptop a full cleaning session. This is also a good time to check if your laptop could benefit from upgrades, such as adding more memory. If you are curious about how to upgrade your laptop RAM, there are many resources available to help you get started.
Clean laptops run better, look better, and last longer. So grab your supplies, follow these steps, and enjoy your freshly cleaned device. Your laptop will thank you for it.
Frequently Asked Questions
Can I use vinegar to remove sticker stains from my laptop?
Yes, white vinegar is a mild acid that can help dissolve adhesive residue. Dilute it with equal parts water, apply it to a cloth, and gently rub the stained area. However, always test it on a small hidden spot first to make sure it does not affect your laptop’s finish.
Will rubbing alcohol damage my laptop’s screen?
Rubbing alcohol is generally safe for laptop screens when used in small amounts on a microfiber cloth. Avoid soaking the screen and never spray liquid directly onto it. Use gentle circular motions and dry the area immediately after cleaning.
How long does it take to remove a sticker stain from a laptop?
The process usually takes about 15 to 30 minutes depending on the size of the stain and how long the sticker has been on the laptop. Stubborn stains may require multiple applications of cleaning solution and a bit more patience.
Can I use a magic eraser on my laptop to remove sticker residue?
Magic erasers can be too abrasive for some laptop finishes. They work well on hard, non-glossy surfaces but can scratch glossy or coated surfaces. If you want to try one, use it very gently and only on a small test area first.
What is the best adhesive remover for laptops?
Goo Gone and similar citrus-based adhesive removers are generally safe for electronics. Always apply the product to a cloth first, not directly on the laptop, and avoid getting any liquid near openings or ports.
How do I prevent sticker residue from coming back after removal?
To prevent residue from returning, clean the area thoroughly after removing the sticker and apply a protective skin or film to the surface. Regular cleaning with a microfiber cloth also helps prevent adhesive from bonding again over time.