Hp Laptop 15z-ef1xxx Ram Upgrade
Upgrading the RAM in your HP 15z-ef1xxx is one of the most effective and affordable ways to eliminate slowdowns and improve multitasking. This guide provides a detailed, beginner-friendly walkthrough from checking your current memory to installing new modules, ensuring a successful performance boost for your laptop.
Is your trusty HP Laptop 15z-ef1xxx starting to feel sluggish? Do you find yourself waiting for applications to load or your browser to respond when you have a few tabs open? Before you start shopping for a brand-new machine, there’s a powerful and incredibly cost-effective solution you should consider: a HP Laptop 15z-ef1xxx RAM upgrade. This single upgrade can breathe new life into your system, transforming it from a struggling workhorse into a capable multitasker. In this comprehensive, step-by-step guide, we will demystify the entire process. We’ll cover everything from identifying your laptop’s exact memory configuration and purchasing the correct RAM module to performing the physical installation with confidence and verifying your success. Think of this as your personal DIY tech support session, designed to make you feel like a pro, even if you’ve never opened a computer before.
Key Takeaways
- Your 15z-ef1xxx is Upgradeable: Most models feature one accessible slot with 4GB or 8GB soldered, allowing you to add a module (up to 32GB total supported).
- Compatibility is Crucial: You must use DDR4-3200 SODIMM RAM. Mixing unmatched capacities or speeds can cause instability.
- Simple Tools, Big Impact: A small Phillips screwdriver and a plastic pry tool are all you need; no soldering or advanced tech skills required.
- Backup First, Always: While the process is safe, creating a system restore point and backing up important data is a non-negotiable precaution.
- Verify After Installation: Enter BIOS/UEFI or check Windows Task Manager to confirm the new RAM is recognized and running at the correct speed.
- Performance Gains are Noticeable: Expect faster application launches, smoother web browsing with many tabs, and seamless handling of photo/video editing tasks.
- Warranty Typically Remains Intact: HP’s warranty generally covers user-upgraded components like RAM, but always check your specific warranty terms first.
📑 Table of Contents
- Understanding Your HP 15z-ef1xxx: The Memory Blueprint
- Preparation: Tools, Purchasing, and Safety First
- Step-by-Step: Opening Your HP 15z-ef1xxx and Installing the RAM
- Verifying Your Upgrade and Optimizing Performance
- Troubleshooting Common Issues and What to Do If It Fails
- Is It Worth It? The Final Verdict
Understanding Your HP 15z-ef1xxx: The Memory Blueprint
Before you buy a single stick of RAM, you need to understand exactly what’s inside your specific HP Laptop 15z-ef1xxx. This model number represents a family of laptops, and configurations can vary. The key is to determine two critical pieces of information: how much RAM is already installed, and how many slots are available for an upgrade.
The Soldered RAM Reality
For the 15z-ef1xxx series, HP typically employs a hybrid memory design. This means a portion of the total RAM is soldered directly onto the motherboard. You cannot remove or upgrade this part. Common soldered amounts are 4GB or 8GB. The good news is that alongside this soldered chip, there is almost always one accessible SODIMM slot. This slot is your gateway to more memory. Your total system RAM will be the sum of the soldered memory plus the module you install in that slot. For example, if your laptop has 4GB soldered and you add an 8GB stick, your total becomes 12GB.
Maximum Supported Memory
It’s vital to respect the manufacturer’s limits. For the HP 15z-ef1xxx, the official maximum supported memory is 32GB. This is a combined total (soldered + slot). If you have 8GB soldered, the maximum module you can add is a 24GB stick (though 24GB modules are less common; a 16GB stick bringing you to 24GB total is a very safe and common choice). Attempting to install a module that, when combined with the soldered RAM, exceeds 32GB will result in the system not recognizing the full capacity or failing to boot.
Identifying Your Current Configuration
So, how do you find out what you have right now? You don’t even need to open the laptop yet. Here are three foolproof methods:
- Windows Task Manager: Press Ctrl + Shift + Esc to open Task Manager. Go to the “Performance” tab and click on “Memory.” At the bottom right, you’ll see “In use (Compressed)” and the total “Committed” memory. More importantly, at the top, it will state something like “8.0 GB” and list the “Speed” (e.g., 3200 MHz). It often also says “1 of 2 slots used,” which is a huge clue.
- System Information: Type “msinfo32” into the Windows Start menu search and hit Enter. In the System Summary, look for “Installed Physical Memory (RAM).” This tells you the total.
- CPU-Z (Recommended): Download and run the free, lightweight utility CPU-Z from CPUID.com. Click the “Memory” tab and then the “SPD” tab. Use the dropdown to select “Slot #1” and “Slot #2.” One will likely show “Empty” or “None,” and the other will show the size, type, and speed of your installed module. The soldered RAM might not appear in a separate slot list, but the total in the Memory tab will match what you have.
By doing this homework, you’ll know if you have, for example, “4GB soldered + one empty slot” or “8GB soldered + one 8GB module,” which is a very common factory configuration.
Preparation: Tools, Purchasing, and Safety First
Now that you know what you need, it’s time to gather your supplies and prepare your workspace. Rushing this step is the number one cause of frustration during hardware upgrades.
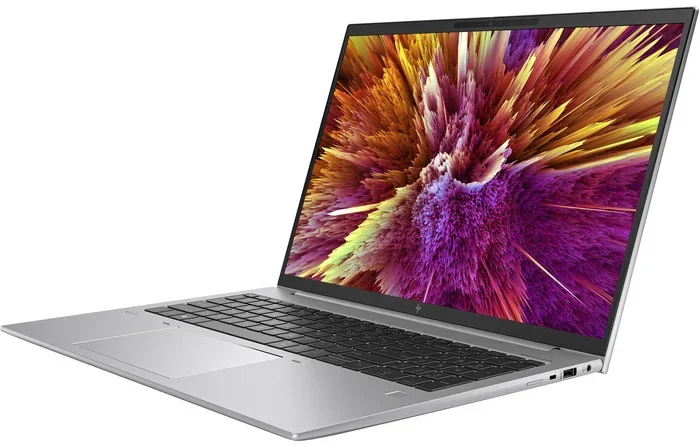
Visual guide about Hp Laptop 15z-ef1xxx Ram Upgrade
Image source: laptopmedia.com
Purchasing the Correct RAM Module
For the HP 15z-ef1xxx, you need a very specific type of memory:
- Form Factor: SODIMM. This is the small, laptop-sized memory module, not the longer DIMM used in desktops.
- Generation: DDR4.
- Speed: 3200 MHz (often labeled as DDR4-3200 or PC4-25600). Using a slower module (like 2666MHz) will work but will run at the lower speed. It’s best to match the speed of the soldered RAM for optimal dual-channel performance. Your Task Manager or CPU-Z from the previous step will confirm the speed.
- Capacity: Based on your current setup and the 32GB max. An 8GB or 16GB module is the most common and cost-effective upgrade path. If you have 4GB soldered, a 16GB stick gives you a fantastic 20GB total. If you have 8GB soldered, a 16GB stick gives you 24GB.
- Voltage: 1.2V (standard for DDR4).
Where to Buy: Stick with reputable brands like Crucial, Samsung, SK Hynix, or Micron. Buying from the manufacturer’s website ( Crucial’s System Scanner is excellent) or a major retailer (Amazon, Newegg) ensures you get genuine, compatible RAM with a warranty. Avoid unknown brands on auction sites.
Essential Tools and a Static-Free Workspace
You will need:
- A small Phillips-head screwdriver (size #0 or #1).
- A plastic pry tool or spudger (a guitar pick or old credit card can work in a pinch). Never use metal tools near the exposed internals.
- A small container or magnetic tray to hold the screw.
- Optional but helpful: An anti-static wrist strap. If you don’t have one, frequently touch the laptop’s bare metal chassis to discharge any static electricity from your body.
Find a clean, well-lit, flat surface. Lay a soft cloth or microfiber towel down to protect the laptop’s casing from scratches.
Software and Data Precautions
Create a System Restore Point: Type “Create a restore point” in the Windows search bar and open the System Properties dialog. On the “System Protection” tab, click “Create…” and name it “Pre-RAM Upgrade.” This gives you a safety net if anything goes wrong.
Backup Critical Data: While a RAM upgrade is low-risk, it’s always wise to ensure your important files are backed up to an external drive or cloud service. Don’t skip this.
Step-by-Step: Opening Your HP 15z-ef1xxx and Installing the RAM
This is the moment of truth. Follow these steps precisely, and you’ll have your new RAM installed in under 10 minutes.
Visual guide about Hp Laptop 15z-ef1xxx Ram Upgrade
Image source: content.propertyroom.com
Step 1: Power Down and Disconnect
Completely shut down your laptop. Do not just put it to sleep or hibernate. Once it’s off, unplug the AC adapter and disconnect any other cables or peripherals (USB drives, mouse, etc.). Flip the laptop over so you’re looking at the bottom panel.
Step 2: Remove the Bottom Cover
Locate all the screws on the bottom casing. There are typically 8-10 screws, including some under rubber feet or in the hinge area. Carefully remove all of them and place them in your container. Note their lengths and positions if they are different; some may be longer. Gently insert your plastic pry tool into the seam along one side of the laptop. Work your way around the perimeter, releasing the plastic snap clips. You will hear a series of pops. Be patient and gentle—the plastic can crack if forced. Once all clips are disengaged, lift the bottom cover off and set it aside.
Step 3: Locate the RAM Slot and Prepare
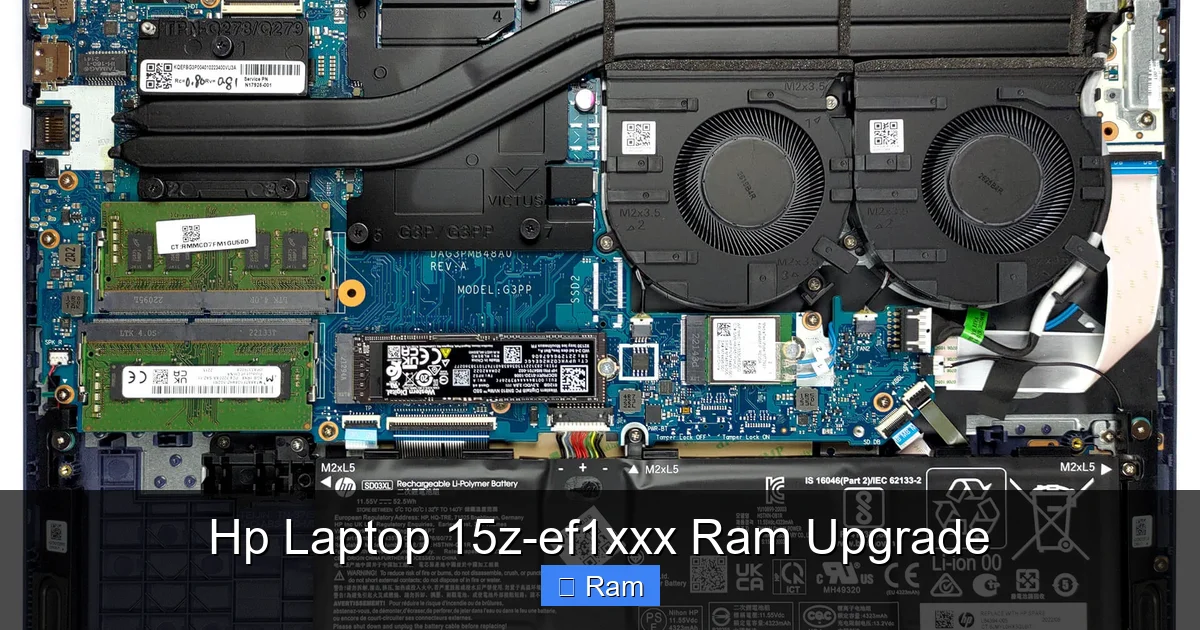
With the internals exposed, look for the existing RAM module. It’s a small, green circuit board about the size of your thumb, held down by two small metal clips on either side. It will be perpendicular to the motherboard. You’ll also see the fan and heat pipes—try to avoid touching these. Ground yourself by touching the metal laptop chassis again. If you see a second, identical slot next to it that is empty, that’s your target. If there’s only one slot and it’s occupied, you’ll need to replace the existing module with a larger-capacity one.
Step 4: Remove the Existing Module (If Upgrading the Stick in the Slot)
Gently pull the two small metal retention clips outward and away from the module. This will cause the module to pop up slightly at an angle, usually around 30-45 degrees. Grasp the module by its edges and pull it straight out. Do not rock it side-to-side. Place it somewhere safe, ideally in an anti-static bag.
Step 5: Install the New RAM Module
Take your new RAM module. Notice the notch on the bottom edge—it’s not centered. This notch must align perfectly with the key in the slot. Hold the module at the same angle the old one popped up at (about 45 degrees). Line up the notch and gently but firmly insert the gold contacts into the slot. You should feel it seat fully and evenly. Now, press the module straight down until the two retention clips snap back into place, locking the module flat against the slot. You should hear/feel a soft click from each clip. Give the module a very gentle tug to ensure it’s secure.
Step 6: Reassemble and First Boot
Double-check that you haven’t left any tools or loose screws inside. Carefully place the bottom cover back on, aligning it with the screw holes. Press down firmly around all edges to re-engage the plastic clips. Reinsert all the screws and tighten them snugly, but do not overtighten and strip the plastic. Reconnect the AC adapter, but do not reconnect any peripherals yet. Power on your laptop. It may reboot once or twice—this is normal as the system configures the new memory. Let it boot fully into Windows.
Verifying Your Upgrade and Optimizing Performance
If your laptop boots to the login screen normally, that’s an excellent first sign. Now, we need to confirm the system sees and is using all your new memory correctly.
Visual guide about Hp Laptop 15z-ef1xxx Ram Upgrade
Image source: content.propertyroom.com
Using Windows Tools for Verification
Log in to Windows. Right-click the Start button and select “Task Manager.” Go to the “Performance” tab and click on “Memory.” Here you should see the new total capacity (e.g., 20.0 GB) listed prominently. It should also show the correct “Speed” (3200 MHz). The “In use” and “Available” numbers will fluctuate. Scroll down to the bottom of this pane—it will say “Hardware reserved” memory. This should be a very small number (usually under 200MB). If it shows 4GB or more reserved, something is wrong, and you should power off and re-seat the module.
Entering the BIOS/UEFI
For a more fundamental check, restart your laptop and press the key to enter BIOS/UEFI (usually F10 for HP, but you’ll see a prompt on the boot screen). Navigate to the “System Configuration” or “Memory” tab. Here, the system will list the total installed memory and its configuration. This is the most authoritative source, as it’s checked before the operating system loads. If the BIOS shows the correct total, your hardware upgrade is 100% successful.
Enabling XMP/AMP for Full Speed (If Needed)
Sometimes, the RAM will default to a slower speed (like 2666MHz) instead of its rated 3200MHz. This is rarely a major issue, but you can maximize performance by enabling the memory profile. In your BIOS/UEFI, look for settings like “Memory Frequency,” “DRAM Frequency,” or profiles called XMP (Intel) or AMP (AMD). If you see a profile for 3200MHz, enable it. Save changes and exit. Re-enter Windows and check Task Manager to confirm the speed has increased. If the option isn’t present or causes instability, simply leave it on the default auto setting.
Troubleshooting Common Issues and What to Do If It Fails
Don’t panic if things don’t go perfectly on the first try. Most upgrade issues have simple fixes.
The Laptop Won’t Power On or Shows a Black Screen
This is the most common symptom of a RAM installation issue. Do not force it. Power off, unplug, and open the case again. The module is likely not seated properly. Remove the RAM, blow out the slot with a can of compressed air (hold the can upright!), and re-install the module, pressing down firmly and evenly until the clips are fully locked. Try booting again.
Windows Shows Less RAM Than Expected (e.g., 16GB Installed, 15.9GB Usable)
This is normal and not a problem. Windows and your system’s hardware reserve a small amount of memory for the integrated graphics and other processes. Seeing 15.9GB out of 16GB is perfectly fine. The “Hardware reserved” number in Task Manager should be small.
Frequent Crashes or Blue Screens (BSOD)
This points to a compatibility or hardware fault. First, re-seat the module as described above. If it persists, your new RAM module might be defective, or it might be incompatible (e.g., wrong speed, faulty chip). Try booting with only the new module installed (remove the old one if you were replacing). If the problem follows the new stick, it’s likely the culprit. Contact the seller for a replacement under warranty.
No Change in Performance
If you’ve upgraded from, say, 4GB to 12GB but don’t feel a difference, consider what you’re doing. The upgrade helps with multitasking. You’ll see the biggest gains when you have many browser tabs open, several applications running simultaneously, or are using memory-intensive programs like photo editors. If you only run one lightweight app at a time, the difference may be subtle. Also, ensure your storage drive (HDD or SSD) isn’t the bottleneck; an old, slow hard drive will mask RAM improvements.
Is It Worth It? The Final Verdict
For the HP Laptop 15z-ef1xxx, a RAM upgrade is almost always a resounding yes. This laptop is designed for easy user upgrades, making it a standout in its price category. The cost of a 16GB DDR4-3200 SODIMM module is typically between $35 and $50. For that investment, you are effectively extending the useful life of your laptop by 2-3 years, potentially postponing the need for a $600+ new computer.
The performance gains are most dramatic if you are currently running with 4GB or 8GB of total RAM. Moving to 12GB, 16GB, or 20GB creates a fluid experience where you can keep dozens of Chrome tabs open, work in a Word document, have a Spotify playlist running, and video call a colleague—all without the system stuttering or swapping data to the slow hard drive. It’s a transformative upgrade that addresses the most common bottleneck in everyday computing.
By following this guide meticulously—from verifying your specs and buying the right part to performing the careful physical install and verification—you hold the power to significantly enhance your computing experience. It’s a rewarding project that saves money, reduces e-waste, and gives you a deeper understanding of your own technology. So gather your tools, order that compatible RAM, and get ready to give your HP 15z-ef1xxx the performance boost it deserves.
Frequently Asked Questions
Can I upgrade the RAM on my HP 15z-ef1xxx myself?
Yes, absolutely. This model is designed for user-upgradable memory. It has one accessible SODIMM slot, and the process only requires a small screwdriver and careful handling. No soldering or advanced technical skill is needed.
What type of RAM do I need for the HP 15z-ef1xxx?
You need a single DDR4 SODIMM module with a speed of 3200 MHz. The capacity you can add depends on how much RAM is already soldered to your motherboard, but a 16GB stick is a safe and powerful upgrade for most configurations, respecting the 32GB total system maximum.
Will upgrading my RAM void my HP laptop’s warranty?
No. HP’s standard limited warranty covers user-upgradable components like RAM and storage. However, it’s always a good practice to quickly review your specific warranty documentation to confirm, but damage caused by the upgrade itself would not be covered.
How much RAM can I put in my HP 15z-ef1xxx?
The official maximum supported memory is 32GB total. This is the combined total of the RAM soldered to the motherboard (usually 4GB or 8GB) plus the module you install in the available slot. A common and effective upgrade is adding a 16GB module to an 8GB soldered configuration for 24GB total.
My laptop has 4GB soldered. Should I add an 8GB or 16GB module?
For a significant performance leap, the 16GB module is the better value. It will give you 20GB total, which is excellent for heavy multitasking and future-proofing. An 8GB stick (totaling 12GB) is also a good upgrade from 4GB, but the 16GB path is more future-resistant and often only costs slightly more.
What should I do if my laptop doesn’t boot after installing the new RAM?
First, don’t panic. Power off, unplug, and open the case. Reseat the RAM module: remove it, ensure the slot is clean, and re-insert it firmly, pressing down until both retention clips click securely. If it still fails, the new module might be incompatible or defective. Try booting with only the new module (remove the old one if present) to test. If the problem persists, contact the RAM seller for a warranty replacement.